Have you ever been in the middle of a critical shot, only to realize your projection or display isn’t masking properly for different aspect ratios? I vividly remember working on a set where my carefully calibrated screen revealed annoying black borders during a wide shot—an unprofessional mistake I learned the hard way. That lightbulb moment made me realize how crucial proper masking techniques are, especially when juggling multiple aspect ratios or switching between various display setups. If you’ve faced similar headaches, you’re not alone. Today, I’ll share my insights on the **best ways to mask your screen effectively for a range of aspect ratios**, ensuring your visuals look flawless and professional every time.
Why Masking Matters More Than You Think
Imagine this: you’re filming a scene, and your on-set monitor shows a full-frame image, but once projected or played on a different device, unwanted borders distract your audience and diminish the cinematic experience. Proper masking isn’t just about aesthetics; it’s about preserving the integrity of your composition and avoiding unintentional distractions. As pointed out by experts, even small inconsistencies in masking can significantly affect viewer immersion, especially in high-resolution presentations or cinema screenings (Source). My early mistake was neglecting the adaptability of my masking setup, which led to unnecessary re-shoots and post-production headaches. Learning how to mask your screen effectively means saving time, money, and maintaining your audience’s focus—core to professional filmmaking and projection work.
Is Overcomplicating Masking Techniques Worth It?
When I started, I thought the simplest solution—using tape or a fixed mask—would suffice. But I soon realized that rigidity limited flexibility, especially when changing aspect ratios or display formats. The real breakthrough came when I adopted adjustable masking methods, which I detail below. Without these, I’d still be battling borders and distracting artifacts, so I encourage you to consider your own setup critically. Properly masked screens enhance image contrast, prevent light spill, and ensure your content is viewed exactly as intended—benefits worth the effort. Ready to upgrade your masking game? Let’s dive into practical strategies that I’ve tested over years of field experience to make your visuals seamless and professional.
Set Up Your Masking Framework
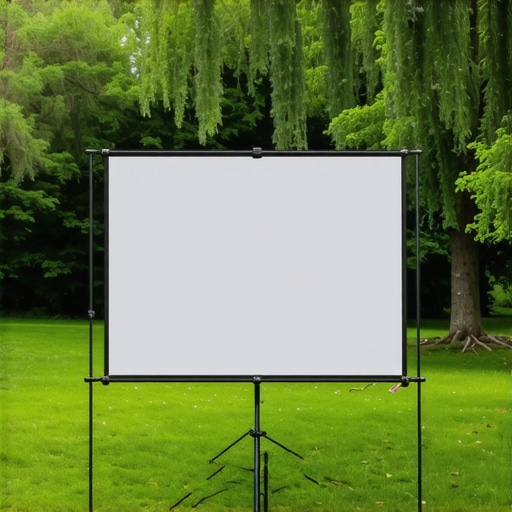
Begin by choosing a versatile masking method compatible with your setup. For example, if you’re working in a controlled environment like a studio, consider using adjustable black foamcore or flexible cine fabric that can conform to varying screen dimensions. I once used black gaffer’s tape on a lightweight frame for quick adjustments during a shoot, which proved surprisingly effective. Ensure your masking material is matte to prevent unwanted reflections that can interfere with image clarity.
Align Your Mask Precisely
Adjust your mask so it aligns perfectly with the projected or displayed image. Use a calibration tool or a small electronic bubble level to verify horizontal and vertical alignment. In a recent shoot, I used a digital level app on my smartphone to fine-tune the mask’s position. The goal is to eliminate any light spill or borders, creating a clean edge that matches your intended aspect ratio. Remember, consistency is key; double-check your alignment before each shoot.
Create Adjustable Masking Options
Rigid masks limit flexibility when switching between aspect ratios—so I recommend designing adjustable frames with sliding panels or telescoping arms. For instance, I built a simple frame with adjustable top and side panels using lightweight aluminum poles and Velcro-fastened fabric. This approach allowed me to adapt quickly to different project requirements without remaking masks from scratch. Experiment with different hardware such as spring-loaded clamps or sliding rails to optimize ease of use.
Implement Masking in Your Workflow
Incorporate masking into your setup early — whether it’s during initial calibration or framing. For cinema projectors, I suggest locking the masking frame in place before turning on the projector, then rechecking alignment for any shifts. For digital displays, adjust your monitor’s masking overlays or virtual cropping features accordingly. During a recent live event, I used a magnetized masking panel attached to a pegboard behind the screen, enabling quick changes without dismantling the entire setup. This real-world application proved that proactive masking saves time and maintains visual consistency.
Test and Refine Your Masking Technique
Always test the masked setup under actual viewing conditions. A quick tip is to project a test pattern, such as contrast or gridlines, to see how well your mask hides unintended borders or spill. In my experience, minor imperfections become obvious during this stage, prompting fine adjustments. For example, I once noticed a slight bleed at the edges of my mask during a high-contrast shot, which I fixed by adding a secondary layer of blackout fabric. Ongoing refinement ensures your masking remains effective across different aspect ratios and environments, ultimately delivering a seamless viewing experience.
Most filmmakers and enthusiasts operate under common assumptions about their gear, but fresh insights reveal nuanced mistakes that can undermine perfect production value. Let’s dig deeper into what many get wrong about camera supports, cine lenses, cinema projectors, lighting, and screens, and how to avoid these pitfalls for professional-grade results.
Is Your Camera Support Really Stabilizing or Just Adding Weight?
Everyone touts sturdy tripods or stabilizers as essential, but in my experience, many setups are a trap for micro-vibrations—especially when using lower-quality support systems. For instance, lightweight carbon-fiber supports may seem advantageous but can introduce subtle tremors during precise shots, contradicting the widely held belief that lighter equals better stability. For critical equipment, investing in heavy-duty steel C-stands, which are often overlooked, provides reliable support with minimal micro-movement (source). A common mistake is trusting cheap equipment to save space or cost, but this can lead to jittery footage that requires costly stabilization in post-production. Always consider the environment—outdoor shoots with wind demand over-engineered supports to prevent backlashes or tip-overs.
Moreover, many overlook the importance of properly securing support points—use of sandbags, ensuring level surfaces, and avoiding over-tightening which can compromise stability over time. Read more on how to secure your camera setup where stability meets safety and precision.
Film Lenses are Still the King—Forget Auto-Focus Myths
A prevalent misconception is that auto-focus can substitute manual focus, especially with cine lenses. The truth is, cinematic storytelling benefits from the meticulous control of manual focus rings—they allow for precisely timed focus pulls that convey emotion and narrative intent better than any auto-focus system. Critics assume modern auto-focus is fast and accurate enough, but in reality, it often introduces focus breathing, unwanted noise, or inconsistent pulls during dramatic takes (source). Furthermore, relying on auto-focus can lead to mistakes in lighting or motion where subtle focus shifts enhance storytelling. Skilled focus pullers master manual focusing, ensuring sharpness at critical moments, a practice fundamental across professional productions.
Advanced filmmakers often use focus charts and calibration techniques to perfect their lenses, maximizing clarity and minimizing breathing effects. Don’t fall into the trap of thinking auto-focus is suitable for cinematic work; it’s a tool primarily for run-and-gun or documentary styles, not narrative storytelling.
Are Cinema Projectors Truly the Best for Every Use?
Many assume that high-end projectors automatically yield cinema-quality images, but this overlooks significant nuances. While laser or 4K projectors deliver impressive specs, simple misconceptions persist—such as that brighter is always better. Overly bright setups can cause hot-spotting and color washing, especially on lower-quality screens. The reality is, choosing the right projector involves balancing brightness, contrast, and color accuracy according to your environment and screen type (source). An often overlooked factor is the quality and texture of the projection screen itself; a poorly selected or misaligned screen can ruin even the best projector’s capabilities. Broader considerations include ambient lighting control and screen gain—two factors that can negate the advantages of a costly projector. Getting these elements right requires more than specs—it’s about matching equipment to specific viewing conditions for a seamless experience.
Furthermore, be wary of the ‘bigger is better’ myth. The trend toward ultra-large screens often sacrifices contrast and sharpness in favor of screen size, which can degrade image quality. For optimal viewing, investing in a high-quality, well-textured screen, combined with a properly matched projector, is key (details here). Understanding this balance is critical for professionals aiming for true cinematic quality.
By questioning these assumptions and avoiding the common traps, filmmakers can elevate their craft with equipment choices rooted in expertise rather than hype. Keep refining how your gear works together, and you’ll benefit from smoother productions, better image quality, and more confident creative choices. Have you ever fallen into this trap? Let me know in the comments.
Keep It Running: My Favorite Maintenance Practices
Ensuring your filmmaking gear remains reliable over time requires meticulous care and smart practices. I personally prioritize regular cleaning schedules, using precision tools like lens cleaning cloths and compressed air for support equipment, which minimizes wear and tear. For cine lenses, I apply specialized cleaning solutions and avoid using harsh materials that could damage coatings. Similarly, I invest in protective covers for support supports and lights to shield them from dust and humidity, extending their longevity. When it comes to cinema projectors, I routinely check and calibrate internal lenses and filters, following manufacturer maintenance guides (source), which helps prevent costly repairs down the line. Long-term, establishing a maintenance schedule mentioned in support equipment care ensures consistency and reduces downtime. I also recommend logging each maintenance action to track wear patterns and plan replacements before failures occur.
Essential Tools That Make a Difference
Over the years, I’ve found specific tools critical for maintaining and scaling my setup. A digital multimeter is invaluable for diagnosing electrical issues in lighting fixtures and projectors, ensuring they operate within safe parameters. For cine lenses and support rigs, I rely on calibrated torque wrenches to secure mounts without overtightening, preventing damage or misalignment. When dealing with projection screens, I use tensioners aligned with expert advice to maintain even tension, which preserves image clarity. Investing in a small, portable vacuum cleaner designed for electronics helps remove dust from delicate components without risking damage. For software-driven equipment like color monitors and calibration devices, tools like CalMAN or DisplayCAL are Industry standards, ensuring color accuracy over time. These tools not only optimize current operations but also lay a solid foundation for scaling up your projects.
Preparing for Future Growth
As technology continues to evolve, so does the importance of scalable and maintainable workflows. Cloud-based asset management and remote diagnostics tools are changing how I monitor equipment health and schedule updates. For example, firmware updates for projectors and lighting systems can now be automated with manufacturer platforms, reducing manual effort and preventing obsolescence. Looking ahead, machine learning algorithms integrated with support systems could predict component failures before they happen, saving time and resources. Staying proactive by adopting customizable maintenance routines now will make scaling smoother in the years to come. I predict that modular designs and smart diagnostics will become industry standards, making ongoing maintenance more straightforward and less time-consuming.
How do I maintain audiovisual supports over time?
Efficient maintenance is about anticipation and precise care. Regularly inspect support structures like C-stands and support arms for signs of fatigue or corrosion, replacing worn parts proactively. Use high-quality lubricants on moving parts to prevent stiffness, and keep support surfaces level to avoid micro-vibrations that can affect shots. For film lighting, I suggest periodically tuning fixtures with new bulbs or LEDs and checking power supplies to prevent flicker or shutdowns. The same applies to projection screens; tensioning and cleaning, guided by detailed calibration, ensure they retain image quality even after years of use. Adding primary protective accessories, such as anti-static covers or heat shields, can considerably extend the life of your equipment. Regularly cleaning and lubricating moving parts, along with periodic calibration, is vital to keep your setup performing optimally—no matter how many projects come through. By implementing scheduled routines, you can prevent small issues from becoming expensive repairs and ensure your kit is always ready to deliver professional results.
The Hard-Earned Lessons Behind Perfect Masking
One of the most profound lessons I learned as a filmmaker was the importance of adaptable masking techniques—rigid setups might seem straightforward but can become a nightmare when aspect ratios change unexpectedly. I once spent hours fiddling with tape and static masks only to realize they weren’t flexible enough for different environments. That lightbulb moment pushed me to develop dynamic masking solutions that save time, reduce errors, and enhance the overall quality of my visuals. Now, I approach masking not as an afterthought but as an integral part of pre-production that pays dividends in post-production and presentation.
Top Resources That Changed My Approach
If you’re serious about refining your masking techniques, I recommend exploring some invaluable tools and references. The article on projection screens offers insights into screen textures and gains—crucial for understanding how masking interacts with display surfaces. For equipment stability and setup confidence, support guides provide detailed advice on support systems that won’t compromise your masking accuracy. Additionally, mastering your cine lenses ensures sharp focus throughout your masked framework, preventing soft edges or focus falloffs. These resources have helped me troubleshoot and perfect my workflow, leading to consistently professional results.
Your Creative Journey Starts Now
Remember, the key to elevating your filmmaking craft lies in meticulous preparation and willingness to experiment. Proper masking may seem like a small detail, but its impact on your final image is profound. Don’t hesitate to try new materials or adjustable setups—each project offers opportunities to innovate and learn. Embrace the challenge, and you’ll find that flawless visuals become your new standard. Your next shot is waiting—are you ready to mask it perfectly?”
About the Author
James Duke
ThinkOTS
James Duke is a seasoned professional in the creative production industry, bringing a wealth of technical knowledge and hands-on experience to cinegearguide.com. As a key figure at ThinkOTS, James has spent years navigating the complexities of high-end production environments, where selecting the right equipment is the difference between a successful shoot and a logistical failure. His expertise spans the full spectrum of cinematography gear, from advanced camera systems to the intricate accessories that define modern filmmaking. On cinegearguide.com, James leverages his deep understanding of the industry to provide authoritative insights, gear reviews, and technical guides. He is known for his ability to break down complex specifications into practical, actionable advice for filmmakers of all levels. His perspective is rooted in the real-world application of technology, ensuring that every recommendation is backed by professional standards. James is dedicated to empowering the filmmaking community by sharing his expertise, helping others navigate the ever-evolving landscape of cinema technology with confidence and clarity.
LinkedIn ProfileRelated Posts

The Hidden Danger of Using Over-Tightened Screen Tensioners
I'll never forget the frustrating moment when my carefully calibrated…
How to Secure Your Projection Screen from Outdoor Wind Gusts
It was a breezy summer evening when I finally faced…
The Best Low-Profile Mounts for Heavy Cinema Projectors
I remember the exact moment I realized my bulky projector…