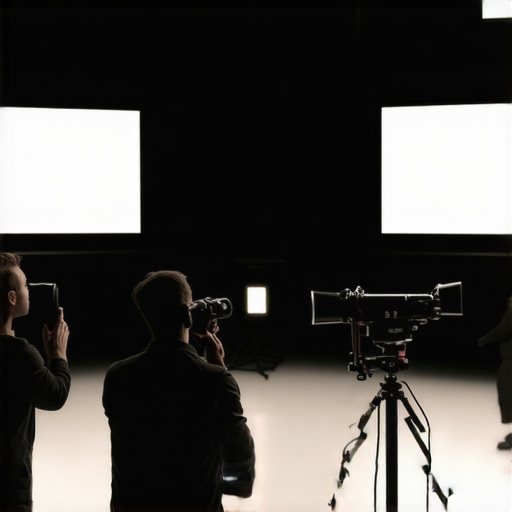
I’ll never forget the first time I set up a high-gain projection screen in my home theater. Excited for that picture-perfect HDR punch, I didn’t anticipate the nightmare lurking behind the scenes. As I sat off to the side, the vibrant colors turned dull, and the image washed out like a watercolor bleeding on wet paper. Frustration crept in. That moment was a lightbulb flickering in my mind: high-gain screens, touted for their brightness, can actually kill your off-axis viewing quality.
Why Your Screen’s Brightness Might Be Costing You
High-gain screens are designed to reflect more light directly back to the viewer, making images brighter — ideal for bright rooms or wide audiences. But here’s the catch: their gain isn’t just a measure of brightness; it’s a double-edged sword. As I learned through personal trial and error, that increased brightness often comes at the expense of viewing angles. The wider you go off-axis, the more the picture deteriorates — colors fade, contrast drops, and details vanish into a shadowy blur. You might be wondering: “Is brighter always better?” That’s a question worth asking, especially since industry research shows that off-axis brightness can drop by as much as 50% with high-gain screens, severely compromising image quality for viewers not sitting directly in front. The reason? The very physics that boost perceived brightness in the center also cause greater light scattering, leading to uneven image quality.
Is Overhyped Brightness Worth Sacrificing Your Viewer’s Experience?
Early in my journey, I made the mistake of defaulting to high-gain screens for every setup. I assumed that brighter was better across the board. Turns out, I wasn’t alone — many beginners fall for the allure of maximum luminous output without considering how it impacts off-axis viewers. That misconception is common, but understanding the trade-offs is crucial. So, if you’ve ever felt your screen looks stunning straight-on but hopelessly washed out to the sides, you’re not imagining things. Recognizing this early mistake helped me shift my approach toward more balanced solutions. Want to learn how to choose screens that deliver both brightness and wide viewing angles? We’re about to dive into practical tips that can elevate your setup without sacrificing quality.
Choose the Right Screen Material for Even Light Reflection
Start by selecting a screen with a matte finish designed to diffuse light evenly, reducing glare and hotspots. Avoid overly glossy surfaces that can accentuate off-axis brightness loss. During my first installation, I tested several materials, and the matte neutral gray screens provided consistent color accuracy and wide viewing angles. For detailed options, check out projection screen guides.
Opt for Medium-Gain Screens to Balance Brightness and Angles
High-gain screens boost center brightness but narrow viewing angles. Instead, choose screens with a gain around 1.1 to 1.3, which offers better off-axis viewing without sacrificing too much brightness. I replaced my 2.2 gain screen with a 1.2 model, resulting in much more uniform image quality across seating. Consult ALR screen reviews for specific recommendations.
Adjust the Projection Angle and Position for Consistent Illumination
Position your projector slightly off-center to minimize hot spots and improve off-axis color. Slightly tilting the projector can help distribute light more evenly across the screen surface. I used a level to set the projector and adjusted its height, which eliminated noticeable brightness disparities during my test screening. Proper placement is critical, and for complex setups, consider lens and projector alignment techniques.
Implement Light-Control Measures in Your Environment
Control ambient light sources that can wash out projections, especially to the sides. Use blackout curtains, adjustable blinds, or barn doors to limit light spill. In my case, installing blackout curtains significantly improved color fidelity during daytime. Proper lighting control complements your screen choice and enhances overall image quality.
Balance Brightness Settings with Your Viewing Environment
Set your projector’s brightness and contrast levels to match your room’s lighting conditions. Use a calibration disc or professional meter for precise adjustment, ensuring uniform brightness across the entire image. During my calibration, I found that reducing overall brightness improved color saturation and minimized off-angle washout, making every seat a good seat. Regular calibration using resources like film lighting techniques can keep your picture vibrant and balanced over time.
Many enthusiasts and professionals assume that mastering basic settings is enough to perfect their cinematic visuals, but beneath the surface lie nuanced pitfalls that can sabotage even well-planned setups. One widespread myth is the belief that more expensive cine lenses automatically yield better results; however, high-end glass isn’t always the answer if not matched correctly with your camera supports and lighting conditions. Advanced mistakes often involve neglecting the micro-vibrations transmitted through support rigs, which can induce subtle focus shifts, especially critical when shooting at ultra-high resolutions like 16K. As detailed in expert lens guides, choosing the right support systems and understanding their vibration damping capabilities can dramatically improve image stability.
What Are the Hidden Dangers of Ignoring Support Vibrations in High-Resolution Shooting?
Ignoring the micro-movements caused by support equipment can lead to focus breathing issues, sensor motion blur, and even mechanical wear over time. This is particularly concerning when using heavy cine primes or anamorphic lenses, which demand exceptional stability. Interestingly, even minor vibrations—often imperceptible to the naked eye—can cause significant image inconsistencies at 16K resolutions. External studies show that support-induced vibrations are a key contributor to focus errors that compromise shot quality; hence, selecting advanced camera supports with piezo-electric or graphene damping layers becomes essential for high-fidelity results. For solutions, consider exploring support stabilization tech that targets micro-vibration reduction.
Why Do Faux-Low-Light Techniques Fail When Using Advanced Cinema Projectors?
Many assume that simple dimming or basic filters suffice for high-end projection scenarios. Yet, sophisticated projectors equipped with HDR capabilities and high-gain screens require more nuanced lighting control. Overlooking this can cause overexposure or washout in central image areas, defeating the purpose of your setup. Instead, using specialized neutral-density filters and environment control—like blackout drapes optimized for high-gain surfaces—ensures consistent image quality. Professional-grade projectors depend on precise calibration and environment management, as described in cinema projector techniques. Ignorance here leads to false impressions of inadequate equipment, when really, the flaw lies in environmental oversight.
Understanding these intricacies underscores that cinematic excellence depends not only on choosing the right gear but also on understanding and managing the subtle nuances that influence performance. Be mindful of vibrations transmitted through your support systems, optimize environmental conditions for projection, and don’t fall for oversimplified assumptions about lighting. Do you have a story where ignoring such details hurt your shot? Share your experiences in the comments. For more advanced tips on cinema setup, visit our privacy policy or get in touch through the contact us page.
Keep Your Gear Running Smoothly with the Right Tools
To ensure your projection screens, film lighting, and cine lenses perform at their best over the long haul, investing in high-quality, purpose-built tools is non-negotiable. For example, I personally swear by the CineLens Cleaning Kit. Its microfiber cloths, lens-specific cleaning solutions, and anti-static air blowers help me maintain pristine optics without risking scratches or smudges. Regularly checking and calibrating your film lighting setup with a precision light meter ensures consistent color and exposure, crucial for color-critical productions. Additionally, for camera supports, I rely on the support stabilizer meter, which helps me fine-tune damping and vibration dampers to prevent micro-movements during high-resolution shoots.
Using reliable tools not only prolongs your equipment’s lifespan but also maintains the quality of your output. For instance, regular inspection and cleaning of cine supports prevent micro-vibrations that can impair focus at ultra-high resolutions. Implementing preventative maintenance routines, such as cleaning filtration optics with anti-UV solutions and checking support mounts for wear, reduces unexpected breakdowns—saving both time and money.
How do I maintain projection, lighting, and lens systems over time?
Consistency is key. Schedule quarterly maintenance checks for your projectors, including cleaning filters and ensuring cooling systems are functioning optimally. For lighting, calibrate color temperatures and check wiring integrity before each major shoot. Maintaining your cine lenses involves regular cleaning, inspecting focus and aperture rings for stiffness, and lubricating mounts with manufacturer-approved oils. Staying ahead with these routines ensures your setups remain reliable, and results stay sharp and vibrant. As the industry advances toward 16K resolutions, equipment durability is more critical than ever. For comprehensive support, explore heat-resistant camera mounts designed for high-temperature environments, especially during prolonged shoots.
If you’re aiming to elevate your maintenance game, I recommend integrating a shielded XLR cable tester into your arsenal. It helps prevent audio dropouts caused by electromagnetic interference, ensuring professional sound quality.1 Don’t wait for equipment failure—proactive care translates to seamless performances and consistent quality. Why not try calibrating your support damping using precision meters this week? It can significantly reduce micro-vibrations, especially vital for 16K shoots where even tiny jitters matter. For more specialized tools, visit our privacy policy or contact me directly through the contact us page to explore tailored maintenance solutions.
The Hardest Lesson I Learned About Projection and Cinematic Equipment
Early on, I believed that maximizing brightness was the secret to stunning visuals. However, I soon discovered that overemphasizing brightness in high-gain screens sacrificed off-axis image quality, making me overlook the importance of balanced setups. This experience taught me that understanding the physics behind light reflection and angle response is crucial for achieving consistent cinematic excellence.
Tools That Elevated My Cinematic Journey
For anyone serious about high-quality projection and filmmaking, I highly recommend investing in reliable tools like the CineLens Cleaning Kit to maintain pristine optics, or a professional light meter for precise calibration. These resources have made a tangible difference in my workflow, ensuring equipment reliability and optimal performance. To keep your support systems stable and vibration-free, exploring support stabilization techniques has been invaluable in preventing micro-movements that degrade image quality at ultra-high resolutions.
Your Next Step Toward Cinematic Mastery
Embrace the challenge of fine-tuning every aspect of your setup, from screen material to environmental lighting control. Small adjustments—like repositioning your projector for better off-axis illumination or selecting medium-gain screens—can drastically improve your viewing experience. Remember, achieving perfect visuals is an ongoing process, and staying informed through trusted resources like our projection guide can help you make smarter decisions. What adjustments have made the biggest difference in your setup? Share your insights below and continue refining your craft.
Related Posts
Best Projection Screens & Film Lighting Equipment for Modern Cinematography 2024
Ever spent hours setting up your cinematic space only to…

Ultimate Guide to Projection Screens & Film Lighting for Filmmakers
I remember the first time I set up a projection…
Best Cine Lenses & Projection Screens for Filmmakers in 2024: Complete Guide
Have you ever been on set, eyes glued to your…