I remember the first time I spent hours tweaking my camera filters, hoping they’d magically transform my footage into something filmic. But no matter how many filters I applied, the result always felt flat,washed out, or overly processed. It was like trying to paint a masterpiece with a color palette that didn’t match the scene’s true mood. Later, it hit me—what if I could achieve the rich, organic look of classic cinema not through filters, but by understanding and controlling my lighting?
Why Relying on Filters Might Be Holding You Back
Most beginner filmmakers fall into the trap of thinking that filters or post-production effects are the fastest way to create a cinematic aesthetic. But in reality, these tools can be a band-aid over deeper issues—poor lighting, wrong camera settings, or a lack of understanding about how light shapes mood and texture. Filters often degrade image quality or introduce unwanted artifacts, reducing your control over the final look. As cinematographer Roger Deakins famously said, “Light is the paintbrush of the filmmaker,” and I couldn’t agree more. But mastering lighting is an art that requires patience, practice, and a good eye—not just fancy equipment.
Back when I first started, I made the mistake of relying on color grading alone to salvage dull footage, thinking post-processing could fix everything. Turns out, that was a quick way to waste hours chasing a look I could have achieved more naturally with proper lighting in-camera. This taught me a crucial lesson: Lighting isn’t just support for your camera—it’s the foundation of your visual storytelling, shaping everything from mood to texture without the need for filters or heavy grading. If you’re tired of your footage looking lifeless or overly digital, focusing on lighting techniques can be a game-changer.
Is Achieving the Film Look with Lighting Actually Worth the Effort?
Honestly, early on, I worried that mastering lighting would be too complicated or expensive. But I learned that some of the most effective techniques aren’t about high-end gear; it’s about understanding light’s qualities, color temperature, and direction. Plus, mistakes like oversoftening shadows or exposing whites improperly can sabotage your image more than any filter. To avoid falling into common traps, I recommend studying renowned lighting strategies—like those explained in this comprehensive guide—which give you practical steps to elevate your cinematography naturally.
So, if you’ve faced frustrations with trying to fix bad lighting in post or feeling limited by your gear, keep reading. I’ll share the core principles and simple steps that transformed my approach—and that can do the same for you. Let’s start by understanding why lighting holds the key to that coveted cinematic look, and how to harness it effectively, regardless of your budget or experience level.
Shape Light with Practical Techniques
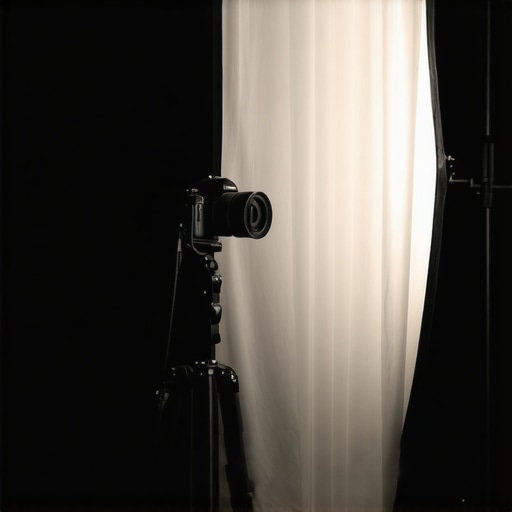
Start by using available light sources to sculpt your scene. Use a simple reflector—like a white foam board—to bounce light onto your subject’s face, filling shadows naturally. For example, I once shot a interview in a dim basement. I positioned a cheap LED panel behind the camera, diffused with a white shirt, and bounced sunlight from a nearby window using a white reflector. The result was a soft, natural glow that made the footage look more filmmaker-grade. Remember, you don’t need expensive tools; understanding light’s behavior is key.
Control Light Direction
Think of camera lenses as projectors—light entering at different angles creates varying textures. Aim a key light slightly above and to the side of your subject; this aligns with the natural angle of sunlight or indoor fixtures. Use flags—objects like foam core or flag paper—to block unwanted spill. In my last shoot, I used a piece of black foam core to block overhead daylight spilling onto the wall, preventing it from overexposing parts of the frame. This simple action kept the shot balanced and visually appealing.
Manipulate Color Temperature
Matching your lights to your scene’s mood enhances realism. Use gels or adjustable LED panels to match daylight (around 5600K) or tungsten (around 3200K). For instance, I once lit a night scene with warm LED bulbs to mimic candlelight. By adjusting the color temperature, I avoided heavy color grading later, preserving image quality. Think of your lights as filters—matching their color temperature to the environment offers a natural, cinematic tone.
Refine Shadows and Highlights
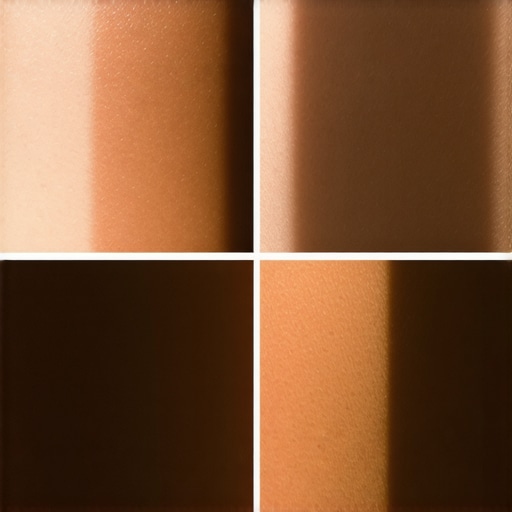
Harsh shadows or blown-out highlights ruin the cinematic feel. Use diffusion materials—like a silk cloth or softbox—to soften light. During a small studio shoot, I placed a silk sheet in front of my key light to create a pleasing, wrap-around glow. This eliminated unflattering shadows and made my subject’s skin look more vibrant. It’s like turning a hard flashlight into a gentle lantern; subtle diffusion elevates image quality.
Use Distance to Your Advantage
Position your light sources at varying distances to control intensity. Moving a light closer intensifies shadows and highlights, while increasing distance softens and flattens the look. On set, I moved a fresnel light back and forth to see how the shadows changed—this quick experiment allowed me to craft the perfect mood without fiddling with settings. Remember, physically adjusting light distance is faster than endlessly altering power levels or adding diffusion. Think of it as zooming in on a projector to sharpen focus, but with light instead of image.
Combine Techniques for a Cohesive Look
Layer multiple lighting methods to achieve depth and texture. Use a background light—like a practical lamp or colored gel—to add dimension. For a moody interview, I added a dim, colored gelled LED behind the subject, creating separation from the background. By controlling each light’s color, position, and diffusion, I crafted a movie-like scene from simple, affordable gear. Think of lighting as painting with layers—each element adds mood, texture, and visual interest.
Practice, Analyze, Repeat
The real magic happens when you experiment actively. Set up a scene, tweak one aspect—like moving a flag or changing the angle—and observe how it alters the mood. Record short tests and review them; you’ll notice subtle improvements over time. I recall spending an afternoon adjusting a single light angle, which transformed my scene from flat to cinematic, despite messy initial results. The key is persistent practice and critical analysis.
When it comes to building a professional-looking film or video project, many overlook the subtle yet impactful nuances in camera supports, projection screens, lighting, cinema projectors, and cine lenses. The common misconception is that more expensive gear or the latest models automatically deliver better results. But the true mastery lies in understanding the quirks and limitations of these tools and how to leverage or mitigate them effectively. For instance, many underestimate how critical stable supports are; a shaky tripod can ruin a shot, regardless of camera quality. Instead of relying on cheap supports, investing in high-quality support systems and knowing their limitations—like wobble points or weight distribution—can save hours of post-production fixing. Dive into camera supports to avoid the trap of shaky footage and learn how proper support techniques truly elevate your cinematic quality.
A pervasive myth among enthusiasts is that projecting from the latest cinema projectors guarantees pristine image quality. In reality, many overlook calibration nuances—such as lens backfocus, color matching, and screen gain—that drastically affect projection clarity and color fidelity. Misalignment or neglecting these details can cause blurry edges or washed-out colors, especially at high resolutions. Advanced users often falter here, thinking that a powerful lamp or the latest 4K projection engine suffices. But the reality is a well-maintained, properly calibrated projector combined with an appropriate screen surface yields far superior results. For a comprehensive deep-dive, see cinema projectors that demystify the calibration process.
Film lighting, surprisingly, is often reduced to mere brightness or color temperature adjustments. However, the nuanced interplay of light direction, quality, and diffusion can dramatically alter the mood and realism of a scene. Many beginners believe that creating soft light requires expensive diffusion boxes or large softboxes. But in practice, mastering techniques like bounce lighting, flags, and practical sources can produce cinema-grade aesthetics on a budget. The trap here is reliance on gimmicky LED panels with high CRI values, which may seem promising but often produce unflattering or unnatural color renditions if not carefully balanced. As detailed in film lighting techniques, understanding how to craft and control light is essential for authentic, organic-looking visuals.
Then there’s cine lenses, which many mistakenly believe are just high-cost versions of standard glass. In reality, cine lenses are engineered with nuanced optical qualities like minimal focus breathing, smooth aperture rings, and unique optical coatings that influence contrast and flare behavior. Overlooking these differences can result in inconsistent focus pulls or image artifacts that ruin the cinematic feel. Moreover, many professionals are unaware of the importance of lens calibration—like back-focus adjustments—to ensure sharpness across focal lengths. For an in-depth guide, cinema lenses explained reveals why choosing the right glass and understanding their optical nuances are crucial.
Finally, a common mistake is ignoring the hidden limitations of seemingly advanced gear, which can lead to costly mistakes or subpar results. For example, many rely on high-gain projection screens expecting perfect contrast, not realizing that high gain surfaces often limit off-axis viewing and can introduce hot-spotting. The key is understanding these trade-offs and selecting tools suited to your specific environment. Always question assumptions: does this support, projector, or lens truly match my scene requirements?
**Have you ever fallen into this trap? Let me know in the comments!** Mastering these details unlocks a new level of cinematic excellence and prevents costly missteps. Remember, in filmmaking, it’s the nuances and understanding of your tools that make all the difference in creating a truly professional result.
Invest in Quality Supports and Stabilizers
One of the most overlooked yet critical aspects of maintaining professional footage is ensuring your camera supports are up to standard. I personally rely on high-quality tripod systems and stabilizers that resist wobble and can handle the weight of recent camera innovations. A sturdy tripod with proper leg locks and a balanced head reduces micro-movements that ruin smooth pans or tracking shots. Regularly inspect and tighten all mounting screws and joints—this simple step often prevents unexpected collapses or shakiness during critical takes.
How do I maintain my camera supports over time?
Cleaning and lubricating support mechanisms like tripod leg locks and pan-tilt heads extends their lifespan and guarantees reliability. Use manufacturer-approved lubricants—such as lightweight silicone oils—and apply sparingly to avoid dirt accumulation. Once or twice a year, disassemble and check for wear or corrosion, especially if operating in humid environments. Also, store supports in climate-controlled conditions, avoiding exposure to extreme temperature swings that can warp materials or cause joint stiffness.
Optimize Projection and Screen Management
Projection setups require meticulous upkeep to preserve image clarity. I’ve found that regularly calibrating my cinema projector’s focus and color balance ensures consistent results. Dust and fingerprints on lenses or filters can be detrimental, so I keep microfiber cloths and lens cleaning fluid handy. When using projection screens, demystify the effects of surface gain by cleaning and maintaining the fabric; a matte white surface, when kept free of dust and wrinkles, offers the most predictable light diffusion, enhancing contrast and color accuracy.
What’s the best way to keep my projection gear in top shape long-term?
Establish a routine of inspecting mounting brackets, lamp condition, and cooling fans. Mechanical vibrations or overheating can prematurely degrade performance. Using a dedicated power conditioner, as described here, helps stabilize power input and prevents sudden surges that could damage sensitive components. Additionally, periodically recalibrate your lens shift and keystone correction—small adjustments that preserve image quality at different throw distances.
Keep Cinema Lenses in Peak Condition
Cine lenses are precision instruments that demand careful upkeep. I recommend routine cleaning of focus and aperture rings with lens-specific wipes and avoiding touching lens elements with fingers, which can leave smudges affecting image clarity. Furthermore, stabilizing optical performance involves back-focus calibration—something I’ve personally performed using a focus chart and a calibrated electronic focus tester. Proper back-focus alignment ensures consistent focus behavior across focal lengths, especially important when switching between prime and zoom lenses.
How do I maintain my cinema lenses long-term?
Store lenses in padded cases away from extreme humidity and temperature changes. Regularly check for dust or mold, and use a blower brush for dust removal. Be cautious with lens caps and avoid forcing focus rings or zoom mechanisms—gentle handling prolongs their service life. For critical focus shifts, consider consulting a professional technician for back-focus calibration, ensuring your lenses deliver sharp images every shoot.
In the future, I predict a rise in smart maintenance tools such as sensor-based lubricants and AI-driven calibration devices that will keep your optical and mechanical gear performing flawlessly with minimal manual effort. For now, though, a disciplined approach—regular cleaning, careful handling, and routine calibration—can dramatically extend your equipment’s operational life and shooting quality. I encourage you to try implementing a scheduled maintenance routine for your primary support gear or lenses today—small investments in upkeep pay dividends every time you press record.
Over my years behind the camera, I’ve come to realize that the most valuable lessons often stem from hands-on experimentation and trusting your intuition rather than relying solely on formulas or the latest gear. Sometimes, the greatest breakthroughs happen when you step outside the comfort of presets and start exploring your equipment with curiosity and deliberate practice. This approach has not only improved my craft but also deepened my understanding of how each component interacts—be it support systems, projection setups, or lens selections—shaping the story you aim to tell. When you embrace learning as an ongoing journey, you unlock a level of mastery that no guidebook or review can fully convey. Remember, the tools are just the beginning; it’s your relationship with them that creates true cinematic magic.
About the Author
James Duke
ThinkOTS
James Duke is a seasoned professional in the creative production industry, bringing a wealth of technical knowledge and hands-on experience to cinegearguide.com. As a key figure at ThinkOTS, James has spent years navigating the complexities of high-end production environments, where selecting the right equipment is the difference between a successful shoot and a logistical failure. His expertise spans the full spectrum of cinematography gear, from advanced camera systems to the intricate accessories that define modern filmmaking. On cinegearguide.com, James leverages his deep understanding of the industry to provide authoritative insights, gear reviews, and technical guides. He is known for his ability to break down complex specifications into practical, actionable advice for filmmakers of all levels. His perspective is rooted in the real-world application of technology, ensuring that every recommendation is backed by professional standards. James is dedicated to empowering the filmmaking community by sharing his expertise, helping others navigate the ever-evolving landscape of cinema technology with confidence and clarity.
LinkedIn ProfileRelated Posts
The DIY Trick for Softening Harsh LED Light Without a Softbox
Have you ever been on a shoot or setting up…
Why Most LED Panels Create Weird Skin Tones and How to Fix It
I vividly recall a shoot where my subject looked radiant—until…
Why Every Professional Set Still Uses Sandbags for Light Stands
I remember the exact moment I nearly lost a light…