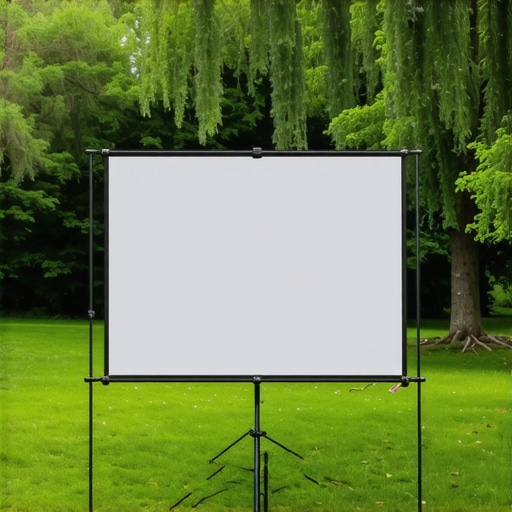
I’ll never forget the frustrating moment when my carefully calibrated projection screen wobbled just as the crowd settled in, casting a blurry image that made me cringe. It wasn’t the projector’s fault—no, it was my overzealous tightening of the screen tensioners. At the time, I thought more tension meant a better, smoother image. But I was wrong. That experience opened my eyes to a hidden danger lurking in many professional setups: over-tightening screen tensioners.
Why Excessive Tension Is a Hidden Threat
Over-tightening screen tensioners may seem like a good idea to keep screens taut and reduce wrinkles. However, too much tension can introduce stress into the material, leading to warping, sagging, or even damaging the fabric over time. This isn’t just a theoretical risk. In my early days, I made the mistake of tightening screens so much that I noticed a permanent distortion, which compromised image quality and required costly replacements. Understanding the delicate balance is crucial for preserving your equipment and maintaining top-notch projection clarity.
Is Over-Tightening Worth the Risk? A Common Misconception
Many believe that tighter is better when it comes to screen support. Yet, experts warn that excessive tension can cause the material to stretch unevenly or develop micro-tears that are invisible initially but degrade the image over time. I used to think that a super-tight screen was essential for sharpness, but after experimenting and consulting with industry pros, I realized that proper tensioning relies more on even, moderate pressure than maximum force. Curious about how to achieve the perfect setup? You can find helpful guidance in this comprehensive resource on projection screens.
Achieve Even Tension with Simple Tools
Start by gently loosening the tensioners to create a slack baseline. Use a tension gauge or a simple weight scale attached to the fabric edges, similar to how camera supports are stabilized using professional support equipment. My first attempt involved wrapping a modest weight with a cloth around the fabric, then incrementally tightening until the tension was evenly distributed, avoiding overstretching in the process. The key: gentle, consistent adjustments rather than brute force, preventing fabric warping or micro-tears.
Apply Tension Gradually for Uniformity
Start from the Center and Work Outwards
When tightening, focus on the center of the screen first. Imagine how cine lenses or projectors need precise alignment; similarly, uniform tension prevents hotspots or sagging. I remember using a small spirit level placed along the top edge during my second setup; I would tighten the center tensioner slightly, then check for levelness, repeating this step at the corners. This iterative process ensures balanced tension across the surface, reducing wrinkles and image distortion.
Use the Right Tensioning Pattern
Create a cross pattern across the screen frame—tighten opposite points incrementally. Think of managing the focus on a cinema lens; you don’t tighten one side all the way. Slowly move between tension points until the fabric feels taut but not stretched tight enough to cause stress. As a result, the fabric remains smooth, and the image stays sharp. I once used a criss-cross approach, taking 2-3 small turns at each tensioner, which resulted in an evenly stretched surface, eliminating prevalent wrinkles.
Monitor and Adjust in Small Increments
After initial tightening, step back and examine the material for unevenness. Use a laser pointer or a bright flashlight to cast light across the surface—any irregularities in tension become obvious as ripples or shadows. In my third attempt, I found tiny micro-variations that I adjusted with more precise, 1/4 turn tweaks, leading to a flawless, flat display surface. This fine-tuning mirrors the meticulous focus pulls required with cine lenses or carefully balanced camera rigs. Remember, patience is key: small adjustments yield the best results.
Test with a High-Resolution Image
Finally, project a high-resolution test image or video to assess the surface quality. If you notice any blur, distortion, or hotspots, revisit tension points, repeating the even, gradual tightening process. It’s like fine-tuning a projector’s focus; minor tweaks can dramatically improve clarity, ensuring viewers experience sharp, vibrant images without distraction. This iterative process is vital, especially when working with large, high-gain screens sensitive to even minor uneven tensioning.

While it’s tempting to assume that selecting high-end cine lenses, projection screens, or camera supports guarantees flawless footage or projection quality, the reality is far more intricate. Many professionals and hobbyists alike fall prey to oversimplifications that can undermine their entire setup.
Revisiting the Myth of the Perfect Lens
Everyone cherishes cine primes for their sharpness and consistency, yet a lesser-known nuance is the impact of lens focus breathing on cinematography. The misconception that all primes are equal ignores how focus breathing can subtly distort framing during rack focus shots, distracting viewers and compromising storytelling. Advanced shooters often opt for specialized lenses with minimal focus breathing, a detail that can make or break your visual continuity. Curious how to identify and select such lenses? Check this guide on cine-lenses for insights.
Why Do We Still Overlook Screen Gain and Texture?
Many assume that any high-gain projection screen will produce vibrant images, but that overlooks the hidden dangers of hotspotting and off-axis brightness loss. The misconception that shiny surfaces always reflect light uniformly leads to uneven viewing experiences, especially in large venues. The subtle interplay of screen texture and gain coefficient influences color accuracy and contrast, yet it’s frequently misunderstood. An in-depth understanding is crucial—learn more at this resource on projection screens.
Camera Supports: The Overlooked Variable
Many believe that sturdy support rigs are enough, but the real expertise lies in how support damping, balance, and vibration control affect shot stability. A common mistake is neglecting the subtle micro-shakes caused by poorly maintained tripods or uneven weight distribution, which become glaring in high-resolution or slow-motion footage. Investing in supportive accessories like titanium heads or carbon-fiber supports can dramatically improve shot quality. Want to prevent micro-shake issues? Explore this advanced guide.
Lighting Surprises That Trip Up Even Pros
Everyone knows that lighting sets the mood, but the hidden nuance is in spectral quality and temperature consistency across different light sources. A common mistake is mixing LED panels with incandescent lights without proper gels or color calibration, leading to mismatched color profiles and subtle skin tone shifts. High CRI LED mats and color calibration techniques can solve this, but they’re often overlooked in pre-production planning. To master the art, consult this comprehensive lighting guide.
Projection Devices and Misjudged Shadows
Finally, many underestimate the importance of projector maintenance and the hidden role of lens quality and heat management in image sharpness and stability. Micro vibrations and overheating can cause image shifting, focus drift, or thermal sag—all subtle issues that degrade quality over time. Recognizing these nuances ensures viewers experience the intended cinematic brilliance without distraction. For a deep dive, see this authoritative guide on cinema projectors.
Understanding and respecting these hidden nuances can dramatically elevate your craft, preventing costly mistakes and producing consistently superior results. Have you ever fallen into this trap? Let me know in the comments.
Invest in Precision Tools for Long-Term Performance
Maintaining cine lenses, projection screens, and camera supports requires the right equipment. I highly recommend using a professional support stabilizer with built-in vibration damping features. This ensures your shots remain steady over extended shoots and helps prevent micro-shakes that can ruin high-resolution footage. Investing in a high-quality laser alignment device also pays dividends, especially when calibrating complex systems like cinema projectors or multi-screen setups.
Tools That Make Routine Maintenance Easier
Regular upkeep is vital to prevent performance degradation. For cinematic lenses, I rely on lens cleaning kits that include anti-static wipes and microfiber cloths—these protect delicate coatings and prevent micro-scratches. When it comes to supporting large film lighting rigs, having a set of versatile C-stands with locking mechanisms ensures stability and safety during extended shoots. For projector upkeep, a thermal cleaning brush helps remove dust from heat sinks, reducing overheating risks.
How do I maintain cine lenses and supports over time?
Proper maintenance begins with routine inspections—look for loose mountings or signs of coating deterioration. Applying a light coating of specialized lens lubricant at the focus rings can prevent stiffness, ensuring smooth operation. Consult the manufacturer’s maintenance schedule regularly and consider professional servicing every 6-12 months—this can extend the lifespan of your equipment significantly. For precise calibration, tools like refinement tools enable quick adjustments, especially for high-end setups.
Future Trends in Equipment Maintenance
The trend in equipment preservation is leaning toward AI-powered diagnostic tools which can detect micro-vibrations, uneven wear, or calibration drift before they turn into costly issues. In particular, predictive analytics integrated into support equipment could revolutionize how we approach system longevity. I predict that by 2027, smart maintenance systems will be standard in professional cinema setups, reducing downtime and boosting image quality.
Implementing Advanced Maintenance Techniques
Start incorporating routine calibration checks with digital tools and schedule professional inspections proactively. For instance, programs that monitor LED panel health help preserve color fidelity and consistency. Additionally, using quality support accessories like graphene fluid heads minimizes drift during long takes, especially in high-precision shots.
Take the initiative today by investing in a laser alignment tool to ensure your projectors and screens are perfectly calibrated. Small improvements now can significantly extend the lifespan and performance of your gear, saving you both time and money in the long run.
Lessons the Hard Way That Tightened My Cinematic Skills
- One of the most valuable lessons I learned was that over-tightening support systems can give a false sense of stability but actually induce micro-movements and damage. It taught me to prioritize even, gentle adjustments, which significantly improved shot stability and equipment longevity.
- Realizing that equipment maintenance isn’t just routine but a strategic part of planning reshaped my workflow. Regular calibration and smart storage prevent micro-shifts and maintain clarity in high-resolution displays, leading to consistent results over time.
- Discovering that understanding the subtle interplay between tension, support, and environmental factors can be the difference between a good shot and a great one. For example, even temperature fluctuations can subtly distort projection surfaces if not managed carefully.
My Go-To Arsenal for Cinematic Precision
- Investing in a quality laser alignment tool has transformed how I calibrate projectors and screens. Precision matters in achieving even tension and perfect focus, and this tool provides immediate feedback for adjustments you can trust.
- The comprehensive guide on [cinema projectors](https://cinegearguide.com/unlock-the-secrets-of-cinema-projectors-a-complete-guide-for-2025) has been a constant source of advanced maintenance techniques that keep my equipment performing at peak levels.
- Using high-quality support accessories like carbon-fiber support rigs and vibration damping mounts, I’ve minimized micro-shakes. Detailed reviews and buying tips from trusted sources help me make informed decisions that stand up to rigorous professional demands.
- My lighting setup is optimized through detailed knowledge gained from [film lighting techniques](https://cinegearguide.com/mastering-film-lighting-techniques-to-elevate-your-cinematography), ensuring color fidelity and minimizing spectral inconsistencies that can creep into high-gain screens and LED arrays.
Fuel Your Passion with Action and Vision
Embracing precise tensioning, diligent maintenance, and continuous learning can elevate your cinema craft from good to unforgettable. Remember, every adjustment and upgrade you make today sets a foundation for the stunning visuals of tomorrow. Don’t let small issues undermine your creative vision—invest in the right tools, stay curious, and refine your technique constantly.
What’s the one piece of equipment or technique you’ve struggled to perfect? Share your experiences below and let’s grow together in mastering cinematic excellence.
About the Author
James Duke
ThinkOTS
James Duke is a seasoned professional in the creative production industry, bringing a wealth of technical knowledge and hands-on experience to cinegearguide.com. As a key figure at ThinkOTS, James has spent years navigating the complexities of high-end production environments, where selecting the right equipment is the difference between a successful shoot and a logistical failure. His expertise spans the full spectrum of cinematography gear, from advanced camera systems to the intricate accessories that define modern filmmaking. On cinegearguide.com, James leverages his deep understanding of the industry to provide authoritative insights, gear reviews, and technical guides. He is known for his ability to break down complex specifications into practical, actionable advice for filmmakers of all levels. His perspective is rooted in the real-world application of technology, ensuring that every recommendation is backed by professional standards. James is dedicated to empowering the filmmaking community by sharing his expertise, helping others navigate the ever-evolving landscape of cinema technology with confidence and clarity.
LinkedIn ProfileRelated Posts
5 Carbon-Fiber Hoods That Kill 16K Screen Glare in 2026
I remember the moment it hit me. Standing on set,…
![Kill Screen Waves: 7 Heavy-Duty Tensioners for 16K Projections [2026]](https://cinegearguide.com/wp-content/uploads/2026/04/Kill-Screen-Waves-7-Heavy-Duty-Tensioners-for-16K-Projections-2026-1.jpeg)
Kill Screen Waves: 7 Heavy-Duty Tensioners for 16K Projections [2026]
It happened during a crucial screening—images started to wobble, edges…
How to Secure Your Projection Screen from Outdoor Wind Gusts
It was a breezy summer evening when I finally faced…