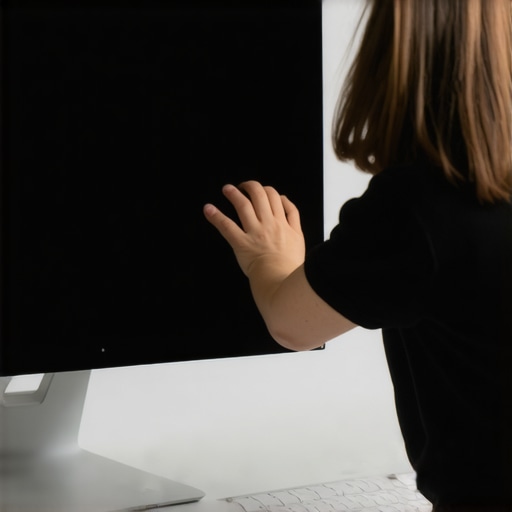
It was a frustrating Saturday afternoon when I finally realized my white walls were sabotaging my home cinema setup. No matter how good my projector or screen was, those bright, reflective surfaces kept washing out the deep blacks I craved. I’d spend hours tweaking settings, trying to compensate, but the walls just refused to cooperate. That lightbulb moment made me dig deeper—literally and figuratively—until I discovered the secret to achieving those rich, velvety blacks despite the stark white boundaries of my room.
Why White Walls Become the Enemy of Deep Blacks
Rooms with white or light-colored walls are notorious for bouncing extra light, which dilutes the contrast and steals away the depth in black levels. This is especially problematic in home cinemas or dedicated projection setups where darkness is key to immersion. Early on, I made the mistake of thinking my projector’s capabilities alone would handle this challenge. I was wrong. The room’s reflectivity played a pivotal role in undermining my efforts. Studies show that wall reflectance significantly impacts perceived contrast, which is critical for cinematic excellence. To truly harness the power of your projector, the room environment must be addressed head-on, not just the device itself.
Is It Worth the Effort or Just a Wiseacre Myth?
Initially, I wondered if investing in special paints or wall treatments was overkill. Honestly, I was skeptical—until I saw the difference for myself. The truth is, small changes can lead to stunning improvements. I learned that proper wall treatments, combined with calibrated settings, can render black levels that rival the best commercial cinemas. If you’re battling similar frustrations, I urge you to explore these strategies; they are more accessible than you might think. Curious about the detailed techniques? Check out film lighting tips to see how professional-grade setups tackle room reflections and contrast.
Start with Wall Preparation to Quell Reflections
Remove any glossy or semi-gloss finishes from your walls by sanding or using matte paints. Use a high-quality matte black paint or specialized projection screen paint, applying multiple thin coats for uniformity. During my project, I first sanded the walls to eliminate gloss, then meticulously painted with a matte black finish, which significantly reduced reflections and enhanced contrast.
Optimizing Room Geometry for Light Control
Install blackout curtains and eliminate light leaks—cover gaps with weatherstripping or blackout fabric. Use removable fabric panels or acoustic blankets on sidewalls to absorb stray light. I customized blackout curtains with velcro strips to block ambient light easily, instantly improving perceived contrast during my evening viewing sessions.
Invest in Strategic Light Absorbers
Add bass traps and wall panels covered with matte black fabric behind seating areas and around the projector to dampen reflections. I constructed simple foam-board panels wrapped in black fabric, mounting them with command strips for easy adjustments, which noticeably deepened the blacks on my projected image.
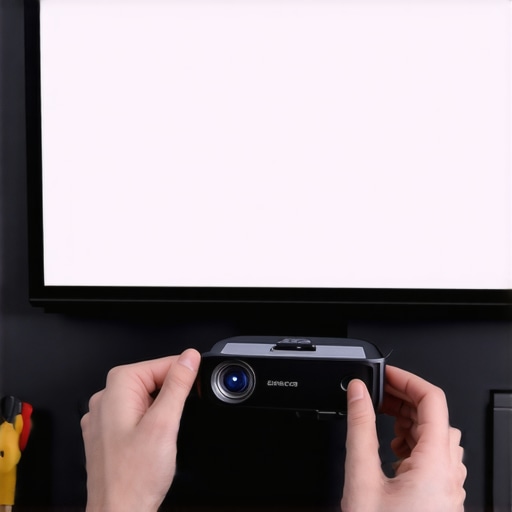
Choosing the Right Projection Screen to Maximize Contrast
Switch from your standard white wall to a dedicated projection screen with high contrast and gain. Consider a screen material with a matte finish and anti-reflective coatings. I transitioned to a 100-inch ambient-light rejecting screen from this selection guide, which brought a dramatic increase in black detail even during daylight hours.
Calibrating Your Projector Like a Pro
Adjust settings for contrast, gamma, and black levels using test patterns and calibration tools. Set the projector’s black level to just below the deepest black you want to appear, ensuring no crush occurs. I used a calibration disc to fine-tune contrast and gamma, yielding a richer, more cinematic image free of washed-out blacks.
Light Management and Room Acoustics
Incorporate controlled lighting—use dimmable lights, bias lighting behind the seating, and avoid direct light hitting the screen. Employ acoustic treatments to prevent echoes, which can alter perceived contrast. I added dimmable LED strips behind furniture and installed acoustic foam on sidewalls, which together created a more immersive contrast experience.
Maintain the System for Consistent Results
Regularly clean your projector lens and check for dust accumulation on filters. Use a consistent setup profile for your calibration settings. During my setup, I scheduled monthly cleaning and saved calibration presets, ensuring consistent deep blacks regardless of ambient changes.
When enthusiasts dive into the world of cinema gear, there’s a common belief that more expensive or popular equipment automatically guarantees better results. However, in my experience, understanding the intricacies and avoiding certain pitfalls can make a significant difference. For example, many assume that camera supports are just about holding the gear steady, but overlooking compatibility with specific camera types or neglecting counterbalance nuances can lead to shaky footage or even equipment failure. Likewise, cine lenses are often thought to be vastly superior simply because of their price tag, but subtle differences in optical construction and breathing can dramatically impact the emotional tone of a shot, a detail often missed by beginners.
When selecting film lighting, a frequent misconception is that high wattage equals better brightness. In reality, excessive light can cause unwanted heat and uneven exposure, especially if fixtures aren’t properly diffused or color-balanced. Projection screens are another area where many get it wrong; choosing a high-gain surface without considering viewing angles may result in hotspots and poor off-axis image quality, contradicting the common belief that a brighter screen always improves visibility.
For cinema projectors, the emphasis on resolution alone can be misleading. Factors like contrast ratio, color accuracy, and uniform light distribution are equally crucial, yet often underestimated. Advanced professionals pay close attention to calibration and room acoustics, understanding that neglecting these can negate the benefits of the highest-end equipment.
A nuanced understanding of these elements is essential because the devil is in the details. For instance, when considering support rigs, the material and locking mechanisms matter—cheap supports might appear identical but can compromise stability or safety, especially when supporting heavy or high-value gear. In cine lenses, the focus breathing can subtly alter a shot’s framing during focus pulls, influencing storytelling. Accurate light diffusion isn’t just about softening the light but maintaining color fidelity.
Moreover, many enthusiasts fall into the trap of overspending on equipment that doesn’t match their specific needs, leading to unnecessary expenses and frustration. Doing thorough research and understanding the technical nuances—like the difference between high-gain and low-gain screens, or the impact of lens coatings on flare—is crucial to making informed choices.
To deepen your knowledge, I recommend exploring resources like this guide on camera supports or how to choose the right cine lenses. Recognizing these subtleties ensures your setup isn’t just capable but optimized for cinematic excellence.
Have you ever fallen into this trap? Let me know in the comments and share your experiences with equipment pitfalls or revelations.
How Do I Maintain My Camera Supports Over Time?
Maintaining your camera supports is crucial for ensuring stability and longevity. I rely on high-quality support rigs like those from this guide to understand proper setup and routine checks. Regularly inspect the locking mechanisms and joints; dust and debris can cause loosening over time, leading to shaky footage. A quick application of light lubricant on moving parts prevents wear and preserves smooth operation. For heavier loads, verify the support’s weight capacity—using supports beyond their rated load risks damage and accidents. Using a tripod head with a locking system that provides precise tension control ensures consistent stability during long shoots. As trends move towards lightweight yet durable materials, I recommend switching to carbon fiber supports that require less maintenance and still offer excellent durability. Predicting future trends, I expect innovations like smart support systems that alert you to wear or imbalance via connected apps, streamlining maintenance routines.
Why Invest in Quality Cine Lenses and How to Maintain Them
My experience has shown that investing in high-quality cine lenses pays dividends in image quality and durability. I choose lenses with meticulous coatings to prevent flare, as explained in this detailed resource. Routine cleaning with proper microfiber cloths and lens cleaning solutions keeps glass elements pristine. Avoid touching the lens elements directly; instead, use lens caps and filters to protect against dust and scratches. When not in use, store lenses in padded cases and with silica gel packets inside to prevent fungus growth and moisture buildup. Calibration and periodic check for focus breathing ensures your shots remain sharp and consistent, an especially important detail in cinematic work. As technology advances, expect smarter lenses with built-in focus and aperture calibration features that notify you of misalignment or wear, simplifying maintenance and calibration over years of use.
Essential Tools to Keep Your Lighting Setup Bright and Consistent
In my kit, the most invaluable tools are high-quality diffusion materials and dedicated lighting meters. I use this guide to fine-tune my lighting setups. Regularly check and clean light fixtures, especially diffusers and barn doors, to maintain consistent color temperature and output. I favor LED lights with fans — but I also invest in noise-reduction techniques to keep my shoot quiet and professional. Calibration of color temperature using a reliable light meter ensures your shots are true to skin tones and scene mood. Prediction indicates that wireless controls and app-based maintenance alerts will become standard, allowing real-time adjustments and troubleshooting, making setups faster and more reliable. Try integrating a digital light meter into your workflow to ensure your lighting remains consistent across shoots—small investments that can drastically improve your output.
Unspoken Lessons from the Darkness
One of the most impactful lessons I discovered was that achieving perfect contrast isn’t just about high-end equipment—it’s about understanding the environment you create. I realized that neglecting room reflections and light control can turn even the most advanced projector into a visual disappointment, no matter its specs. This insight made me rethink the entire setup process, emphasizing that meticulous room preparation and strategic light management are vital for cinematic perfection.
Another revelation was that professional calibration isn’t a one-time fix but an ongoing process. Small adjustments in contrast, gamma, and black levels, when performed regularly, maintain the richness of blacks over time. This constant attention prevents the dreaded ‘washed-out’ look and ensures every viewing remains as immersive as the first.
Lastly, I learned that investing in quality projection screens and wall treatments pays off exponentially. These elements work synergistically with calibration and room optimization, turning a simple space into a true home theater sanctuary that rivals commercial cinemas in depth and darkness.
Tools and Resources That Elevated My Home Cinema Game
- Calibration Discs: Using a dedicated test pattern disc was key to fine-tuning my projector. It provided precise control over contrast and black levels, making the image profoundly better.
- Ambient Light Rejection Screens: Transitioning to an ambient-light rejecting screen was a game-changer, allowing me to enjoy deep blacks even during the day or with non-ideal lighting conditions.
- Matte Black Wall Paint: Applying high-quality matte projection paint significantly reduced reflections, creating a deeper, more immersive black in the image.
- Blackout Curtains and Acoustic Panels: Combining light-blocking curtains with absorptive wall treatments minimized light pollution and internal reflections, further enhancing contrast and overall picture quality.
Embrace the Challenge and Elevate Your Viewing Experience
Transforming your home cinema into a dark sanctuary that delivers velvety blacks and stunning contrast is a journey worth undertaking. Every tweak, every investment in environment and calibration, brings you closer to that cinematic magic. Remember, mastering these details isn’t just about equipment—it’s about cultivating an environment that respects and amplifies the technology’s potential.
Don’t wait for perfection—start small, learn, tweak, and enjoy. Your dedicated space for cinematic immersion awaits, and with patience and experimentation, you’ll discover the profound depth that makes every film feel like a first-run experience. What specific challenge have you faced in improving contrast in your setup? Share your story below and let’s grow together in the pursuit of cinematic excellence.
About the Author
James Duke
ThinkOTS
James Duke is a seasoned professional in the creative production industry, bringing a wealth of technical knowledge and hands-on experience to cinegearguide.com. As a key figure at ThinkOTS, James has spent years navigating the complexities of high-end production environments, where selecting the right equipment is the difference between a successful shoot and a logistical failure. His expertise spans the full spectrum of cinematography gear, from advanced camera systems to the intricate accessories that define modern filmmaking. On cinegearguide.com, James leverages his deep understanding of the industry to provide authoritative insights, gear reviews, and technical guides. He is known for his ability to break down complex specifications into practical, actionable advice for filmmakers of all levels. His perspective is rooted in the real-world application of technology, ensuring that every recommendation is backed by professional standards. James is dedicated to empowering the filmmaking community by sharing his expertise, helping others navigate the ever-evolving landscape of cinema technology with confidence and clarity.
LinkedIn ProfileRelated Posts
The Secret to Perfect Screen Tension Without Professional Tools
I'll never forget the moment I watched my carefully set-up…

The Acoustic Transparent Screen Mistake Ruining Your Soundstage
Last week, I set up a brand-new projection screen in…
How to Fix Screen Hotspotting for Bright Projector Setups
Have you ever sat down to watch a film, only…