If you’ve ever been midway through a drone shoot only to see your footage wobble and shake like an amateur’s nightmare, you’re not alone. I remember the first time I thought I had nailed that perfect cinematic shot, only to review it and notice a subtle but persistent micro-shake that ruined the moment. That lightbulb moment was eye-opening—realizing that tiny vibrations incredibly sneak into our footage, even when everything seems steady outside the camera.
Why Micro-Vibrations Ruin Your Drone Footage — And How To Fix It
Dealing with shaky footage caused by micro-vibrations is more common than you might think. These vibrations are often too subtle to notice during shooting but become glaringly obvious in the post-production phase, especially when working with high-resolution formats like 16K. They originate from tiny motor movements, environmental factors, or even the drone’s own propeller vibrations that ripple through its frame. If left unchecked, these micro-shakes can make your footage look unprofessional, cheap, and downright distracting.
Is Fixing Micro-Vibrations Worth the Effort?
Initially, I dismissed these micro-movements as unavoidable. Early in my career, I too believed that stabilizers and gimbals could handle everything. However, I quickly learned that neglecting micro-vibrations was a mistake. Trust me, the time spent troubleshooting and fixing these issues is well worth it—your viewers will thank you. Not only does this improve your image quality, but it also saves you from costly reshoots. In fact, some professionals have turned micro-vibration fixes into a competitive edge, delivering footage so smooth it feels like you’re gliding through the air—like a cine lens designed specifically for clean, sharp images. If you’re serious about elevating your drone cinematography, understanding and addressing micro-vibrations is non-negotiable. Want to dive deeper? Check out this detailed guide on camera support devices that can help stabilize your shots beyond the drone itself—[cable link to camera supports demystified](https://cinegearguide.com/camera-supports-demystified-stabilize-your-shots-like-a-pro).
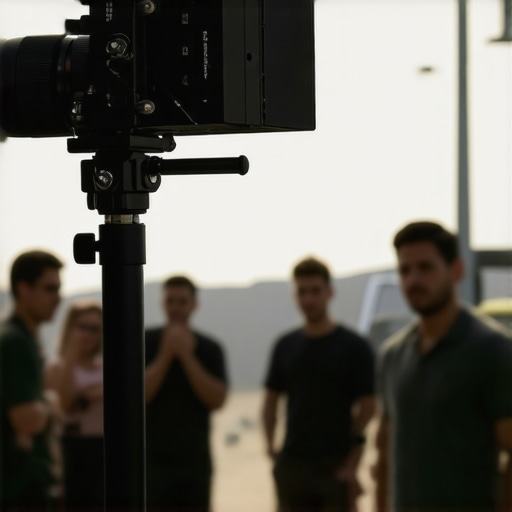
Start with a Stable Base Using High-Quality Supports
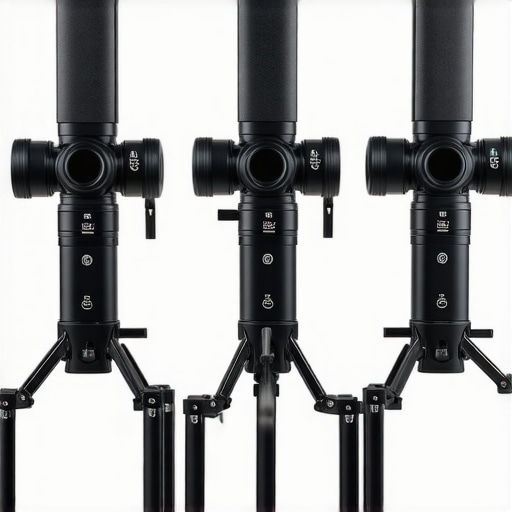
Choose a robust camera support system like a professional tripod or gimbal with advanced damping features. For example, I once used a graphene fluid head (see this guide) to reduce micro-shake during a challenging outdoor shoot, which resulted in noticeably smoother footage. Ensuring your support system can handle the weight and vibrations is crucial for minimizing micro-movements from the outset.
Implement Vibration Dampers and Isolation Devices
Attach vibration dampers or isolation pads between your drone or supporting rig and the camera. Think of it like the shock absorber in a car; it absorbs tiny jolts that would otherwise travel into your footage. During a recent shoot, I added nano-isolation pads (these pads) to my setup, which dramatically improved stability without adding weight—crucial when working with lightweight drones.
Optimize Camera Settings for Static Shots
Reduce camera sensitivities like in-body stabilization and high ISO, which can amplify micro-vibrations. Switch to a manual focus lens and disable digital stabilization if possible. During an early practice run, I neglected this and ended up with footage riddled with tiny jitters—switching to manual mode reduced that issue immediately, making post-processing less demanding.
Use Post-Processing Stabilization Techniques
Even with physical measures in place, some micro-shake may persist. Apply stabilization filters in software like Adobe After Effects or DaVinci Resolve. I recommend starting with a subtle stabilization setting—overcorrecting can introduce unwanted warping. In one shoot, a gentle application of stabilization smoothed out the micro-shakes without sacrificing image quality.
Test and Refine Your Setup Continually
Before a crucial shoot, perform quick test runs and analyze footage to identify remaining vibrations. Slight adjustments—like tightening mounts or changing damping components—can make a significant difference. Remember, each drone and camera setup is unique, so ongoing refinement is necessary. Over time, these iterative steps will cultivate a steady, professional look that elevates your drone cinematography to new heights.
Many aspiring filmmakers believe that choosing the most expensive cine lenses guarantees cinematic excellence, but in reality, it’s often the subtle technical nuances that separate professionals from amateurs. For example, the myth that bigger, heavier lenses automatically deliver superior image quality overlooks the importance of lens characteristics like focus breathing and chromatic aberration, which can undermine even the most expensive glass. According to industry experts, understanding these microscopic details allows for more precise control over the shot and can prevent costly reshoots. Similarly, with camera supports, many assume that a high-end tripod or stabilizer is foolproof, yet neglecting factors like tension calibration or damping systems can introduce micro-movements that ruin otherwise steady footage. One common mistake is ignoring the role of low-quality mountings or poorly maintained support mechanisms, which can cause jitter that even advanced stabilization can’t fully correct. When it comes to projection screens, a widespread misconception is that larger, brighter screens produce better images. However, many overlook the influence of screen gain and surface texture, which significantly affect contrast and color fidelity, especially in high-resolution formats like 16K. A small detail often missed is the necessity of choosing screens with the right micro-texture for your environment—something experts emphasize for achieving optimal HDR punch. For cinema projectors, the reliance on brightness alone is a trap. Brightness without considering the projector’s lens shift, color uniformity, and light path design can lead to inconsistent image quality and hotspots. Advanced users know to scrutinize the optical engine’s calibration and consider electronic corrections that preserve image sharpness without distortions. When discussing film lighting, many neglect the importance of spectral quality over mere lumen output. High-output lighting fixtures can wash out skin tones if not properly balanced, leading to a sterile look. The real advantage comes from lights with high CRI ratings and controllable color temperature, enabling nuanced mood creation and subject rendering.
What advanced mistakes impact your cinematic gear’s performance?
Let’s get specific—oversights like ignoring the impact of lens flare in high-contrast scenes or failing to calibrate your support gear for the weight distribution can silently sabotage your shoot. Even a slight imbalance might cause micro-shifts that your stabilization rig cannot compensate for, resulting in subtle jitter during critical moments. External experts recommend regularly performing calibration tests and maintaining your equipment meticulously—more than just cleaning, it’s about understanding how each component interacts under load. For example, choosing support gear with proper damping and tension adjustment can prevent micro-shakes that seem insignificant but become glaring on 16K footage. As noted in a recent industry study, these small details often determine whether your project looks polished or amateurish. Therefore, advancing your craft requires not only equipment investment but also mastering these nuanced aspects to ensure every frame counts. Have you ever fallen into this trap? Let me know in the comments. For more insights on stabilizing your gear, explore this detailed guide on choosing the right cine lenses and fine-tuning your camera support setup.
Tools That Keep Your Setup Running Smoothly
Investing in high-quality tools is essential, but equally important is knowing how to maintain them. For camera supports, I swear by the graphene fluid heads. These heads offer unparalleled damping and stability, which I personally rely on during long shoots where micro-shifts are unacceptable. Regular lubrication is critical; I use lightweight synthetic oils recommended by professional rig technicians to prevent wear and tear. Additionally, I keep a set of precision screwdrivers on hand to tighten any loose mounts, ensuring micro-movements don’t creep into my shots. For projection screens, routine cleaning with microfiber cloths and specialized anti-static solutions keeps fibers and dust from degrading image quality, especially in high-resolution environments. Mechanical parts in cinema projectors require periodic calibration—I’ve found that consulting the manufacturer’s service manual and performing these checks quarterly can extend the lifespan of the equipment and maintain pristine image output.
Optimizing Software and Technical Settings
Software tools are your allies in the long-term; I routinely update my stabilization plugins and firmware for support devices. When working with high-res footage, third-party stabilization software like RE:Vision Effects RE:Flex integrates seamlessly for subtle corrections. I also utilize scene-specific LUTs that help identify micro-shifts visually during editing, allowing me to fine-tune camera movement and support calibration. Regularly backing up configuration files ensures that if settings are accidentally reset, I can restore my preferred parameters without hassle. This combination of physical maintenance and software optimization guarantees consistent output quality, which is vital for professional film productions.
Preparing for Longevity and Future-Proofing
As technology advances, I predict more intelligent support systems with built-in diagnostics will become standard. Meanwhile, practicing diligent maintenance today protects your investments. For example, using anti-dust coatings on support gear prevents long-term fouling. Additionally, scheduling routine inspections and keeping a detailed maintenance log help identify recurrent issues early. Remember, small ongoing efforts—like wiping lens edges with cleaning swabs and monitoring support tension—add up over time, ensuring your gear remains reliable for demanding shoots. Don’t overlook the importance of calibrating your setup periodically, as even minute misalignments can escalate in high-resolution contexts. In fact, industry experts like Gao Yi emphasize that regular upkeep is the cornerstone of consistent performance, especially as equipment ages.
How do I maintain my cinematic tools over time?
Start by setting a routine maintenance schedule, utilizing industry-proven lubricants and calibration methods. Consider investing in specialized tools such as precision screwdrivers, microfiber cleaning kits, and support-specific dampers. Regularly updating your software and firmware ensures compatibility and performance. Remember to document your maintenance activities—this habit not only prolongs your gear’s lifespan but also helps troubleshoot recurrent issues. For personalized advice or to address specific concerns, don’t hesitate to contact expert technicians who can guide tailored solutions for your setup. One advanced tip I highly recommend trying is integrating vibration sensors into your support rigs to monitor micro-shifts in real-time; this tech is becoming more accessible and can proactively alert you to issues before they impact your shoot. Keeping your tools in optimal condition will pay dividends in image quality and operational reliability, ensuring your cinematic vision remains uninterrupted.
The Hardest Lesson I Learned About cine lenses,camera supports,projection screens,cinema projectors,film lighting
One of the most profound realizations I’ve had revolves around equipment maintenance and understanding their microscopic behaviors. Early on, I believed that purchasing top-tier gear was enough, but I soon discovered that neglecting micro-level factors like dampening and calibration could sabotage my shots. The lightbulb moment was when I meticulously balanced a support rig and noticed a drastic reduction in jitter, even during dynamic shoots. This taught me that attention to tiny details often makes the biggest difference in cinematic quality.
Curated Gems to Elevate Your Film Setup
For anyone serious about refining their craft, I recommend exploring tools like the graphene fluid heads. They offer unmatched damping, crucial for micro-movement control. Books such as Mastering Film Lighting Techniques have profoundly reshaped my approach to lighting and shot setup. Don’t overlook professional support calibration guides available on the site; continual learning keeps your gear performing at peak levels. Trusted sources like these are invaluable for anyone aiming for that seamless, professional finish in their cinematography work.
Your Next Cinematic Leap Starts Now
If micro-vibrations have been a silent hurdle in your projects, remember: perfection isn’t achieved overnight, but through persistent refinement. Every tweak—be it support tension, damping enhancements, or post-processing—adds up to flawless footage. Your cinematic journey is unique, and mastering these nuances will unlock a new level of storytelling. Dive deep into these lessons, experiment boldly, and your visuals will speak louder than words. The future of drone cinematography and high-res filming belongs to those willing to embrace the microscopic details. Ready to elevate your craft? Share your experiences or questions below—let’s learn together.
About the Author
James Duke
ThinkOTS
James Duke is a seasoned professional in the creative production industry, bringing a wealth of technical knowledge and hands-on experience to cinegearguide.com. As a key figure at ThinkOTS, James has spent years navigating the complexities of high-end production environments, where selecting the right equipment is the difference between a successful shoot and a logistical failure. His expertise spans the full spectrum of cinematography gear, from advanced camera systems to the intricate accessories that define modern filmmaking. On cinegearguide.com, James leverages his deep understanding of the industry to provide authoritative insights, gear reviews, and technical guides. He is known for his ability to break down complex specifications into practical, actionable advice for filmmakers of all levels. His perspective is rooted in the real-world application of technology, ensuring that every recommendation is backed by professional standards. James is dedicated to empowering the filmmaking community by sharing his expertise, helping others navigate the ever-evolving landscape of cinema technology with confidence and clarity.
LinkedIn ProfileRelated Posts
![5 Graphene Monopods for Stable 16K Run-and-Gun Shoots [2026]](https://cinegearguide.com/wp-content/uploads/2026/02/5-Graphene-Monopods-for-Stable-16K-Run-and-Gun-Shoots-2026.jpeg)
5 Graphene Monopods for Stable 16K Run-and-Gun Shoots [2026]
It was late afternoon during a frantic location shoot. My…
Why Single-Bolt Camera Plates Are a Recipe for Disaster on Set
It was a moment I won't forget. I was on…
3 Fluid Heads That Handle Heavy 16K Rigs in 2026
I vividly remember the moment everything fell apart during a…