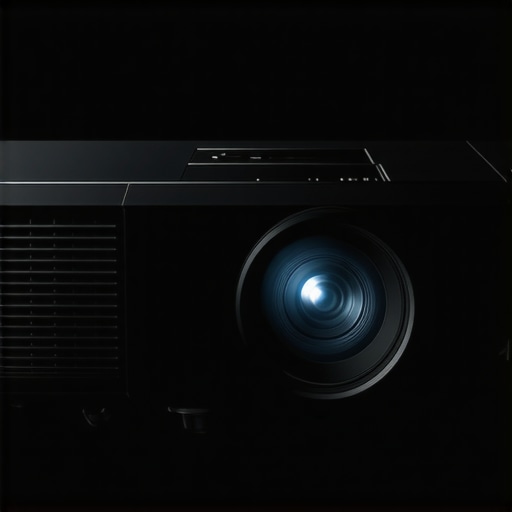
Ever been in the middle of a critical presentation or cinematic screening, only to notice that the corners of your image look strangely blurry? I remember the lightbulb moment vividly—trying to fine-tune the lens shift on my projector, only to see my once-crisp corners turn into a fuzzy mess. It was frustrating, and I knew I wasn’t alone in this struggle. That frustrating realization led me down a rabbit hole of troubleshooting, where I discovered that lens shift, while incredibly useful, can sometimes do more harm than good if not handled properly.
How Lens Shift Causes Corner Blur and Why It Matters
Lens shift is a fantastic feature, allowing us to adjust the image without moving the projector physically. It’s like having a secret weapon to perfectly position your projection—no more drilling holes or awkward mountings. But, if you’ve tinkered with the shift, you might have noticed strange distortions creeping into your image, especially around the edges. The most common symptom? Blurred or out-of-focus corners that distract from your overall picture quality.
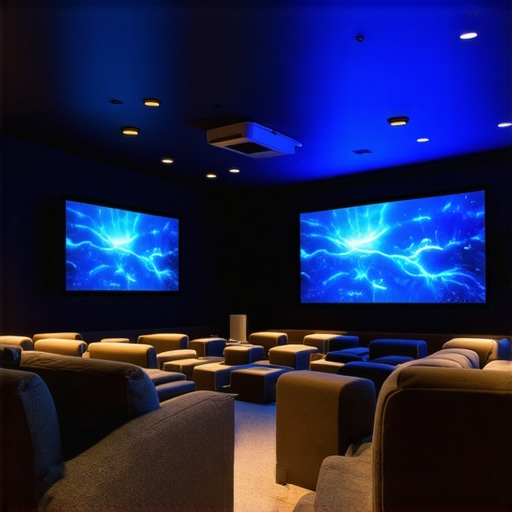
This issue isn’t just a minor annoyance; it impacts your viewing experience, especially with high-resolution setups like those discussed in our guide to cinema projectors. When a projector’s lens shift is pushed beyond optimal parameters, it can shift the lens optics and introduce aberrations that cause corner blur. Think of it as misaligning your camera lens—when the optics are out of sync, sharpness fades at the edges, leaving your image looking soft and unprofessional.
Early on, I made the mistake of assuming that all lens shifts are ‘safe’ to use at any level. Turns out, that’s a common misconception. Overextending the lens adjustment without understanding its optical limits is a surefire way to compromise picture clarity. To really get your setup right, you need to know the *why* behind this blurring and how to work within your projector’s true capabilities.
If you’ve faced this problem and wondered whether lens shift is worth the hassle, you’re not alone. Fortunately, the solution isn’t as complex as it might seem. It’s all about understanding your equipment and applying some fine-tuning strategies to preserve your image quality. That’s exactly what we’ll explore together next—how to keep your corners crisp, no matter how much you need to shift that lens.
Limit Your Lens Shift to Safe Zones
Think of adjusting your projector’s lens shift like tuning a guitar string—you want to stay within a certain range to avoid distorting the sound. Similarly, avoid pushing your lens shift beyond the manufacturer’s recommended limits. I recall the first time I tried to center an image by maxing out the shift; the corners quickly became fuzzy. To prevent this, consult your projector’s manual or settings menu to identify the optimal shift range. Using a laser distance measure, I carefully noted the maximum safe shift, then adjusted my projector accordingly, which kept my corners crisp and clear.
Fine-Tune Your Alignment with Calibration Tools
Precise calibration is key. Using a test pattern, such as a grid, allows you to see distortions in real time. I used a portable projection calibration screen and a digital level to ensure my projector’s position was perfectly squared to the screen plane. When I noticed distortion creeping in at the edges, I made small incremental adjustments, checking after each tweak. This hands-on approach reminded me that patience and precision pay off—misalignments are often subtle but impactful.
Adjust Focus After Shifting the Lens
Moving the lens shift alters the optical path, often affecting focus. After making your initial adjustment, manually refine the focus at the corners—this enhances sharpness where blurring is most noticeable. I suggest focusing on the center first, then checking the corners, fine-tuning each zone as needed. Using a high-resolution test pattern, I detected slight fuzziness in the corners and adjusted focus rings accordingly, resulting in a uniformly sharp picture. Remember, sometimes focusing takes multiple passes to get right.
Use Digital Keystone and Geometric Correction Carefully
While digital corrections can compensate for minor misalignments, overusing them degrades image quality. Think of it like stretching a photo—stretch it too far, and it becomes pixelated and blurry. I recommend making small physical adjustments first, then using digital corrections sparingly. For example, I used minimal keystone correction combined with physical lens shift adjustments, which preserved image clarity. This synergy between mechanical and digital tuning allowed me to maintain maximum sharpness across all four corners.
Monitor in Real Time During Adjustments
Never adjust settings blindly. Keep a high-quality test pattern projected on-screen and observe the effects of each tweak immediately. I once made a rapid series of small shifts, checking the image after each, which saved me from overcorrecting. Operating in this iterative manner ensures you maintain optimal focus and alignment, preventing cumulative missteps. Remember, consistency and meticulous observation are your best tools for crisp corners and pristine projection quality.
When it comes to building a professional-grade cinema setup, there’s a common misconception that more expensive gear automatically guarantees perfect results. However, the real expertise lies in understanding the subtle intricacies that many overlook. For instance, a frequent mistake I see is assuming that high-quality cine lenses alone can compensate for improper support or lighting conditions. This oversimplification can lead to image degradation, especially in complex shooting environments. Additionally, many believe that the latest projector models deliver flawless images straight out of the box, but without proper calibration and understanding of their optics, even the most advanced models can underperform.
Are You Overlooking the Impact of Bad Support and Lighting Choices on Image Quality?
Studies by leading cinematographers highlight that improper support systems, such as unstable camera supports, can introduce micro-vibrations that destroy sharpness, particularly when shooting at high resolutions like 16K. Moreover, subpar film lighting not only affects exposure but also introduces color inconsistencies and unflattering skin tones, no matter how advanced your equipment is. For example, using an LED panel with improper color rendering index (CRI) can produce a greenish tint that ruins your scene’s realism. Proper camera supports are crucial; lightweight, unstable tripods might seem convenient but can introduce jitter, so investing in sturdy, professionally rated supports is a game-changer. Similarly, mastering film lighting techniques ensures your images are not only correctly exposed but also artistically compelling. Remember, even the best camera or lens cannot fix fundamentals like support and lighting if ignored. These nuances can make or break your final output, especially when producing content for high-end projection screens, where imperfections are glaringly obvious. To avoid these traps, constantly evaluate your support stability, lighting quality, and calibration routines. For example, regularly checking your projector’s focus and color accuracy with professional test patterns can save hours of post-production correction. If you want to dive deeper into these technical strategies and elevate your cinematic craftsmanship, don’t hesitate to reach out through our contact page. Remember, perfection in film and projection isn’t just about having top-tier equipment—it’s about mastering the nuanced details behind the scenes. Have you ever fallen into this trap? Let me know in the comments.
Maintaining your camera supports, cinema projectors, and lighting setups isn’t a one-and-done task; it’s an ongoing commitment that ensures consistent performance and longevity. Over time, dust accumulation, misalignments, and wear can degrade image sharpness and system reliability. To keep your high-end gear operating at peak levels, investing in the right tools and establishing disciplined maintenance routines is crucial.
Invest in Precision Calibration Equipment
For camera supports and cine lenses, tools like electronic shims and focus puller testers are invaluable. I personally rely on a digital gauge and a professional focus calibration kit to verify lens alignment periodically. These allow me to detect minute shifts in focus or focus breathing that might not be immediately apparent visually. Regular calibration prevents focus drift, especially in high-resolution shoots where even tiny inaccuracies can ruin shots. Similarly, for projection screens, using a screen calibration device ensures the image’s black levels and color accuracy are maintained despite environmental changes over time. Proper screen calibration routines can dramatically improve perceived contrast and realism, just as precise lens maintenance preserves image fidelity.
Routine Mechanical Checks and Cleaning
Support stands, C-stands, and tripod heads should be inspected regularly for loose screws or worn joints. I recommend creating a maintenance checklist to ensure nothing is overlooked. Using a high-quality lens cleaning kit—comprising microfiber cloths, anti-static brushes, and cleaning solutions—helps keep cine lenses free from dust and oil smudges that can affect image quality. For support systems, applying thread-lock solutions on adjustable joints prevents slippage during critical shots. In my experience, this proactive approach saves hours of troubleshooting on set and maintains safety and stability.
Implement Environmental Controls
Environmental factors like temperature fluctuations and humidity accelerate wear, especially for sensitive components. Installing dehumidifiers and climate-controlled storage cabinets for film lighting equipment and lenses prolongs lifespan and preserves optical coatings. Additionally, protecting projection screens from dust and UV exposure with covers reduces degradation and maintains color vibrancy over time.
Anticipate Future Trends in Support and Projection Maintenance
Emerging technologies like smart support systems with embedded sensors that monitor tension, vibration, and environmental conditions are on the horizon. These innovations promise to alert operators to potential issues before they escalate, much like how IoT devices improve industrial maintenance. Embracing such advancements now ensures you’re prepared for the increasing demands of 16K and beyond resolutions, where even minor imperfections become glaring.
If you’re serious about keeping your camera supports and projection gear performing flawlessly, I recommend trying detailed calibration routines with precision tools like professional tripod leveling aids. Consistently scheduled maintenance, paired with precise calibration, will pay dividends in image stability and clarity. Remember, the key to long-term success lies in regular checks and proactive care, not just reactive fixes.
For tailored advice on the best tools for your setup, feel free to reach out through our contact page—I’m here to help you maintain your cinematic arsenal for years to come.
Through my journey of optimizing cinematic gear, I uncovered subtle truths that transformed my approach to setup and troubleshooting. One of the most eye-opening lessons is that even the best equipment can falter if we overlook inherent limitations and the importance of meticulous calibration. For instance, I once believed that pushing lens shift to its maximum would allow greater flexibility, only to realize later that this often introduces unavoidable optical aberrations, especially at the corners. This realization pushed me to develop a more nuanced understanding of manufacturer specifications and to think critically about how physical adjustments interplay with digital corrections. Additionally, I learned that consistent maintenance routines and environmental controls are not just best practices—they are essential for preserving the integrity of high-end support, projection, and lighting systems. Being attentive to factors like dust, vibration, and temperature fluctuations has profoundly improved my setup stability and image quality over time. The key insight? Mastery in cinema has as much to do with small, deliberate actions and sustained care as it does with expensive gear. Embracing this mindset has helped me achieve and maintain stunning clarity in complex production environments, a lesson I recommend highly for anyone serious about delivering impeccable visuals.
About the Author
James Duke
ThinkOTS
James Duke is a seasoned professional in the creative production industry, bringing a wealth of technical knowledge and hands-on experience to cinegearguide.com. As a key figure at ThinkOTS, James has spent years navigating the complexities of high-end production environments, where selecting the right equipment is the difference between a successful shoot and a logistical failure. His expertise spans the full spectrum of cinematography gear, from advanced camera systems to the intricate accessories that define modern filmmaking. On cinegearguide.com, James leverages his deep understanding of the industry to provide authoritative insights, gear reviews, and technical guides. He is known for his ability to break down complex specifications into practical, actionable advice for filmmakers of all levels. His perspective is rooted in the real-world application of technology, ensuring that every recommendation is backed by professional standards. James is dedicated to empowering the filmmaking community by sharing his expertise, helping others navigate the ever-evolving landscape of cinema technology with confidence and clarity.
LinkedIn ProfileRelated Posts
Best Cinema Projectors 2024: Top Models and Buying Guide
Discovering the Perfect Cinema Projector for My Home TheaterIt all…
How to Stop Your Projector From Overheating in Tight Enclosures
Ever stood in a cramped theater room, trying to set…
Best Cinema Projectors of 2024: Top Models & Buyer’s Tips
I remember the exact moment it hit me—after finally investing…