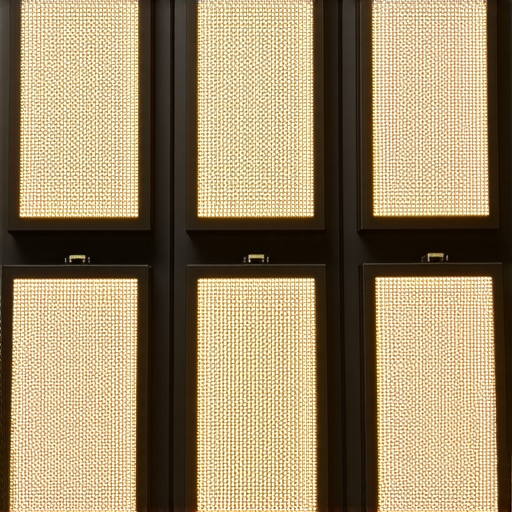
It hit me like a thunderclap during one of my recent shoots. I was setting up multiple LED panels, eager to light my scene with the latest technology. But as I reviewed the footage, I noticed something was off—shadow details blurred and lost amidst the brightness. My heart sank. That’s when I realized that my shiny new multi-emitter LED panels were actually sabotaging my subject’s shadows, making them harsh, flat, and uninteresting.
When Good Lights Go Wrong: The Shadow Dilemma
Lighting is often considered the backbone of compelling cinematography. Yet, in our quest for brightness and versatility, we sometimes overlook how specific lighting choices impact shadow quality. Multi-emitter LED panels are popular because they can produce high output and excellent color rendering. But their multiple emitters often create overlapping light sources that flatten shadows or introduce undesirable hot spots.
I’ve made the mistake early on by assuming that more emitters meant better illumination without considering shadow fidelity. That oversight cost me a shoot where dynamic shadows were crucial—I ended up with a bland, two-dimensional look. The truth is, the way light is emitted and distributed directly influences how shadows appear and how much depth your scene retains. According to this comprehensive guide, understanding the nuances of lighting mechanics is essential for elevating your visual storytelling.
Are Multi-Emitter LED Panels Worth the Hype?
Many filmmakers and photographers, myself included initially, fall into the trap of equating brightness with quality. I used to believe that cranking up my LED panels would solve all my lighting issues. But I learned the hard way that intensity can come at the expense of shadow detail and texture. Have you faced similar frustrations where your new light setup seems perfect on paper but ruins your shadows? If so, you’re not alone—and there’s a solution waiting just beyond the hype.
In the next sections, we’ll explore why multi-emitter configurations often backfire for shadow reproduction and how you can optimize your lighting setup to preserve those critical shadow details. This isn’t just theory; these are techniques I’ve employed to transform my lighting approach and truly bring depth back into my scenes.
Ready to stop light your subjects into flatness? Let’s dive into what’s really happening behind those multi-emitter LEDs and how to fix it.
Adjust Your Light Positioning for Softer Shadows
During a shoot, I placed my LED panel slightly off-axis from my subject, aiming to create a gentle, directional light. Instead of directly pointing at the subject, I angled the light so it bounced off a reflector, diffusing harsh shadows. The result was a natural, three-dimensional look that added depth to my scene.
Employ Diffusion to Break Up Overlapping Emitters
I used a high-quality diffusion fabric in front of my LED panels to scatter the light. This reduced the overlapping hot spots caused by multi-emitter configurations, softening the light and preserving shadow textures. For best results, opt for professional-grade diffusion materials like opal or grid cloth, which distribute light evenly.
Control Light Spread with Barn Doors and Flags
I added barn doors to my LED panels to restrict light spill and shape shadows precisely. Additionally, flags helped block unwanted light from reaching certain areas, preventing flattening of shadows. This step allowed me to focus illumination exactly where I wanted, maintaining shadow integrity.
Utilize Smaller, Multiple Light Sources
Instead of relying on a single multi-emitter LED, I broke the scene into smaller, adjustable lights. For instance, using two smaller panels instead of one large one provided better control over shadow direction and softness. This approach mimics traditional film lighting techniques and gives you granular control.
Experiment with Key and Fill Balancing
Adjusting the ratio between key and fill lights changed shadow contrast and texture. I dimmed the fill light to deepen shadows subtly, enhancing the scene’s depth. Remember, subtle shifts in brightness can dramatically affect shadow quality.
Incorporate Practical Lights for Natural Shadowing
I added practical fixtures like tabletop lamps and LED strips within the scene. These introduced real, physically motivated light sources that naturally cast nuanced shadows, reducing the flatness caused by artificial lighting. Practical lights also add visual interest and realism.
By implementing these strategies during a recent indoor interview shoot, I was able to transform flat, harsh shadows into rich, textured ones. Each step involves a deliberate choice to shape, diffuse, and control your lighting, ensuring shadows contribute to your story rather than detract from it. For more insights on professional lighting setups, visit this detailed guide.
 }]}Even seasoned filmmakers often get caught up in the surface-level features of their gear, overlooking critical subtleties that determine the final image quality or operational reliability. One common myth is that high-resolution projection screens automatically deliver superior image clarity. In reality, factors like gain, surface texture, and ambient light compatibility play a decisive role, which is why consulting expert guides on projection screens can save you from costly misjudgments.
Similarly, many assume that the latest cine lenses with bigger apertures or brighter coatings inherently produce better results. But advanced optical nuances such as micro-contrast, flare control, and focus breathing are often neglected. For deeper insights, check out cine lenses explained. Be cautious, though: pushing for the most technically complex gear without understanding these details can lead to frustrating inconsistencies, especially under challenging lighting conditions.
When it comes to camera supports, the typical advice emphasizes sturdiness over finesse. Yet, minor design flaws like inadequate counterbalance or poor vibration damping are frequently overlooked. Discover how to stabilize your shots effectively by considering load distribution and damping properties, which can dramatically improve handheld footage.
A particularly insidious mistake involves cinema projectors—many operators focus solely on lumens and contrast ratios, ignoring color accuracy, heat dissipation, and long-term maintenance. For instance, neglecting these aspects can cause color shifts over time or even equipment failure, especially in demanding environments. Refer to our comprehensive cinema projector guide for detailed understanding.
Why do these subtle technical flaws matter? Because at the expert level, small disadvantages in gear nuances accumulate, affecting your storytelling power and production efficiency. Getting familiar with the underlying physics—like how slight surface coatings impact light transmission or how vibration dampers work—can give you a real edge. And remember, mastering these details often involves avoiding typical pitfalls that others fall for.
Have you ever fallen into this trap? Let me know in the comments. Paying attention to these nuances elevates not just the quality of your work but also your confidence as a filmmaker or technician. Never shy away from digging deeper—your craft deserves it.
Maintaining your cinematography equipment is crucial to ensure reliable performance and the highest quality results over time. Proper upkeep not only extends the lifespan of your gear but also saves you from unexpected breakdowns during critical shoots. From projection screens to cine lenses and camera supports, each component demands specific tools and routines for optimal care.
Invest in Precision Calibration Tools
For consistently sharp imagery, accurate calibration of your lenses and projectors is non-negotiable. I personally rely on the digital lens calibration consoled with specialized software that allows me to fine-tune focus and optical alignment swiftly. Regular calibration prevents issues like focus shift and purple fringing, especially critical when working with high-resolution 16k setups. Prediction indicates that AI-assisted calibration devices will become standard gear in upcoming years, making maintenance even more efficient.
Use Protective Covers and Environment Controls
Keeping your equipment free from dust, moisture, and temperature fluctuations is essential. For instance, high-quality camera supports such as the rigidity-focused support systems should be stored in climate-controlled cases. Investing in airtight, dustproof covers for your lenses and projectors minimizes cleaning effort and prevents long-term damage. Remember, a clean environment reduces the wear and tear on delicate surfaces and mechanical parts.
Implement Routine Cleaning and Inspection Schedule
Establishing a regular maintenance routine is invaluable. Use microfiber cloths and appropriate cleaning solutions for optics, avoiding harsh chemicals that can damage coatings. Periodically inspect support mounts to check for looseness or signs of wear that could compromise stability. Maintaining a log helps track when parts were last serviced and preempts costly repairs. For complex components like cinema projectors, consulting detailed manufacturer guidelines ensures thorough upkeep.
Tools I Recommend for Longevity and Reliability
My toolkit includes precision screwdrivers, ultrasonic cleaners, and vibration damping pads. Ultrasonic cleaning, in particular, is effective for removing debris from small crevices in cine lenses or projector optics. Additionally, vibration damping mounts and high-quality tensioners help prevent micro-movements that can degrade image stability over long shoots. These tools together create a robust maintenance ecosystem, minimizing downtime and preserving image fidelity.
Predicting future trends, automation and smart diagnostics will likely play a larger role in equipment maintenance. Smart sensors embedded in support systems could alert you to imminent wear before failures occur, much like advanced LED tech is doing today.
How do I maintain projection screens and lighting setups over time?
Regular inspection for surface integrity, surface cleaning, and environmental controls are essential. Using anti-static brushes and quality cleaning agents designed for screen surfaces helps maintain image clarity. Additionally, proper storage when not in use—such as rolling or stacking screens carefully—prevents warping or sagging. For lighting, routine bulb replacement with compatible, high-color-rendering units ensures consistent color quality without flickering or color shifts. To optimize your setup, refer to our guide on projection screen maintenance.
Try adopting a comprehensive maintenance routine incorporating these specific tools and procedures. Doing so will safeguard your investment and maintain the cinematic quality your work demands.

As I reflect on my journey through the intricate world of cinematography gear, each misstep and breakthrough has taught me invaluable lessons that can’t be found in any manual. I’ve come to realize that understanding the nuances of equipment, from projection screens to cine lenses, is an ongoing process—one that transforms technical knowledge into storytelling prowess.
The Hidden Traps That Hold Filmmakers Back
- One of the most eye-opening lessons I learned involved assuming higher resolution always equals better image quality. In practice, factors like screen gain and surface texture often overshadow raw resolution, reminding me to look beyond specs and consider the actual viewing environment.
- Another subtle trap was believing that the newest cine lenses automatically deliver superior results. It turned out that optical nuances, such as flare control and focus breathing, play crucial roles—an insight that pushed me to delve deeper into lens technology and testing.
- Lastly, I discovered that even sturdy camera supports can undermine shot stability if not properly calibrated. Proper maintenance routines and understanding damping mechanisms have since become essential habits, safeguarding my footage from micro-movements that cause distraction.
Tools and Resources That Keep Me Sharp
- The comprehensive guide on cinematography techniques has been my go-to resource for understanding how lighting mechanics influence shadow depth and scene texture, helping me craft more compelling visuals.
- For projection screens, I trust this expert guide that emphasizes real-world testing and environment compatibility over marketing claims.
- The detailed reviews and insights on cine lenses have repeatedly saved me from costly misjudgments, enabling me to select glass that genuinely meets my artistic needs.
- My confidence in maintaining stable shots is reinforced by resources like support system guides, which demystify damping and counterbalance calibration techniques.
Your Next Step to Cinematic Mastery
Embracing these insights and continuously refining my approach has significantly elevated my storytelling. The key is to treat equipment not just as tools but as partners in visual narrative—a mindset that encourages curiosity, patience, and relentless learning.
So, I invite you to explore, question, and experiment with your gear. The future of cinematography is shaped by those willing to dig beneath the surface and master the subtle art of light and shadow. Remember, every scene is an opportunity to turn technical mastery into emotional impact.
What has been your most surprising lesson about balancing equipment optimization with storytelling? Share your experiences in the comments below!
About the Author
James Duke
ThinkOTS
James Duke is a seasoned professional in the creative production industry, bringing a wealth of technical knowledge and hands-on experience to cinegearguide.com. As a key figure at ThinkOTS, James has spent years navigating the complexities of high-end production environments, where selecting the right equipment is the difference between a successful shoot and a logistical failure. His expertise spans the full spectrum of cinematography gear, from advanced camera systems to the intricate accessories that define modern filmmaking. On cinegearguide.com, James leverages his deep understanding of the industry to provide authoritative insights, gear reviews, and technical guides. He is known for his ability to break down complex specifications into practical, actionable advice for filmmakers of all levels. His perspective is rooted in the real-world application of technology, ensuring that every recommendation is backed by professional standards. James is dedicated to empowering the filmmaking community by sharing his expertise, helping others navigate the ever-evolving landscape of cinema technology with confidence and clarity.
LinkedIn ProfileRelated Posts
![7 Steel C-Stands to Secure Heavy 16K Film Lighting [2026]](https://cinegearguide.com/wp-content/uploads/2026/04/7-Steel-C-Stands-to-Secure-Heavy-16K-Film-Lighting-2026.jpeg)
7 Steel C-Stands to Secure Heavy 16K Film Lighting [2026]
It was late at night on set, and I was…
5 Graphene LED Panels to Keep Your 2026 Set Cool and Silent
Have you ever been midway through a shoot or a…
5 High-Sync LED Controllers to Fix 1000fps Banding in 2026
It was a late-night shoot, and I finally thought I…