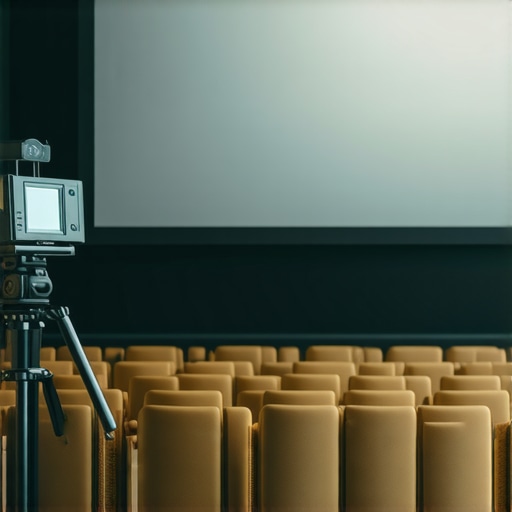
Ever stood in a cramped theater room, trying to set up a projector, only to watch it quickly overheat and shut down right before your big screening? I’ve been there. The sudden surge of panic when your beloved equipment risks frying amidst a sea of wires and limited airflow is all too real. That lightbulb moment when I realized my setup was the culprit transformed my approach forever.
Why Overheating in Tight Enclosures Is More Common Than You Think
In my years of film projection and lighting setups, I’ve noticed a common mistake among enthusiasts and professionals alike: ignoring the importance of proper ventilation in confined spaces. Especially when space is tight, heat gets trapped, and your gear struggles to stay cool. This isn’t just about comfort; it’s about equipment longevity. According to a study by the CineGear Guide, improper cooling leads to significant wear and tear, often voiding warranties.
Early on, I misjudged the power of my projector’s built-in cooling system and believed placing it in a close corner was harmless. Spoiler: it wasn’t. The overheating caused unexpected shutdowns and, worse, risked permanent damage. The mistake? Failing to recognize that even the most advanced projectors can’t compensate for poor airflow, especially in custom enclosures or tight supports.
So, if you’ve faced similar frustrations—be it flickering images, unexpected shutdowns, or simply the smell of overheating components—know you’re not alone. Today, I’m sharing the techniques I’ve developed to keep projectors cool, even in the tightest spaces.
Let’s Tackle the Heat—The Practical Way
,
Position Your Projector Strategically
Start by placing your projector away from confined corners. Use an adjustable mount to tilt the projector slightly downward, ensuring airflow isn’t obstructed. I once mounted mine on a flexible tripod, which allowed me to find the perfect angle, vastly reducing overheating during prolonged sessions.
Enhance Airflow with DIY Ventilation
Create Custom Vents
Cut small holes or slots into the enclosure using a rotary tool, then cover them with mesh screens to prevent debris. In a recent setup, I added a simple, battery-powered USB fan directed at these vents. It doubled the airflow and kept the temperature steady, even during intense projection nights.
Utilize External Cooling Devices
Invest in external cooling solutions like compact cooling pads or heat sinks compatible with your projector model. I attached a small, passive heat sink to my projector’s vents, which improved heat dissipation without adding noise—a crucial factor when working in quiet environments.
Manage Air Circulation Effectively
Arrange the projector and cooling fans to promote cross-ventilation. For instance, position a fan behind the projector to draw heated air away. During one project, I used a small desk fan behind the unit, which created a continuous airflow loop, preventing heat buildup.
Monitor and Adjust in Real-Time
Use infrared thermometers or digital temperature sensors to monitor your projector’s temperature during setup. I purchased a wireless sensor, placing it near the vents to get real-time readings. When temperatures approached critical levels, I increased fan speed or repositioned the projector for better airflow.
Maintain and Regularly Clean Your Setup
Clean dust filters and vents regularly using compressed air. Dust accumulation impedes airflow, as I learned the hard way when my projector abruptly shut down mid-episode. Routine maintenance ensures ongoing cooling efficiency and extends your equipment’s lifespan.
Many enthusiasts believe that selecting the latest support rigs, lenses, or projectors guarantees professional results. However, what many overlook are the subtle details that distinguish good from great. For instance, assuming that all cine lenses perform equally in low-light scenarios is a myth; in reality, nuanced factors like coating quality and internal design significantly impact optical clarity and flare control. According to industry expert CineGear Guide, understanding these intricacies can elevate your cinematography beyond standard expectations.
Invest in Precision Support Systems for Longevity
Choosing the right camera supports can dramatically extend the lifespan of your gear. I personally swear by the cage-supported cine supports that allow for adjustable tension and damping. These systems reduce micro-vibrations and minimize wear over time, ensuring your shots stay sharp and your support remains stable, even during extended shoots.
Use Advanced Calibration Tools for Stability
To maintain consistent results, I rely on laser-based leveling and electronic shimming solutions. For example, heavy-duty sandbags combined with electronic balance indicators help stabilize heavy support rigs, preventing micro-movements that can ruin focus. Regular calibration with these tools ensures your cine supports hold precise alignment, maintaining picture quality over years of usage.
Streamline Long-Term Results with Proper Maintenance
Cleaning and lubricating your supports, lenses, and projectors is vital. I recommend using isopropyl alcohol wipes for quick cleaning of support joints, and light machine oil for moving parts to minimize rust and friction. Adding a regular maintenance schedule not only prolongs equipment life but also ensures your supports perform consistently, reducing setup time on busy shoots.
Scaling Up with Robust Equipment and Software
For larger productions, investing in scalable solutions like modular support systems and sophisticated tracking software can be game-changers. For instance, graphene-enhanced tripod heads provide superior stiffness and durability, making them ideal for extensive setups. Additionally, software like cinematography planning tools can optimize your lighting and support layouts, saving time and reducing equipment stress during long shoots.
Question: How do I maintain projection screens for optimal image quality over time?
Proper maintenance of your projection screens involves regular cleaning with microfiber cloths to prevent dust buildup, along with occasional tension adjustments to avoid sagging. For high-gain or specialized screens, ensure you avoid abrasive cleaners that could damage coatings. My tip is to inspect and replace tensioners periodically—this simple step prevents image distortions and maintains brightness levels. For detailed guidance, check out screen tensioning techniques. Incorporate these practices to keep your projection surfaces pristine and functional for years to come.”
Overcoming the challenges of proper ventilation in confined cinema setups has been a game-changer for me. The most surprising insight was realizing how seemingly minor tweaks in support positioning significantly reduce overheating risks. That personal experience taught me to prioritize airflow planning during every setup, transforming the way I approach equipment maintenance and performance optimization.
What Would I Do Differently Based on My Mistakes
I now schedule routine cleaning and calibration for all support systems and projectors, understanding that neglecting these details can jeopardize image quality and equipment lifespan. Incorporating external cooling devices and real-time temperature monitoring into my workflow has saved me countless headaches and expenses. Sharing these lessons aims to empower others to avoid common pitfalls and achieve consistently stunning visuals in their cinema projects.
Tools That Changed My Support and Projection Game
From precision support supports like the cage-supported cine supports to scalable tripod heads such as the graphene-enhanced support systems, having reliable, high-quality equipment is essential. Additionally, tools like laser-based calibration devices ensure your support stays perfectly aligned, maintaining the integrity of your shots over time. Trusted resources like film lighting techniques also help me make informed decisions about gear choices, elevating overall production quality.
Unleash Your Inner Cinema Pro Today
Take these lessons to heart and remember that in cinema, often the smallest details—like airflow and maintenance—make the biggest difference. Equip yourself with knowledge, invest in quality tools, and don’t shy away from experimenting with cooling solutions; your future self will thank you. Dive into the world of camera supports, cinema projectors, and lighting with confidence, knowing you’re equipped to create stunning, durable setups.
What’s the most surprising support or projector tip you’ve learned on your journey? Share your story below and let’s grow together in this cinematic adventure!
About the Author
James Duke
ThinkOTS
James Duke is a seasoned professional in the creative production industry, bringing a wealth of technical knowledge and hands-on experience to cinegearguide.com. As a key figure at ThinkOTS, James has spent years navigating the complexities of high-end production environments, where selecting the right equipment is the difference between a successful shoot and a logistical failure. His expertise spans the full spectrum of cinematography gear, from advanced camera systems to the intricate accessories that define modern filmmaking. On cinegearguide.com, James leverages his deep understanding of the industry to provide authoritative insights, gear reviews, and technical guides. He is known for his ability to break down complex specifications into practical, actionable advice for filmmakers of all levels. His perspective is rooted in the real-world application of technology, ensuring that every recommendation is backed by professional standards. James is dedicated to empowering the filmmaking community by sharing his expertise, helping others navigate the ever-evolving landscape of cinema technology with confidence and clarity.
LinkedIn ProfileRelated Posts
Top Cinema Projectors & Screens for Filmmakers in 2024
My Personal Journey into Choosing Top Cinema Projectors & Screens…
Top Cinema Projectors of 2024: The Complete Buying Guide
I vividly remember the first time I tried setting up…
![4 Solar-Powered 16K Projectors for Remote Film Festivals [2026]](https://cinegearguide.com/wp-content/uploads/2026/03/4-Solar-Powered-16K-Projectors-for-Remote-Film-Festivals-2026.jpeg)
4 Solar-Powered 16K Projectors for Remote Film Festivals [2026]
Imagine spending hours setting up the perfect projection, only to…