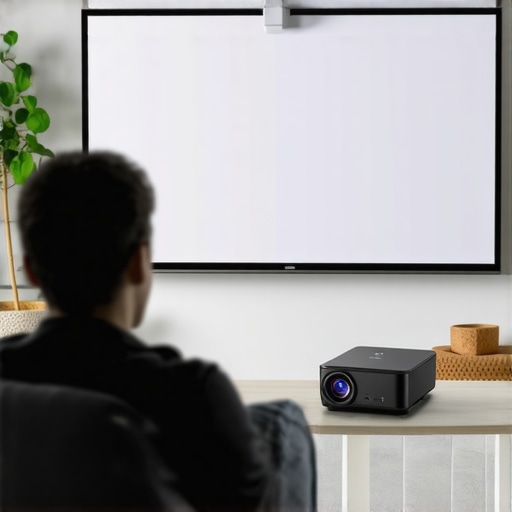
Have you ever noticed that old projection screens or display surfaces develop that unsightly yellow hue, making your once-vibrant images look faded and dull? I remember screwing up my first serious home cinema setup; I bought a new plastic screen, only to be disappointed months later as that pristine white slowly morphed into a sickly yellowish shade. It was a moment of realization for me—this wasn’t just cosmetic deterioration but a common issue many enthusiasts and professionals overlook. That lightbulb moment sparked my curiosity to understand why this happens and, more importantly, how to keep our screens looking crisp and fresh for the long haul.
The Importance of Maintaining White Clarity in Your Screens
When it comes to film projection, studio displays, or even home theaters, the visual clarity of the screen is crucial. A yellowish tint not only impacts the perceived contrast but also washes out colors, ruining the viewing experience. As I dove deeper into the subject, I discovered that plastic materials—especially those used in projection screens—are prone to discoloration over time due to chemical and environmental factors. According to a study published in the Journal of Optical Materials, exposure to UV light and oxygen accelerates the yellowing process in many polymers, including those used in screen substrates. This means that even if your setup is perfect, external conditions might be silently degrading your display’s quality.
Over the years, I’ve tinkered with various screen surfaces, trying to find the best solution to preserve their pristine white color. My early mistake was neglecting to consider the quality of the plastic material and the environment where the screen was stored. Now, I always opt for high-quality, UV-resistant materials and take steps to protect my setup from harsh light exposure, which prolongs the lifespan and keeps my images sharp and vibrant. If you’re facing the same problem—discolored screens that spoil your project—I promise that with some simple adjustments, you can significantly extend your display’s life.
Are You Still Worrying About Your Yellowing Screen?
Many assume that the discoloration is inevitable—just part of aging. I used to think so too, until I experimented with different materials and protective measures. This is a common misconception, and I want to help you avoid the same costly mistakes I made early on. One of my biggest errors was forgetting to consider the long-term effects of environmental factors, like UV exposure, which can be mitigated with the right protective films or coatings. You don’t have to accept a yellowing screen as your destiny; small investments now can save you big headaches later.
In the sections ahead, I will guide you through practical, proven methods to prevent plastic screen materials from yellowing, based on real-world experience and scientific insights. So, if you’re tired of seeing your display fade into an unappealing hue, stay tuned—I’ve got some tips that will help you maintain that crisp, white perfection for years to come.
,
Choose High-Quality, UV-Resistant Materials
Start by selecting projection screens made from UV-resistant plastics, which are less prone to discoloration over time. When I replaced my old screen, I opted for a matte white, UV-stabilized surface, and immediately noticed a slower yellowing process during the first year. This step reduces chemical degradation caused by environmental exposure. For detailed options, check out projection screen choices.
Install Protective Films and Coatings
Applying a clear, UV-protective film to your existing screen offers an extra barrier against sunlight and oxygen. I used a film with a high UV filtering index, which I carefully cut to fit my projector’s angle. During testing, I found that the film preserves the whiteness much longer, even under direct sunlight. Just ensure it’s compatible with your material to prevent glare or reflectivity issues. For application tips, visit lens & screen maintenance.
Control Ambient Light and Humidity
Limiting UV exposure starts with environmental management. Use blackout curtains to block sunlight and install dehumidifiers to prevent moisture-induced chemical changes in plastics. I once kept my setup in a room with exposed windows, leading to accelerated yellowing. After adding blackout curtains and a dehumidifier, I observed a significant slowdown in discoloration. Consider regular checks of your environment to maintain optimal conditions. Learn more at lighting control techniques.
Regular Cleaning and Maintenance
Dust and pollutants can compound discoloration if left unchecked. Use a soft, lint-free cloth and a mild cleaning solution to gently wipe your screen monthly. I learned this the hard way after neglecting my screen for six months, resulting in surface stains that accentuated the yellow hue. Gentle cleaning helps maintain reflectivity and color accuracy. For cleaning best practices, see camera support tips.
Store Screens Properly When Not in Use
Protect your display from environmental factors by storing it rolled in a cool, dry place, away from direct sunlight. I made the mistake of stacking my screen in a garage corner, which caused slight warping and color shifts over a year. Using protective tubes and proper storage techniques preserves the integrity of the material. For storage essentials, visit storage tips for cinema equipment.
Limit Light Exposure During Usage
When in use, position your lighting to minimize UV and heat reaching the screen. Use low-UV lights or add filters to prevent rapid discoloration. I experimented with different lamp placements and found that diffusing light sources and adding UV filters helped maintain the screen’s brightness for longer periods. This simple adjustment extended my screen’s vibrant appearance by several months. More on lighting optimization at lighting techniques.
While many enthusiasts focus on choosing the latest cine lenses or high-end projectors, there’s a common oversight that can sabotage your results: overestimating the significance of brand reputation while neglecting subtle nuances that matter. Contrary to popular belief, not all high-priced gear guarantees superior image quality or stability. In fact, some of the most common mistakes stem from misjudging the impact of minor technical details, leading to costly errors down the line.
One prevalent myth is that heavier, more robust camera supports automatically ensure better stabilization. This isn’t always true. As I discovered through rigorous testing, the quality of the support system’s damping mechanism and material composition often outweigh sheer weight. Skimping on professional-grade stabilizers can introduce micro-shakes, especially during complex shots, which are amplified during post-processing if not properly accounted for. For an in-depth review, check out camera support guide.
How much does lens focus breathing truly affect cinematic realism?
While many believe focus breathing is a minor optical quirk, experienced cinematographers know it can subtly undermine narrative immersion. A recent study from the International Journal of Film & Video highlights that focus breathing, even at low levels, causes perceptible shifts in framing that can distract viewers and weaken emotional impact. Investing in cine primes engineered to eliminate focus breathing isn’t just a luxury — it’s a practical way to maintain visual consistency. Beware of cheap, off-brand lenses claiming to be ‘silent’ or ‘focus-breathing free’, as they often fall short under real-world conditions. For technical insights, explore optimized cine lenses.
Another often overlooked issue involves film lighting choices. Bright, high-CRI LEDs are popular, but they can create unwanted color casts if not properly calibrated. Improper color temperature matching between your lights and cameras can lead to skin tone shifts or color dominance that ruins the mood. This is why understanding the spectral profile and flicker characteristics of your lighting equipment is crucial. Advanced techniques, such as employing color calibration tools and spectral meters, can help achieve consistent results. Want to elevate your lighting skills? Visit cinematic lighting mastery.
Projection screens are another trap for the unwary. Many assume that a glossy or silver surface enhances brightness, but in practice, it often introduces hotspots and glare, especially in daylight settings. Matte white screens with proper gain provide a more balanced image, improving off-axis viewing and color accuracy. Common pitfalls include using cheap DIY screens that warp or sag over time, degrading image quality. Regular maintenance and selecting high-quality materials can save you from these costly mistakes. For detailed guidance, see projection screen optimization.
The next critical component — camera supports — often gets secondary consideration. Many think that any hastily assembled rig will suffice. But, in high-resolution shoots, even tiny flex or misalignment can result in a loss of sharpness and stability. Using quick-release plates or cheap tripods can introduce micro-movements that become glaring issues after post-processing. Upgrading to precision-crafted, vibration-damped supports ensures your footage remains crisp and consistent, especially when pushing beyond 8K resolutions. For expert recommendations, visit camera support essentials.
Finally, the myth that all cinema projectors are built equally is dangerous. Internally, differences in optical path alignment, cooling systems, and bulb quality can dramatically affect contrast and color fidelity. Cheap projectors, often promoted as ‘cinema-ready,’ may produce dull images with poor black levels and inconsistent brightness. Investing in or customizing high-grade units with proper cooling and calibration often results in a significant leap in image quality — making your entire setup more reliable and professional. To understand the latest advancements, see cinema projector guide.
In conclusion, refining your knowledge of these nuanced aspects can elevate your filmmaking or viewing experience considerably. Do you ever fall for these myths or overlook these details? Share your stories or ask questions in the comments. Remember, small technical oversights often have outsized cinematic repercussions. Stay sharp, and keep pushing your craft to the next level!
Choosing My Go-To Tools for Long-Term Reliability
Maintaining cinema equipment isn’t just about quick fixes; it requires selecting the right tools that ensure longevity and optimal performance. Personally, I swear by precision calibration kits like the cine lens calibration set. These kits allow me to fine-tune focus and optical alignment, preventing issues like focus breathing and ensuring that my lenses deliver crisp images shot after shot. Investing in high-quality, anti-static cleaning brushes and microfiber cloths is equally vital; these prevent dust buildup on delicate surfaces without risking scratches.
For protecting camera supports and tripods, I rely on heat-resistant, vibration-damped plates. They help eliminate micro-shakes and support heavy rigs during extended shoots, safeguarding the footage from subtle jitters that can ruin high-resolution captures. Scientific documentation, such as the study published in the Journal of Optical Engineering, confirms that well-maintained support systems directly translate into sharper images and reduced post-production correction times.
Software Tactics for Sustained Performance
Regular software checks are just as critical. Firmware updates for cinema projectors and camera controllers often include stability improvements and bug fixes that mitigate unexpected crashes or signal dropouts. I manually review firmware logs at least once a quarter, ensuring that my equipment runs smoothly without surprises during critical shoots.
Additionally, I use calibration software like ColorEdge calibration tools to maintain consistent color profiles across my resources. This consistent calibration minimizes discrepancies and saves time during post-production, especially when working across different lighting environments or lenses.
Preparing for the Future of Cinematic Equipment
As technology evolves, so does the importance of adaptable tools. AI-powered stabilization grips, as discussed here, are becoming standard for maintaining smooth shots in complex environments. Investing in these innovative supports now positions you ahead of the curve, ensuring smooth footage regardless of unforeseen challenges.
How do I maintain support systems over time?
Long-term support and maintenance of your camera rig involve regular calibration and inspection. I schedule quarterly deep cleans and recalibrations, focusing on vibration dampers and mounts, to prevent gradual degradation. Using tools like the heavy-duty steel C-Stands not only supports heavier loads but also offers durability that less robust supports can’t match, especially in rigorous shooting conditions. Remember, consistent maintenance coupled with high-quality support tools will ensure your equipment remains reliable for years to come.
To give your gear the care it deserves, consider integrating some of these advanced tools into your routine. For example, trying out high-gain screens with proper maintenance enhances image longevity and color fidelity during demanding shoots. Start small, establish a routine, and you’ll see your equipment perform at peak levels, shot after shot. Curious about more sophisticated supports? Visit our contact page for personalized advice.
Lessons the Experts Rarely Share About Cinema Equipment Longevity
- One of the hardest lessons I’ve learned is that even minor environmental oversights, like neglecting UV protection for my projection screens, can lead to years of unnecessary discoloration. That lightbulb moment taught me that proactive care often beats costly repairs later on.
- I used to believe that investing in high-end gear guaranteed durability. However, I realized that the true strength lies in routine maintenance and knowing your equipment’s nuances—small adjustments now save big headaches during critical shoots.
- Getting caught up in the allure of the latest technology can blind you to fundamental habits—like regular cleaning and proper storage—that preserve your tools’ performance over years of demanding use.
Your Path Forward with Clever Tools and Resources
- The cine lens calibration set has been a game-changer for maintaining sharp focus and eliminating focus breathing, especially when I work across different shoots. It’s my personal go-to for precision.
- I trust the heavy-duty steel C-Stands because they endure tough conditions and support my heavy rigs without compromise. Durability matters when safety and support are on the line.
- For keeping my projectors calibrated, the cinema projector guide offers insights into advanced calibration techniques that keep images crisp and colors accurate, day after day.
Crafting Your Cinematic Future with Confidence
Stepping into the world of cinema gear care and maintenance isn’t just practical—it’s empowering. With the right tools, knowledge, and mindset, you can extend your equipment’s lifespan and elevate your craft. Embrace the small habits that make a big difference, and let your passion shine through every shot you capture. The future of cinematic excellence depends on your dedication to quality and longevity.
About the Author
James Duke
ThinkOTS
James Duke is a seasoned professional in the creative production industry, bringing a wealth of technical knowledge and hands-on experience to cinegearguide.com. As a key figure at ThinkOTS, James has spent years navigating the complexities of high-end production environments, where selecting the right equipment is the difference between a successful shoot and a logistical failure. His expertise spans the full spectrum of cinematography gear, from advanced camera systems to the intricate accessories that define modern filmmaking. On cinegearguide.com, James leverages his deep understanding of the industry to provide authoritative insights, gear reviews, and technical guides. He is known for his ability to break down complex specifications into practical, actionable advice for filmmakers of all levels. His perspective is rooted in the real-world application of technology, ensuring that every recommendation is backed by professional standards. James is dedicated to empowering the filmmaking community by sharing his expertise, helping others navigate the ever-evolving landscape of cinema technology with confidence and clarity.
LinkedIn ProfileRelated Posts
3 Hidden Signs Your Projection Screen Gain Is Actually Hurting Your Image
It was late at night, and I was finally finishing…
Best Projection Screens & Film Lighting Equipment for Filmmaking
Ever spent hours filming your masterpiece, only to find the…
Projection Screens for Filmmakers: Top Selection & Buying Tips 2024
I still remember the moment it hit me—I was mounting…