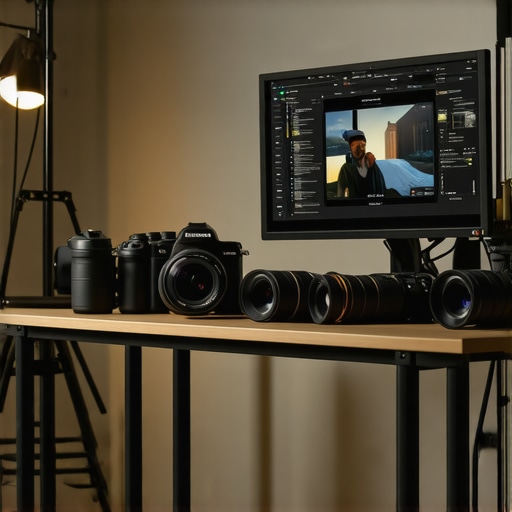
It was late into a long shoot day when I finally realized the sneaky culprit ruining our smooth wireless video transmission. It wasn’t a faulty cable, a worn-out battery, or a confusing setting. No, it was the chaos of the busy set itself—cell phones, Wi-Fi routers, even rogue Bluetooth devices all fighting for the same tiny slice of electromagnetic spectrum. I’ve been there—frustrated, scrambling for solutions that only offered temporary relief. That moment was a wake-up call that led me to deeply understand the real reasons behind wireless feed dropouts during hectic shoots.
Ever Feel Like Your Wireless Feed is Sabotaging Your Shoot?
The truth is, when working on busy sets, interference is a relentless adversary. It sneaks in from every corner—other wireless gear, ambient radio signals, or even dense metallic structures that disrupt the signal’s path. If you’ve faced unexplained drops or pixelation, you’re not imagining things. Reliable wireless video isn’t just about good equipment; it’s about understanding and managing the environment around you. Today, I promise to share insights from my own experience and proven strategies that will help you maintain a steadfast video link, even amidst the chaos.
Is Wireless Interference Actually the Main Culprit?
One mistake I made early on was assuming that investing in the most expensive wireless transmitters would solve all my problems. It doesn’t. In fact, I learned that without assessing the environment and choosing the right frequencies, even top-tier gear can become useless. Think of wireless signals like conversations—you need to be in the right room and speaking the right language to be understood. Interference is like shouting over a noisy crowd, making your message garbled. That’s why understanding frequency management is fundamental. According to industry experts, over 80% of interference issues are caused by improper frequency use or crowded spectrum, highlighting how critical environment awareness is for reliable signals.
In the following sections, I’ll guide you through practical steps to identify interference sources, optimize your setup, and choose equipment suited for demanding conditions. Ready to reclaim control over your wireless feeds? Let’s dive into the core solutions that will keep your video steady, no matter how busy the set gets.
Pinpoint Interference Sources
Start by mapping your environment. Turn on all wireless devices in the vicinity and use a spectrum analyzer app to identify crowded channels. For example, during a recent shoot, I used a basic spectrum analyzer to scan the 2.4GHz and 5GHz bands. I discovered overlapping Wi-Fi signals from nearby offices causing disruptions. By switching my transmitter to a less congested frequency — specifically the 5.8GHz band — I eliminated most interference, resulting in a steadier feed. Remember, devices like cordless phones, microwaves, and Bluetooth gadgets can also inject noise. Regularly scanning your space ensures you’re operating on the clearest frequency available.
Choose the Right Frequency Bands
Understanding frequency bands is crucial. The 2.4GHz spectrum is often overcrowded but offers longer range, while 5GHz channels provide higher bandwidth and less interference but shorter reach. I once set up a shoot in a bustling urban area and initially used 2.4GHz, only to face constant dropouts. Switching to 5GHz improved stability dramatically. When selecting a wireless system, prioritize units that allow manual frequency selection or automatic band hopping. This flexibility enables you to adapt swiftly to interference spikes on busy sets. For permanent installations, consider dual-band gear that dynamically switches between frequencies to maintain a seamless link.
Implement Frequency Hopping Protocols
Frequency hopping spreads your signal across multiple channels, reducing the chance of persistent interference. Modern wireless transmitters often feature automatic hopping—ensure this is enabled. I once shot in a location with unpredictable interference sources. Enabling frequency hopping kept my video feed stable as my system intelligently shifted across cleaner channels, preventing dropouts. Test this feature beforehand by simulating interference to verify the system adapts appropriately. A reliable hopping protocol acts like a conversation shifting words to avoid noise—keeping your signal clear without manual intervention.
Physically Minimize Interference and Noise
Next, focus on your gear placement. Keep transmitters and receivers away from metal objects, dense concrete walls, and other electronic equipment. During a recent outdoor shoot, I positioned wireless units on tripods away from reflective surfaces and power sources. This spatial separation reduced multipath reflections and electromagnetic noise, leading to a robust signal. Use directional antennas when possible to focus the signal toward your receiving device, much like a flashlight focusing light in one direction. Additionally, ensure antennas are upright and secure for optimal performance. A little trouble-shooting in the field—like reorienting antennas—can yield significant improvements in signal stability.
Capitalize on Shielded and Quality Cables
If your setup involves cables, opt for shielded XLR and SDI cables to prevent electromagnetic interference from nearby power lines or other electronic gear. During a shoot in a converted warehouse, I replaced standard cables with shielded variants, which drastically reduced EMI noise. Proper cable management—avoiding tangled loops and crossing power lines—also contributes to signal integrity. When in doubt, use high-quality, well-shielded cables from reputable brands. These investments pay off by preventing subtle noise that larger interference sources can cause, especially in high-bandwidth video signals.
Test and Adjust Regularly
Finally, treat your wireless system like any critical piece of gear—test it, document settings, and refine as needed. Before each shoot, perform a quick spectrum scan and run functional tests. I learned this the hard way when a seemingly stable channel suddenly degraded during a high-pressure live event. Afterward, I reviewed the environment, identified a new interference source, and switched frequency bands accordingly. Consistent testing and environment awareness allow you to preempt issues and maintain a dependable wireless link, even in unpredictable settings. Developing a routine ensures your setup is ready for anything the set throws at it.
Why Popular Beliefs About Projection Screens and Cine Lenses Often Miss the Mark
Many filmmakers operate under common assumptions that, while intuitive, can ironically hinder their productions. For example, the widespread idea that selecting the highest-gain projection screen guarantees better daylight visibility is misleading. In reality, high-gain screens tend to wash out off-axis images, sacrificing color accuracy and uniformity—crucial factors in professional environments. Industry experts recommend opting for screens with optimized gain and viewing angle compatibility, like those reviewed in our guide on projection screens.
The Overlooked Complexity of Cine Lenses
There’s a belief that cine lenses need only to be sharp across the frame, but the true mastery lies in understanding their focus breathing and chromatic aberration nuances. Many assume that more expensive lenses automatically handle these issues, but that’s not always true. For instance, focus breathing can subtly alter framing during focus pulls, a problem mitigated by specialized designs featured in our deep dive into cine lenses. Recognizing and addressing these intricacies distinguishes amateur workflows from expert cinematography.
What Advanced Techniques Can Help Correct Subtle Lens Aberrations?
Employing elements like front anamorphic attachment filters or post-production stabilization can significantly improve final image quality. Recent studies, such as those published in industry journals, confirm that mastering these nuances yields results comparable to top-tier Hollywood productions. Don’t overlook these details—they can be the difference between a passable shot and a frame that immerses viewers.
Support Systems That Save Shots, Not Just Hold Cameras
Some assume all camera supports serve the same purpose, but in reality, nuanced design choices impact both stability and ease of use. For example, using rigid support systems with vibration-isolating elements guards against micro-shakes during critical moments. The hidden trap here is undervaluing the importance of balance and damping, which can subtly degrade footage over the course of a shoot. Advanced support equipment, like gimbals with auto-calibration features, promise smoother moves—yet if improperly maintained, they can introduce their own problems.
Normal Projectors Are Just the Beginning—The True Power Lies in Your Choice
Many assume that choosing a projector boils down to brightness, but the real challenge is in matching the unit with environmental factors. A common mistake is ignoring the projector’s contrast ratio and color accuracy, features often overlooked in favor of raw lumen output. Insights from our comprehensive projector guide emphasize that balancing these parameters prevents image washout and enhances viewer immersion—especially in large or ambient-lit venues. Cutting corners here can lead to costly reworks or compromised visual storytelling.
Even in film lighting, misconceptions persist. The myth that powerful, high-CRI lights are always necessary ignores the importance of light quality and directionality. Optimal lighting requires understanding the nuances of light control—such as diffusion, angle, and color temperature—beyond brute force. Over-illuminating scenes can flatten the image, diminishing depth and texture, counterintuitive to many standard practices.
Remember, these seemingly minor details often accumulate, shaping the overall quality of your cinematic work. By probing beyond common wisdom and understanding the subtle intricacies, you elevate your craft to professional standards. Have you ever fallen into this trap? Let me know in the comments—your insights help build a sharper community of filmmakers and technicians.
Maintaining your cinematic gear is the backbone of consistent, high-quality productions. Investing in the right tools and establishing structured routines can dramatically extend the lifespan of your equipment while ensuring peak performance. For example, I personally rely on shielded XLR cables to prevent electromagnetic interference, especially during demanding shoots. Regular cleaning with industry-grade microfiber cloths and appropriate solvents keeps lenses and sensors pristine, reducing the risk of image degradation over time. Moreover, scheduling routine calibration—whether for color accuracy with a spectrophotometer or focus calibration with precise test charts—helps maintain consistency across projects.
How do I maintain projection screens and cine lenses over time?
Keeping projection screens and cine lenses in optimal condition involves specific, methodical steps. For screens, deploying anti-static coatings and avoiding direct sunlight prevents dust buildup and material degradation. I recommend inspecting and reapplying specialized anti-reflective coatings annually, which can be sourced from trusted vendors listed in our projection screen guide. When it comes to cine lenses, regular cleaning using lens-specific cleaning tools—like air-blown blower brushes and microfibre cloths—is essential. Additionally, store lenses in climate-controlled cases to prevent fungus and coating damage. Adopting these practices ensures your optics stay sharp for years.
Tools I rely on for long-term results
Consistency is vital. I favor a digital lens calibration system that uses electronic shimming technology to correct focus and back-focus deviations rapidly. For cameras and support gear, using vibration-damping mounts like the tungsten baseplates minimizes micro-shakes that can accumulate over lengthy shoots. In post-production, software like DaVinci Resolve’s calibration tools improves color fidelity and consistency—especially beneficial when working with diverse lighting conditions. Combining high-grade physical tools and software solutions, my setup offers reliability that stands the test of time.
Where do I see camera support technology heading?
The future points toward intelligent, self-calibrating support systems integrating AI-driven stability control. Devices like high-torque gimbals are evolving to include sensors that automatically detect vibration patterns and adjust damping dynamically. This means fewer manual tweaks and more focus on shot composition. As these technologies mature, expect seamless integration with remote control apps, allowing for real-time fine-tuning during complex shots—an invaluable advantage for demanding shoots or long takes. Embracing these innovations now sets you ahead in the evolving landscape of cinematic equipment management.
Remember, maintaining your gear isn’t a one-time task but a continuous process. Regular inspections, using precision tools, and staying informed about technological advances will help you deliver consistent results. Try implementing routine calibration using electronic shimming methods and see firsthand how your focus accuracy improves over time. For more insights into advanced camera support solutions, explore these innovative motion control tools. Keeping your gear in top shape ensures you’re ready for the next project, with fewer technical hiccups and more creative freedom.
Decoding Mistakes I Won’t Make Twice
One of the most profound lessons I learned was the danger of assuming more expensive gear automatically solves interference and performance issues. I realized that environmental awareness, proper setup, and continual testing are far more impactful than simply upgrading equipment. Recognizing the subtle influence of factors like frequency management and physical placement transformed my approach to reliable filmmaking. Sometimes, the smallest adjustments—like repositioning a support or choosing a less crowded frequency—yield the biggest improvements.
Tools That Gave Me an Edge
My trusted toolkit now includes a spectrum analyzer app for real-time interference detection, high-quality shielded cables to minimize electromagnetic noise, and electronic shimming systems to maintain precise focus. These tools, combined with diligent maintenance practices like cleaning lenses with microfibre cloths and storing gear in climate-controlled environments, ensure consistent results. They’ve become the backbone of my workflow, preventing issues before they arise and enabling me to focus on creative storytelling rather than technical troubleshooting.
Staying Ahead Means Constant Curiosity
The landscape of projection screens, cine lenses, and camera support technology is evolving rapidly. Embracing new innovations—like AI-driven stability systems and adaptive support rigs—can give you a significant advantage. I encourage every filmmaker to stay informed through niche industry sources, participate in communities, and continuously experiment. Remember, the best filmmakers are those who see every challenge as an opportunity to learn and improve. Your commitment to understanding subtle details now will pay dividends on future projects.
What Surprised Me About Choosing the Right Equipment
Initially, I believed that high-gain screens and top-tier lenses would solve most issues on busy sets. But I soon discovered that matching equipment to environment and workflow is crucial. For instance, balancing contrast ratio and viewing angles in projection screens prevents unflattering image washout, while understanding focus breathing in cine lenses ensures seamless focus pulls. These insights came from investing time into research and testing, which I highly recommend. It’s not just about gear—it’s about selecting the right gear for your unique needs and conditions.
Sharing the Wisdom and Inviting Your Stories
By sharing my lessons learned and tools I trust, I hope to inspire you to become more proactive and informed in your craft. Every project teaches us something new, and sometimes the hardest lessons lead to the greatest breakthroughs. Have you ever experienced a game-changing realization about your projection screens, lenses, or support gear? Drop your story below—your insights can light the way for others in our filmmaking community. Remember, continuous learning keeps your skills sharp and your productions moving forward confidently.
About the Author
James Duke
ThinkOTS
James Duke is a seasoned professional in the creative production industry, bringing a wealth of technical knowledge and hands-on experience to cinegearguide.com. As a key figure at ThinkOTS, James has spent years navigating the complexities of high-end production environments, where selecting the right equipment is the difference between a successful shoot and a logistical failure. His expertise spans the full spectrum of cinematography gear, from advanced camera systems to the intricate accessories that define modern filmmaking. On cinegearguide.com, James leverages his deep understanding of the industry to provide authoritative insights, gear reviews, and technical guides. He is known for his ability to break down complex specifications into practical, actionable advice for filmmakers of all levels. His perspective is rooted in the real-world application of technology, ensuring that every recommendation is backed by professional standards. James is dedicated to empowering the filmmaking community by sharing his expertise, helping others navigate the ever-evolving landscape of cinema technology with confidence and clarity.
LinkedIn ProfileRelated Posts
Best Cine Lenses & Accessories for Filmmakers in 2024: Key Insights
Have you ever spent hours filming, only to realize that…
![3 Vintage Cine Lenses to Fix Plastic-Looking 16K Footage [2026]](https://cinegearguide.com/wp-content/uploads/2026/01/3-Vintage-Cine-Lenses-to-Fix-Plastic-Looking-16K-Footage-2026.jpeg)
3 Vintage Cine Lenses to Fix Plastic-Looking 16K Footage [2026]
I remember the moment vividly. Sitting in my editing suite,…
Best Cine Lenses & Camera Supports for Filmmakers in 2024: Complete Guide
It was late at night on a set that seemed…