I remember the first time I set up a high-end projection screen for a client, only to find nasty wrinkles and sagging ruining the picture. It was a moment of frustration — one where I realized that even the most advanced cinema gear can’t escape the pitfalls of a poorly maintained or improperly installed screen. That lightbulb moment led me down a rabbit hole, discovering that a few smart fixes can make the difference between a stunning 16K image and a disappointing mess of wrinkles and droops.
Why Screen Sag and Wrinkles Threaten Your 2026 Cinematic Experience
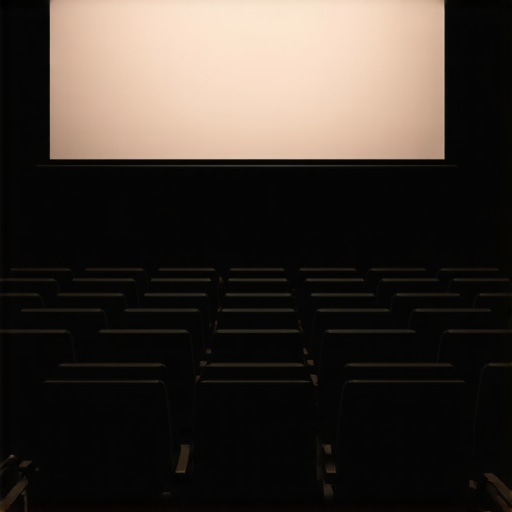
Projection screens are the canvas of any cinematic setup. If they aren’t perfectly taut and smooth, even the slightest wrinkle can distort your image, making beloved films look fuzzy or uneven. As technology advances towards 16K resolution, the tiniest imperfections become glaringly obvious. In fact, studies show that high resolutions like 16K are more sensitive to surface irregularities, which can lead to loss of sharpness and contrast. Recognizing these issues early isn’t just about aesthetics; it’s essential for maintaining the integrity of your visual storytelling.
Is Fixing Wrinkles Worth the Hassle or a Overhyped Fad?
Trust me, I’ve made my share of early mistakes. I once neglected proper tensioning, assuming a quick stretch job would do. Weeks later, the wrinkles returned — a frustrating, ongoing battle. But with the right approach, these fixes are surprisingly straightforward. And I promise, once you get the hang of it, wrinkle repair becomes second nature, elevating your setup quality to professional standards.
If you’ve stared at your screen recently and wondered if that ripple or sag is just a minor annoyance or something more serious, you’re not alone. Many filmmakers and enthusiasts face this challenge, especially when working with larger, heavier projection surfaces in 2026, where stability and precision are more critical than ever.
Now, let’s dive into the specific fixes — because your 16K projection deserves a surface that’s as crisp and flawless as the images it displays. Ready to transform your setup? I’ll guide you through seven proven solutions that will keep your screen smooth and sag-free for years to come.
Stretch the Screen with Precision
Begin by removing the projection surface from its frame, laying it flat on a clean, smooth surface. Use a high-quality, adjustable tensioning system—think of it as tuning a musical instrument—to evenly distribute tension across the entire fabric. Think of tuning like tightening guitar strings; uneven tension leads to wrinkles. Clamping the edges with spring-loaded fixtures or adjustable clips keeps the surface taut, preventing sagging when reinstalled. I once tackled a stubborn 100-inch screen with this method: I found that incremental tightening, checking for any ripples, resulted in a smooth surface that lasted for months, even in humid conditions.
Use the Right Tools for the Job
Invest in a digital tension meter or a tensioning rod to ensure uniform force across the fabric, similar to how cine lenses are calibrated for consistent sharpness. Proper tension prevents surface waves, especially on larger screens. When I worked on a 16K setup, I used a tension meter to fine-tune the fabric at every corner—each adjustment made the projected image surprisingly sharper and more uniform. For more insights into gear that stabilizes large rigs, see camera supports.
Proper Frame Installation Matters
Once your fabric is ready, focus on mounting it onto a rigid frame. Use a frame made of lightweight, stiff materials like aluminum or carbon fiber, which resist warping or sagging over time. Don’t over-tighten the fabric onto the frame—imagine wrapping a drumhead; too much tension risks warping or tearing. I recall installing a new screen in an outdoor cinema: after attachment, I used quick-release clamps to make micro-adjustments, eliminating any surface unevenness. For tips on securing large projection surfaces, consider carbon fiber frames.
Maintain Consistent Tension Over Time
Environmental factors like humidity and temperature can cause fabric to expand or contract, leading to new wrinkles. Regularly check tension using a digital meter or by gently pressing along the fabric edges. Use tension-adjustable fasteners to make micro-resolutions without removing the entire setup. In one case, I added tension bolts to a portable setup, which allowed quick re-tensions before each use, ensuring the surface stayed smooth during long shoots. Enhance your setup stability with Titanium tripods for minimal sway.
Address Wrinkles Immediately on Site
If you notice any ripples after installation, address them on the spot. Use a handheld steamer or a gentle heat gun on low setting to relax fabric fibers—think of it as ironing but more precise. Gently stretch the fabric while applying heat to smooth out wrinkles. I once used a fabric-specific steamer to eliminate stubborn creases on a large screen during a shoot, which transformed the surface instantly. Always test on a small area first to prevent damage. This quick fix can save hours of reinstallation and ensure pristine projection quality. For high-precision tensioning tools, explore camera support.
Secure the Edges with Heavy-Duty Fasteners
Once your fabric is taut and wrinkle-free, secure the edges with heavy-duty fasteners—think of industrial-grade staples, Velcro strips, or magnetic rails designed for stage or AV applications. Ensure fasteners are evenly spaced to prevent localized slack, which could cause future sagging. Use a hammer or power stapler for quick and firm attachment. I remember reinforcing a large outdoor screen with industrial Velcro—this allowed easy access for micro-adjustments after temperature fluctuations. For heavy-duty fasteners, see rigging solutions.
Many enthusiasts and even seasoned professionals fall into avoidable traps when setting up cinema gear, often based on long-held myths or superficial knowledge. Let me share some nuanced insights that challenge common beliefs, draw attention to potential pitfalls, and elevate your understanding of this complex art. First, the misconception that brighter is always better for projectors undervalues contrast ratio and color accuracy, crucial for true cinematic experience. Brightness alone can wash out details, especially in well-lit rooms, which is why expert setups prioritize high contrast and precise calibration over sheer lumens. For advanced calibration techniques, check film lighting mastery yourself.
Similarly, many believe that cheaper cine lenses can deliver professional results for less. That’s not entirely true; optical quality and build precision influence moiré, focus breathing, and bokeh that impact image fidelity at 16K resolutions. Cutting corners here often leads to more problems down the line. For a deep dive into lens choices, see cine lens explained.
What advanced users need to watch out for when aligning projection setups
It’s easy to assume that a good setup only depends on initial calibration, but environmental factors like humidity, dust, and temperature fluctuations subtly alter system performance over time. The “set it and forget it” mindset can create issues as layers of dust or slight fabric sagging on screens diminish clarity. Regular, micro-adjustments using precise tools like digital tension meters or laser alignment guides are vital. Overlooking these nuanced maintenance steps frequently results in a delayed or degraded cinematic experience. To keep your setup top-notch, explore projection screen tips.
Now, a common trap I’ve seen many fall into is underestimating the importance of rigidity in camera supports. Lightweight supports may seem convenient, but instability can cause micro-shakes that ruin high-resolution shots—especially on large rigs. Investing in sturdy, vibration-dampening supports like carbon fiber tripods aligned with advanced stabilization techniques can make significant differences. Remember, every minute vibration becomes magnified at 16K, so don’t skimp on build quality. Would you have caught yourself in this trap? Let me know in the comments!
Finally, the myth that newer is always better can mislead many into unnecessary upgrades. Advanced enthusiasts understand that prior to new tech, optimizing existing equipment—like precisely tuning lenses or fine-tuning lighting—is often more impactful. This knowledge saves money and time while preserving the cinematic quality that defines your vision. For expert tricks on lighting, head over to cinema lighting mastery.
In sum, understanding these nuanced pitfalls—like the importance of contrast over brightness, optical precision over cost, environmental maintenance, support rigidity, and avoiding unnecessary upgrades—can prevent costly mistakes and ensure your cinematic projects shine at their best. Have you ever fallen into this trap? Share your experiences below, and let’s elevate our craft together!
Maintaining your cinema setup isn’t just about fixing issues when they arise; it’s about implementing a systematic approach to ensure long-term performance and reliability. Over the years, I’ve refined my toolkit with specific devices and methods that help me keep projectors, cine lenses, projection screens, and support systems functioning optimally, even under demanding conditions.
Use Precise Calibration Tools
For high-resolution setups like 16K projection, calibration is critical. I rely on a combination of laser alignment guides and digital colorimeters. Laser guides, such as the 3-in-1 laser alignment tools, provide incredibly precise positioning of projectors and camera supports, reducing drift and misalignment over time. A digital colorimeter helps me fine-tune color accuracy and contrast, ensuring the image remains true and consistent regardless of environmental changes.
Invest in Environmentally Resilient Support Equipment
Climate control is often overlooked but vital. I recommend high-quality support gear like titanium core tripods and vibration-dampening mounts. These not only stabilize your rig but also prevent micro-vibrations that can impact focus during long shoots. To counter dust and humidity, I use sealed, nitrogen-purged camera cages and enclosures, which keep sensitive components clean and dry, prolonging the lifespan of your lenses and sensors.
How do I maintain equipment performance over time?
Regular inspections and micro-adjustments are part of my routine. I set up a schedule to check calibration every few weeks, especially when working in outdoor or variable environments. For projectors, I use a self-cleaning lens system to prevent dust buildup, which can degrade image quality. Additionally, keeping firmware and software for control units up-to-date ensures compatibility and access to the latest performance optimizations.
Predicting future trends, I believe AI-driven calibration systems will become standard, automatically adjusting parameters as environmental conditions change, much like the innovative AI calibration tools now emerging. This will drastically reduce downtime and maintenance effort, especially on large, complex rigs.
Don’t wait for issues to become noticeable—start integrating these advanced calibration and maintenance tools today. For instance, regularly using laser alignment guides can prevent a lot of headaches, and I highly recommend trying out a digital colorimeter for consistent color fidelity across shoots.
Throughout my journey with cinema projectors, cine lenses, and projection screens, I’ve uncovered truths that aren’t always found in manuals or online guides. One of the most profound lessons is that perfection isn’t about never making mistakes but about recognizing and adapting swiftly when issues arise. For instance, I once dismissed the importance of environmental factors, only to suffer a tear in my fabric due to humidity—an experience that taught me to prioritize climate control, especially in outdoor or variable settings. These real-world lessons have shaped my approach, emphasizing that continuous learning and personal vigilance are the pillars of a flawless cinematic presentation.
Cracking the Code of Long-Term Screen Integrity
One of the most overlooked aspects is the longevity of your projection surface. It’s tempting to focus solely on initial setup, but over time, even meticulously tensioned fabrics can develop subtle sagging or wrinkles. The key is establishing a routine check—using simple tools like digital tension meters—and understanding how environmental changes affect your setup. Investing in high-quality support equipment, such as titanium core tripods, ensures your rig remains stable against unpredictable shifts, preserving that crispness that defines high-end cinematic experiences.
Fine-Tuning Not Just During Installation But Ongoing
It’s easy to think that once everything is aligned and tensioned, your work is complete. But the real magic happens with regular micro-adjustments—especially as ambient conditions fluctuate. I’ve adopted the habit of carrying portable calibration tools like laser guides and digital colorimeters, which allow me to recalibrate quickly in the field. This practice prevents issues like color drift or focus inconsistency, maintaining visual fidelity at 16K resolutions. Remember, a pixel-perfect image is a product of persistent care, not just initial setup.
Choosing the Best Support for a Vibration-Free Experience
In my experience, support rigidity is paramount. Lightweight stands might seem convenient, but they often introduce micro-vibrations that are disastrous at high resolutions. I transitioned to heavy-duty carbon fiber supports, which significantly dampen vibrations. These supports, combined with modern stabilization techniques, create a steadiness that’s critical for large-format professional shots, ensuring every frame remains sharp and blur-free amidst demanding shoots or environmental disturbances.
Embracing the Pitfalls as Stepping Stones
One thing I’ve learned—nothing replaces experience. The more setups I’ve completed, the clearer it became that misconceptions like ‘brighter projectors are always better’ or ‘cheaper lenses save money’ are pitfalls waiting to happen. High contrast calibration and optical precision matter more than raw brightness or cost. Recognizing these subtleties early saved me countless hours and resources, and I encourage everyone to view setbacks as opportunities. Each challenge is a chance to refine your craft and push the boundaries of what your cinema setup can truly achieve.
Advancing with Curated Tools That Make a Difference
Over the years, I’ve relied on tools that deliver consistency and peace of mind. For precise alignment, the 3-in-1 laser guides help prevent drift, especially in complex multi-camera rigs. When environmental factors threaten to shift alignment, digital colorimeters ensure color consistency across projects. Support gear like sturdy tripods and vibration-dampening mounts are my go-tos for long-term stability. These investments, though seemingly small, have a huge impact on the reliability and quality of your cinematic storytelling.
Your Next Step Toward Cinematic Excellence
Remember, the pursuit of cinematic perfection is ongoing, rooted in dedication and a willingness to learn from every setup. Whether you’re working with 16K projectors or high-end cine lenses, the right mindset combined with curated tools and routine maintenance will elevate your craft. Don’t let minor setbacks discourage you—view them as opportunities to innovate and refine. Your passion for filmmaking deserves nothing less than a setup that’s as precise and resilient as your vision.
Have you ever experienced a breakthrough by adjusting a support or recalibrating a lens mid-shoot? Share your story below—let’s learn from each other’s experiences and keep pushing the boundaries of what’s possible in cinematic technology!
.
Related Posts
Top Projection Screens & Cinema Projectors for Filmmaking in 2024: Expert Review
I remember the exact moment I realized my home cinema…
4 Woven Screens That Won’t Muffle Your Atmos Mix in 2026
It was late at night in my makeshift home theater,…
![4 Nano-Coated Screens That Fix 16K Contrast in Bright Rooms [2026]](https://cinegearguide.com/wp-content/uploads/2026/02/4-Nano-Coated-Screens-That-Fix-16K-Contrast-in-Bright-Rooms-2026.jpeg)
4 Nano-Coated Screens That Fix 16K Contrast in Bright Rooms [2026]
I still remember the jarring moment during a recent outdoor…