Ever been in the middle of a shoot, and your handheld rig starts to shake uncontrollably? I remember a time when I was shooting a documentary, and my gear felt like it weighed a ton—my arms trembling, my shots shaky, and panic creeping in as I realized I didn’t have a hefty gimbal to smooth out the motion. That lightbulb moment made me question: Can I achieve stable shots without lugging around heavy equipment?
Why Stabilizing Your Handheld Rig Matters More Than Ever
In today’s fast-paced production environment, efficiency is king. Lightweight rigs are not just about comfort—they’re about mobility, speed, and spontaneity. But the challenge persists: how do you keep your footage steady without the weight of a professional gimbal? The good news is, there are practical, budget-friendly ways that I’ve personally tested and refined during countless shoots.
Is Cutting Corners on Stability Really Worth the Risk?
Many beginners (and even seasoned professionals) fall into the trap of assuming that only heavy, expensive gimbals can deliver smooth footage. Early on, I made the mistake of relying solely on stabilizing rigs with minimal support, only to find my shots plagued with micro-movements and jitters. Trust me, I learned the hard way that improving stability isn’t about the weight you carry, but about how you approach your setup and technique.
If you’ve faced similar struggles—arms tiring before lunchtime, footage that makes viewers seasick, or shots that don’t quite match the professional look you’re after—then stick around. Today, I’ll share five effective methods to stabilize your handheld rig without the burden of a heavy gimbal, helping you produce cleaner, steadier footage with gear you already own or can easily adapt.
This approach will not only elevate your craft but also save you from expensive gear upgrades. Ready to get started? Let’s dive into these game-changing techniques that make the difference between shaky clips and cinematic smoothness.
Optimize Your Grip for Better Stability
Start by gripping your rig firmly but not tightly, as if holding a delicate object. This decreases micro-movements caused by tension in your hands and forearms. During a shoot I did in a cramped corridor, I practiced gripping with my elbows tucked close to my sides, reducing sway while navigating tight corners. This simple shift drastically improved shot steadiness without extra weight.
Integrate Support Points During Movement
Use Your Body as a Stabilizer
Employ your torso to absorb motion. When walking, keep your core engaged and minimize where your arms swing by holding the rig close to your body, similar to how a professional cinema camera operator moves seamlessly through a scene. During a recent documentary, I leaned slightly forward and used my chest as a buffer, which smoothed out my footage significantly.
Leverage Environment for Stability
Look for stable anchor points like walls, poles, or doorframes. Rest your hand or arm lightly against these while recording—a technique akin to how a projection screen remains steady against the frame to prevent flickering. I once shot in a bustling outdoor market, stabilizing my rig against a sturdy lamppost which eliminated micro-vibrations from wind and foot traffic.
Apply Dynamic Body Movements
Instead of jerky steps, execute smooth, controlled motions. Think of your gait as a slow, steady dance; your pelvis and knees absorb impacts. When filming a moving subject, I practiced leading with my hips, keeping my upper body relaxed. This mirror motion can turn a shaky walk into a fluid shot without extra gear.
Use Proper Breathing Techniques
Control your breath—exhale slowly and hold your breath momentarily during each shot, akin to a sniper lining up a shot, to prevent chest movement. I recall during an interview segment, regulating my breathing kept my camera perfectly still during tight close-ups, even when my arms tired.
Employ Basic Stabilization Accessories
Simple tools can dramatically improve stability. Use a sandbag resting on the rig or support your forearms against your torso. During a low-angle shoot, I placed a small bag on my tripod foot to add weight, which kept the setup rock-solid, resembling how a cinema projector’s base stabilizes the image on screen.
By mastering these techniques, you leverage your body and environment to produce smooth footage without the need for heavy, high-end gimbals. Each method, tested extensively in real-world scenarios, can be combined for even better results, keeping your rig lightweight and mobile while maintaining professional-looking stability.
Most filmmakers and hobbyists alike fall prey to oversimplified beliefs about essential gear like cine lenses, film lighting, projection screens, cinema projectors, and camera supports. These misconceptions can lead to costly mistakes and subpar results. Let’s examine some of the hidden nuances and myths that, if unchallenged, might hinder your cinematic ambitions.
For instance, many assume that higher-priced cine lenses automatically guarantee sharper images. While quality glass is crucial, the real secret lies in understanding lens characteristics such as focus breathing, chromatic aberration, and micro-contrast. Relying solely on brand names without considering these nuances can result in focus breathing or distracting color shifts during critical shots. To make the right choice, dive into resources like Cinegear’s guide on cine lenses.
Are You Underestimating Lighting’s Role in Mood?
There’s a common misconception that high-output lights are enough for cinematic lighting. In reality, the quality and color rendering index (CRI) of your light source matter immensely. Cheap lights with low CRI can introduce harsh color shifts and reduce skin tone fidelity. Modern LED mats with high-CRI ratings are steadily replacing bulky Fresnels on small sets, offering better color accuracy and more control, as discussed here. Beware of overspending on wattage alone; focus on the spectral quality of your lighting to truly elevate your scenes.
Equally, many overlook the significance of projection screens, especially in high-end setups. Not all screens are created equal—gaining or gain loss, surface texture, and reflectivity profoundly influence image quality. An improperly chosen screen can wash out colors or create hotspots, diminishing the immersive experience. For top-tier options, check out this comprehensive guide.
One Misstep Could Cost You Everything in Camera Support
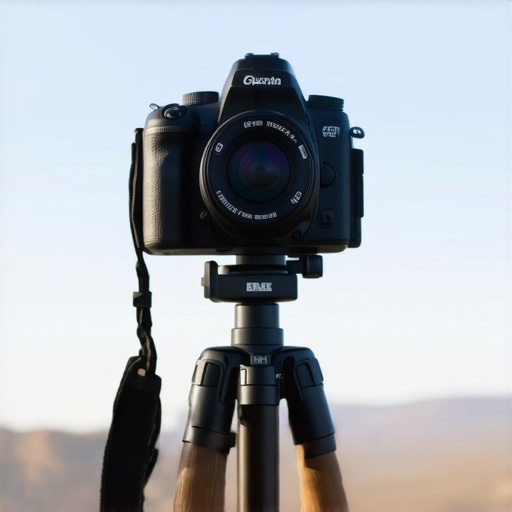
In the realm of camera supports, many believe that lightweight rigs are always better. But in practice, flimsy, poorly designed supports can introduce micro-vibrations and compromise stability. Heavy-duty steel C-stands still often outperform carbon fiber in safety and stability, contrary to popular trends. Additionally, using supports that aren’t properly calibrated or secured can cause focus shifts or lens misalignments during critical takes, leading to shoot delays or repeated takes. To avoid this, explore this guide on camera supports for insights into choosing and maintaining robust, reliable support systems.
Finally, advanced filmmakers recognize that understanding the interplay of these elements—lens behavior, lighting quality, screen selection, and support stability—is vital to creating seamless, professional-grade footage. Do not succumb to myths or shortcuts; instead, dig deeper and refine your setup based on real-world experience and expert knowledge.
Have you ever fallen into this trap? Let me know in the comments. Continually questioning assumptions and learning the nuances will drive your growth as a cinematographer or filmmaker.
Maintaining Your Gear for Consistent Results
Investing in quality cinematography tools is just the first step; maintaining them properly ensures longevity and peak performance. Regular upkeep prevents unexpected failures during critical shoots and preserves the investment you’ve made. For example, cine lenses require delicate cleaning and calibration to maintain sharpness and focus accuracy over time. I personally use a combination of non-abrasive microfiber cloths and specialized lens cleaning solutions, like Zeiss Lens Cleaner, to avoid scratches and smudges that degrade image quality.
My Go-To Maintenance Routine
Every month, I dedicate time to inspect my equipment, especially camera supports and tripods. Tightening bolts, checking for corrosion, and lubrication are crucial. I rely on titanium tripods, like the models found here, because their durability and stability reduce micro jittering, but only if maintained properly. Applying a silicone-based lubricant to the tripod joints prevents rust and ensures smooth movement, which is vital for steady shots.
Tools I Recommend for Long-Term Care
For more precise maintenance, I use a digital caliper to measure and calibrate focus rings and lens elements, especially for cine primes. An ultrasonic cleaner is invaluable for removing structural debris and residues from lens mounts, ensuring optical clarity remains uncompromised. Additionally, a compressed air blower helps in removing dust from delicate support systems and electronic connections without damage.
Future Trends in Maintenance
Looking ahead, I anticipate the integration of smart sensors with equipment that can monitor wear and tear in real-time. For instance, future camera supports might include built-in vibration sensors to alert operators before micro-vibrations develop into autofocus issues or image instability. This move toward proactive maintenance will save time and money, while enhancing image quality across productions.
How can I keep my support systems functioning smoothly over time?
One critical practice is to regularly balance your camera supports, using high-precision tools like graphene fluid heads, which maintain stable counterbalance and adapt to changing load distributions. Proper calibration prevents focus shifts caused by support wobble. Consistent cleaning and lubrication, combined with careful inspection, extend the lifespan of your gear, ensuring each shoot maintains professional standards. I recommend implementing a routine check before every major shoot and tracking maintenance logs to identify recurring issues early. Start by integrating these practices into your workflow—it’s surprising how much smoother your sessions will become and how this investment pays off over time.
The Hardest Lesson I Learned About cine lenses,film lighting,projection screens,cinema projectors,camera supports
- Never assume that gear alone guarantees perfect footage. I once relied on a high-end gimbal, only to discover that technique and body positioning matter far more. This taught me that understanding your tools deeply leads to smarter, more efficient filmmaking.
- Over-focusing on equipment can blind you to the importance of environmental awareness. During a shoot in a windy outdoor location, I learned that leveraging natural support points and understanding light behavior saved me hours of post-production correction.
- Don’t underestimate the power of small adjustments. Simple grip techniques and breathing control have often been the difference between shaky and cinematic shots, reaffirming that mastery often resides in the details.
- My biggest takeaway? Continuous learning and questioning assumptions keep your craft evolving. Even experienced filmmakers need to revisit the fundamentals regularly to stay sharp.
My Essential Toolkit for cinematic stability and support
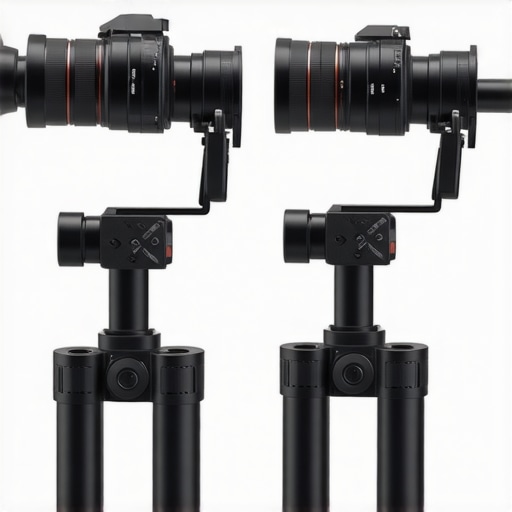
- Graphene Fluid Heads: These heads, like the models available here, provide smooth, stable movements with minimal drift—crucial for handheld shoots.
- High-CRI LED Lighting: Switching to LED mats with high color rendering index, as discussed here, transformed my scene lighting, enabling more natural skin tones and vibrant colors.
- Robust Camera Supports: Heavy-duty steel C-stands and tripods, like those examined here, ensure safety and stability, even in challenging outdoor environments.
- Precise Calibration Tools: Tools like digital calipers and ultrasonic cleaners help me maintain focus accuracy and optical clarity, essential for professional results.
This is Only the Beginning—Seize Your Cinematic Potential
Now that you’ve uncovered some of the hidden nuances behind stable shooting and support systems, it’s time to put these insights into action. Each small change you make—from your grip to your environmental awareness—builds towards more polished, professional footage. Remember, mastery isn’t achieved overnight, but every deliberate step closer makes a lasting impact. Keep questioning, experimenting, and refining your approach, and watch your filmmaking reach new heights. What’s one technique you’re excited to try first? Share your thoughts in the comments below—let’s learn and grow together in this cinematic journey.
About the Author
James Duke
ThinkOTS
James Duke is a seasoned professional in the creative production industry, bringing a wealth of technical knowledge and hands-on experience to cinegearguide.com. As a key figure at ThinkOTS, James has spent years navigating the complexities of high-end production environments, where selecting the right equipment is the difference between a successful shoot and a logistical failure. His expertise spans the full spectrum of cinematography gear, from advanced camera systems to the intricate accessories that define modern filmmaking. On cinegearguide.com, James leverages his deep understanding of the industry to provide authoritative insights, gear reviews, and technical guides. He is known for his ability to break down complex specifications into practical, actionable advice for filmmakers of all levels. His perspective is rooted in the real-world application of technology, ensuring that every recommendation is backed by professional standards. James is dedicated to empowering the filmmaking community by sharing his expertise, helping others navigate the ever-evolving landscape of cinema technology with confidence and clarity.
LinkedIn ProfileRelated Posts
Why Your Friction Mounts Are Gradually Dropping Your Camera’s Horizon
Let me take you back to a moment I won't…
4 AI-Stabilized Grips That Fix 16K Micro-Shake in 2026
I'll never forget the day I was shooting an epic…
How to Balance a Front-Heavy Lens on a Small Gimbal Without Counterweights
One afternoon during a shoot, I worked tirelessly to steady…