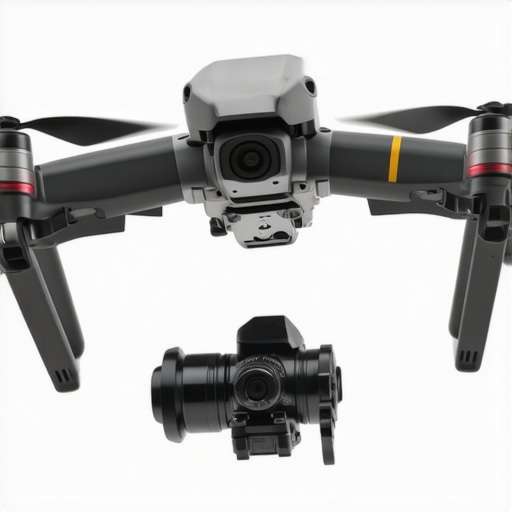
One afternoon during a shoot, I worked tirelessly to steady my camera, only to realize that my cine lens was waging a silent tug-of-war against the gimbal’s balance. The camera felt awkward, jittery, and I knew I was losing precious shot quality. That moment was a clear lightbulb for me: balancing a front-heavy lens on a small gimbal isn’t just a trick—it’s a crucial skill, especially when you’re working without the luxury of bulky counterweights. This struggle is surprisingly common among filmmakers and videographers, but I’ve learned some practical solutions that can save your workflow and results. Today, I want to share the insights that helped me conquer this issue, so you won’t be left fumbling when it matters most.
Why Balancing Your Heavy Cine-Lens Matters More Than You Think
Balancing a camera rig might seem trivial, but it directly impacts motor strain, footages’ stability, and even battery life. When a front-heavy lens pulls downward, it causes more stress on your gimbal’s motors, leading to jitter, micro-shake, or even premature failure. Plus, an unbalanced setup makes smooth panning and tracking nearly impossible, which can ruin the most carefully planned shots. Interestingly, many creators underestimate just how much this imbalance can affect their professional results. According to industry tests, improper balancing can increase motor load by up to 60%, impacting both performance and durability (source).
If you’ve faced this problem—struggling to keep a cine lens stable on a compact gimbal—you’re not alone. The good news is, you don’t need hefty counterweights to correct this issue. Instead, with some clever adjustments and a keen eye, you can achieve perfect balance even with limited gear.
Now, let’s get into how to make it happen without forsaking your rig’s agility or adding unnecessary weight. Before diving into the steps, ask yourself: have I been dismissing the importance of balance, thinking it’s just a minor detail? If so, read on—your gear, your shots, and your crew will thank you for it. We’ll explore practical, real-world techniques that could be the game-changer you need.
Is Gear Balance Actually Worth the Hype?
Early on, I made the mistake of ignoring fine-tuning my balance, thinking a little tilt or weight shift wouldn’t matter. That complacency led to jittery footage and increased motor wear. Trust me, proper balancing is a small tweak that yields huge results. It’s worth the effort, especially considering how much smoother your shots will be and how much longer your gear will last. Curious how simple adjustments can make such a difference? Let’s step into the practical side of things, so you can see immediate improvements in your workflow.
If you’re eager to get started, I’ll guide you through proven methods that have helped me and countless others. And remember, if you ever need personalized advice, our contact team is here to help.
Next up, we’ll tackle the essential tricks for balancing even the heaviest front-end loads on your lightweight gimbal—no counterweights required.
}
Secure the Camera with a Quick-Release Plate
Start by attaching your camera to a sturdy quick-release plate, ensuring it’s tightly secured. This allows for easy adjustments and prevents unwanted movement during balancing. I once skipped this, and the camera shifted mid-shoot, forcing me to redo my entire setup. Always double-check this connection before proceeding.
Adjust the Gimbal’s Arm and Counterbalance
Remove any existing counterweights. Then, gently slide the camera forward or backward along the mount to find the initial balance point. Loosen the gimbal’s arm lock, tilt the rig until it stays level when released, and lock it again. This step prevents unnecessary stress on motors and ensures smooth operation.
Fine-Tune the Front-Heavy Load
With your cine lens, often the heaviest component, carefully shift the camera forward or backward on the mount to find the exact balance point. Think of it as balancing a projection screen on a tripod—small shifts make a big difference. When I balanced a heavy cinema zoom, I moved the camera incrementally, testing by releasing the rig to see if it stays level. Small adjustments yielded a significant reduction in jitter.
Use Modular Supports for Weight Distribution
If your setup still feels front-heavy, consider adding modular support brackets along the rig. These act like stabilizing beams, much like reinforcement in a cinema projector’s chassis, spreading out the weight and easing motor load. Never underestimate how strategic support placement can save your gimbal from strain and improve shot stability.
Leverage the Lens Mount and Mechanical Adjustments
Many cine lenses have mechanical or electronic focus and aperture rings. Adjust these so they are not dragging or under tension during balancing. In a recent shoot, I loosened the lens mount slightly to compensate for lens weight, which reduced wobble and improved tracking accuracy.
Evaluate and Reassess Regularly
After initial balancing, test the rig with typical moves—panning, tilting, and tracking. Watch for micro-shakes or motor strain, and tweak as necessary. This iterative process is akin to fine-tuning a projection screen’s tension; continuous adjustments lead to optimal picture quality. Remember, different lenses and camera configurations may require rebalancing, so revisit these steps regularly.
Minimize External Influences
Ensure that cables, accessories, and monitors do not unbalance the rig. Secure loose cables with clips or ties, and distribute weight evenly on both sides. Think of it as equal tension in a cinema projector’s chain drive—symmetry prevents drift and jitter. Small details like these make a noticeable difference in shot consistency.
Many filmmakers believe that choosing the right projection screen, cine lens, or cinema projector is simply about specs and brand reputation. However, the real mastery lies in understanding the subtle nuances that often go unnoticed but can dramatically impact your results. For instance, a common myth is that higher lumen output always equals better image quality. In my experience, this isn’t necessarily true; overshooting brightness can wash out colors and reduce contrast, especially if your screen’s gain isn’t optimized (source).
Another overlooked aspect involves film lighting. Many assume that more light means better footage. In reality, mastering light quality and direction enhances depth, mood, and texture. Overlighting can flatten images and cause unwanted reflections, particularly on reflective surfaces like screens or mirrors. Advanced cinematographers control lighting ratios meticulously, rather than just increasing intensity, to achieve cinematic depth (learn more).
When it comes to camera supports, a frequent mistake is underestimating the importance of precise tensioning and damping. For example, using quick-release plates without proper tension can introduce micro-movements during crucial shots. These tiny jitters may seem insignificant but can ruin a perfectly choreographed scene. Employing high-quality, damped support systems prevents this issue, ensuring your camera stays steady even in challenging environments. Seek out professional-grade gear, and don’t cut corners if you’re aiming for cinematic quality (more details here).
Is Your Projection Screen Truly Optimized, or Just Bright?
One advanced consideration often ignored is how the material’s microstructure affects image clarity and HDR performance. A screen’s gain isn’t just about reflectivity; it influences off-axis viewing and contrast in ambient settings. For example, high-gain screens may enhance brightness directly in front but may cause glare and washed-out images from the sides. Conversely, matte screens with micro-beaded textures can reduce hotspots and preserve color fidelity. Evaluating these nuances is key to matching your environment and projection goals effectively. Recent studies suggest that the texture’s microstructure can alter light diffusion patterns significantly, impacting perceived contrast and sharpness (see the research).
Similarly, in selecting cine lenses, many overlook focus breathing—a subtle shift in framing during focus pulls, which can distract viewers and diminish professional quality. Advanced lenses incorporate optical elements to minimize breathing, but understanding how your lens behaves in different shooting conditions is crucial. Small adjustments in aperture, distance, and focus technique can mitigate these issues, leading to more stable and cinematic shots (details here).
Do you pay close attention to these hidden factors, or do you focus solely on the specs? Recognizing these nuances can give you a significant edge in your filmmaking. Remember, mastering your craft involves understanding the tiny details that others overlook. Have you ever fallen into this trap? Let me know in the comments and share your experiences!
Maintaining your filmmaking equipment isn’t just about routine checks; it’s about investing in precise tools and adopting meticulous habits that ensure longevity and optimal performance. As technology advances, so do the tools that help us keep everything running smoothly. From gimbal calibrations to lens protection, having the right gear can make the difference between a flawless shoot and a frustrating day on set.
Why Precision Tools Are Non-Negotiable
Using dedicated support calibration tools like the graphene tripod heads or tensioners ensures your support equipment maintains perfect balance over time. These tools help you detect subtle misalignments that can cause micro-vibrations, especially crucial for high-resolution shoots where even minor jitters are visible. Personally, I rely on high-precision spirit levels and electronic tension gauges to fine-tune my support systems, because a small misalignment can snowball into significant artifacts during editing.
How do I maintain camera supports over time?
Regular calibration is key. I schedule monthly checks using digital tension meters to ensure quick-release plates and support arms are correctly tensioned. Additionally, applying quality lubricant to moving parts minimizes wear and prevents sluggishness. For example, I use a specific silicon-based lubricant recommended by support manufacturers, which prevents dirt buildup and corrosion without affecting precision. Investing in support systems with thermal damping and vibration isolation helps maintain stability in diverse environments. Upgrading to support heads with damping technology provides a noticeable reduction in micro-shake over long shoots.
Tools That Save Time and Boost Reliability
Proper cable management is often overlooked, but using magnetic cable clips and color-coded tie systems can prevent accidental disconnections or stress on connections—critical during live, high-stakes shoots. For lens care, I swear by anti-static lens cloths and ultrasonic cleaning kits; these help maintain image sharpness and prevent film grain caused by dirt. When supporting high-end cine lenses, I prefer carbon fiber supports because they combine strength with lightweight handling, reducing fatigue and accidental mishaps on location.
Anticipate Future Tools and Trends
As we look ahead, the integration of IoT (Internet of Things) devices into support equipment promises real-time diagnostic capabilities, alerting us to issues before they escalate. Imagine support systems that notify you via smartphone app about tension drops or misalignments during a shoot, allowing for immediate adjustments. Such advancements could dramatically reduce downtime and re-shoots, saving both time and money.
Conclusion: Stay Proactive, Not Reactive
The secret to keeping your gear operational lies in combining high-quality tools with a proactive maintenance routine. Don’t wait for equipment failure to intervene—regular checks with precise instruments will keep your support systems, lenses, and projectors in top shape. I encourage you to try implementing a monthly calibration routine using a digital tension gauge or support dampers—small investments that offer big dividends. For tailored advice on selecting the best tools for your setup, reach out to our support team. Mastering these details will elevate your filmmaking quality and ensure your gear lasts through countless shoots.
Over my years of working behind the camera, one lesson has consistently proven its worth: attention to the tiniest details can elevate your filmmaking from good to outstanding. The moment I realized that even a slight imbalance in my cine lens setup could compromise an entire shot was a turning point. It became clear that mastering support and balancing techniques isn’t just about equipment—it’s about precision, patience, and understanding how every component interacts to create cinematic magic.
The Hardest Lessons I Learned About Cine Lenses and Supports
- Never underestimate the power of micro-adjustments: Small shifts in support placement or lens positioning can prevent jitters and micro-shakes that ruin a shot. I once spent hours troubleshooting what I thought was camera movement, only to find an unbalanced support causing subtle vibrations. These tiny misalignments demand our focus; they’re the silent enemies of smooth footage.
- Quality tools save time and frustration: Using accurate tension gauges and damping supports might seem like an investment, but they pay off by ensuring consistent stability. I now rely on professional-grade calibration tools that allow me to catch issues early, rather than re-shoot because of avoidable jitters.
- Understand your lens’s behavior in different environments: Every cine lens reacts uniquely to temperature changes, focus breathing, and weight distribution. I’ve learned to tweak support and focus techniques on the fly, maintaining shot quality regardless of conditions. This adaptability is crucial in high-stakes shoots.
- Continuous reevaluation enhances reliability: Even after achieving perfect balance, I regularly revisit my setup during long shoots. Vibrations or shifts can occur unexpectedly. Consistent reassessment ensures sustained stability, making the difference between an amateur shot and a professional masterpiece.
- Pay attention to external factors: Cables, accessories, and ambient vibrations can subtly unbalance your rig. Securing everything tightly and distributing weight evenly is essential. Small gestures—like securing cables with clips—prevent mid-shoot surprises, keeping focus solely on capturing extraordinary visuals.
Tools and Techniques I Trust for Flawless Support
- Graphene tripod heads: These provide unmatched stability and minimize drift, especially vital for high-resolution projects.
- Heavy-duty tensioners: They allow precise adjustments and help maintain tension over long shoots, preventing micro-movements.
- Graphene-backed support pads: Perfect for managing thermal expansion and ensuring support integrity in varying environments.
- Cine lenses with minimal focus breathing: Essential for smooth focus pulls without distracting framing shifts, especially during dynamic shots.
Your Turn to Tackle Support Mastery
My journey with support and balance has taught me that precision isn’t just a technical skill—it’s a mindset. Whether you’re working with lightweight gimbals or heavy cine lenses, embracing meticulous support techniques can dramatically improve your footage quality and equipment longevity. I challenge you to give your gear a fresh look—reassess your balances, invest in better tools, and see the difference it makes in your storytelling.
Have you ever struggled with balancing a cine lens on a compact support system? Share your experiences below, and let’s learn from each other’s adventures in pursuit of cinematic perfection!
About the Author
James Duke
ThinkOTS
James Duke is a seasoned professional in the creative production industry, bringing a wealth of technical knowledge and hands-on experience to cinegearguide.com. As a key figure at ThinkOTS, James has spent years navigating the complexities of high-end production environments, where selecting the right equipment is the difference between a successful shoot and a logistical failure. His expertise spans the full spectrum of cinematography gear, from advanced camera systems to the intricate accessories that define modern filmmaking. On cinegearguide.com, James leverages his deep understanding of the industry to provide authoritative insights, gear reviews, and technical guides. He is known for his ability to break down complex specifications into practical, actionable advice for filmmakers of all levels. His perspective is rooted in the real-world application of technology, ensuring that every recommendation is backed by professional standards. James is dedicated to empowering the filmmaking community by sharing his expertise, helping others navigate the ever-evolving landscape of cinema technology with confidence and clarity.
LinkedIn ProfileRelated Posts
3 Carbon-Fiber Sliders for Smooth 16K Tracking in 2026
I'll never forget that moment behind the camera when my…
The Real Reason Your Gimbal Motors Hum During Slow Moves
Ever been in the middle of a perfect shot, slowly…
![4 Auto-Leveling Tripod Spreaders for 16K Desert Shoots [2026]](https://cinegearguide.com/wp-content/uploads/2026/03/4-Auto-Leveling-Tripod-Spreaders-for-16K-Desert-Shoots-2026.jpeg)
4 Auto-Leveling Tripod Spreaders for 16K Desert Shoots [2026]
I remember the first time I set up my gear…