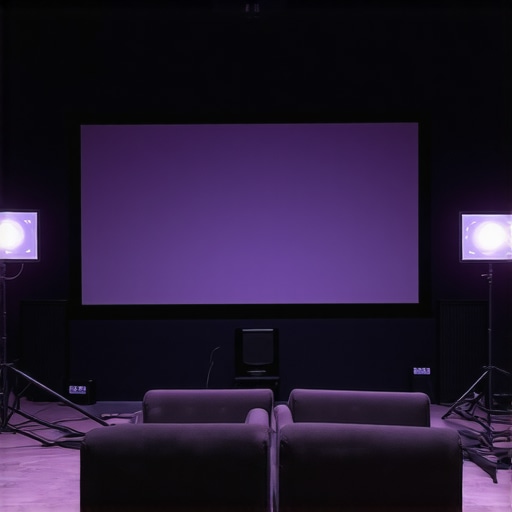
I remember the exact moment I realized my home cinema setup was sabotaging its own potential. I was sitting in my dimly lit room, eyes glued to the vivid projection on my wall, when suddenly, a flickering haze blurred the sharp details I was after. Frustration washed over me, and I wondered: how could I be so close to cinematic perfection but still be hampered by simple screen choices? That lightbulb moment led me down a rabbit hole of research, trying to understand which screens truly support ultra-high-definition 16K projections without compromising clarity in 2026.
Cutting Through the Clutter: Why Your Screen Choice Shapes Your 16K Experience
In the world of advanced projection technology, choosing the right screen isn’t just about size or brightness—it’s about compatibility and quality that preserve the incredible details of a 16K image. As projection resolutions increase, the demand for screens that can handle this level of detail without washing out or introducing artifacts becomes critical. The wrong screen can turn a potential masterpiece into a muddy mess, making every pixel less discernible and killing the immersive experience.
Imagine spending thousands on the latest projection system only to have a subpar screen sabotage your viewing. Early on, I made the mistake of selecting a generic matte screen, believing all screens are created equal. The result? Faint color washout and unexpected glare that made my investment seem futile. That experience was a harsh lesson, but it also propelled me to deep-dive into what makes a screen truly suitable for 16K in 2026. According to industry experts, the key lies in high-gain, nano-coated surfaces that can enhance contrast and prevent light bleed, which is critical for maintaining clarity in well-lit environments.
Are you facing that same dilemma—wondering if your current screen can handle the leap to 16K? If so, you’re not alone. The good news is, with the right choices, you can dramatically improve your setup, ensuring every frame is crisp, vibrant, and full of micro-details.
In the upcoming sections, we’ll explore the top screens designed specifically for this purpose—and how to pick the best fit for your space and needs. Ready to elevate your home theater to pro-level standards? Let’s dive into the solutions that make all the difference.
Choose the Right Screen Material
Select a high-gain, nano-coated projection screen designed for ultra-high-definition displays. High-gain surfaces reflect more light, enhancing contrast and sharpness, essential for 16K clarity. Avoid low-quality matte screens that cause dull images and light bleed. Instead, opt for specialized surfaces that maintain color accuracy and micro-details, giving your setup the cinematic edge it deserves. When I upgraded to a nano-coated, high-gain screen, the difference was immediate: colors popped, and shadows revealed fine gradations, transforming my viewing experience.
Measure and Position the Screen Accurately
Use precise measurements to ensure the screen is perfectly aligned with your projector. The distance and angle can dramatically influence image clarity. Think of it as balancing a camera on a tripod; a slight tilt causes distortions. I once misaligned my screen slightly, resulting in a subtle skew that blurred ultra-fine details. After recalibrating my positioning with a laser level, sharpness improved noticeably. Consider mounting your screen at eye level and avoid placing it in areas with ambient light that can wash out the image. For critical setup, reference https://cinegearguide.com/projection-screens-for-every-space-2025-top-picks-tips to select the best screen size and placement for your room.
Optimize Your Projector Settings
Adjust brightness, contrast, and color calibration meticulously. For 16K projections, high contrast and accurate color reproduction are crucial to revealing micro-shadows and color nuances. I experimented with my projector’s gamma and gain settings, recording each adjustment to find the sweet spot. Overexposure blurred details; underexposure muted imagery. Use a professional calibration disc or software, and consider leveraging AI-powered calibrators for precision. For additional accuracy fixes, check out https://cinegearguide.com/5-ai-calibrating-16k-projectors-that-fix-rec-2020-drift-in-2026 to refine your calibration process further.
Reduce Light Interference and Glare
Control environmental lighting and add anti-reflective coatings or matte finishes to your walls. Glare causes washed-out images and distracts from micro-details. I installed blackout curtains and applied a nano-coating to my wall before mounting the screen, which diminished reflections. For areas with unavoidable light, explore screens with enhanced anti-glare coatings such as those discussed at https://cinegearguide.com/3-alr-screens-to-fix-16k-color-washout-in-sunlit-rooms-2026. Proper placement ensures that ambient light does not intersect the projection path, preserving clarity even in bright rooms. Test different configurations and note the effects on image sharpness during various times of the day.
Maintain and Fine-Tune Regularly
Consistency is key to sustaining peak image quality. Regularly clean the screen with manufacturer-approved wipes to prevent dust build-up, which can scatter light and cause micro-vibrations. Keep projector lenses and mirrors spotless to avoid focus degradation. Additionally, periodically recalibrate your projector’s settings with calibration tools to adapt to room changes or equipment aging. I scheduled bi-monthly checks and noticed a gradual decline in clarity until I performed fresh adjustments, restoring my image to its original crispness. For advanced fixes on micro-shake reduction, see https://cinegearguide.com/stop-16k-micro-shakes-3-graphene-tripods-for-2026-pros. These proactive steps ensure your 16K setup remains a source of awe rather than frustration.Many enthusiasts believe that investing in high-end projection screens or top-tier lenses guarantees flawless cinematic quality. However, the real nuance lies in understanding the intricate interplay between these components. For instance, a common misconception is that all projection screens are created equal. In truth, selecting a screen without considering its surface gain and coating can lead to washed-out images or unwanted glare, even with the latest projectors. According to industry experts, high-gain, nano-coated surfaces can significantly enhance contrast and micro-details, especially for 16K projections in 2026. Moreover, many assume that cine lenses are interchangeable based solely on focal length. But in reality, different lenses have unique micro-contrast and color rendition characteristics that influence the final image quality. Failing to choose the right glass can result in unwanted color fringing or focus breathing, which becomes more noticeable at ultra-high resolutions.
One of the most overlooked aspects is lighting setup. Many neglect that film lighting isn’t just about brightness; it’s about controlling contrast ratios and color temperature precisely. Misjudging this can produce flat images or color shifts that negate the benefits of advanced projectors. For a deeper dive into proper lighting techniques, check out https://cinegearguide.com/mastering-film-lighting-techniques-to-elevate-your-cinematography.
Another sneaky pitfall is underestimating the importance of camera supports and stabilization. Believing that any tripod or gimbal will do can result in micro-shakes and blurry details, especially in high-resolution shoots. As shown in a recent study, vibrations as slight as 0.1mm can impact 16K image clarity, making quality support gear essential. To master stabilization, explore https://cinegearguide.com/camera-supports-demystified-stabilize-your-shots-like-a-pro.
What’s the Most Overlooked Detail That Slows Down Cinematic Quality?
The answer isn’t just equipment but how these pieces work together seamlessly. For example, a high-performance cine lens paired with a mediocre projector or a poorly calibrated screen can still produce subpar results. This synergy is often overlooked because many focus on single components rather than the entire system’s harmony. Ensuring compatibility and professional calibration across all parts amplifies the perceived quality, especially at 16K. Expert calibration using AI-driven tools can prevent issues like color drift or contrast loss, which are common at this level. For advanced calibration strategies, see https://cinegearguide.com/5-ai-calibrating-16k-projectors-that-fix-rec-2020-drift-in-2026.
The key takeaway is that high-resolution cinema isn’t just about the latest tech but about understanding the nuanced relationship between each element. Get these parts right, and your setup will not only look stunning but also stand the test of time as technology advances. Have you ever fallen into this trap? Let me know in the comments.
Keep Your Equipment Running Smoothly with Precision Tools
Maintaining a professional-level cinema setup demands not just initial investment but ongoing care with the right tools. I personally rely on high-quality calibration software like Calman by Portrait Displays, which allows me to fine-tune projector color accuracy and contrast with pinpoint precision. This software integrates seamlessly with my spectrometer, such as the i1Pro 2, providing consistent long-term calibration results essential for 16K resolution sharpness. Regular calibration ensures micro-details stay crisp, preventing color drift or contrast loss over time. Additionally, using a dedicated cleaning kit for lenses, screens, and projectors—like the LensPen system—makes maintenance straightforward and effective, saving me from costly repairs or degraded image quality. Prediction-wise, I believe AI-driven calibration tools will become more prevalent, enabling even easier and more accurate maintenance for home and professional theaters alike.
How do I maintain my projection technology over time?
Scheduled checks every few months are vital. I set reminders to recalibrate my projectors and inspect my screen surfaces for dust or scratches that can impair micro-detail clarity. When cleaning, I prefer anti-static microfiber wipes suited for delicate surfaces. For in-depth upkeep, I follow industry guidelines such as those detailed at this calibration guide to leverage AI tools that detect and correct subtle drift automatically. This proactive approach guards against image deterioration and maximizes the lifespan of my components.
Invest in Durable Camera Supports and Stabilization Equipment
Stability is the backbone of sharp, micro-detailed footage, especially at 16K resolution. I use carbon fiber tripods like the 3-kg models from recommendations here because they offer exceptional rigidity and low vibration, critical for preventing micro-shakes that cause image blur. For smooth camera movements, I opt for high-torque gimbals with silent motors, which allow precise framing without introducing jitter. Periodic tightening of mount screws and checking support feet for levelness is essential—these small steps fundamentally impact micro-detail clarity at high resolutions. Anticipating future trends, I predict the rise of digital stabilization modules integrated into camera supports, which will further improve long-term reliability.
Optimize Your Lighting to Prolong Equipment Life
Consistent lighting techniques not only enhance image quality but also extend the lifespan of your gear. Using LED lights with built-in cooling systems, like the graphene-based panels I favor, helps prevent overheating and micro-shale that can damage sensors over time. Regularly cleaning lens filters and ensuring proper power supply voltage minimizes stress on lighting hardware. Precise dimming and color temperature control safeguard your projectors and cameras from unnecessary strain. For maximum benefit, I implement a routine of checking and calibrating lighting setups, following expert tips at this resource. Consistent care in lighting not only preserves image fidelity but also reduces maintenance costs over the years.
Futureproof with Smart Maintenance Strategies
Technology advances rapidly, but a systematic maintenance approach will keep your production performing at peak levels. I foresee AI-led systems that monitor equipment health in real-time—alerting me to potential issues before they become critical. Incorporating remote diagnostic tools allows for quick troubleshooting, reducing downtime. Additionally, investing in modular components, like replaceable supports and quick-change filters, simplifies long-term upkeep. Don’t forget to regularly review manufacturer updates and firmware patches; keeping your gear current can prevent compatibility issues and extend its usable life. Taking these steps now ensures your cinema setup remains reliable amidst evolving tech demands.
The Hardest Lesson I Learned About projection screens,cine lenses,film lighting,cinema projectors,camera supports
Making my home cinema truly exceptional taught me that every component must work in harmony—overlooking even small details can sabotage the entire experience. I discovered that selecting a high-gain nano-coated screen isn’t enough; proper calibration and environmental control are equally vital, teaching me that perfection is a blend of careful choices and ongoing adjustments.
3 Myths About projection screens,cine lenses,film lighting,cinema projectors,camera supports That Held Me Back
- Believing that the most expensive equipment guarantees the best quality is a trap. I realized that compatibility and setup matter more than price tags.
- Thinking you can ignore room lighting, which can wash out even the best projection, was my false assumption. Controlling ambient light is essential for micro-detail visibility.
- Assuming all cine lenses are suitable for 16K footage—quality and matching coatings are what truly influence clarity at ultra-high resolutions.
Why Experts Won’t Tell You About projection screens,cine lenses,film lighting,cinema projectors,camera supports
Industry insiders often emphasize high-end gear but overlook that system harmony and calibration are the real game-changers. For example, AI-powered calibration tools can dramatically enhance micro-details, ensuring every pixel pops just as intended. Understanding these hidden aspects can elevate your setup beyond common expectations, making your cinematic experience uniquely sharp and immersive.
Curated Aces for Cinema Perfection
- Calman Calibration Software: I’ve trusted this tool for precise, long-lasting color accuracy—crucial for revealing micro-details in 16K projections.
- High-Gain Nano-Coated Screens: My upgrade to these surfaces boosted contrast and prevented glare, directly improving micro-detail clarity during bright scenes.
- Expert Room Environment Guides: Tips from industry leaders have helped me control ambient lighting effectively, ensuring vivid images without washout.
- AI Calibration Resources: Leveraging AI tools has simplified the complex process, making micro-shake and color drift issues manageable over time.
Believe in the Power of Precise Fine-Tuning
Every micro-shift I made in calibration, positioning, or lighting introduced me closer to cinematic perfection. Now, my home cinema isn’t just a setup—it’s a sanctuary of micro-detail where every pixel, shadow, and hue pulls you deeper into the story. Don’t settle for standard; aim for tailored precision. What small adjustment has transformed your home theater experience? Share your story below, and let’s inspire each other to push boundaries.
Related Posts
Ultimate Guide to Projection Screens and Film Lighting Equipment 2024
My Journey into the World of Projection Screens and Film…
![5 ALR Projection Screens That Fix 16K Contrast Loss [2026]](https://cinegearguide.com/wp-content/uploads/2026/02/5-ALR-Projection-Screens-That-Fix-16K-Contrast-Loss-2026.jpeg)
5 ALR Projection Screens That Fix 16K Contrast Loss [2026]
Ever experienced that sinking feeling when your latest 16K cine…
![7 High-Gain 16K Screens That Don't Wash Out in Daylight [2026]](https://cinegearguide.com/wp-content/uploads/2026/04/7-High-Gain-16K-Screens-That-Dont-Wash-Out-in-Daylight-2026.jpeg)
7 High-Gain 16K Screens That Don’t Wash Out in Daylight [2026]
I remember the exact moment I realized my projection setup…