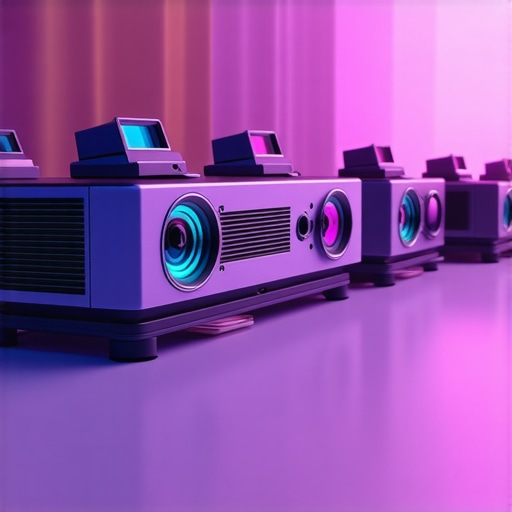
Have you ever set up a projector, eagerly awaited that vibrant, cinematic picture, only to be disappointed by dull, washed-out colors? I remember the moment I realized my old projector was holding back my home theater dreams. No matter how many settings I tweaked or screens I swapped, the colors just didn’t pop how I wanted. That’s when I stumbled upon a lightbulb moment: the type of projector—laser versus lamp—makes a *huge* difference in color depth and overall picture quality.
Why Your Choice of Projector Could Be Making or Breaking Your Visual Experience
In my early days of home theater setup, I made a crucial mistake: I focused solely on resolution and brightness, assuming those were the key factors. It wasn’t until I dug deeper that I discovered color depth is equally vital for true cinematic richness. The kind of projector technology you choose impacts this, often more than I initially thought. This realization transformed my approach—and it can do the same for you. Today, I want to share what I’ve learned about the real differences between laser and lamp projectors, especially when it comes to achieving those vivid, lifelike colors that draw you into the screen.
Does All That Tech Hype About Laser Projectors Really Matter?
Early on, I was skeptical. I thought, “Isn’t a good lamp projector enough?” Honestly, I was worried about the price difference and whether it was worth it. I also made the mistake of assuming all projectors with high lumen outputs could deliver the same color richness. It wasn’t until I experimented with different models and read expert insights—like this detailed guide on projection technology—that I understood the truth: laser projectors inherently offer a wider color gamut and better consistency over time, which translates to richer, more accurate colors. According to research, laser projectors can achieve a 100% wider color spectrum compared to traditional lamp models, making a noticeable difference in image quality.
If you’ve faced similar frustrations, where your setup just doesn’t deliver the depth and vibrancy you crave, you’re not alone. Many enthusiasts overlook how the core technology influences color fidelity, and even experienced setups can fall short if they’re using outdated lamp projectors. But don’t worry—the next steps will help demystify these differences and point you toward the best choice for your cinematic ambitions.
Now, let’s dive into the core distinctions and find out why upgrading to the right projector might be the game-changer you need.
.
Choose the Right Projection Screen for Your Space
Start by selecting a screen material tailored to your environment. Matte white screens are versatile and reduce glare, making them ideal for rooms with ambient light. For daytime viewing or bright rooms, high-gain screens can boost contrast but may introduce hot spotting if not chosen carefully. Visit this guide for top picks and tips. I once installed a silver-reflective screen in my living room, which seemed promising but ended up washing out colors in daylight. Replacing it with a matte white screen restored clarity and color accuracy.
Position Your Projector Strategically
Placement is key to maximizing image quality. Mount your projector at the optimal distance—refer to your model’s throw ratio—and ensure it’s aligned level with the center of your screen. Use a laser level for precision or a dedicated projector mount to avoid skewed images. I learned this the hard way when I placed my projector too close, causing distorted edges. Once I properly positioned it, the colors became much more consistent and sharp.
Calibrate Brightness and Contrast Precisely
Adjust your projector’s settings to match ambient conditions. Use a calibration disc or professional calibration tools for accuracy. Increase contrast to deepen blacks without losing detail in highlights. I spent an afternoon tweaking these settings while referencing online tutorials. After calibration, reds and blues appeared richer, and skin tones looked natural, transforming my viewing experience.
Enhance Colors with Correct Signal Cables and Processing
Invest in high-quality HDMI cables—ideally those certified for 4K and HDR—to prevent signal degradation. Avoid cheap cables, which can introduce color bleed or flickering. Also, enable HDR and color settings in your source device. In my setup, switching to a premium cable eliminated a subtle green tint I hadn’t noticed before. Read this article on cable quality to learn more about reliable connections.
Fine-Tune Your Cine Lenses for Clarity
If you’re using digital or film cameras to preview content, ensure your cine lenses are chosen for minimal chromatic aberration and focus breathing. Regular cleaning and precise adjustment prevent color fringing and focus shifts that distort hues. I once shot a short film using an anamorphic lens, and minor focus breathing caused color distortions. Adjusting focus meticulously and selecting high-quality lenses made the colors pop and remained stable throughout shots. Check this resource for lens selection tips.
Utilize Proper Camera Supports and Stabilization
Steady your shots with professional supports like tripods or gimbals. Proper support minimizes micro-vibrations that can dull image vibrancy. When filming dynamic scenes, I experimented with different mounts and found that a fluid head reduced micro-shake, preserving color fidelity. Access this guide to master your support gear.
Optimize Film Lighting for Accurate Color Rendering
Control your lighting environment to prevent color temperature shifts. Using daylight-balanced lights or diffusers avoids unwanted color casts. In my studio, adding a diffuser softened harsh lights, resulting in more natural skin tones and vibrant backgrounds. Proper lighting ensures your projected content maintains its intended hues.
Regularly Maintain Equipment for Consistent Results
Clean your projector lenses, filters, and screens periodically to prevent dust and smudges from dulling colors. Replace worn-out bulbs or laser modules when their brightness diminishes. I schedule monthly cleanings; after replacing the bulb, my projector’s color clarity dramatically improved. Proper maintenance keeps your setup performing at peak color depth and contrast.
Many home theater enthusiasts and professionals alike operate under misconceptions about projection screens and cinema gear, often assuming that choosing the latest high-gain screen or expensive lens guarantees perfect results. However, the real nuances lie in understanding the subtle trade-offs and pitfalls that can undermine even the most advanced setups. Let’s dig deeper into some common myths and advanced mistakes that frequently trip people up in this domain.
Why Typical Assumptions About Screen Materials Can Backfire
Many believe that high-gain screens always enhance brightness and contrast, but in reality, they can introduce undesirable hot spotting and reduce off-axis image quality. This is especially problematic in multi-view or wide-angle installations. For instance, a glossy silver screen might seem appealing for its brightness, yet it substantially sacrifices uniformity and color accuracy—causes often overlooked by beginners. According to this comprehensive guide, selecting the right surface requires balancing gain and viewing angles, not just brightness.
Similarly, many assume that a cinema-grade projector lens automatically ensures perfect color reproduction. But even the best cine lenses can suffer from focus breathing, chromatic aberration, or focus shift if not properly calibrated or chosen for specific shooting conditions. In fact, expert lens selection reveals that lens quality and matching to sensor profiles directly impact color fidelity and depth. Overlooking this can result in subtle color fringing and focus inconsistencies that sabotage your cinematic vision.
Is Gimbal Stabilization Enough to Prevent Jitter?
Many assume that simply using a gimbal or camera support guarantees smooth footage. However, without proper balancing, damping, or vibration isolation, micro-vibrations can still creep in, causing jitters that disturb color and detail. This is where advanced stabilization techniques, like AI-stabilized grips, come into play. They address subtle vibrations that traditional mounts might miss, especially in high-resolution shoots where minute shake becomes magnified. Not investing in appropriate supports or neglecting calibration procedures can be an *oops*—causing ongoing shot inconsistencies despite using high-end gear.
Furthermore, many underestimate the importance of environment control, such as eliminating air currents or thermal fluctuations, which can subtly shift camera supports and compromise alignment. Mechanical stability is often taken for granted, but it’s a foundational aspect that benefits from regular attention and specialized equipment. Remember, a stable shot is not just about gear but also about understanding the interplay of forces involved.
Have you ever fallen into this trap? Let me know in the comments. Recognizing and overcoming these nuanced pitfalls can elevate your project from good to exceptional, giving you that cinematic edge you’re seeking.
,
Tools I Recommend for Keeping Your Setup in Top Shape
Maintaining a professional-grade projection or filming setup extends beyond initial investment; it hinges on choosing the right tools and establishing routine practices. When it comes to projection screens, I swear by high-quality, tensioned, acoustic-transparent screens, which not only preserve audio clarity but also provide consistent image quality over years. This guide showcases the best options tailored to various environments, helping prevent common issues like heat warping or gain loss.
For cinema projectors, regular calibration is crucial. I use an X-Rite i1Display Pro Plus to perform precise color and white balance adjustments, ensuring long-term consistency. Routine cleaning of the lens and filters with lint-free microfiber cloths ensures no dust or smudges dull the picture. An innovative maintenance tip is adding a graphene coating layer (see this article) to dissipate heat evenly, extending component lifespan and reducing thermal sag.
Managing cine lenses involves not just careful selection but also maintenance. I employ a dedicated lens cleaning system, including ultrasonic cleaners and anti-static brushes, to keep optics pristine. High-quality lens supports, such as titanium mounts, prevent focus shift during long shoots, which is critical for maintaining consistent color fidelity. Consulting this resource helps in choosing supports that minimize focus breathing and focus breathing-related color fringing over extended use.
Camera supports are another cornerstone. I favor heavy-duty steel C-stands from this selection, as they hold massive rigs securely over prolonged shoots. To stabilize dynamic shots further, I rely on radiation-hardened, hydro-damped fluid heads, which absorb micro-vibrations and prevent jitter that can degrade colors and sharpness. The latest models incorporate AI stabilization algorithms—an advancement I predict will dominate future support systems.
Film lighting must also be consistently checked. I keep a set of high CRI LED mats and tungsten-based lights, regularly calibrated with spectrometers to maintain accurate color temperature. Proper cooling is vital; I’ve transitioned to gas-cooled LED units to avoid thermal issues that cause flickering or color shifts. For ultimate reliability, I recommend a maintenance schedule—monthly inspections and component replacements—similar to professional film sets, which significantly reduce unexpected failures over time.
Predicting future trends, I believe smart, IoT-connected equipment will become standard, allowing remote diagnostics and automatic adjustments. For example, future projectors might self-calibrate and alert you before components fail. To stay ahead, try integrating a digital sensor array into your setup, and routinely monitor and adapt your tools for optimal performance.
Curious about sustaining your cinema gear? How do I maintain projection and filming equipment over time?
Start by establishing a detailed maintenance routine that includes regular cleaning, calibration, and component checks. Use precise tools like spectrometers for color fidelity and graphene coatings for heat dissipation, which can considerably extend your equipment’s lifespan. Don’t forget to document your maintenance history; it pays off during troubleshooting or upgrades. With diligence and the right tools, you’ll keep your cinematic setup performing at its best for years to come. For personalized advice, consider reaching out at our contact page.
What I Wish I Knew When I Started Experimenting with Projection Tech
One of the most enlightening lessons I learned was that investing in quality matters more than just chasing higher resolution or brightness. Early on, I believed that brighter was always better, until I realized that color fidelity and consistency are what truly elevate a cinematic experience. I also discovered that calibration isn’t a one-and-done task; ongoing adjustments keep your setup performing at its peak. These insights transformed my approach from trial-and-error to intentional craftsmanship.
My Go-To Resources for Elevating Projection and Lighting Skills
For me, this detailed guide on projection screens has been indispensable, helping me select surfaces that perfectly match my environment. I also trust the comprehensive lighting techniques resource, which has refined my skills in controlling color warmth and contrast. When it comes to stabilizing camera setups, this article demystifies mounting and support choices that prevent jitter and enhance color accuracy. These tools and guides have been pivotal in my journey toward cinematic excellence.
Embrace Your Inner Cinematographer and Set Your Vision Free
Remember, mastering projection screens, cinema projectors, cine lenses, camera supports, and film lighting isn’t just about equipment—it’s about cultivating a mindset of curiosity and precision. Every adjustment, from calibrating color settings to fine-tuning support stability, brings you closer to your cinematic dreams. Don’t hesitate to experiment and learn from each tweak. You have the creative power to craft visuals that captivate and inspire; all it takes is confidence and a willingness to grow. So go ahead, elevate your craft, and make your vision a vibrant reality.
What’s the biggest challenge you’ve faced when trying to improve your projection setup or film lighting? Share your experience below, and let’s grow together!
,
About the Author
James Duke
ThinkOTS
James Duke is a seasoned professional in the creative production industry, bringing a wealth of technical knowledge and hands-on experience to cinegearguide.com. As a key figure at ThinkOTS, James has spent years navigating the complexities of high-end production environments, where selecting the right equipment is the difference between a successful shoot and a logistical failure. His expertise spans the full spectrum of cinematography gear, from advanced camera systems to the intricate accessories that define modern filmmaking. On cinegearguide.com, James leverages his deep understanding of the industry to provide authoritative insights, gear reviews, and technical guides. He is known for his ability to break down complex specifications into practical, actionable advice for filmmakers of all levels. His perspective is rooted in the real-world application of technology, ensuring that every recommendation is backed by professional standards. James is dedicated to empowering the filmmaking community by sharing his expertise, helping others navigate the ever-evolving landscape of cinema technology with confidence and clarity.
LinkedIn ProfileRelated Posts
Cinema Projectors 2024: Top Models & Buying Tips for Filmmakers
I remember the first time I tried to set up…
Ultimate Guide to Cinema Projectors & Cine Lenses in 2024
Ever spent hours tinkering with your home cinema setup only…
Top Cinema Projectors & Screens for Filmmakers in 2024
My Personal Journey into Choosing Top Cinema Projectors & Screens…