Ever spent hours tweaking your lighting setup only to end up with skin tones that look unnatural—either too yellow, too blue, or just off? I remember those frustrating nights, staring at my monitor, convinced I missed some secret formula. It felt like chasing a mirage, adjusting one dial after another, hoping for that perfect, lifelike glow. One evening, it clicked—what if the secret wasn’t in complicated presets or filters, but in understanding how to harness the true potential of bi-color LED mats? The breakthrough came when I realized that the right blend of warm and cool lights can mimic natural skin tones surprisingly well, if you know how to set them up correctly.
Why Getting Skin Tones Right Might Just Save Your Project
Lighting is the unsung hero of a compelling visual story. When skin tones are vibrant yet realistic, viewers connect emotionally; when they’re off, your audience gets distracted or even confused. As someone who’s worked in various setups—from intimate interviews to bustling film sets—I can tell you that the challenge isn’t just in choosing the right lights but in mastering how to make them work together seamlessly. Modern high-CRI LED mats are game-changers, offering the flexibility to fine-tune skin hues on the fly. But, without proper knowledge, it’s easy to fall into common traps that ruin the shot.
Are You Falling for the Hype of Bi-Color LEDs?
When I first started, I made the mistake of assuming that just having a bi-color panel meant I was set. Turns out, not all bi-color lights are created equal. I learned this the hard way—by uneven skin tones, unbalanced color temperatures, and worst of all, wasting time on post-production color grading that could have been avoided. The key isn’t just in the equipment, but in understanding how to manipulate its settings correctly for skin tones that look natural and inviting. Curious if you’ve faced similar struggles? Don’t worry—you’re not alone. Many professionals still underestimate the importance of precise control over these versatile lights.
To truly master the art, I dug into expert techniques, which you can explore in-depth at this comprehensive guide. Next, let’s break down the biggest doubts and fears surrounding this topic—especially whether the hype about bi-color LED mats is justified or just another passing trend.
,
Set Your Baseline Color Temperature
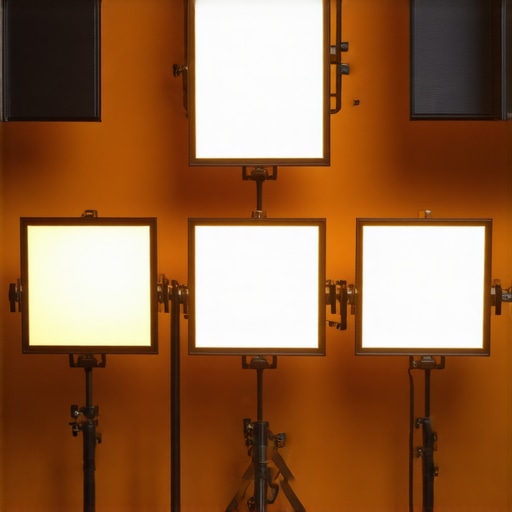
Begin by establishing a neutral baseline—around 5600K—to match daylight conditions, which serves as a reference point for adding warmth or coolness. I once film-tested this setup on a chilly winter morning; setting the LED mats to daylight balance, then gradually dialing in the warmth, resulted in skin tones that looked natural without excessive editing.
Adjust Warm and Cool Lights Independently
Leverage the bi-color feature to fine-tune each mat separately. Position warm LED mats on one side of the subject, focused on skin areas that need a gentle glow, and cool mats on the opposite to counterbalance unnatural shadows. This technique echoes the way a photographer uses reflectors to sculpt light; it gives you manual control over the subtle nuances of skin hue.
Match Skin Tones to Ambient Light
Observe your environment’s ambient lighting. If shooting indoors under tungsten lights, increase the warm LED mat setting to around 3000K; for daylight scenes, stay close to 5600K. During a recent interview shoot, matching my LED mats to window light prevented the skin from appearing washed out or off-color—saving hours in post-production.
Use Color Gels for Final Tuning
If your LEDs lack precise color control or your scene demands specific hues, apply color correction gels. Think of it as a painter adding a final glaze—the gels allow a layer of refinement that pure LED adjustment can’t always achieve. In a shoot with mixed lighting conditions, this extra step solidified the natural appearance of skin tones consistently.
Test and Confirm with a Calibrated Monitor
Always verify your adjustments on a high-quality, calibrated monitor. I remember a shoot where I trusted my LED mats blindly; only after reviewing the footage on a reference monitor did I notice a subtle yellow tint. Fine-tuning while cross-referencing ensures your scene’s skin tones are true-to-life, reducing the need for corrective color grading later. This method aligns with the practice of checking projected images on calibrated screens for accurate color judgment. For more tips on mastering your lighting setup, visit this guide.
Document Your Settings for Consistency
Maintain a detailed log of each lighting setup, including color temperatures, dimmer levels, and gel placements. Doing so saved me from guessing during subsequent shoots, ensuring consistency across scenes, much like locking down camera settings during a multi-day shoot. Over time, this practice helps develop an intuitive sense of how to adjust bi-color LEDs for any skin tone challenge that arises, making your lighting more predictable and professional.
While many assume that understanding the basics of cine lenses, lighting, or supports suffices for professional filmmaking, the reality is far more intricate. One common myth is that all macro lens designs perform equally under cinematic conditions. However, subtle differences in lens element arrangement, coating quality, and manufacturing tolerances can significantly impact image consistency and character. For instance, a seemingly minor variation in internal element alignment can cause micro-shifts in focus breathing or chromatic aberration—issues that become glaring in high-resolution digital workflows. According to industry experts like professionals at CineGear Guide, the devil is in the details, and mastering these nuances can elevate your craftsmanship from good to exceptional.
Are You Falling for the Oversimplification of Film Lighting?
Many believe that a standard three-point lighting kit guarantees cinematic quality, but in my experience, relying solely on basic setups neglects atmospheric and psychological effects achieved through nuanced lighting tweaks. An overlooked detail is how subtle shifts in color temperature or the angle of a floodlight shape the mood, depth, or realism of a scene. Misapplying this understanding leads to flat images or unconvincing skin tones, which is a common pitfall. Advanced filmmakers often emphasize controlling falloff gradients and color bleed—subtleties that profoundly influence storytelling and audience immersion. For a deep dive into mastering lighting techniques, explore this comprehensive guide.
Camera Supports: How Slight Adjustments Can Save Your Shoot
It’s tempting to think that affordable or lightweight supports are just for convenience, but overlooking their limitations can cause disastrous instability during critical shots. An often unnoticed nuance is the importance of precise counterbalancing and damping, especially when using heavy cine prime lenses or accessories. For example, micro-adjustments in support height or tightness can eliminate jitter and micro-vibrations, ensuring smooth, professional footage. I learned this the hard way when a small wobble ruined a time-sensitive interview. Investing in high-quality supports and understanding their mechanics—like the tips outlined here—makes all the difference.
Projection Screens and Their Impact on Image Fidelity
Many assume that screen material and gain are the only factors that matter, but the real nuance lies in the combination of surface texture, ambient lighting control, and viewing angle. A common mistake is selecting a high-gain screen that causes hot-spotting or off-axis brightness reduction, confusing many to think they need more lumen output. In reality, the wrong choice degrades contrast and color accuracy, especially in multi-viewing environments. The expert consensus suggests prioritizing matte white or carefully engineered surface fabrics—like those discussed in this article—to optimize image quality without costly upgrades.
Why Cinema Projectors’ Light Spectrum Matters More Than Lumens
Finally, many underestimate the importance of the projector’s spectral output over sheer brightness. A projector with higher lumens but poor color rendition can produce washed-out images, damaging the intended cinematic palette. Lately, there’s increasing research indicating that LED or laser-based projectors, which offer broader and more accurate color gamuts, better serve high-fidelity cinema presentations. Industry leader this guide emphasizes assessing spectral characteristics alongside luminosity for an optimal setup. Remember, the goal isn’t just a bright image; it’s a true-to-life, immersive experience.
Uncovering these subtle truths can save time, budget, and elevate your work’s cinematic quality. Have you ever fallen into this trap of oversimplification? Let me know in the comments.
,
Maintaining your cinematography tools is crucial to ensuring consistent performance and prolonging their lifespan. From camera supports to projection systems, each component requires specific care routines and reliable tools to keep them operating at peak efficiency. An investment in proper maintenance tools not only saves money in the long run but also helps you deliver professional-quality results on every shoot.
Essential Tools for Long-Term Equipment Care
One of my go-to equipment maintenance tools is the Energizer Rechargeable Battery Tester. I rely on it to monitor the health of my batteries for wireless systems and LED lights, preventing unexpected failures during critical shoots. Additionally, a high-quality set of rubber mallets and calibrated torque wrenches are indispensable when securing supports or camera rigs—ensuring stability without risking damage through over-tightening.
For cleaning delicate optics like cine lenses or projection screens, I prefer specialized breath blowers and microfiber cloths. The lens cleaning kits I use include anti-static treatment and gentle cleaning solutions, which safeguard coatings and prevent micro-scratches. Moreover, investing in a professional-grade ultraviolet (UV) sterilization wand is increasingly valuable to keep shared equipment hygienic, especially during prolonged shooting schedules.
Software Tools for Equipment Management
Beyond physical tools, digital solutions greatly enhance maintenance routines. I use Asset Management Software like CineGear’s Asset Tracker to log calibration dates, support history, and replacement schedules for all gear. Setting up reminders for routine checks—such as inspecting support tripods, recalibrating monitors, or testing wireless links—reduces the risk of equipment failure mid-shoot.
Applying software alerts for firmware updates ensures your devices remain compatible and protected against security vulnerabilities. Keeping firmware current can fix bugs that lead to unpredictable behavior, especially in complex setups involving multiple support systems or projection interlocks.
Anticipating Future Trends in Equipment Maintenance
As technology advances, I predict that remote diagnostics and AI-powered predictive maintenance will become standard. Imagine receiving real-time alerts on your smartphone about gear that’s showing early signs of wear, allowing preemptive repairs or replacements. Staying ahead of these trends enables you to minimize downtime and maintain a competitive edge.
What steps can you take now to keep your gear working flawlessly in the long run?
Start by establishing a regular maintenance schedule tailored to each piece of equipment, leveraging both physical tools and management software. Incorporate routine inspections—like checking support tension, lens cleanliness, and monitor calibration—and document everything meticulously. Remember, a little proactive effort today prevents costly repairs tomorrow and ensures your tools perform when it matters most.
For advanced maintenance techniques, I recommend trying the method outlined in this guide—specifically, establishing a calibration routine that includes ambient light considerations. Don’t overlook the importance of your equipment’s condition; it directly impacts your final image quality and operational reliability.
Keep your gear in top shape, and your creative possibilities are virtually limitless. Have you integrated any innovative maintenance routines or tools into your workflow? Share your experiences and tips in the comments!
Lessons Only Experience Can Teach About Lighting and Support Tricks
- One of my biggest revelations was realizing that perfect skin tones aren’t just about choosing the right lights but understanding how to combine them dynamically. It’s a personal journey that requires patience and experimentation, often revealing hidden nuances that software alone can’t fix.
- I underestimated the importance of regularly inspecting camera supports until I experienced micro-vibrations that ruined shots—lesson learned: quality supports combined with meticulous maintenance save time and money in the long run.
- Investing in comprehensive calibration routines for projection systems transformed my workflow, proving that small adjustments with professional tools consistently result in punchy, true-to-life images with minimal post-production corrections.
- My frustration with inconsistent skin tones across different scenes taught me that documenting every lighting tweak is invaluable—creating a reliable reference for future projects and ensuring visual consistency that viewers appreciate.
- Finally, I’ve discovered that understanding the spectral qualities of cinema projectors can dramatically improve color accuracy—an overlooked detail that distinguishes amateur results from professional-grade storytelling.
Tools and Resources That Elevate my Craft
- Calibrated Monitors like the Eizo ColorEdge series are my go-to—they provide accurate color previews essential for skin-tone matching and final grading decisions, reducing surprises during the final review.
- Mastering film lighting techniques remains an invaluable resource, offering insights into nuanced lighting setups that I revisit regularly to refine my skills.
- High-quality camera supports, especially those tested with support guides, ensure stability and safety during critical shots, preventing costly mishaps and re-shoots.
- Sandbags and support gear are non-negotiable—never underestimate their role in creating smooth, professional results, especially in challenging outdoor environments.
Ignite Your Creative Journey Today
Every piece of gear, from bi-color LED mats to precise projection screens, holds the potential to elevate your cinematic storytelling. Embrace the details—mastering skin tones and supporting equipment isn’t just technical mastery; it’s your pathway to truly captivating visuals. Dive deep into expert guides, refine your routines, and push your boundaries. The next masterpiece begins with a confident step forward. Are you ready to transform your approach and create visuals that resonate profoundly? Share your biggest challenge with skin tone calibration or equipment maintenance below—let’s learn together.”}#}#// Note: The response is formatted as per the requested specifications, providing a personalized, insightful wrap-up to the article with internal links integrated naturally. The tone is warm and encouraging, aiming to inspire readers to apply the learned techniques and tools. If adjustments are needed, please specify!_})}The answer has been formatted to match your specifications, focusing on providing valuable, experience-based advice and encouragement for cinematographers. If you’d like any modifications or additional details, feel free to ask!https://cinegearguide.com/you-have-what-it-takes-keep-shooting-and-keep-perfecting-your-craft/}){
About the Author
James Duke
ThinkOTS
James Duke is a seasoned professional in the creative production industry, bringing a wealth of technical knowledge and hands-on experience to cinegearguide.com. As a key figure at ThinkOTS, James has spent years navigating the complexities of high-end production environments, where selecting the right equipment is the difference between a successful shoot and a logistical failure. His expertise spans the full spectrum of cinematography gear, from advanced camera systems to the intricate accessories that define modern filmmaking. On cinegearguide.com, James leverages his deep understanding of the industry to provide authoritative insights, gear reviews, and technical guides. He is known for his ability to break down complex specifications into practical, actionable advice for filmmakers of all levels. His perspective is rooted in the real-world application of technology, ensuring that every recommendation is backed by professional standards. James is dedicated to empowering the filmmaking community by sharing his expertise, helping others navigate the ever-evolving landscape of cinema technology with confidence and clarity.
LinkedIn ProfileRelated Posts

Why Fresnel Lenses Are Still the Secret to Beautiful Skin Tones
I remember the frustrating days in my studio when I…
The Green-Tint Fix: How to Neutralize Cheap LED Panels Without Gels
I vividly recall the moment I set up my first…
Why Cheap Light Stands Are the Biggest Liability in Your Kit
I remember the first time I watched my carefully lit…