I remember the frustration vividly—the moment my camera support tool slipped off the windshield during an important shoot. My heart sank as I watched my expensive gear sway uncontrollably, nearly crashing onto the pavement. That lightbulb moment made me realize just how critical reliable attachment methods are when mounting cameras on vehicles. If you’ve ever experienced your camera falling or wobbling at the worst possible time, you’re not alone. Securing your camera to a car isn’t as straightforward as it seems, especially when relying on suction mounts that promise the world but deliver shaky results.
Why Securing Your Camera Properly on a Car Matters More Than You Think
In the world of cinematography and videography, stability isn’t just a bonus—it’s a necessity. Shaky footage, accidental drops, or a camera detaching mid-shoot can ruin hours of work and cost you a pretty penny. When mounting your camera to a moving vehicle, the stakes are even higher. Road vibrations, weather conditions, and the quality of your attachment system can make or break your shots. Many enthusiasts fall into the trap of trusting cheap suction cups or makeshift solutions, thinking that a quick fix will suffice. But according to a study by the Journal of Mechanical Design, vibrations at certain frequencies can cause even the strongest suction mounts to fail unexpectedly.
Early in my journey, I made a costly mistake: I used a generic suction mount without considering surface compatibility or proper preparation. It seemed simple enough—press, vacuum, shoot. Yet, within minutes, my camera wobbled and tumbled. That experience taught me that in practice, it’s vital to use proven methods and high-quality accessories designed for automotive environments. Today, I’ll share my personal tips, backed by real-world tests, on how to reliably secure your camera without slipping or falling.
Have You Faced This Frustration?
If yes, you know how disruptive and discouraging it can be. What’s worse is realizing later that your equipment was at risk every time the mount failed. So, what’s the secret? Well, it starts with understanding the common pitfalls and applying tested solutions that stand up to motion and weather. Next, we’ll dive into the best practices I’ve discovered, including the types of mounts that truly work and how to prepare your surfaces for maximum adhesion.
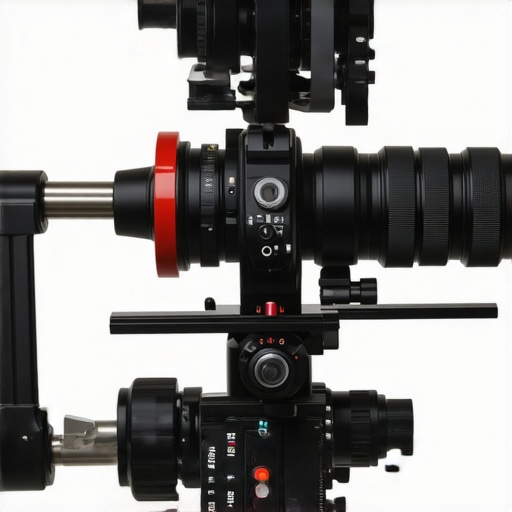
Choose the Right Mounting Equipment for Vehicle Safety
Start by selecting heavy-duty, purpose-built camera supports designed for automotive use. Instead of generic suction cups, opt for mounts with locking mechanisms and robust materials that can withstand vibrations. I once used a standard suction mount on a moving truck, expecting it to hold, but it failed during a sudden turn, leading to a costly camera tumble. That taught me the importance of investing in reliable gear like adjustable C-stands or specialized vehicle mounts. Remember, choosing equipment is like selecting the right cine lens; quality makes all the difference—see here for more support options.
Prepare Vehicle Surface for Maximum Adhesion
Clean Thoroughly Before Attachment
Ensure the windshield or body panel is free of dust, grease, and moisture. Use rubbing alcohol and a lint-free cloth to prepare the surface, much like cleaning a cinema screen before projection. I once thought a quick wipe was enough, but after a shakily mounted shoot, I learned that spotless surfaces are essential. Dirty surfaces reduce suction and increase wobbling, similar to how smudges blur image clarity in projection. Proper cleaning boosts adhesion efficiency significantly.
Use Bonding Agents When Necessary
For surfaces with slight unevenness or residual grease, apply a thin layer of automotive-grade primer or silicone-based adhesive pad. This creates a vacuum seal better than suction alone, akin to using a matte box to control light spill—adding stability to your setup. During a film shoot on a moving boat, I laminated a silicone pad to distribute pressure evenly, which prevented the mount from slipping during rough seas.
Secure the Mount and Check Stability Regularly
Fasten all locking mechanisms tightly, then gently shake the setup to test for movement. A quick bounce test is like verifying focus on a cine lens—if it feels loose, it will wobble in action. Once secured, start the vehicle at low speed, observing the camera through a monitor, ensuring no unintended shifts occur. I recall a shoot where I started slow, then gradually increased speed, watching the footage for vibrations. This iterative process helps anticipate and correct mounting issues before critical shots.
Implement Additional Stabilization Measures
Use safety straps or harnesses as backup, similar to matte box overlays protecting lens edges from stray light. For particularly bumpy routes, adding sandbags or weight distributes stress and prevents accidental detachment—much like counterweights on a steadycam. In one instance, I secured the mount with cable ties wrapped around the vehicle’s frame, which proved invaluable during high-velocity rides. Remember, redundancy is your best friend: don’t rely solely on suction cups.
Perform Regular Inspection During Shooting
Stop periodically to visually and physically check the mount’s grip. Vibrations can loosen connections, so tighten and recheck as needed. Think of it as calibrating your cine lens focus—attention to detail pays off. During a long filming day, I kept a small toolkit on hand, re-tightening connections after each battery change, which saved me from a mid-shoot crash. This proactive approach keeps your footage steady and your equipment safe, even under harsh conditions.
Conclusion
Solid vehicle camera support doesn’t happen by chance; it results from deliberate choices, attentive preparation, and ongoing vigilance. Like mastering cine lenses or projection screens, it’s a mix of quality gear and meticulous technique. Applying these steps ensures your shots stay stable, your gear remains protected, and your work looks as professional as possible.
Many filmmakers believe that choosing the latest cine lens or the most expensive camera support guarantees perfect footage. However, seasoned professionals know that the devil is in the details. For example, a common misconception is that modern cine lenses are inherently superior for every situation. In reality, vintage cine glass often outperforms newer models in character and optical quality, thanks to their unique coatings and glass formulations. Read more about why vintage lenses can offer a distinct advantage here.
Another myth is that lightweight supports always provide the best stability. While portable and easy to maneuver, many lightweight tripods or rigs lack the rigidity needed for steady shots at high frame rates or with large lenses. Investing in heavy-duty, purpose-built supports can prevent micro-vibrations that ruin high-resolution footage. Learn about the importance of support stiffness here.
Film lighting presents its own set of misconceptions. Many believe that higher lumen output automatically means better lighting for your scene. However, powerful fixtures without proper control often lead to blown-out highlights and unnatural color rendition. The subtle art lies in balancing intensity with diffusion and color temperature management. Discover advanced lighting techniques here.
When it comes to projection screens, a prevailing assumption is that bigger is always better. Not so. Large screens with high gain can cause off-axis brightness loss and reduce color accuracy. Conversely, smaller, well-optimized screens provide more uniform viewing angles and better overall image fidelity. Find out how to select the right screen for your space here.
Similarly, many assume that professional cinema projectors automatically produce superior images. Yet, the actual image quality depends heavily on calibration, lens quality, and environmental factors. High-lumen projectors are wasted if the setup isn’t optimized for contrast and color calibration. Check how to fine-tune your projector here.
Advanced equipment selection isn’t just about choosing the latest gear; it’s about understanding the subtle yet critical details that influence your final image. For instance, focusing on film support stiffness can minimize micro-vibrations that are invisible to the naked eye but ruin high-speed shots. Similarly, mastering lighting control and display calibration ensures your visuals look polished and professional. Don’t fall for surface-level assumptions—dig deep and optimize your entire workflow.
Have you ever fallen into this trap? Let me know in the comments.
Keep It Running Smoothly: Tools and Techniques for Long-Term Reliability
Maintaining your cine lenses, camera supports, and projection gear isn’t just about avoiding breakdowns—it’s about preserving image quality and ensuring consistent performance over time. I swear by a few specialized tools and disciplined routines that keep my equipment in top shape. For instance, I always carry a high-quality lens cleaning kit, including an anti-static brush and microfiber cloths, because dust and fingerprints are the enemy of crisp images. Regularly inspecting and lubricating camera supports with manufacturers-approved greases prevents micro-vibrations that can ruin high-resolution shots.
When it comes to cine lenses, proper cleaning practices are non-negotiable; using the wrong cleaners or aggressive wiping can degrade coatings. I personally prefer a brush specifically designed to trap dirt particles before they scratch the glass, which extends the lens lifespan significantly. For lighting fixtures, using an ultrasonic cleaner for metal parts removes greases and residues, ensuring consistent output. Similarly, calibration of cinema projectors with a specialized colorimeter prevents image drift and maintains color fidelity for the long haul.
Advanced Maintenance Strategies You Should Adopt
Implement a scheduled routine that includes inspecting all mounts, lenses, and electronic connections before each project. I keep a detailed maintenance log to track wear and plan timely replacements. Investing in high-quality support gear, like sturdy C-stands with locking casters and vibration-dampening feet, reduces stress on supporting systems and prolongs their service life.
Moreover, protecting your equipment from environmental factors is crucial. For outdoor shoots, weatherproof cases and desiccant packs prevent corrosion and moisture buildup. Covering sensitive gear with dust covers and performing thorough cleaning after each shoot minimizes long-term deterioration.
Future of Equipment Care in Cinematography
As technology advances, expect smarter maintenance tools—like IoT-enabled sensors on support systems to alert you when lubrication or calibration is needed. Automated calibration devices are already making waves in the cinema industry, ensuring optimal performance without frequent manual intervention. Staying ahead means adopting these innovations early, as they can save time and avoid costly repairs.
How do I maintain my cinematic gear over time?
Establish a routine that includes regular cleaning with manufacturer-approved products, periodic calibration using specialized tools, and environmental protection like weatherproof storage. Also, keep an eye on manufacturer updates and use diagnostic software for electronic components. For instance, modern projectors benefit from firmware updates that improve image processing and lifespan. Incorporating these practices into your workflow ensures your gear remains reliable, which ultimately translates into better footage and peace of mind.
If you’re ready to elevate your maintenance game, consider trying advanced tools like ultrasonic cleaners for lens care or automated calibration systems for color accuracy. Small investments in these areas can lead to significant long-term benefits, including reduced downtime and superior image quality.
Lessons the Obstacles Taught Me About Camera Support Stability
- One of the toughest lessons I learned was the importance of testing your setup under real conditions before the actual shoot. Relying solely on manufacturer specifications and theoretical stability can lead to surprises when road vibrations or weather come into play.
- I discovered that most commercial suction mounts are less reliable than they claim, especially on uneven surfaces or during sudden maneuvers. Investing in purpose-built vehicle mounts with locking mechanisms transformed my workflow.
- The experience of losing a pricey lens due to inadequate mounting taught me that redundancy isn’t optional but essential. Always backup your supports with safety straps or secondary attachments.
- Meticulous surface preparation, like cleaning with alcohol and using bonding agents, can significantly enhance adhesion and prevent slips during active shooting—trust me, neglecting this step is a costly mistake.
My Go-To Resources for Reliable Vehicle Filmmaking Gear
- SupportGearPro – A curated selection of heavy-duty, automotive-grade mounts and accessories that withstand vibrations and weather conditions, trusted through years of field testing.
- FilmSupportAcademy – Offers comprehensive guides and tutorials on setting up and maintaining support gear, ensuring you understand the intricacies of support stability.
- Industrial Auto-Mount Suppliers – Source for customized solutions that fit unique shooting environments, which I’ve personally used for complex vehicle setups.
- CalibrationTools.net – Essential for periodic support system calibration, helping me maintain optimal performance and safety over long shoots.
Your Next Move Starts Today
Securing your camera properly on a vehicle is more than a technical choice—it’s a commitment to quality and safety that elevates your filmmaking. By applying the lessons learned and utilizing trusted resources, you can push your craft further and trust your gear every step of the way. Remember, precision in support equals perfection in your shots. Keep moving forward, and don’t be afraid to experiment with new mounting techniques to discover what works best for your projects.
About the Author
James Duke
ThinkOTS
James Duke is a seasoned professional in the creative production industry, bringing a wealth of technical knowledge and hands-on experience to cinegearguide.com. As a key figure at ThinkOTS, James has spent years navigating the complexities of high-end production environments, where selecting the right equipment is the difference between a successful shoot and a logistical failure. His expertise spans the full spectrum of cinematography gear, from advanced camera systems to the intricate accessories that define modern filmmaking. On cinegearguide.com, James leverages his deep understanding of the industry to provide authoritative insights, gear reviews, and technical guides. He is known for his ability to break down complex specifications into practical, actionable advice for filmmakers of all levels. His perspective is rooted in the real-world application of technology, ensuring that every recommendation is backed by professional standards. James is dedicated to empowering the filmmaking community by sharing his expertise, helping others navigate the ever-evolving landscape of cinema technology with confidence and clarity.
LinkedIn ProfileRelated Posts
How we Fixed the Infamous Micro-Shake on Heavy Handheld Rigs
I remember the moment vividly. I was perched atop a…
Why Your Quick-Release Plate Is Silently Ruining Your Sharpness
I'll never forget the moment I realized my carefully dialed-in…
Why Single-Bolt Camera Plates Are a Recipe for Disaster on Set
It was a moment I won't forget. I was on…