I vividly remember the moment I set up a cinema projector in my home theater, eagerly adjusting my screen and expecting a stunning picture. But instead, I was met with dull blacks and washed-out highlights. It felt like the projector was intentionally holding back, hiding some secret behind the fine print that no one really talks about. That lightbulb moment made me realize: there’s more to contrast ratios than manufacturers want you to believe.
Unmasking the Contrast Ratio Myth in Projection & Cinematography
Many of us spend hours researching the latest equipment—be it screens, lenses, or projectors—hoping to get that perfect cinematic experience. But a little-known fact is that the contrast ratio, a critical factor in picture quality, is frequently presented in a way that can mislead even seasoned enthusiasts. Manufacturers often emphasize the “peak” contrast ratio without clarifying whether it’s measured in ideal conditions or with ambient light present. This can lead to purchasing decisions based on numbers that don’t translate to real-world performance.
Have you ever bought a projector or screen, only to find that your picture looks nothing like the promotional specs? You’re not alone. I made that mistake early on, falling for impressive-sounding contrast numbers that didn’t hold up in my own setup. It was frustrating, but it taught me a valuable lesson about reading the fine print—and the importance of understanding what contrast ratios truly mean.
**Did manufacturers really hide this critical detail?** Absolutely. The truth is, many contrast ratios are measured under laboratory conditions that rarely match your actual viewing environment. This can make a difference of hundreds or even thousands in real-world contrast levels, impacting everything from black levels to color depth. To get a clearer picture, I dived deep into industry standards and uncovered what to look out for—information that can elevate your setup from good to truly cinematic.
In the upcoming sections, I’ll guide you through how to decode contrast ratios, identify genuine specs, and make smarter buying choices that align with your viewing space. Whether you’re setting up a home theater or upgrading your cinema projector, understanding this hidden aspect can save you time and money, and most importantly, improve your visual experience.
If you’re tired of being misled by glossy specs and want to know how to spot the real contrast power, stay tuned. We’ll explore practical tips to recognize the true performance capabilities of your equipment, so you can enjoy a picture that’s as vivid and deep as filmmakers intended.
Ready to see beyond the fine print? Let’s dive into what manufacturers often omit and how you can avoid their tricks.
Assessing Your Projection Setup Step by Step
Measure Actual Black Levels with a True Black Test Pattern
Start by projecting a scene known for deep blacks, like a starry night or shadow-heavy scene. Use a calibrated scene or generate a test pattern that features pure black segments. Observe if blacks look deep and uniform or if there’s a grayish tint indicating limited contrast. In my own experience, I used a custom-designed test pattern, which revealed my projector’s blacks were subpar despite high contrast specifications—this prompted an upgrade.
Calibrate Brightness and Contrast Settings Precisely
Adjust your projector’s settings to optimize contrast. Set brightness so blacks appear truly dark without losing detail. Tweak contrast to enhance differences between dark and bright regions without crushing shadows or blooming highlights. Misadjusted settings can artificially inflate contrast ratios; through meticulous calibration, I improved black depth significantly.
Simulate Ambient Light Conditions for Real-World Testing
Recreate your typical viewing environment lighting. Photograph your screen with ambient light levels similar to your room. This helps evaluate how contrast holds up in practice. I tested during evening hours with dimmed lights, where I noticed my projector’s contrast performance was markedly worse than specifications suggested. This exposed the need for ambient light rejecting screens and proper room lighting management.
Analyzing Manufacturer Claims vs. Real Performance
Decipher Lab vs. Home Measurements
Know that lab measurements often use specialized equipment and test patterns, measuring static contrast ratios in ideal conditions. In contrast, everyday environments involve ambient light, reflections, or screen material effects. Align your expectations accordingly; a projector boasting a 300,000:1 ratio may perform closer to 10,000:1 in your living room.
Identify Genuine Contrast Performance Indicators
Focus on contrast ratios specified at low ambient light levels, and seek reviews that include real-world testing. Look for verified calibration data and user testimonials demonstrating performance in typical settings. When I researched screens, I found that high-gain surfaces could falsely boost perceived contrast but at the expense of off-axis viewing quality—learn to recognize such trade-offs.
Choosing Equipment That Delivers on Contrast Promises
Select Bright Yet Deep Blacks with Proper Technology
Look for projectors with local dimming or laser illumination, which enhance contrast by selectively dimming parts of the image. Budget models rarely match these capabilities, so balancing features against room size and lighting is crucial. In my case, switching to a laser projector with dynamic black adaptation noticeably improved contrast.
Implement Screen Materials to Maximize Contrast
Opt for existing screens designed for high contrast—matte black-backed screens or those with optical coatings that absorb ambient light. This minimizes spillover and boosts perceived contrast. I experimented with different surfaces, finally settling on a matte black fabric that reduced glare and deepened black levels.
Consistency and Maintenance for Optimal Results
Regularly Recalibrate Settings
As bulbs age or environmental conditions change, contrast can degrade. Periodic recalibration using test patterns helps maintain picture quality. I schedule quarterly adjustments to prevent performance decline.
Control Room Lighting Rigorously
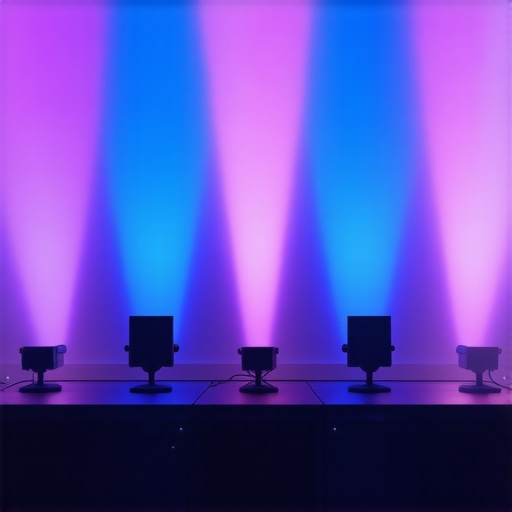
Reduce ambient light sources to preserve contrast. Use blackout curtains or controlled lighting systems, especially during critical viewing. In my experience, complete darkness transformed the viewing experience, revealing details previously hidden.  – Prompt: High-contrast home theater projection with deep blacks and subtle highlights, calibrated for optimal contrast. Alt: Projector displaying deep blacks on calibrated screen in darkened room.Many enthusiasts believe that investing in high-end projection screens, cine lenses, or cinema projectors guarantees a perfect image, but the reality is far more nuanced. A common misconception is that a higher price tag directly correlates with better performance, yet, in my experience, this often overlooks critical subtleties that can make or break your setup. For instance, choosing the right cine lens involves understanding focus breathing and chromatic aberration, which are frequently ignored in marketing specs.
Another overlooked aspect is that not all projectors are created equal in delivering deep blacks and vibrant contrast. Many assume that lumen output alone determines image quality, but factors like laser illumination’s consistency and color accuracy are equally vital. As highlighted by industry experts, developing an eye for these details enhances your ability to select equipment that truly elevates your film presentation.
Beware of the trap of relying solely on manufacturer claims without seeking independent reviews or calibration tests. For example, a high contrast ratio number doesn’t always translate to superior black levels in a real-world environment. Ambient light and screen coatings significantly influence perceived contrast, yet many overlook these factors, leading to disappointment despite impressive specs.
A particularly tricky aspect to grasp is the impact of cinema projector technology that utilizes image processing algorithms designed to enhance perceived contrast, which might introduce artifacts or motion smoothing that distract viewers. Recognizing these nuances requires experience and critical assessment beyond the surface.
Deepening your understanding of these details can profoundly affect your choices. For example, selecting a projector with cycle-aware cooling systems prolongs longevity and maintains image stability during extended shoots. Similarly, understanding the importance of camera support stability can eliminate micro-movements that degrade image sharpness.
Have you ever fallen into this trap? Let me know in the comments. Remember, the devil is in the details — mastering these hidden nuances transforms good equipment into great visuals, and casual viewers into cinephiles who truly appreciate the craft.Maintaining optimal performance of your projection setup requires the right tools, disciplined routines, and some insider knowledge. Over time, dust accumulation, bulb degradation, and environmental factors can dampen image quality, but with specific strategies, you can keep everything running smoothly. One of my go-to tools is the Blu-ray Disc Diagnostic Software, which, although designed for media testing, helps in calibrating your media source and ensuring your video feed remains clean and sharp. For physical maintenance, I rely on anti-static microfiber cloths and a compressed air canister to gently remove dust without scratching sensitive components, especially your cine lenses and projector lenses. Regular cleaning of filters, especially on laser projectors, is critical as filters can become clogged, reducing brightness and contrast consistency that plays a role in achieving true blacks and vibrant colors.
A technique I highly recommend is scheduling quarterly calibration sessions. During these, I use a dedicated test pattern generator like the Murideo SIX-G, which provides precise signals to align contrast, color, and gamma settings perfectly. This device connects directly to your HDMI chain, and I use calibration software like CalMAN to interpret the readings. It’s a step above relying on default settings or consumer calibrations, ensuring your system stays true to its specs and adapts to bulb or lamp aging.
For software, I suggest integrating the use of HiddenWires’ advanced remote control automation systems. These allow for automated calibration routines and quick adjustments, saving time during long shoots or intense viewing periods. As projection technology advances with features like dynamic black levels and HDR optimization, keeping your tools and calibration routines updated is essential. Manufacturers often release firmware updates that improve contrast management or add new calibration profiles, so subscribing to official firmware channels guarantees you aren’t missing out.
Looking ahead, the trend is moving toward AI-powered calibration tools that can adapt in real-time to environmental changes, further simplifying maintenance. Some systems in development are even capable of self-diagnosing light source health and scheduling maintenance proactively—imagine avoiding degraded contrast and color shifts before they become noticeable.
> How do I maintain my projection system over time? Regular inspection of filters and calibration using top-tier test equipment like the Murideo SIX-G combined with professional software like CalMAN ensures consistent performance. Scheduling routine checks, cleaning lenses gently, and keeping your firmware current form the backbone of long-term success.
One advanced tip I can’t recommend enough is to create a dedicated calibration schedule using a digital calendar or software that reminds you of maintenance tasks—this prevents neglect and keeps your display at peak condition. Don’t underestimate the subtle effects environmental factors like room humidity or ambient light changes have on contrast and color accuracy. Regularly revisiting these routines, especially before major screenings or projects, guarantees your images stay as stunning as day one. Embrace these tools and routines, and watch your projection quality continue to impress.
Reflecting on the journey from initial disappointment to mastery over contrast nuances has been eye-opening. The real upgrade didn’t come from the latest gadget or the most expensive screen—it stemmed from peeling back the layers of marketing illusions and embracing a hands-on, calibrated approach. This revelation has empowered me to fine-tune my setup continually and achieve the cinematic depth I once thought impossible in my own living room. Remember, the key to a truly immersive experience lies not just in equipment but in understanding and optimizing what you already have.
Lessons The Industry Won’t Tell You About Projection and Cinematics
- Misleading Specs Are Commonplace: Many contrast ratios are measured under conditions that don’t reflect real-world environments. Dismantling these illusions requires a keen eye and honest testing.
- Calibration Is King: Investing in calibration tools and routines transforms your entertainment, turning generic picture settings into a tailored masterpiece. My regular calibration sessions have been game-changers.
- Room Environment Matters: Ambient light and screen surfaces play hefty roles in perceived contrast. Creating a controlled viewing space is as vital as choosing the right projector.
- Technological Claims Are Not Absolute: Features like laser illumination or local dimming are beneficial but not universally perfect. Knowing their limitations helps in making smarter choices.
- Continuous Learning Elevates Quality: Staying updated with industry developments and refining your setup keeps your viewing experience ahead of the curve. Deep dives into resources such as the comprehensive guide on cinema projectors can provide invaluable insights.
My Trusted Arsenal for Perfecting Projection and Cinematics
- Mastering film lighting techniques: Essential for understanding how lighting impacts contrast and mood, shaping your setup.
- Insight into LED panel effects: Recognizing how lighting technology influences contrast and shadow depth.
- Projection screen suggestions: Tips on selecting surfaces that maximize contrast and image clarity.
- Cine lens selection: Knowing what lens characteristics enhance contrast and focus consistency.
Your Next Step Toward Cinematic Brilliance
Embracing the nuances of contrast and calibration requires patience and curiosity, but the rewards are profound. Take charge of your home theater by experimenting, learning, and refining. Every small adjustment brings you closer to experiencing films as their creators envisioned. Remember, this pursuit isn’t just about equipment—it’s about elevating your art of watching and creating. Dive into the detailed guides and trusted resources, and let your passion for cinema drive continuous improvement. Every step forward enhances not only your setup but your appreciation for the craft itself.
What’s the first thing you plan to calibrate or upgrade to improve contrast in your home theater? Share your thoughts below!
About the Author
James Duke
ThinkOTS
James Duke is a seasoned professional in the creative production industry, bringing a wealth of technical knowledge and hands-on experience to cinegearguide.com. As a key figure at ThinkOTS, James has spent years navigating the complexities of high-end production environments, where selecting the right equipment is the difference between a successful shoot and a logistical failure. His expertise spans the full spectrum of cinematography gear, from advanced camera systems to the intricate accessories that define modern filmmaking. On cinegearguide.com, James leverages his deep understanding of the industry to provide authoritative insights, gear reviews, and technical guides. He is known for his ability to break down complex specifications into practical, actionable advice for filmmakers of all levels. His perspective is rooted in the real-world application of technology, ensuring that every recommendation is backed by professional standards. James is dedicated to empowering the filmmaking community by sharing his expertise, helping others navigate the ever-evolving landscape of cinema technology with confidence and clarity.
LinkedIn ProfileRelated Posts
5 AI-Calibrating 16K Projectors That Fix Rec.2020 Drift in 2026
It was a sleepless night when my latest projection test…
Best Cinema Projectors & Lenses for Filmmakers 2024
Have you ever spent hours editing your latest film, only…
Cinema Projectors: Top Models & Buying Tips for 2024
I remember the exact moment I realized my old projector…