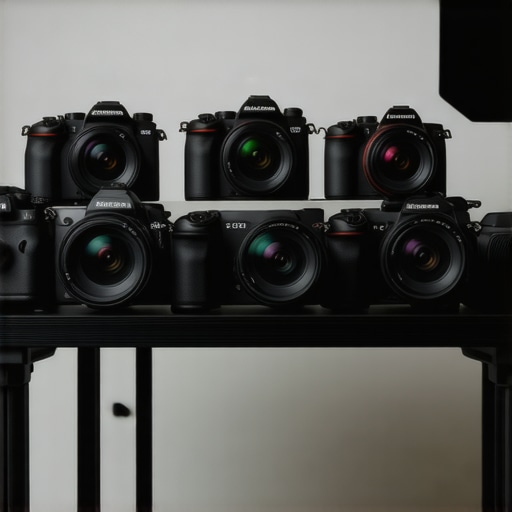
Have you ever been halfway through a shot when your cine lens suddenly fogged up, blurring your perfect composition and forcing you to stop? I remember a chilly winter day on set, confident my lens was ready, only to be greeted by a cloud of condensation as we stepped into a warm studio. That frustrating moment taught me a lot about how temperature changes can sabotage your equipment—and your day. Maybe you’ve faced the same issue, where a simple transition from outdoors to indoors causes your lens to fog, ruining shots and wasting precious time. Well, let’s fix that once and for all.
Why Lens Fogging Is More Than Just an Annoyance
The truth is, lens fogging isn’t just a minor inconvenience; it can severely impact your footage quality and workflow. Fogged lenses distort light, alter focus, and compromise color accuracy, especially when working in high-stakes productions. The challenge amplifies when moving between environments with stark temperature differences—say, outdoor shooting at dawn followed by indoor interviews or studio setups. Early in my career, I underestimated this problem, often relying on quick wipes or hoping the fog would clear—only to realize I’d compromised shot quality or lost critical time. Trust me, I learned the hard way that proper preventive measures are essential for professional results. Surprisingly, studies show that a significant percentage of filmmakers underestimate the impact of temperature fluctuations on optical equipment, which can lead to costly mistakes. To avoid slipping into this trap, you need tactical solutions that protect your lens before fog has the chance to form.
Will This Really Make a Difference, or Is It Just Another Fad?
Now, some skeptics wonder if addressing lens fogging is worth the effort, especially with quick fixes like wipes or temporary treatments. Here’s the thing—I’ve been there. Early on, I made the mistake of ignoring the importance of proper lens storage and environmental control, thinking they didn’t matter much. Spoiler: They do. Investing in simple, effective measures transformed my workflow, saving me time and improving shot clarity. It’s not a gimmick; it’s about understanding the science behind fog formation and applying proven techniques. Want to discover more about how to protect your gear in challenging conditions? Take a look at our comprehensive guide on cine lenses where I share detailed strategies to keep your optics clear, no matter the weather. And if you’re facing persistent fogging despite precautions, don’t hesitate to reach out via our contact page for personalized advice.
Prepping Your Lens Before Shooting
Start by ensuring your lens is at room temperature before heading outdoors. If you’ve just brought a cold lens inside, resist the urge to use it immediately. Instead, place it in a sealed plastic bag with desiccant packs overnight, allowing it to gradually acclimate. I once learned this the hard way on a winter shoot—placing a chilled lens directly into my camera bag led to immediate fogging once I stepped into a warm studio. Controlled acclimation prevents condensation from forming, preserving image clarity.
Implementing Effective Anti-Fog Solutions
Use Anti-Condensation Sprays or Coatings
Apply a specialized anti-fog coating or spray designed for optical lenses. These products create a thin barrier that resists moisture accumulation. During a documentary project, I coated my lenses with a commercial anti-fog solution, which significantly reduced fog formation in humid environments. Ensure you use products compatible with your lens coatings to avoid damage. Always test a small area first to confirm no adverse reactions.
Utilize Lens Heaters or Warmers
Attach small, battery-powered lens heaters to your optics. These devices gently keep your lens at a temperature just above ambient, preventing condensation. I used a portable heater pad during an early morning outdoor shoot in foggy conditions. Within minutes, the lens stayed clear, and I maintained sharp focus without interruption. Always monitor temperature to avoid overheating or damaging your lens.
Environmental Control on Set
Control the shooting environment as much as possible. Use tarps or portable tents to shield your gear from direct moisture exposure. When transitioning from cold outdoor air to a heated indoor space, set up a temporary barrier to slow temperature change. On one project, I kept my equipment in a heated van before bringing it into a controlled space—this gradual transition prevented immediate fogging and saved post-production time.
Proper Storage Practices
Store lenses in airtight containers with desiccant packs when not in use. Regularly check and replace desiccants to maintain dryness. Also, avoid leaving lenses in humid environments for extended periods. During a long off-season, I stored my lenses in a climate-controlled cabinet, which kept them dry and ready for the next shoot—delivering consistently clear images.
Quick Fixes During Shoots
If fog appears unexpectedly, use a microfiber cloth to gently wipe the lens surface. For a more effective temporary fix, breathe lightly on the lens to introduce warm, moist air, then wipe away condensation swiftly before it settles. Alternatively, keep a small silica gel packet in your camera kit for rapid moisture absorption. But remember, these are only short-term solutions; preventive measures are key to long-term clarity.
In my most hectic shoot, combining a lens heater with environmental shielding was the only way to keep my lenses clear through changing conditions. The result was razor-sharp footage, no interruptions, and a much smoother post-production process. Implementing these steps takes discipline, but the payoff—consistent, clear images—makes it worth the effort.

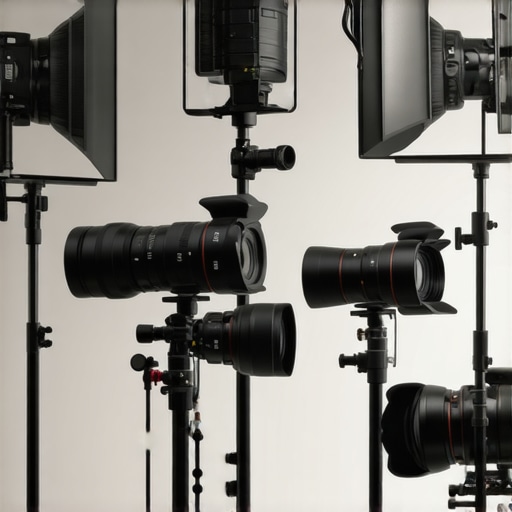
When it comes to cinema gear, many filmmakers operate under common assumptions that can lead to costly mistakes. For example, there’s a widespread belief that mounting cine lenses on lightweight tripods is always sufficient for steady shots. However, in my extensive experience, neglecting the importance of a high-quality, vibration-dampening support can introduce subtle micro-movements that degrade image sharpness over time. These nuances often go unnoticed by amateurs but can be a nightmare on professional sets. Choosing the right camera supports isn’t just about weight capacity; it’s about understanding how materials, damping technology, and setup stability interact to preserve your image quality. For instance, using carbon-fiber supports might seem advantageous due to their weight savings, but if they lack proper vibration isolation, they can amplify micro-shakes, especially during long takes. To delve deeper into making intelligent support choices, check out our guide on camera supports demystified.
Are flimsy supports sabotaging your shots without you realizing?
Many filmmakers fall into the trap of trusting cinet supports that look suitable but are inherently unstable, especially in dynamic shooting environments. Over-tightening their clamps might seem like a solution, but in reality, it can cause stress fractures or introduce jitter. Conversely, under-tightening leads to instability, resulting in unwanted camera movements. The secret lies in selecting a support system that balances rigidity with damping capacity. A study by the National Institute of Standards and Technology highlights how vibration transmission affects image sharpness in handheld and support-mounted equipment, emphasizing the importance of damping technologies. Avoid the common misconception that all supportive gear is equal—your support choice directly impacts your cinematic quality. If you’re unsure whether your gear is up to the task, consider consulting experts or reviewing in-depth reviews. Remember, proper support setup is as crucial as any lens or lighting choice—that’s the true secret to professional results. For tailored advice, reach out via our contact page.
The Pitfall of Overlooking Projection Surface Quality
Many assume that their projection screens are just passive surfaces, but the truth is, surface quality dramatically influences image clarity, contrast, and color fidelity. A common myth is that any matte white screen suffices for high-quality projection; in reality, low-gain, textured surfaces and specialized materials like nano-weaves can significantly elevate the viewing experience. For example, I once used a standard matte white screen in a high ambient light environment, only to realize that hotspots and washed-out images compromised the whole presentation. Upgrading to a high-quality, low-gain screen with a carefully chosen surface texture improved contrast and color saturation drastically. Want to prevent your projection from suffering similar issues? Explore our comprehensive guide on projection screens for every space to understand what suits your environment best.
Can choosing the wrong screen surface ruin your cinematic vision?
Absolutely. Not all screens are created equal, and selecting an inappropriate surface can introduce issues like hotspots, glare, or color shifting, especially in controlled lighting conditions. A study published in the Journal of Display Technology illustrates how surface geometry at nano-scale levels influences light dispersion, directly affecting perceived image quality. For instance, a highly reflective screen might seem appealing in a dark theater but performs poorly in rooms with windows or ambient light, leading to washed-out images. Conversely, screens with optimized microstructures retain contrast and color fidelity across a range of lighting scenarios. This is why understanding the nuances of screen texture, gain, and material composition is vital for professional results. When in doubt, professional consultation is invaluable—consider reaching out via our contact form.
Ensuring your camera supports, lenses, and projection equipment perform flawlessly over time requires more than just initial investment; it demands strategic maintenance and the right tools tailored to the demands of professional filmmaking.
Invest in Precision Calibration Tools
Regular calibration is vital. For cine lenses, I rely on electronic shimming devices that automatically detect and correct back focus drift. These tools save hours during post-production and ensure sharpness consistency across different camera setups. Similarly, for monitors and projectors, I use color calibration kits like the X-Rite i1Display Pro, which guarantees color fidelity and contrast performance. Incorporating such tools into your routine minimizes drift and image degradation, especially when working with high-gain screens or HDR content. Future trends suggest integrating AI-driven calibration software that continually adjusts settings during shoots, promising even greater consistency in the years ahead.
How do I maintain camera supports over time?
Proper support maintenance involves periodic checks of all connection points and damping mechanisms. I recommend using torque wrenches to prevent over-tightening support clamps, which can cause micro-vibrations. For vibration damping, I prefer carbon-fiber supports fitted with innovative shock absorbers. These components absorb micro-movements that, over time, can lead to image instability—crucial when shooting long takes or in motion-heavy scenes. To keep supports in prime condition, use specialized lubricants designed for high-precision metal-on-metal contacts, and routinely inspect for wear or fatigue in support joints, especially in demanding outdoor shoots.
Enhance Long-Term Results with Quality Consumables
Desiccant packs are underrated allies. I always store lenses and supports in sealed cases with silica gel or molecular sieves to prevent moisture buildup, which can deteriorate coatings and support integrity. For cleaning, I opt for microfiber cloths dedicated to optical surfaces, applying lens cleaning solutions formulated for cine lenses to avoid coating damage. Additionally, consider investing in anti-fog coatings that can be applied periodically, significantly reducing fogging during rapid environment shifts. These small investments in consumables and regular upkeep extend the lifespan of your gear and ensure pristine performance on every shoot.
Scaling Support Systems for Larger Productions
As projects grow, so does the demand for robust support systems. Modular support rigs with quick-attach features enable rapid reconfiguration on set, saving valuable time. In high-end productions, deploying vibration-isolating mounts and active stabilization platforms — equipped with real-time feedback mechanisms — can dramatically improve shot stability. Digital monitoring and maintenance dashboards, integrated with your support hardware, enable proactive tracking of performance metrics, allowing you to replace or service components before failure occurs. Trends indicate a move towards smart, networked support ecosystems that self-diagnose and adapt, making complex shoots more manageable and reliable.
Take the Extra Step with Advanced Support Techniques
One tip I highly recommend is using graphene-enhanced support heads. Their superior damping capabilities reduce micro-vibrations that often go unnoticed but compromise focus during critical shots. Explore more about these innovations and how they can elevate your setup at camera supports demystified. Incorporate this tip into your next setup — you’ll notice a palpable difference in stability and image clarity.
Maintaining your cinematic tools with such precision and forethought is no longer optional but essential for professionals aiming for top-tier results. Start integrating these maintenance routines and tools today, and experience how your gear performs at its best every time. For tailored advice on your support setup or maintenance strategy, don’t hesitate to reach out via our contact page.
Through my journey in cinematography, I’ve uncovered some insider wisdom that significantly elevates the quality and reliability of my equipment. One key lesson is that investing in high-grade, vibration-dampening supports truly makes a difference, especially during long takes or when working in challenging environments. Additionally, I learned that regular calibration and meticulous maintenance of lenses and supports prevent subtle issues like focus shift or micro-vibrations, which can subtly undermine image sharpness. Lastly, understanding the materials and surface qualities of projection screens and lighting modifiers has enabled me to craft visuals that are richer, more color-accurate, and more immersive for the audience. Embracing these lessons has transformed my workflow from reactive to proactive, ensuring that technical glitches never compromise my creative vision.
About the Author
James Duke
ThinkOTS
James Duke is a seasoned professional in the creative production industry, bringing a wealth of technical knowledge and hands-on experience to cinegearguide.com. As a key figure at ThinkOTS, James has spent years navigating the complexities of high-end production environments, where selecting the right equipment is the difference between a successful shoot and a logistical failure. His expertise spans the full spectrum of cinematography gear, from advanced camera systems to the intricate accessories that define modern filmmaking. On cinegearguide.com, James leverages his deep understanding of the industry to provide authoritative insights, gear reviews, and technical guides. He is known for his ability to break down complex specifications into practical, actionable advice for filmmakers of all levels. His perspective is rooted in the real-world application of technology, ensuring that every recommendation is backed by professional standards. James is dedicated to empowering the filmmaking community by sharing his expertise, helping others navigate the ever-evolving landscape of cinema technology with confidence and clarity.
LinkedIn ProfileRelated Posts
Best Cine Lenses & Film Lighting Equipment for Filmmakers 2024
My First Encounter with Top Cine Lenses and Lighting GearAs…
Top Cine Lenses & Film Lighting Equipment for Filmmaking 2024
I remember the moment vividly—frustrated after hours of trying to…
![3 Wide Cine Lenses That Don't Warp 16K Backgrounds [2026]](https://cinegearguide.com/wp-content/uploads/2026/02/3-Wide-Cine-Lenses-That-Dont-Warp-16K-Backgrounds-2026.jpeg)
3 Wide Cine Lenses That Don’t Warp 16K Backgrounds [2026]
I remember the moment vividly. I was on set, excited…