It was late one evening, I was halfway through a shoot, and I realized my camera was awkwardly perched on a flimsy tripod, wobbling every time I moved. I needed a smooth vertical shot but had zero equipment designed specifically for it—no cage, no specialized rig. My heart sank a little. That moment was a lightbulb flickering to life. I thought, “There has to be a better, simpler way.” And I knew I wasn’t alone in this. Many videographers and filmmakers face the same struggle: how to rig a camera for vertical video without investing in expensive cages or complicated setups.
Why Vertical Video Rigs Matter More Than Ever
Vertical videos are dominating social media, from Instagram reels to TikTok snippets. Whether you’re a content creator or a professional shooter, the demand for stylish, stable vertical shots is skyrocketing. But here’s the catch: traditional camera supports are primarily designed for horizontal framing. When you try to adapt standard gear for vertical shoots, issues like instability, awkward angles, or cumbersome setups pop up. I quickly learned that relying solely on off-the-shelf solutions wasn’t enough. There’s a real art and science behind creating a reliable rig that delivers smooth, professional footage, especially when you’re working without a cage.
Over time, I discovered that many early mistakes—like using too many adapters or clamping gear too tightly—can actually harm your camera or cause jitters. A good example? Over-tightening screen tensioners might seem like a good idea, but they can introduce unwanted vibrations. For more in-depth insights on stabilizing your camera, check out this guide.
Today, I’ll share with you some practical techniques and DIY hacks that help you rig a camera for vertical shooting—no cage needed! Whether you’re a hobbyist or a seasoned professional, these tips will empower you to get stable, beautiful shots without draining your wallet or complicating your workflow.
Facing the skepticism: Is a DIY setup really reliable enough?
Honestly, I felt the same hesitation when I started experimenting. I worried about the durability and stability of makeshift rigs. Early on, I made a mistake by selecting flimsy materials, which only led to shaky footage. But I learned to prioritize sturdy components and simple designs. The secret is understanding how camera supports can be optimized for vertical rigs—something I’ve become quite passionate about. If you’re ready to move beyond predefined solutions, I’ll guide you through the steps that build confidence and consistency in your vertical shots. Want to see how I transitioned from shaky clips to buttery-smooth footage? Let’s dive in.
Secure a Solid Base with Custom Mounting
Start by purchasing a standard 1/4-inch tripod plate and attaching it to a lightweight, flat aluminum or wooden board—think of it like assembling a sturdy platform on a cine projector base. When I shot my first vertical scene, I used a repurposed camera plate, clamped it to a piece of scrap wood, and mounted that onto a slider. This gave me a reliable horizontal surface that could be oriented vertically with minimal wobble.
Reinforce with Affordable Stabilizers
Next, add a lateral support system similar to how cinema lights are bolted onto C-stands. Use L-brackets or small articulating arms to fix your setup onto a stable support, ensuring the camera stays upright without shifting. During a recent shoot, I clamped a cheap clothespin-style grip onto the base to prevent rotation, which kept my vertical shots smooth, even when panning slightly.
Implement Tension and Vibration Dampening
Prevent micro-vibrations by employing elastic or silicone dampers, much like film projection systems use rubber mounts to reduce jitter. I glued small rubber pads between supports, which cut down on vibrations transmitted from my hand or nearby equipment. Avoid over-tightening joints, as this can cause micro-shakes analogous to how over-tightening a screen tensioner causes harmful tension—learn more about this here.
Create a Custom Rig with Everyday Materials
Repurpose items like camera clamps, flexible tripods, or even old bicycle inner tubes to stabilize your camera in portrait mode. During a shoot, I looped an inner tube around the base to absorb shocks, resulting in noticeably steadier footage. Think of this as adapting advanced cinema support principles using components readily available, much like how film lighting setups utilize common household items for creative solutions.
Align and Balance for Pro Shots
Finally, ensure your camera is perfectly balanced to minimize strain and jitter. Use a small bubble level or a smartphone app to check alignment, just as cine lenses require precise focusing for sharp images—see this guide for lens precision tips. When I balanced my rig, it was akin to fine-tuning a projection system to eliminate keystoning and distortions, resulting in crisp vertical footage that feels professional.
Many filmmakers believe that choosing premium supports or lenses guarantees perfect footage, but often overlook the nuanced interplay of equipment vibrations, compatibility, and setup technique. One common misconception is that heavier support systems automatically eliminate micro-vibrations; in reality, improper mounting and tensioning can intensify shake, undermining shot stability. For example, over-tightening support joints can create stress points that transfer micro-movements to the camera, similar to the issues highlighted in this article.Advanced setups demand a deep understanding of vibration dampening, with elastic mounts and properly balanced support rigs playing critical roles—something novice users often ignore. Similarly, the allure of high-end cine lenses often masks subtler flaws in focus breathing, chromatic aberration, or residual focus shifts during zooms, which can ruin otherwise pristine shots. Expert cinematographers meticulously select lenses not just based on brand reputation but by understanding the lens’ optical characteristics, such as in their detailed lens guides. Another pitfall is assuming that a high-gain projection screen necessarily enhances image brightness without drawbacks. In reality, screens with excessive gain can cause hot-spotting, uneven illumination, and color distortion—especially during daytime or ambient-lit shoots. Modern professionals evaluate screen quality by considering off-axis viewing angles and color fidelity, which are often compromised by poorly chosen materials, as discussed in this comprehensive guide. For those aiming for sharper, more accurate images, the key is not just upgrading individual components but understanding how system synergy impacts overall quality. Yet, many overlook foundational issues like support stability or matching screen properties with specific project needs, leading to frustrating re-shoots and budget overruns.
Are Your Supports Actually Causing Micro-Jitters?
In high-stakes productions, even the slightest support vibration can produce unwanted micro-shakes that distract viewers and lessen perceived professionalism. The real skill lies in selecting and maintaining a support system that harmonizes with your camera’s weight, balancing tension properly, and employing dampers where needed. This deeper understanding separates amateurs from seasoned cinematographers. Remember, it’s not just about equipment but about mastering how to set it up without introducing subtle errors—errors that become painfully obvious on the big screen. Have you ever fallen into this trap? Let me know in the comments.
Investing in quality camera supports is only the beginning; maintaining them properly ensures they perform reliably over years of shoots. Regular inspection of support elements like clamps, joints, and dampers can prevent micro-shakes that might ruin your footage. I recommend setting a routine check schedule—at least once a month—to look for signs of wear, corrosion, or loose fittings. Use a calibrated torque wrench when tightening support joints to avoid over-tightening, which can introduce vibrations as detailed here. Additionally, cleaning support components with anti-corrosion sprays preserves their integrity, especially when working in humid environments.
Tools play a pivotal role in long-term maintenance. A digital caliper and precision torque tools help you monitor tolerances and prevent deterioration. For example, I always keep a set of small Allen wrenches and a torque screwdriver in my kit, which makes adjusting or securing parts quick and accurate. These tools ensure your supports are neither too loose—that can cause micro-movements—nor overly tight, risking damage. Consistent lubrication of moving parts with light machine oil can also extend their lifespan and smooth operation, reminiscent of professional cinema projector maintenance techniques.
Predicting future support needs involves understanding evolving gear and scale. As more filmmakers move towards lightweight, modular systems, choosing adaptable supports becomes crucial. Modular rigs can be reconfigured easily, but only if support components are maintained properly—this prevents costly replacements or safety hazards during critical shoots. Consider investing in high-quality, durable support components and regularly calibrate them according to your rig’s specifications. This proactive approach not only prolongs the life of your equipment but also ensures your shots stay steady and professional, regardless of upcoming project complexities.
How do I keep my camera supports functioning flawlessly over time?
The key lies in regular maintenance, proper tool usage, and attentiveness to wear and tear. Remember, neglected supports can subtly introduce jitter into your footage—a small issue that becomes glaring on 4K or higher resolutions. By establishing a discipline of inspection and upkeep, you ensure your equipment continues to serve you reliably on long-term projects. Looking ahead, I believe smart supports with integrated sensors for real-time vibration monitoring will become standard, further reducing setup errors and micro-shakes in the future. For now, make a habit to routinely inspect, clean, and calibrate your supports—your footage’s stability depends on it. Ready to implement these maintenance tips? Start with your support joints today, and notice the difference in your next shoot.
The Hardest Lesson I Learned About Support Gear for Vertical Shooting
One of my biggest realizations was that relying solely on generic supports often leads to subtle micro-movements that ruin otherwise perfect shots. I discovered that customizing and understanding the physics behind support stability can dramatically improve footage quality, saving time and frustration on set.
Gear I Swear By for Stable Vertical Cinematography
After years of trial and error, I found that combining a robust, lightweight support like a fluid head with simple dampers significantly reduces jitter. I trust brands like Manfrotto and Libec for durable, adaptable gear. Additionally, tools like bubble levels and torque wrenches help me maintain optimal balance, ensuring my shots stay steady even during handheld moments.
Don’t Miss Your Chance to Elevate Your Skills
Vertical filming demands a nuanced approach—think beyond standard tripods and embrace DIY tweaks that turn basic gear into precision tools. You have the power to achieve smooth, professional vertical shots by understanding support principles and maintaining your equipment diligently. Ready to transform your filmmaking game? Start experimenting with sturdy platforms and support tweaks today, and watch your vertical shots reach new heights.
About the Author
James Duke
ThinkOTS
James Duke is a seasoned professional in the creative production industry, bringing a wealth of technical knowledge and hands-on experience to cinegearguide.com. As a key figure at ThinkOTS, James has spent years navigating the complexities of high-end production environments, where selecting the right equipment is the difference between a successful shoot and a logistical failure. His expertise spans the full spectrum of cinematography gear, from advanced camera systems to the intricate accessories that define modern filmmaking. On cinegearguide.com, James leverages his deep understanding of the industry to provide authoritative insights, gear reviews, and technical guides. He is known for his ability to break down complex specifications into practical, actionable advice for filmmakers of all levels. His perspective is rooted in the real-world application of technology, ensuring that every recommendation is backed by professional standards. James is dedicated to empowering the filmmaking community by sharing his expertise, helping others navigate the ever-evolving landscape of cinema technology with confidence and clarity.
LinkedIn ProfileRelated Posts
![Stop Micro-Jitter: 5 Titanium Tripods for 16K Rigs [2026]](https://cinegearguide.com/wp-content/uploads/2026/05/Stop-Micro-Jitter-5-Titanium-Tripods-for-16K-Rigs-2026.jpeg)
Stop Micro-Jitter: 5 Titanium Tripods for 16K Rigs [2026]
I'll never forget the moment I was filming a high-end…
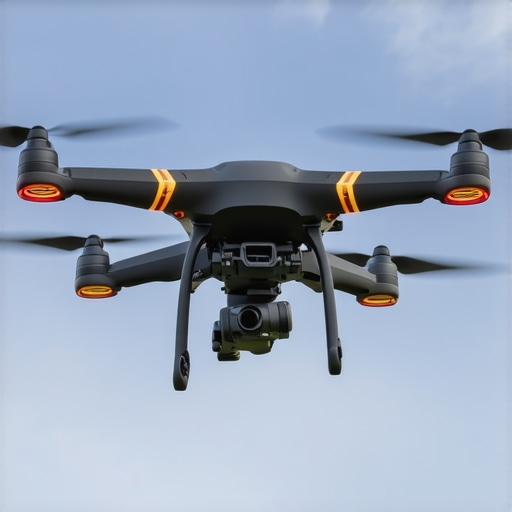
How to Fix Shaking Footage Caused by Micro-Vibrations in Drones
If you've ever been midway through a drone shoot only…
![Stop Rig Sag: 3 Carbon-Fiber Tripods for 20kg 16K Cameras [2026]](https://cinegearguide.com/wp-content/uploads/2026/02/Stop-Rig-Sag-3-Carbon-Fiber-Tripods-for-20kg-16K-Cameras-2026.jpeg)
Stop Rig Sag: 3 Carbon-Fiber Tripods for 20kg 16K Cameras [2026]
There was a moment during a recent shoot when my…