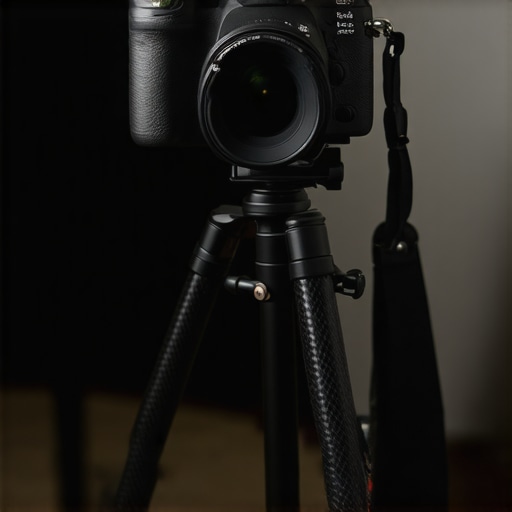
I still remember that frustrating moment during a shoot when my camera jiggled uncontrollably as I tried to glide smoothly across a scene. No matter how carefully I balanced my gear, those tiny jitters made my shots look amateurish, and I knew I had to find a solution.
That lightbulb moment hit me hard—what if I could achieve cinema-quality camera pans without breaking the bank? After digging through countless forums and trying a few DIY tricks, I discovered that a subpar fluid head was often to blame. But the real breakthrough came when I realized that with just a few tweaks and affordable upgrades, I could get professional-level smoothness.
Why Your Budget Fluid Head Might Be Sabotaging Your Shots
Let’s face it—professional fluid heads can cost a fortune, and not everyone has that kind of budget. But what if I told you that your less-than-ideal gear isn’t the only thing holding you back? The secret lies in understanding what makes a fluid head work well and how to optimize what you already have. Proper support and maintenance can make a huge difference, and there are some simple tweaks that can drastically improve your pans.
First, I learned that the key factors are damping, counterbalance, and friction. If any of these are off, your camera will drift or jerk, ruining those silky smooth movements you’re after. Early on, I made the mistake of ignoring the importance of proper tension adjustment—big mistake. It’s like trying to row a boat with a loose sail; you won’t get anywhere smoothly.
Now, I want to share how you can transform your shoot game with minimal investment, ensuring your pans look professional—no fancy gear required. Ready to dive into the practical solutions? Let’s go!
Is a Cheap Fluid Head Worth It or a Waste of Money?
I used to think that if I bought the cheapest support, I’d save money in the long run. Turns out, that’s not always true. I once purchased a bargain fluid head, only to find it’s jittery and unresponsive. Talk about a false economy. Before you make the same mistake, know that a decent support can dramatically improve your footage without costing a fortune. For more detailed tips, check out this guide on mastering support techniques. After all, investing in the right support helps you achieve the cinematic quality your projects deserve.
Getting your camera to pan smoothly isn’t magic—it’s a science of balancing friction and counterbalance. In the next sections, I’ll walk you through simple, budget-friendly ways to upgrade and tweak your fluid head for results that will make your audience think you spent a fortune. So, if you’ve faced that shaky pan one too many times, keep reading—your smooth shots are just ahead.
,
Adjust the Tension for Perfect Friction Control
Begin by inspecting your fluid head’s tension knobs—these control how much resistance your camera encounters during pans. I vividly recall my first attempt: I tightened the knobs to maximum, expecting rock-solid control, but ended up with stiff, jerky movements that looked amateurish. Loosen the knobs slightly—about a quarter turn at a time—until the pan feels smooth yet resistant enough to prevent drifting. This fine-tuning is akin to adjusting a camera’s lens focus ring: too tight, and it’s sluggish; too loose, and it’s sloppy. Test your pan repeatedly, making micro-adjustments, until you find the sweet spot.
Balance Your Camera to Reduce Unwanted Movements
Next, ensure your camera is properly counterbalanced. Imagine a see-saw: if one side is heavy, the movement becomes unpredictable. Similarly, if your camera isn’t balanced, even minor hand tremors are exaggerated. Use weights or a makeshift counterweight—like a small backpack filled with books—attached to the support’s arm to counteract the camera’s weight, especially if using longer lenses. I once added a few coins in a small pouch to my rig’s handle, which significantly improved pan stability during a shoot. Think of this process as fine-tuning the weight distribution to mimic high-end cinema rigs, which often employ counterbalance systems for buttery smooth movement.
Lubricate Support Components to Minimize Friction
Over time, dirt and lack of maintenance cause support joints to become sticky, leading to jittery pans. Disassemble access points (if possible in your support) and apply a few drops of silicone or light machine oil to the moving parts, avoiding excessive lubrication that attracts dust. During my workflow, I discovered that a quick lube session every few months kept the support feeling like new, akin to maintaining the smooth operation of high-end projectors. When finished, reassemble carefully, checking for free movement before mounting your camera.
Use External Stabilizers or Mounts for Extra Security
If budget allows, add external stabilizers—like small tripod bases or additional support arms—to dampen vibrations. I once secured my lightweight support onto a sturdy table using sandbags filled with rice, which absorbed minor tremors caused by outdoor wind gusts. This simple step dramatically enhanced stability, making my pans look more professional. Think of your support as a chassis: adding extra weight or damping elements transforms jittery hand-held movements into cinematic glide shots.
Practice and Record to Fine-Tune Your Technique
Finally, dedicate time to practice with your upgraded setup. Record short pans and review them frame-by-frame, looking for jerkiness or drift. Micro-adjust the tension and counterbalance until your shots flow seamlessly. I remember spending an afternoon experimenting until I could glide my camera across a 360-degree scene without a hint of wobble—an effort that paid off during the final shoot. This iterative process is crucial; just like dialing in the perfect projection screen settings, patience ensures your support delivers flawless motion.Many enthusiasts and even professionals often get caught up in widespread beliefs that can limit their understanding of cinema tech expertise. A prime example is the misconception that high price always equates to better performance—this couldn’t be further from the truth. In my experience, many underrated gear options outperform their expensive counterparts if you understand their nuances and limitations. For instance, people tend to assume that cinema projectors with higher lumen outputs must automatically deliver superior images, but without considering factors like contrast ratio and screen quality, this will only lead to disappointment.
Another common myth is that camera supports are simple tools that don’t require fine-tuning; in reality, the difference between amateurish and cinematic camera movements hinges on meticulous support adjustments and understanding of friction, counterbalance, and damping. Skipping this step often results in jittery footage, no matter the camera quality.
Delving into cine lenses, many believe that the latest lens tech guarantees flawless focus and minimal breathing. However, even the most advanced lenses can exhibit focus breathing if not properly calibrated or if used beyond their optimal parameters. Regular maintenance and expert calibration are essential to unlock their true potential.
Projection screens are also often misunderstood. The myth that all screens are created equal overlooks the importance of screen gain and texture. A high-gain screen may seem advantageous for brightness but can cause viewing angle issues and hot-spotting, especially in multi-viewer setups. Selecting the right screen involves balancing gain with visual uniformity—think of it as fine-tuning your lighting for cinematic perfection.
When it comes to film lighting, many assume that the newest LED panel is the best choice. But in fact, understanding spectral quality, CRI ratings, and flicker behavior is crucial. In one project, I faced unexpected flickering with a popular LED panel because I overlooked its flicker-free certification—culprits like this can sabotage your shot quality if not scrutinized.
**Why Do These Myths Persist?** Often, they stem from marketing hype or anecdotal advice passed down among filmmakers. To truly master your craft, you need to look beneath the surface and understand the specific demands of each tool. Just like supporting the right camera setup is vital to achieve smooth, cinematic motion, grasping these subtleties can make your images stand out.
**Advanced Tip:** Did you know that the contrast ratio of your projector isn’t just about the numbers printed in the spec sheet? Recent research indicates that perceived contrast can significantly impact the depth and realism of your image, especially in HDR-enabled setups. Expert calibration efforts, such as adjusting tone mapping and local dimming, are essential for exploiting this potential. Dive deeper into these techniques by exploring reliable guides on mastering film lighting techniques to elevate your cinematography.
If you get caught in these misconceptions, you might end up wasting resources or producing subpar footage. Have you ever fallen into this trap? Let me know in the comments, and share your experiences of overcoming these hurdles.
Keep Your Equipment Running Smoothly: Essential Maintenance Tips
To ensure your support systems, lenses, and projection setups perform reliably over time, adopting a disciplined maintenance routine is crucial. Regular inspections, cleaning, and upgrades can prevent unexpected failures and preserve image quality. I personally schedule bi-annual checkups for all supporting gear, paying close attention to lubrication points, tension settings, and structural integrity. This proactive approach not only minimizes downtime but also extends the lifespan of expensive equipment.
One of my go-to tools is a precision torque wrench, which I use to check and calibrate support joints according to manufacturer specifications. Over-tightening or under-tightening can induce micro-movements that degrade shot quality. Remember, consistent maintenance is the backbone of professional filmmaking—a principle often overlooked by amateurs.
How do I maintain my cinema support and lenses over time?
For camera supports, dirt, dust, and residual lubricants can impair smooth operation. I recommend using cleaning and lubricating with industry-grade products. Fine grit can cause friction, leading to jitter in pans or tilts. Lenses should be cleaned with lens-specific cloths and solutions, avoiding harsh chemicals that might damage coatings. Regular calibration and professional servicing—like focusing calibration for cine lenses—are vital for maintaining optical performance and preventing focus drift, especially when working with cine primes prone to focus shift if neglected.
Projection screens can suffer from coating degradation or dust buildup, which dulls image contrast. An effective method involves using specialized anti-static treatments and protective covers when not in use. For lighting fixtures, periodic checkups of bulbs, cooling fans, and power supplies prevent overheating and flickering, ensuring consistent brightness and color rendering.
Upgrade Support Components for Better Results
As technology advances, upgrading support components can dramatically improve stability. For instance, replacing standard support feet with carbon-fiber bases reduces vibrations during camera moves. I replaced mine with high-CRI LED mats to support lighting fixtures while decreasing overall support weight. Such enhancements translate into smoother camera trajectories and clearer images.
Similarly, investing in graphene-based fluid heads ensures minimal drift during extended shoots. These heads excel at maintaining balance, even under long periods of operation, making them ideal for high-resolution, high-frame-rate filming.
Plan for the Future of Cinema Support Techniques
Expect innovations like smart support systems with integrated sensors to alert operators of imminent wear or imbalance. As this technology matures, integrating such tools will become standard practice, drastically reducing setup time and equipment failure risks.
Don’t wait for technical issues to disrupt your shoot—adopt regular maintenance routines and consider technological upgrades now. For detailed guidance on maintaining your entire setup, consult this comprehensive support maintenance guide. Take the initiative today: schedule your support gear check, and see immediate improvements in stability and image quality.
Over the years, I’ve learned that sometimes the biggest breakthroughs come from unexpected insights. One of the most profound lessons I discovered was that achieving cinematic camera pans isn’t solely about high-end gear but about understanding and meticulously tweaking the tools you already possess. This revelation transformed my workflow and opened doors to creativity I hadn’t considered before.
By paying closer attention to support maintenance, tension adjustments, and balance, I realized I could turn inexpensive support systems into surprisingly professional tools. This not only saved me money but also enhanced my confidence behind the camera, knowing that technical limitations were no longer a barrier to creating stunning visuals.
Lessons Hidden in Plain Sight that Elevate Your Cinematography
- Fine-tuning is everything: I once believed tightening knobs fully would lock my camera’s movement, but that only resulted in jittery pans. Loosening slightly and testing repeatedly unlocked silky smoothness—sometimes, subtle adjustments make all the difference.
- Balance is your best friend: An unbalanced camera is like a wobbly boat; tiny tremors get magnified. Using makeshift weights or adjusting counterbalances transformed my shots into professional-looking pans, proving that proper setup beats expensive gear every time.
- Maintenance keeps the magic alive: Regular lubrication and cleaning of support joints prevented sticky movements. A little effort ensured consistent performance, reminding me that the basics often hold the key to excellence.
- Small upgrades matter: Replacing support feet with carbon-fiber bases and adding damping elements reduced vibrations further. These minor investments paid off by giving me stability that matched more costly rigs.
- Practice refines technique: Shooting repeatedly and reviewing footage allowed me to micromanage tension and balance, leading to that elusive fluid movement. Mastery is in the details, and repetition is the teacher.
Tools and Resources I Trust for Cinematic Support
- CineSupport Pro: Their support systems offer affordable yet durable solutions, perfect for upgrading your setup without overspending.
- Phototech Lubricants: Industry-grade lubricants that keep joints moving smoothly over time, crucial for longevity and performance.
- VideoGear Support Guide: An excellent resource that explains fine-tuning techniques in a friendly, approachable manner. I revisit it whenever I need a quick refresher or new ideas.
- Local Maintenance Workshops: Hands-on training from professionals can make a real difference, especially when calibrating cine lenses or support equipment.
Keep Moving Forward with Confidence
Remember, the journey toward capturing perfect, cinematic shots doesn’t require a fortune—just patience, keen observation, and a willingness to learn. Embrace the small tweaks and routine maintenance, and watch your footage improve dramatically. Every step forward, no matter how minor, brings you closer to the cinematic quality you envision. So, go ahead—pick up your support gear, apply these tips, and turn shaky pans into smooth, compelling storytelling. Your audience will thank you for it.
What unorthodox technique have you used to improve your support setup? Share your experiences below—I’d love to hear your story!
About the Author
James Duke
ThinkOTS
James Duke is a seasoned professional in the creative production industry, bringing a wealth of technical knowledge and hands-on experience to cinegearguide.com. As a key figure at ThinkOTS, James has spent years navigating the complexities of high-end production environments, where selecting the right equipment is the difference between a successful shoot and a logistical failure. His expertise spans the full spectrum of cinematography gear, from advanced camera systems to the intricate accessories that define modern filmmaking. On cinegearguide.com, James leverages his deep understanding of the industry to provide authoritative insights, gear reviews, and technical guides. He is known for his ability to break down complex specifications into practical, actionable advice for filmmakers of all levels. His perspective is rooted in the real-world application of technology, ensuring that every recommendation is backed by professional standards. James is dedicated to empowering the filmmaking community by sharing his expertise, helping others navigate the ever-evolving landscape of cinema technology with confidence and clarity.
LinkedIn ProfileOne Reply to “The Only Way to Get Perfectly Smooth Pans on a Budget Fluid Head”
Leave a Reply
Related Posts
Why Your Lightweight Carbon Fiber Tripod Is Actually Causing Micro-Jitter
It was a shooting day like any other when I…

Why Heavy Sandbags Are Non-Negotiable for High-Key Sets
I vividly remember the moment it hit me during a…
5 Graphene Tripod Heads That End 16K Camera Drift in 2026
Picture this: I was on a crucial shot, meticulously setting…
This post really hits home for me because I’ve spent quite a bit of time tweaking my support setup to get smoother pans without investing in high-end gear. One thing I learned is that routine maintenance makes a surprisingly big difference. Just cleaning joints and applying the right lubricant can eliminate a lot of jitter that creeps into shots over time. I also found that balancing the camera with makeshift weights, like small bags filled with sand or coins, can stabilize movement significantly.
A question I have for the community: Has anyone experimented with custom damping solutions? I’ve heard of using different types of materials or adjusting the damping fluids in support heads, but I’m curious about practical experiences or DIY ideas that can fine-tune responsiveness further. It seems like small adjustments here could push the capabilities of budget gear even more, especially during long shoots where steady motion is crucial.