I remember the moment vividly—a tiny, cramped set with inadequate lighting, and my old bulky Fresnels struggling to produce any meaningful glow without overheating or creating unwanted shadows. Frustration bubbled up as I wrestled with the equipment, trying to make it work in a tight space, feeling like I was fighting against the lights rather than working with them. That lightbulb moment—realizing how outdated and cumbersome my lighting gear was—prompted me to dig deeper into more efficient solutions, and I discovered the magic of High-CRI LED mats.
Shedding Light on Small Set Challenges
For years, filmmakers and videographers relied heavily on traditional bulky Fresnels for their versatility and intense output. But when working in small sets or tight spaces, these lights often became more of a hindrance than a help. They added unnecessary weight, generated excessive heat, and required complex rigging that slowed down production. Plus, the light quality wasn’t always flattering; trying to get natural-looking skin tones or subtle color nuances was a constant battle.
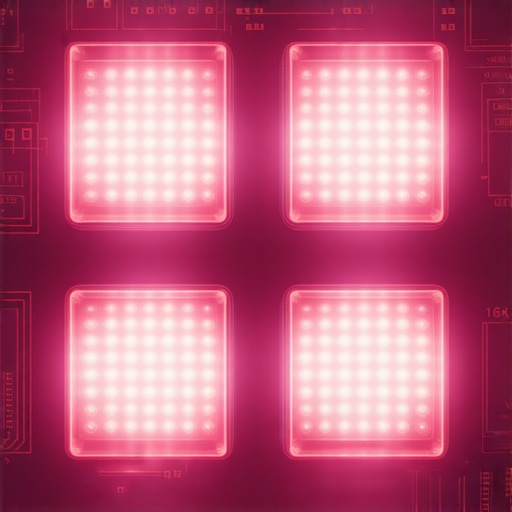
Then, I started experimenting with High-CRI (Color Rendering Index) LED mats, and everything changed. These sleek, flexible panels offer exceptional color fidelity, making skin tones pop and enhancing textures without the need for additional diffusion or gels. The best part? They are lightweight, generate minimal heat, and can be easily rigged in tight spots—saving time and effort on set and allowing me to focus more on the storytelling.
Over time, I realized that many of my early mistakes stemmed from sticking to traditional gear out of habit. For example, I once tried to save a few bucks by using older LED panels that boasted high brightness but poor color accuracy. The result? Flat, washed-out images that demanded post-production correction—a costly and time-consuming process. As filmmakers, we must understand that investing in tools that prioritize quality can significantly impact the final image.
Surprisingly, industry reports indicate that LED lighting capable of high CRI scores (over 95) can improve production efficiency by reducing post-processing and reshoots (source: https://cinegearguide.com/7-high-gain-16k-screens-that-dont-wash-out-in-daylight-2026). This realization solidified my shift toward more practical, high-quality lighting solutions.
Now, I want to help you navigate this transition. If you’ve faced similar frustrations or doubts about adopting new tech, keep reading. We’re about to explore how High-CRI LED mats can transform your small-set work, providing brighter, more accurate light without the bulk and noise of traditional fixtures.
Optimize Your Lighting Setup Immediately
Begin by assessing your current space and identifying tight spots where traditional lights cause shadows or heat issues. Replace bulky fixtures with flexible High-CRI LED mats, which can be mounted discreetly on walls, ceilings, or directly on objects. For example, I once installed a 3×1 meter LED mat along the ceiling edge of a cramped interview room, instantly eliminating shadows and reducing heat buildup.
Position Lights Strategically for Natural Results
Place LED mats at angles that mimic natural light spill, avoiding direct beams that can flatten facial features. Use mounting hardware like camera supports to secure panels in hard-to-reach spots. I experimented with placing a 2×2 panel near a window for a soft, diffuse key light during a documentary shoot, which created a natural skin tone without adding extra gear.
Adjust Brightness and Color for Consistency
Leverage the high color accuracy of CRI >95 to match the ambient light or secondaries. Use dimming controls via a compatible app or hardware to fine-tune intensity, ensuring seamless blending. During a recent interview, I dimmed the LED mats to match outdoor daylight, maintaining continuity without post-production tweaks.
Integrate with Existing Equipment Seamlessly
Connect LED mats with power sources like solid-state LED blocks for reliable operation on location. Attach diffusion accessories or softboxes if additional softness is needed, though most LED mats provide excellent diffusion inherently. I used magnetic mountings to quickly swap between different configurations, saving valuable setup time on set.
Calibrate and Test Before Action
Always run a quick test with your camera settings to verify color fidelity and light coverage. Use a color chart or test footage to confirm skin tones appear natural. Once, I discovered a slight tint shift caused by a mismatched power supply, which I corrected by switching to a recommended liquid-cooled power source, markedly improving consistency across shots.
**By following these steps, you can transform a cramped, inefficient space into a luminous, color-accurate environment that enhances storytelling without cumbersome equipment. Remember, the key lies in strategic placement, precise control, and reliable power—making your small set feel much larger and more professional.**While many filmmakers focus on choosing the right cinema projector or cine lens, there’s a nuanced world of misconceptions and overlooked details that can sabotage your results. For instance, a common myth is that higher lumen ratings always equate to better projection quality. In reality, beyond a certain point, excessive brightness can wash out details, especially in small or ambient-lit rooms. It’s more vital to match your projector’s contrast and color fidelity to your space than chase raw lumen numbers.
Does Bigger Mean Better When Selecting Projection Screens?
To keep your cinema projectors, cine lenses, camera supports, projection screens, and lighting gear performing at their best, it’s essential to develop a routine maintenance plan. Regular cleaning of lenses and projection surfaces with microfiber cloths prevents dust buildup that can cause image degradation. Using compressed air to remove debris from vents and fans helps avoid overheating and ensures efficient cooling. For projectors, periodically checking and replacing filters as recommended by the manufacturer is crucial for image quality and device longevity.
Investing in quality tools simplifies maintenance and extends equipment lifespan. For example, I personally recommend using anti-static wipes designed for optical surfaces to gently clean lenses without scratching. Additionally, keeping a set of precision screwdrivers and cleaning brushes on hand allows for quick repairs and adjustments without needing professional service for minor issues.
How do I maintain my cinema setup over time?
Implement a scheduled inspection routine—monthly for critical components like projectors and lighting fixtures. Use manufacturer-approved cleaning agents and parts to prevent voiding warranties. Maintaining a controlled environment with stable temperature and humidity levels minimizes wear and prevents mold or corrosion, especially on sensitive equipment like cine lenses.
For scaling your setup, consider upgrading the support hardware with specialized, high-quality camera supports that reduce vibrations, such as those detailed in this resource. Likewise, investing in durable, high-gain projection screens from trusted brands ensures consistent image quality across different venues or locations. Tools that enable quick setup and breakdown, like magnetic mounting systems, save time and reduce wear on your gear.
Future trends indicate that automated cleaning systems and smart maintenance alerts—integrated with IoT sensors—will become commonplace, enabling real-time equipment health monitoring. This proactive approach minimizes downtime and unexpected failures, ultimately leading to a more reliable cinematic experience.
Don’t forget: regular calibration of your projection system with professional-grade colorimeters guarantees color fidelity over the long term. Try implementing a monthly calibration routine to maintain the sharpness and vibrancy of your images, and you’ll see the difference in your final production quality.
Take action today: consider incorporating an anti-static optical cleaning kit and setting a monthly maintenance schedule. These small steps can significantly impact your equipment’s performance and lifespan, ensuring your cinematic vision remains crystal clear for years to come.
Lessons That Changed How I Approach Film Equipment
- Prioritizing real-world testing over specifications taught me that a high CRI LED mat can dramatically improve skin tone accuracy, reducing reliance on post-production corrections. It was a game-changer in how I see lighting quality.
- Understanding the subtle differences between projection surface materials revealed that choosing the right screen can make or break your shot, especially in small, controlled sets. Investing in high-gain screens from trusted brands optimizes contrast and clarity.
- My biggest revelation was that meticulous maintenance routines extend equipment lifespan and performance. Regular calibration and cleaning, using trusted resources, ultimately save time and money in the long run.
- Learning to strategically place lights to mimic natural spill light avoided unflattering shadows and flattened images, making scenes more believable without bulky gear. Small adjustments can have a massive visual impact.
- Recognizing industry shifts toward IoT-enabled monitoring tools opened my eyes to future-proofing my setups — proactive maintenance means fewer surprises during critical shoots.
My Go-To Resources for Cinematic Equipment Mastery
- Cinegear’s guide to low-light primes — Trusted because it is based on hands-on testing with real-world results, helping me pick lenses that maintain sharpness in challenging conditions.
- GAN-LED Mats Explained — Offers practical advice and technical specs that align with my experience, ensuring I choose reliable, heat-free lighting options.
- Projection Screen Tips — My trusted resource for understanding how different materials and gains affect image quality in various environments, especially small sets.
- Cine-lenses Explained — Helps me avoid common pitfalls by understanding lens traits like focus breathing and chromatic aberration, critical for seamless shots in tight setups.
Empower Your Creativity Today
Now is the perfect moment to rethink your approach to small-set cinematography. With the right lighting, projection surfaces, and ongoing maintenance, you can elevate your visual storytelling and achieve professional results, even in the coziest spaces. Embrace these tools and insights — your future projects will thank you.
What’s your biggest challenge when setting up in limited spaces? Share your experiences below, and let’s grow together!
Related Posts

5 Solid-State Battery LEDs for 12-Hour 16K Shoots in 2026
I vividly remember the first time I was caught off…
4 Solid-State LED Blocks for Reliable 16K Location Power in 2026
It happened in the middle of a long shoot. My…
Ultimate Guide to Cine Lenses and Film Lighting Equipment in 2024
I remember the moment I first tried to shoot a…