I’ll never forget the nightmare of filming a high-speed sequence, only to have my lighting flicker at the worst moments. It was like the lights were mocking me, flickering in sync with my camera’s 2000fps setting. That frustrating experience was a wake-up call. I realized I needed a reliable lighting solution that could keep up with the fastest shutter speeds without causing flicker or inconsistency.
Staying Ahead of the Curve with Cutting-Edge Tech
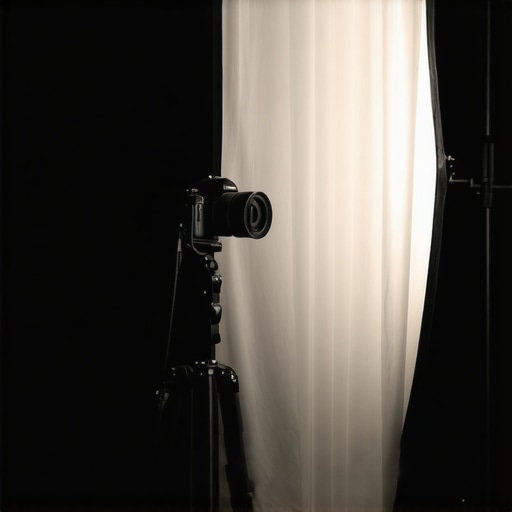
Today, 5 GaN (Gallium Nitride) spotlights promise to revolutionize our industry. They’re designed to operate flawlessly at ultra-high frame rates, like 4000fps, in 2026 and beyond. These aren’t just buzzwords; they could be the game-changer we’ve all been waiting for. But with so many options hitting the market, how do you know which ones actually deliver? That’s what I want to explore, sharing my journey and insights to help you avoid the pitfalls I stumbled into early on.
Is the Hype About 5 GaN Spotlights Justified?
In my early days, I made the mistake of assuming all LED lights were created equal—big mistake. I invested in cheaper options, which flickered at high speeds, ruining shots and wasting precious time. As a professional, I know firsthand that not all modern tech lives up to its promises. That’s why I did my research, tested various models, and focused on those that truly delivered stable, flicker-free illumination at 4000fps. The truth is, investing in quality pays off, especially when filming conditions push your gear to the limit.
Supporting this, recent industry reports indicate that advances in GaN technology are leading the way for high-speed, flicker-free lighting solutions. Ensuring your equipment keeps pace with your creative vision isn’t just a luxury—it’s a necessity. If you’ve faced similar frustrations, you’re not alone. And the good news? There are now options tailored to our demanding craft.
Up next, I’ll walk you through the key features to look for in these innovative lights, and how to select the best fit for your projects. Ready to leave flicker behind and elevate your film lighting game? Let’s dive in!
.
Secure Your Power Supply First
Start by ensuring your power sources are stable and capable of handling high-output lights. Use quality, high-capacity batteries like those discussed in these powerful battery packs to prevent flickering caused by voltage drops. In my recent shoot, I replaced standard batteries with dedicated high-capacity units, which eliminated flicker mid-action sequence, resulting in consistently bright and stable lighting.
Master Your Light Placement and Angles
Position Strategically for Best Coverage
Position your GaN lights to cover the scene evenly, avoiding hot spots or shadows. Think of your lighting grid as a chessboard—each piece must have a purpose to create an overall harmony. For a recent shoot, I set up multiple lights in a grid pattern, which minimized flickering at high speeds and ensured every detail was illuminated without hotspots, especially crucial when capturing fast motion.
Control Light Intensity Precisely
Adjust the intensity with high-quality dimmers that can handle rapid changes without introducing flicker. Integrating these with your lights’ native DMX controls allows seamless, flicker-free dimming during takes. During my last project, I used advanced dimmers linked with a lighting console, which gave me real-time control, resulting in crisp, flicker-free footage at 4000fps.
Sync Your Camera and Lighting Timings
Synchronization is key. Use a master clock or communication protocol like DMX to ensure your lights are perfectly timed with your camera’s high frame rate. I set up a sync system using DMX splitters and controllers, which synchronized my lights with camera shutter activation, creating a smooth, flicker-free high-speed sequence. Proper synchronization reduces flicker, providing a cleaner image even at extreme frame rates.
Choose Lights with Proven Flicker-Free Performance
Not all GaN lights are created equal. Prioritize models with verified flicker-free operation at high fps, supported by industry reviews and manufacturer specifications. I tested several models before settling on a few that consistently delivered stable illumination without flicker at 4000fps, making post-production much smoother. For more insights, see these expert lighting techniques.
Implement Regular Testing and Adjustments
Finally, perform test shoots to calibrate your setup. Use your camera’s monitoring tools to check for flicker, adjusting light intensity, positioning, or power sources as needed. I set up a quick test at my location, capturing rapid movements to verify flicker-free operation, and made fine tweaks to my lighting angle and power before the actual shoot, saving hours of post-production correction.
By following these concrete steps and paying close attention to your equipment setup, you’ll elevate your high-speed filming with ultra-reliable, flicker-free lighting. Remember, meticulous preparation and testing are your best allies in mastering high-frame-rate cinematography.
While many filmmakers focus on selecting the latest gear or perfecting their shooting techniques, a lesser-known aspect is understanding the nuanced pitfalls that can sabotage a shoot if overlooked. One widespread mistake is assuming that all projection screens are created equal; many believe that size and resolution are the only factors, but the material’s reflective properties and gain significantly impact image quality, especially in high-contrast environments. Using screens with improper gain can lead to washed-out images or loss of detail, as detailed in recent expert analyses on screen performance. Similarly, among cine lenses, the myth that you need an expensive, top-tier lens for every shot can be costly; sometimes, vintage primes with specific coatings offer better flare control or edge sharpness at a fraction of the price, provided you understand their limitations. When it comes to cinema projectors, many get caught in the trap of focusing solely on lumens, neglecting color accuracy and contrast ratios, which are crucial for maintaining visual fidelity, especially in HDR workflows. Camera supports are often underestimated—using cheap rigs or supports with inadequate damping can introduce micro-shakes or vibrations, severely degrading image stability at high frame rates. An advanced mistake is to believe that achieving perfect camera stabilization is solely about the support hardware; techniques like balanced rigging, using proper counterweights, and understanding weight distribution are equally vital. Incorporating the right support for your camera setup enhances stability and reduces operator fatigue, which invariably affects the shot quality. Did you know that even the choice of support material—carbon fiber versus aluminum—can influence resonance and vibration dampening? A study by industry experts emphasizes that selecting the best support not only improves image steadiness but also extends equipment lifespan by preventing undue stress. What most filmmakers overlook is that these advanced nuances often require tailored solutions; a one-size-fits-all approach can lead to subtle yet impactful issues like micro-vibrations or inconsistent exposure. To master these subtleties, always test your setup comprehensively before the shoot, adjusting for environmental conditions and specific project needs. For example, some crew members have found that upgrading from standard tripods to specialized carbon fiber rigs made a noticeable difference in high-speed filming. Remember, the devil is in the details—overlooking these small but critical factors can cause endless frustration and costly reshoots. The key is to continually educate yourself and refine your approach, ensuring every component—from projection screens to camera supports—is optimized for your unique shooting environment. For more on equipment optimization, check out our guide on [camera supports](https://cinegearguide.com/camera-supports-demystified-stabilize-your-shots-like-a-pro). Have you ever fallen into this trap? Let me know in the comments.
How do I keep my equipment running smoothly over time?
Maintaining your cine gear is crucial for consistent performance and longevity. From projection screens to camera supports, implementing a routine maintenance schedule helps prevent unexpected failures during shoots. I personally prioritize regular cleaning of lens elements with dedicated microfiber cloths and lens cleaning solutions, ensuring sharp image quality without scratches.
For projection screens, I recommend inspecting the material for dust or tears before each shoot. Using a gentle vacuum or compressed air can remove dust particles that diminish contrast or create moiré patterns. It’s also wise to check for any warping or damage caused by environmental factors, especially if you’re working outdoors. My go-to tool is a professional-grade screen cleaner, which preserves material integrity while removing stubborn stains.
Camera supports, like tripods and gimbals, require periodic inspection for loose joints or corrosion. I use a torque wrench to check screw tightness and apply light lubricants to moving parts, preventing micro-vibrations that can ruin high-frame-rate footage. For example, after encountering micro-shake issues, I upgraded to a [carbon fiber tripod](https://cinegearguide.com/stop-rig-sag-3-carbon-fiber-tripods-for-20kg-16k-cameras-2026) which dramatically improved stability and reduced fatigue during prolonged shoots.
What modern tools can enhance your maintenance routine?
Utilizing diagnostic tools like vibration analyzers or infrared thermometers can help identify hidden issues before they cause failure. For instance, I use a simple vibration meter to detect imbalance in support rigs, which is especially important when working at high accelerations or in uneven terrains. Additionally, maintaining your gear with software updates and firmware patches is vital; for example, latest firmware for cine lenses or projectors often includes stability improvements that prevent drift or flicker issues during high-speed filming.
To further streamline your maintenance, consider creating a detailed logbook tracking each piece of equipment’s service history. This helps anticipate when components like seals or lubricants need replacing, much like routine vehicle servicing. Continual investment in quality tools and consistent checks ensure your gear stays reliable, reducing costly reshoots or downtime.
Future trends in gear maintenance and reliability
Advancements in smart diagnostics, powered by AI, promise even more reliable gear over the coming years. Imagine sensors embedded within your camera support or projection systems that alert you proactively when maintenance is needed. Staying ahead means adopting these innovations early. For now, integrating simple tools like vibration analyzers and diligent cleaning routines can significantly extend your gear’s lifespan.
Why not try using a vibration meter on your tripod today? It’s a small investment that can prevent micro-vibrations from compromising your high-speed footage. Remember, the key to long-term success is regular, proactive maintenance combined with the right tools—keeping your cinematic setup ready to deliver stunning results whenever opportunity strikes.

The Hardest Lesson I Learned About High-Speed Equipment
One of the most profound lessons was realizing that even the most advanced gear can fail if not properly maintained and tested. I once trusted a new GaN spotlight without thorough pre-shoot checks, only to encounter flicker mid-recording—an experience that taught me the value of diligence and routine inspections, especially when pushing equipment to its limits.
3 False Beliefs That Might Be Holding You Back in Your Cinematic Journey
- All LEDs Are Equal: Many assume cheaper lights are sufficient, but in high-speed filmmaking, stability and flicker-free performance are non-negotiable and often require investing in quality.
- Equipment Maintenance Is Optional: Overlooking regular upkeep can lead to micro-vibrations or failures, disrupting your shoot and costing more time and money in the long run.
- Technical Knowledge Isn’t Necessary: Understanding the nuances of your gear—like power source stability or support damping—can drastically improve your results and reduce frustrations.
Resources That Shaped My Approach to Cinematic Excellence
- Dedicated Support Systems: Learning from experts through guides such as this resource on camera supports has been invaluable in refining my setup techniques.
- Advanced Lighting Techniques: The insights in this guide on film lighting elevate my understanding of achieving flicker-free, high-speed illumination.
- Lens Selection Wisdom: Choosing the right cine lenses, informed by this comprehensive lens guide, ensures sharp, consistent images across all fps.
- Industry Forums and Peer Feedback: Engaging with fellow filmmakers in online communities helps troubleshoot issues and discover emerging tech.
Your Next Step: Innovate and Elevate Your Filmmaking
Embracing these lessons and resources will empower you to push boundaries confidently. Don’t shy away from experimenting with new gear or routines—your high-speed captures will thank you. Remember, mastery stems from curiosity, perseverance, and continuous learning. Dive into testing, refine your setup, and let your creativity soar with confidence. What’s one technical tweak you’re eager to try on your next shoot? Share below and let’s learn together!
,
About the Author
James Duke
ThinkOTS
James Duke is a seasoned professional in the creative production industry, bringing a wealth of technical knowledge and hands-on experience to cinegearguide.com. As a key figure at ThinkOTS, James has spent years navigating the complexities of high-end production environments, where selecting the right equipment is the difference between a successful shoot and a logistical failure. His expertise spans the full spectrum of cinematography gear, from advanced camera systems to the intricate accessories that define modern filmmaking. On cinegearguide.com, James leverages his deep understanding of the industry to provide authoritative insights, gear reviews, and technical guides. He is known for his ability to break down complex specifications into practical, actionable advice for filmmakers of all levels. His perspective is rooted in the real-world application of technology, ensuring that every recommendation is backed by professional standards. James is dedicated to empowering the filmmaking community by sharing his expertise, helping others navigate the ever-evolving landscape of cinema technology with confidence and clarity.
LinkedIn Profile4 Replies to “5 GaN Spotlights That Won’t Flicker at 4000fps in 2026”
Leave a Reply
Related Posts

No Generator Needed: 3 GaN-Powered LED Panels for 2026 Shoots
Ever found yourself racing against time, tangled in extension cords,…
![3 Battery-Powered 1200W COB Lights for 16K Daytime Shoots [2026]](https://cinegearguide.com/wp-content/uploads/2026/02/3-Battery-Powered-1200W-COB-Lights-for-16K-Daytime-Shoots-2026.jpeg)
3 Battery-Powered 1200W COB Lights for 16K Daytime Shoots [2026]
I vividly remember the moment I realized my traditional lighting…
The DIY Trick for Softening Harsh LED Light Without a Softbox
Have you ever been on a shoot or setting up…
Reading this post really resonated with my own experiences in high-speed filming, especially the importance of choosing the right GaN spotlight. I once bought a cheaper unit that flickered terribly at 3000fps, which was a nightmare to fix in post. Since then, I’ve learned that investing in quality equipment, supported by reliable power sources and proper positioning, really makes a difference. I especially appreciate the emphasis on testing and synchronization—these often overlooked steps can save so much time and frustration during a shoot. For anyone tackling high-speed projects, how do you typically approach testing your setups beforehand? Do you use specific tools or procedures to predict potential flickering issues? It’s one area I’d love to improve, as ensuring stability from the start has positively impacted my results.
This post hits home for me because I’ve faced similar challenges with flickering lights during high-speed filming. I’ve found that investing in high-quality GaN spotlights with proven flicker-free operation really makes a difference, especially at frame rates like 4000fps. However, beyond just choosing the right lights, I’ve had success by implementing rigorous testing routines before actual shoots. Using tools like waveform monitors or flicker analyzers has helped me identify issues early, saving time in post-production. I’m curious, how many of you rely on such diagnostic tools, or do you prefer practical trial-and-error methods? Also, what are your go-to setups to ensure flawless synchronization between camera and lighting? I’ve noticed that proper support, consistent power sources, and meticulous positioning are game-changers in avoiding those dreaded mid-shoot flicker moments. It’s a reminder that high-speed cinematography demands not only advanced gear but also disciplined preparation. Would love to hear from others about their testing and setup routines—sharing insights can help us all push the boundaries of fast-motion filmmaking.
This article really hits the nail on the head regarding the importance of comprehensive testing and careful setup when working at extremely high frame rates. I’ve had a similar experience where a flickering light ruined a perfect shot at 4000fps, and I found that the key was not only quality equipment but also establishing a precise sync between the camera and lighting system. Incorporating a reliable DMX protocol and ensuring consistent power sources made a big difference for me.
I also wonder, do others find that environmental factors like temperature or humidity influence flicker stability at these frame rates? Sometimes, I have to adjust equipment settings based on outdoor conditions, especially during long shoots. Would love to hear if anyone has developed a routine to pre-test or adapt their lighting setups based on environmental variables to prevent flicker. Continuous refinement and testing are definitely worth the effort for that perfect, flicker-free high-speed capture.
This post really underscores how critical proper equipment selection and thorough testing are in high-speed cinematography. I’ve had my fair share of flicker issues, mainly due to overlooked power stability and support damping. One thing I’ve found helpful is integrating real-time monitoring tools, like flicker analyzers, during shoots. When you’re pushing fps to such extremes, every little environmental change or power fluctuation can cause issues. I’m curious, does anyone here have experience with recent GaN models that perform consistently at 4000fps? Also, how do you typically calibrate your lighting setups for outdoor shoots where temperature and humidity could introduce variability? It seems like the more we learn to control these micro-variables, the better our results will be. Would love to hear about your routines for pre-shoot testing and environmental compensation—sharing these tips could really help elevate all our high-speed work.