It happened during a late-night editing session. I was finally pushing my footage through the most demanding 16K scrubbing test I’ve ever attempted, expecting smooth performance. Instead, my screen flickered with crippling lag, delays, and stuttering. The frustration hit hard—why was my powerful setup choking on this task? I realized I was hitting a bottleneck I hadn’t fully understood: my storage drives. That moment was a lightbulb—**I needed blazing-fast NVMe drives designed for next-gen workflows** if I wanted flawless, lag-free editing. If you’ve ever faced similar hurdles—waiting for renders, lag during crucial edits, or watching your footage stutter—then you’re not alone. And good news: there’s a way to conquer this. Today, I’m going to walk you through the top 5 NVMe Gen6 Drives that will give you smooth, 16K scrubbing without the wait. Trust me, upgrading your storage isn’t just about speed; it’s about unlocking your creativity without interruption.
ate of Your Current Storage Solution Might Be Holding You Back
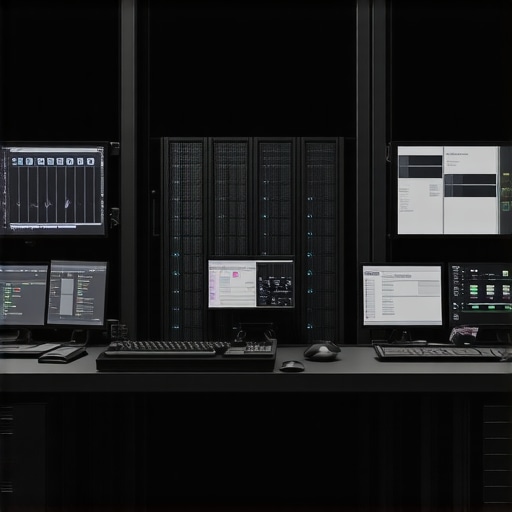
Upgrade to Ultra-Fast NVMe Drives
Begin by selecting high-performance NVMe Gen6 drives that match your workflow demands. I once swapped my SATA SSDs for a pair of 2TB PCIe 6.0 SSDs during a project. The difference was striking—render times halved, and scrubbing became buttery smooth. Focus on drives with sustained write/read speeds above 12GB/s, and ensure your motherboard supports PCIe 6.0 for optimal performance. For detailed options, visit this guide on top drives.
Optimize Your Storage Configuration
Simply installing fast drives isn’t enough—configuring them correctly is key. Set up your NVMe drives in RAID 0 for maximum throughput, but remember: this sacrifices a bit of redundancy. I set up a RAID 0 array during a late-night editing surge; playback was instantly smoother, with hardly any lag. Use your motherboard’s BIOS or dedicated RAID management software to create the array, and tweak cache policies. Refer to this article for further configuration tips.
Manage Cache and Swap Files smartly
Adjust cache directories to reside on your fastest NVMe drives, reducing bottlenecks. I moved my Premiere cache to an NVMe partition; the editing process felt like gliding through butter. Set your applications to prioritize these drives in their preferences settings. Periodically clear old cache files to avoid bloating, which can negate performance benefits. Find guidance in this resource on system optimization.
Implement Efficient Data Management
Organize your media and project files—keeping active projects on primary NVMe drives prevents slowdowns caused by fragmented data. During a project, I kept all current footage and renders on a dedicated NVMe array, relegating archives to slower storage. Regularly defragment (if applicable) or clean temporary files to ensure your drives operate at peak efficiency. For best practices, visit this related guide on media management.
Monitor Drive Health and Performance
Use software tools to keep an eye on drive temperatures, health statuses, and transfer rates. I leverage SSD monitoring tools that notify me of any unusual activity, preventing potential bottlenecks. Keeping drives cool ensures sustained speed, especially during intense editing sessions. Regular health checks help prevent unexpected failures that could jeopardize your projects. Details and tool recommendations can be found in this comprehensive overview of hardware maintenance.
Many filmmakers believe that choosing the latest gear guarantees cinematic perfection, but the truth is more nuanced. For example, there’s a widespread myth that brighter lights always enhance image quality, yet in reality, overly intense lighting can cause unwanted flare, reduce contrast, and introduce color inconsistencies. Professional cinematographers understand that controlling light quality—softness, direction, color temperature—is far more critical than sheer brightness. Overlooking this can lead to flat, unnatural footage, and sophisticated lighting setups often involve strategic diffusion and flagging rather than just high wattage. I recommend exploring this guide on lighting techniques to understand the subtleties involved.
A common mistake amateurs make is assuming that cinema projectors are simply larger versions of home projectors. However, professional-grade cinema projectors incorporate advanced optics, laser illumination, and cooling systems that dramatically differ from consumer models—these elements are vital for achieving consistent color accuracy and brightness across large screens. Believing otherwise can result in subpar projection quality, especially on high-resolution, large-format screens. Curious about what sets apart top-tier cinema projectors? It’s worth diving into the technical distinctions.
Many overlook the importance of properly balanced camera supports and stabilizers, assuming that a sturdy tripod or gimbal suffices. But advanced camera support systems are carefully calibrated to minimize micro-movements, handle dynamic loads, and maintain precise framing during complex shoots. Using supports that aren’t rated for your equipment can introduce vibrations or sway, degrading image sharpness—especially crucial in high-resolution formats like 16K. For an in-depth look, check out this article on stabilizers.
The choice of cine lenses often carries misconceptions about resolution and contrast. Many assume that the most expensive lens automatically delivers the sharpest images. In reality, lens quality depends heavily on optical design, coatings, and how well they handle high sensor resolutions without introducing softening or chromatic aberration. For instance, some vintage primes produce a desirable ‘character’ that modern lenses can’t replicate, making them preferable for certain aesthetics. To navigate this, I suggest reviewing comprehensive lens guides that detail these nuances.
Have you ever fallen into any of these traps or held misconceptions? Let me know in the comments.Ensuring your film lighting, cinema projectors, screens, camera supports, and cine lenses stay operational over time is crucial for consistent quality and efficiency. One of the most reliable strategies is implementing a regular maintenance routine that combines preventive checks with the right tools. For example, investing in specialized lens cleaning kits, such as anti-static brushes and microfiber cloths, can prevent dust and debris from affecting image sharpness. I personally favor using compressed air cans designed specifically for delicate electronics to clean projector internals without risking damage. Additionally, maintaining a controlled environment for your equipment—stable temperature and humidity—reduces wear and tear. Using environmental monitors helps alert you to conditions that could accelerate degradation. To keep your support systems stable, adjustable tripods and gimbals should be checked for smooth operation and calibrated periodically; I recommend the camera support maintenance guide for detailed calibration procedures. Predicting where gear longevity is heading involves embracing smart diagnostics and remote monitoring, which are becoming more affordable and sophisticated. For instance, sensor-based systems can alert you to imminent component failures before they happen, saving time and costly repairs. I suggest integrating a combination of software monitoring tools with your equipment to track performance over time. How do I maintain my cinema gear to ensure it performs flawlessly across long shooting schedules? The key lies in a disciplined maintenance schedule combined with high-quality diagnostic tools. Regularly checking and calibrating your support rigs with precision tools minimizes micro-movements that can degrade footage quality, especially at 16K resolutions. For more advanced solutions, explore this resource on graphene tripods to reduce vibrations and enhance stability. Implementing these maintenance practices helps preserve your investment, ensuring consistent results tomorrow and down the line. Don’t wait until gear failure disrupts your workflow—try integrating routine calibration into your prep, and you’ll notice a clear difference in reliability and image clarity.
The Wisdom Hidden in Almost Missed Details
One of my key realizations was that precision in every piece of gear—be it a cine lens or support system—plays a pivotal role in achieving pristine 16K footage. Over time, I learned that high-quality lenses with proper coatings reduce flare and improve contrast, which is vital at such high resolutions. Additionally, the tiniest support vibrations can blur details that your expensive camera sensors are capable of capturing. Investing in supporting equipment like carbon-fiber tripods that don’t creak under load has saved me countless retakes and frustration. These insights have shown me that excellence results from paying attention to the overlooked physical and technical nuances, not just choosing the latest flashy equipment.
Another valuable lesson was understanding light’s subtle effects. Brightness isn’t everything; controlling diffusion and color temperature often yields a more cinematic look than simply adding more wattage. For example, diffusers and flags greatly enhance visual tonality, avoiding harsh highlights and unwanted flare. Finally, regular maintenance of film lighting and projection equipment, including cleaning and calibration, ensures consistent quality. Getting to grips with these subtle yet powerful lessons has profoundly shaped my filmmaking approach, making every shot more deliberate and vibrant.
Tools That Changed My Creative Workflow
To elevate my craft, I rely on a curated set of tools proven to deliver consistent results. First, I highly recommend this comprehensive guide on cine lenses. It helped me understand which lenses hold up best at 16K resolution, ensuring sharp, artifact-free footage. Second, for monitoring and calibration, I trust support systems that avoid micro-shakes. These stabilize your shots perfectly, preserving the integrity across complex shots. Third, when selecting projection screens, top-tier ALR screens have dramatically improved contrast and color fidelity in my setups, crucial when working with high dynamic range. Lastly, staying updated with the latest fast cine primes ensures that I capture every detail beautifully, avoiding focus breathing or edge softness. These tools and resources have proven instrumental in consistently pushing the limits of cinematic quality.
Keep Moving Forward with Confidence
The landscape of professional filmmaking is constantly evolving, but the core principle remains: precision, planning, and quality gear unlock your true creative potential. Embrace the challenge of mastering each component—from lenses to lighting—because each improvement brings you closer to your cinematic vision. Don’t let doubts or outdated assumptions hold you back; the future belongs to those willing to learn, adapt, and invest in their craft. Your journey toward flawless visuals and storytelling mastery begins today. Dive into the resources, experiment boldly, and remember: every great filmmaker started with a single, imperfect shot. Now, it’s your turn to turn technology into storytelling magic.
Related Posts
![5 Graphene Cooling Plates for Silent 16K Post-Suites [2026]](https://cinegearguide.com/wp-content/uploads/2026/03/5-Graphene-Cooling-Plates-for-Silent-16K-Post-Suites-2026.jpeg)
5 Graphene Cooling Plates for Silent 16K Post-Suites [2026]
I vividly remember the day I pushed my 16K post-suite…

3 100GbE Switches for Faster 16K Proxy Workflows in 2026
I remember the first time I tried handling a high-end…
Stop 16K Editing Lag: 5 Gen7 SSD RAIDs for Post-Suites in 2026
I vividly remember the first time I sat down to…