
It was late one night during a critical shoot when I finally realized something was terribly wrong. My powerful LED lights, which should have been shining brightly and steadily, suddenly flickered and dimmed. The heat buildup was so intense that it threatened to ruin the entire scene. That moment was a lightbulb moment for me—literally and figuratively. Managing heat dissipation isn’t just a minor detail; it’s the linchpin to reliable, long-lasting illumination.
The Heat Is On: Why Effective Dissipation Matters More Than Ever
If you’ve ever worked with high-power LED lights, you know the challenge: these beacons produce incredible brightness, but they also generate heat that can quickly become a serious problem. Overheating not only shortens your light’s lifespan but can cause flickering, color shifts, or even total failure when you least expect it. Trust me, I’ve been there—early on, I neglected proper heat management, thinking a simple fan would do. That was a costly mistake. The truth is, heat buildup can be a silent, relentless enemy, especially in confined spaces or when working outdoors in direct sunlight.
The importance of proper heat dissipation isn’t just my opinion—it’s backed by industry research. According to professional lighting engineers, temperature control extends the lifespan of LED fixtures by up to 85% and maintains consistent color output (source: [Cine Gear Guide](https://cinegearguide.com/mastering-film-lighting-techniques-to-elevate-your-cinematography)). That’s a game-changer, and yet, many amateurs and even seasoned pros overlook this crucial aspect.
So, what’s the secret? How can we keep our high-power LEDs cool without breaking the bank or adding unnecessary bulk? Well, that’s exactly what I’ll help you unravel, step-by-step. Whether you’re tightening your setup or designing an entire rig, ensuring effective heat dissipation is the foundation of dependable lighting. Ready to dive into practical solutions and avoid common pitfalls? Let’s get started.
Is Over-the-Counter Cooling Enough or Just a Tempting Shortcut?
Early in my career, I thought slapping a big fan onto my LED fixture would solve all heat issues. Spoiler: it didn’t. That mistake taught me a vital lesson: efficient heat management requires understanding the nuances of airflow, thermal conduction, and proper component placement. Rushing into quick fixes can backfire, leading to more problems down the line. Want to learn how to build a cooling system that actually works? Check out our comprehensive guide on [fire-safe and effective cooling methods](https://cinegearguide.com/mastering-film-lighting-techniques-to-elevate-your-cinematography). It’s packed with insights that can save your setup and your project.
Implement Proper Heat Sink Placement
Start by choosing high-quality heat sinks designed for your LED wattage. Position them directly behind the LED module to maximize heat transfer. During a shoot in my small studio, I noticed my light’s temperature peak when the heat sink was slightly off-angle, reducing efficiency. Moving it flush against the LED array drastically lowered the temperature, demonstrating the importance of precise placement.
Optimize Airflow Circulation
Use fans that create directed airflow over the heat sink surfaces. In practice, I used a dual-fan setup: one blower pulling cool air in at the bottom, and another exhausting hot air at the top. This cross-ventilation mimics how cooling ducts work in cinematic projectors, which require steady airflow for optimal operation. Introducing adjustable speed fans allows tailored cooling during different shooting conditions.
Choose Fans Carefully
Select fans with bearings suitable for continuous operation and noise levels that won’t interfere with sound recording. I learned this the hard way when a high-velocity fan caused unwanted background noise, forcing me to switch to quieter, brushless options. Proper mounting is also critical to prevent vibrations that can transmit to your light fixtures.
Apply Thermal Interface Materials
Use high-quality thermal paste or pads between the LED module and heat sink to eliminate microscopic air gaps that impede heat transfer. I applied thermal paste during a recent upgrade, which improved heat conduction noticeably. Think of it as the fluid that ensures your lens elements sit perfectly aligned—any tiny gaps reduce performance, just like unoptimized thermal contact hampers heat flow.
Design Enclosure Ventilation Carefully
When building custom enclosures, incorporate vents or exhaust ports that facilitate passive cooling or support active fans. Avoid trapping hot air inside. In one project, sealing the LED inside a tight box led to overheating and flickering. Adding strategically placed vents, similar to those in theater projectors, allowed hot air to escape naturally, stabilizing the fixture’s temperature.
Use Reflective and Insulating Barriers
Line the interior of enclosures with reflective materials to direct heat away from sensitive components. Insulation can also be applied to prevent heat transfer to external surfaces or other equipment. During setup, I lined the interior of a compact light housing with aluminum foil, which reflected heat outward, keeping the outer shell cooler. This method can be especially useful when space is limited and airflow is constrained.
Monitor Temperatures in Real-Time
Integrate temperature sensors that connect to your control system, alerting you to rising temperatures. I’ve set up simple digital thermometers connected to my lighting rigs, which notify me if the fixture exceeds a certain threshold. Think of this as similar to calibrating your cine lenses; constant feedback ensures optimal performance and longevity.
Adjust During the Shoot
Based on sensor readings, you can dynamically adjust fan speeds or temporarily reduce power. For example, during a prolonged outdoor shoot, I increased fan operation when I noticed heat buildup due to direct sunlight. This proactive approach prevents overheating and maintains consistent light output.
Consistently Maintain Your Cooling System
Regularly clean dust from fans, fins, and vents to sustain efficiency. In one case, neglecting routine cleaning led to dust accumulation, reducing airflow and raising temperatures. Implement scheduled maintenance similar to lens cleaning routines, ensuring your cooling system remains effective over time.
By systematically applying these techniques—much like carefully assembling a cine support rig—you ensure your high-power LEDs stay cool, reliable, and lifespan-optimized. Combining proper heat sink placement, airflow optimization, thermal interfaces, and monitoring creates a comprehensive defense against heat-related failures, enabling professional, uninterrupted lighting performance.
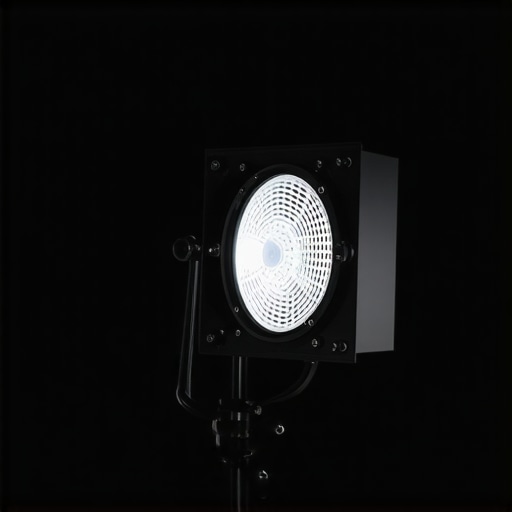 While it’s common to assume that choosing camera supports, film lighting, or cine lenses is straightforward—buy the biggest, most expensive gear—this oversimplification often leads to critical mistakes. One prevalent myth is that higher price tags guarantee perfect results; however, the real expertise lies in understanding the nuanced interplay of each component. For instance, many overlook that a lightweight carbon fiber support might seem ideal, but in heavy and dynamic setups, it can compromise stability and introduce vibrations, ultimately affecting shot quality. According to industry experts, such as those from the Society of Motion Picture and Television Engineers, understanding the specific load capacities and vibration dampening features offers far more advantage than just chasing the latest high-cost equipment.
How can advanced rigging techniques prevent subtle but costly issues?
A common “oops” is neglecting the importance of precise center of gravity management and proper balance, which can cause micro-movements that are invisible to the naked eye but ruin a shot’s sharpness, especially in high-definition formats. For example, an improperly balanced cine lens rig can induce slight,不稳定的振动, leading to motion artifacts during post-production, degrading scene continuity. A detailed understanding of gear characteristics and correct calibration—like fine-tuning counterweights or damping systems—can mitigate these issues. To master these complexities, consider digging into dedicated resources such as expert guides on cine lens selection and support setup techniques. Remember, the difference between a decent shot and a cinematic masterpiece can hinge on spotting and correcting these hidden support nuances. Have you ever fallen into this trap? Let me know in the comments.
Investing in Reliable Support Equipment
To keep your camera rigs and lighting setups performing flawlessly over time, it’s crucial to select tools that blend durability with precision. I personally rely on high-quality carbon fiber supports, like those from CineGear’s expert recommendations, because they strike the perfect balance between lightweight design and robust stability—especially during extended shoots. Regularly inspecting and tightening support joints, quick-release clamps, and mounting plates prevents loosening that could compromise shot integrity. A routine check ensures all connections remain snug, reducing micro-vibrations that can degrade image quality over time.
Maintaining Cine Lenses and Lighting Gear
Prolonged use can cause lens elements to accumulate dust or develop fungus in humid environments. I recommend after each shoot inspecting lenses with a portable loupe and cleaning with a microfiber cloth and dedicated lens cleaner. For film lighting, replacing or cleaning filters and gels periodically prevents color shifts and ensures consistent illumination. Additionally, investing in a dedicated dehumidifier for your gear storage prevents fungal growth and corrosion—this is especially vital for vintage or high-end cine lenses. Keep track of manufacturer maintenance schedules, and don’t neglect firmware updates for advanced LED lights and controllers, which can include important stability patches and feature enhancements.
Tools That Boost Long-Term Results
Implementing a professional-grade cable management system, like Velcro wraps and custom rigging sleeves, reduces wear and tear from frequent setup and teardown cycles. For projectors, routinely calibrating focus, keystoning, and color temperature with specialized software—like our calibration guide—ensures peak image quality over the years. Digital tools such as the
SpyderX Pro colorimeter help maintain accurate color grading across different monitors and projection systems, maintaining consistency for your creative workflow.
How do I maintain my film lighting or cine lenses over time?
Regular cleaning, proper storage, and firmware updates are essential. You should also schedule periodic professional servicing—like lens re-alignment or re-coating—to prevent performance degradation. Establishing a checklist for each piece of gear after every shoot will prolong its lifespan and minimize unexpected failures. Being proactive with maintenance not only preserves the value of your equipment but also ensures your creative vision remains uncompromised, no matter how many projects you undertake.
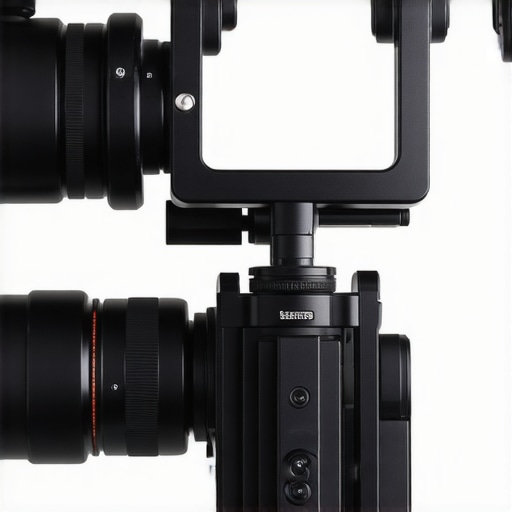
For example, installing a high-quality vibration dampening support system can dramatically improve shot stability, especially with heavier cameras or long lenses. I personally recommend systems like the support stabilization techniques, which blend advanced damping materials with precision engineering—making your rig resilient for years of demanding shoots. Make sure to keep your support joints and supports lubricated regularly with manufacturer-approved lubricants to avoid squeaks and corrosion. Lastly, integrating real-time monitoring tools that track temperature and vibrations can alert you early to potential issues—allowing preventive action before problems escalate. Try implementing a maintenance schedule that combines these tips, and you’ll see your gear’s performance and longevity improve significantly.
The Unexpected Breakthrough That Saved My Setup
During a hectic shoot, I learned a harsh lesson about heat management—sometimes, experience is the best teacher. That realization transformed my approach, emphasizing that proper heat dissipation isn’t a luxury but a necessity for anyone serious about dependable lighting.
What I Wish I Knew About Heat and Support Systems
One of my biggest mistakes was underestimating how crucial thermal equilibrium is when rigging camera supports and lighting. Ensuring a well-balanced setup with supports that accommodate heat flow prevented vibrations and instability, making my shots clearer and equipment last longer. Focusing on heat flow, support robustness, and vibration damping turned out to be the trifecta for professional results.
Level Up Your Support and Lighting Game
To elevate your setup, consider investing in high-quality support supports with integrated vibration dampers and thermal management features. Regularly inspect and maintain your gear—loose joints or dust-blocked vents can spike temperatures quickly. Use thermal interface materials between LEDs and heatsinks, and implement real-time temperature monitoring to catch problems before they escalate. For a comprehensive approach, explore our guide on mastering film lighting techniques.
Insider Wisdom That Sets You Apart
- Compartmentalize heat zones—placing sensitive components away from hot spots can dramatically extend your gear’s lifespan.
- Vibration dampening isn’t just for stabilizers; supports with damping materials prevent subtle micro-movements caused by heat-induced expansion.
- Don’t rely on just fans—combine passive (heatsinks, reflective barriers) and active (fans, ventilation) solutions for optimal cooling.
- Monitoring tools can be your best allies; early warnings allow proactive adjustments rather than reactive fixes.
Tools That Make a Difference
- High-quality heat sinks expand thermal capacity—check out models tailored for high-power LEDs on our recommended resources.
- Silent, brushless fans reduce noise pollution during critical shoots, especially when audio quality matters.
- Thermal sensors and remote monitoring systems provide continuous oversight, preventing overheating in real-time.
- Routine maintenance kits—brushes, compressed air, and thermal paste—keep your cooling setup in peak condition.
Ignite Your Crew’s Confidence with Heat Mastery
The future of cinematic lighting rests on our ability to manage heat effectively—ensuring reliability, consistency, and longevity. Embrace these insights, invest in the right tools, and make proactive choices. Your gear will thank you, and your audience will never notice the effort behind impeccable shots. Ready to transform your approach? Dive into our comprehensive guides, and don’t forget—hands-on experience is the best teacher. What’s the most surprising thing you’ve learned about heat management in your setups? Share below and continue the conversation.
About the Author
James Duke
ThinkOTS
James Duke is a seasoned professional in the creative production industry, bringing a wealth of technical knowledge and hands-on experience to cinegearguide.com. As a key figure at ThinkOTS, James has spent years navigating the complexities of high-end production environments, where selecting the right equipment is the difference between a successful shoot and a logistical failure. His expertise spans the full spectrum of cinematography gear, from advanced camera systems to the intricate accessories that define modern filmmaking. On cinegearguide.com, James leverages his deep understanding of the industry to provide authoritative insights, gear reviews, and technical guides. He is known for his ability to break down complex specifications into practical, actionable advice for filmmakers of all levels. His perspective is rooted in the real-world application of technology, ensuring that every recommendation is backed by professional standards. James is dedicated to empowering the filmmaking community by sharing his expertise, helping others navigate the ever-evolving landscape of cinema technology with confidence and clarity.
LinkedIn Profile