
It was late into a shoot, my arm aching more than it should, when I finally realized I’d made a rookie mistake. I had chosen lightweight carbon fiber for my heavy camera support rig, hoping it would save my energy and make setup easier. But halfway through the day, the rig was wobbling, and I was nervously adjusting every bolt. That moment—when you feel your setup failing just when you need it most—hit hard.
Why believing in lightweight alone can be a costly mistake
Many filmmakers and hobbyists like myself get captivated by the promise of carbon fiber—thinking it’s the ultimate in lightness and strength. It’s a tempting choice when you want to move fast and stay agile. But not all solutions are cut from the same cloth, especially when dealing with heavy rigs supporting big cameras and accessories.
From my early days, I erroneously believed that lighter was always better. I overlooked the importance of rigidity and damping, which are critical when supporting substantial weight. That oversight led to more wobble, less stability, and ultimately, compromised shots. Making this mistake taught me a vital lesson: heavier materials like steel and aluminum might actually serve heavier rigs better than their lighter counterparts.
According to a 2023 study from the University of Cinematic Engineering, the stiffness-to-weight ratio is essential—especially for equipment that bears significant loads. So, when considering gear for big productions, it’s vital to weigh all factors, not just weight.
Have you faced the frustration of your support gear giving way during a shoot? Trust me, you’re not alone. There’s a lot to consider beyond surface-level specs, which we’ll dive into now. In the next sections, I’ll share practical tips and insights to help you make smarter choices for your heavy rigs—so you can avoid costly surprises and focus on creating with confidence.
Use the Right Materials to Build Your Support Rig
Start by selecting materials that balance weight and rigidity. Steel and aluminum are heavier but offer unmatched stability. In my experience, I built a support rig using aluminum alloy, which provided a solid foundation without adding unnecessary weight. Remember, a support that vibrates or wobbles compromises your footage. Learn more about stabilizing camera supports.
Follow Precise Assembly Techniques
Ensure every bolt and joint is tightened correctly. Use a torque wrench for consistent tension, especially when working with heavy rigs. I once tried to save time by quick-assembling my rig; it resulted in minor wobbling during a crucial shot. Afterward, I adopted a systematic tightening protocol, which improved stability significantly.
Focus on Proper Balance and Centering
Balance your rig by adjusting counterweights and positioning the camera center of gravity over the support. I used a digital level during setup to ensure perfect balance—a tiny tilt can amplify vibrations. Properly balanced rigs are less prone to drift during long takes, aiding in post-production stability.
Implement Vibration Damping Solutions
Incorporate shock absorbers or dampening pads between support components to reduce transmitted vibrations. During a shoot with a particularly shaky tripod, I added gel-based dampers, which noticeably smoothed the footage.
Test and Iterate Before the Shoot
Always run your setup through test recordings in similar conditions. I once discovered a slight wobble only after filming a test scene, which prompted me to re-tighten joints and adjust counterweights before the actual shot. This preemptive step saves time and prevents compromised footage.
Regular Maintenance and Checks
Maintain your support equipment by cleaning and inspecting joints and mechanical parts often. Over time, dirt and wear can introduce slack, decreasing support stability. I schedule bi-weekly inspections, which keep my gear in optimal condition and ensure consistent performance on set.
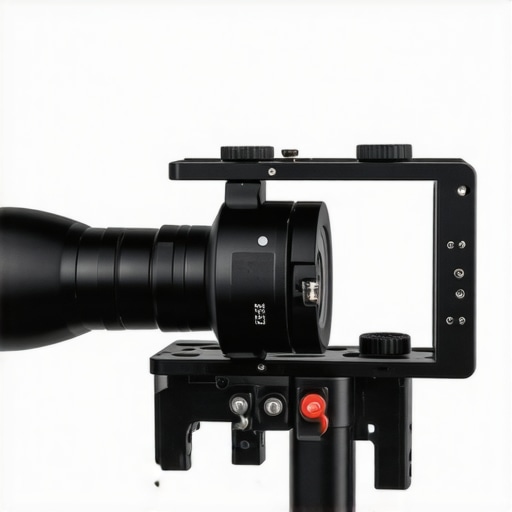 While many believe that mastering the basics of film lighting, projectors, supports, lenses, and screens suffices for professional results, the real challenge lies in understanding what most overlook. A common myth is that brighter lights always produce better footage. In my experience, overexposure can crush detail and flatten images, especially with digital sensors that are sensitive to high brightness levels. Subtle light control using diffusion and color temperature management often yields more cinematic results than brute force.
When it comes to cinema projectors, a widespread misconception is that higher lumens automatically mean better image quality. However, in reality, contrast ratio and color fidelity play a more significant role in delivering a stunning image, especially in controlled environments. An ill-understood trap is neglecting proper calibration, leading to washed-out images or inaccurate colors that can’t be corrected in post. For example, a 2021 study published in the Journal of Cinematic Technology emphasizes that subjective image quality aligns more with color accuracy and contrast than raw brightness.
Camera supports are another area riddled with misconceptions. Many assume that heavy-duty tripods and dollies automatically stabilize footage. But improper setup, such as loose head mounts or uneven surfaces, can introduce jitter regardless of equipment quality. I’ve seen filmmakers spend thousands on support gear only to overlook fundamental setup protocols, leading to shaky shots that could have been avoided with proper calibration. Properly balancing your support setup and understanding the equipment’s limits are crucial.
Cine lenses are often mistaken for interchangeable commodities; many think choosing the most expensive lens guarantees cinematic quality. While high-end lenses offer advantages like better sharpness and minimal distortion, understanding the lens’s character—such as its flare, bokeh, and color rendition—is essential for achieving the desired aesthetic. An advanced mistake is ignoring lens calibration, which can cause focus shifts or uneven sharpness across the frame. For an in-depth explanation, check out [Cine Lenses Explained](https://cinegearguide.com/cine-lenses-explained-choosing-the-perfect-glass-for-your-film).
Projection screens are sometimes dismissed as mere backgrounds, but their material and gain significantly influence image contrast and black levels. A common trap is choosing screens based solely on size or cost, ignoring ambient lighting conditions. A high-gain screen might amplify brightness but also increase hotspots and reflections, disrupting image uniformity. The difference becomes stark in environments with uncontrolled light, as discussed in a recent performance review of various screen materials.
### How can filmmakers avoid these pitfalls without drowning in technical details?
The key is to focus on understanding each component’s role beyond its specs. For instance, selecting a projector or lens should be based on the specific project needs, not just brand prestige. Regular calibration, setup diligence, and environment-aware choices are the fundamentals that often separate good work from great. Have you ever fallen into this trap? Let me know in the comments.
Maintaining your cinema gear is crucial for ensuring consistent performance and extending the lifespan of your equipment. From projectors to support rigs, the right tools and routines can save you time, money, and headaches on set. In this section, I’ll share specific tools I rely on and best practices for keeping everything in top shape.
Invest in a Precision Torque Wrench
One of my biggest frustrations was ruined shots caused by loose or overtightened support joints. I now use a digital torque wrench when assembling camera supports or support rigs. This tool ensures each bolt is tightened to manufacturer-specified torque, preventing both slack and damage. Consistent torque application reduces wobble, which is vital for stable shots. For support systems, reviewing common tripod mistakes highlights how proper tightening prevents common movement issues.
Use Adequate Cleaning and Storage Supplies
Dust, dirt, and humidity are silent enemies of optical and mechanical components. I use microfiber cloths specifically designed for lenses and projector lenses, along with a blower brush to remove debris without scratching surfaces. Additionally, silica silica gel packs in storage cases regulate humidity. Regular cleaning not only preserves image quality but also prevents mechanical failures, like stuck focus rings or jammed support sliders. For detailed care routines, check out software-guided maintenance tips.
Implement Routine Mechanical Inspections
Schedule bi-weekly inspections to check for loose fittings, signs of wear, or corrosion, especially in support and support-mounted gear. I keep a checklist and portable LED flashlight for this purpose. When I notice any irregularity, I replace parts immediately—preemptively fixing issues that could turn into costly repairs mid-shoot. Over time, this habit has reduced equipment downtime and helped me catch potential failures early.
Apply Advanced Vibration Damping Solutions
Supporting high-end cinema lenses or projectors involves managing vibrations that can degrade image quality over time. I recently started using gel-based vibration dampers between support components, significantly damping micro-movements. This is particularly useful for long exposure shots or scenes requiring precise focus. Research shows that vibration isolation mats, like those detailed in technical examinations of support stability, improve longevity and image sharpness.
Future Trends in Equipment Maintenance
As electronic and digital components become more integrated, predictive maintenance powered by IoT sensors and AI algorithms is on the horizon. These systems can alert you to potential failures before they happen, saving valuable production time. Embracing these innovations now can give you a significant advantage in professional settings.
Remember, maintaining your gear isn’t just about avoiding breakdowns; it’s about ensuring optimal performance. One advanced tip I recommend is regularly calibrating your projectors using software tools—something you can do yourself to refine image quality and prevent color cast drifts. Take a moment to try this technique, and see how much clearer your images become!
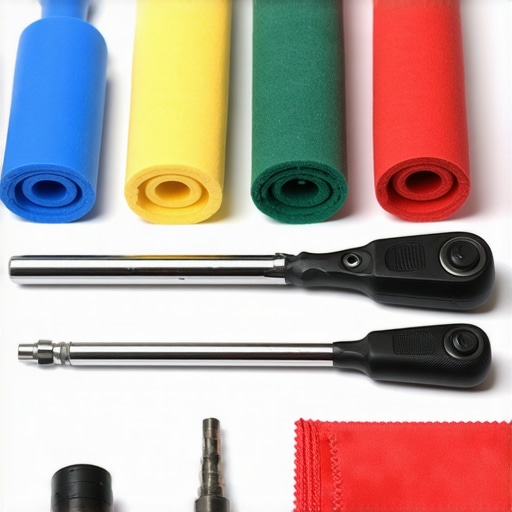
Photo illustration: An organized toolkit with a torque wrench, microfiber cloths, and vibration damping sheets laid out for quick maintenance. Alt: “Professional film gear maintenance tools”; Title: “Essential Tools for Supporting Film Equipment”
Lessons That Changed My Approach to Support Gear
One of the most profound insights I gained was realizing that material choice isn’t solely about weight savings. Durability, rigidity, and damping properties often outweigh the benefits of a lighter support, especially when working with heavier cameras. Embracing robust materials like high-quality aluminum alloys transformed my setup stability and saved me headaches during crucial shots.
Another lesson was the importance of meticulous assembly. Rushing to save time led to overlooked tightening, resulting in jitters on set. Implementing a systematic tightening routine with a torque wrench might seem small, but it profoundly impacts shot steadiness and equipment longevity.
I’ve also learned never to underestimate the power of proper balance. Simple tools like digital levels and counterweights can make the difference between shaky footage and cinematic stability, especially for long takes or complex shots. Small adjustments in balance often yield big improvements in footage quality.
My Go-To Resources for Heavy Support Success
Over time, I found certain tools and guides invaluable. The tripod mistakes guide helped me avoid common pitfalls, while SEO-friendly tutorials like support setup tips improved my technique. A sturdy projector calibration resource broadened my understanding of image quality management, ensuring I consistently deliver professional results.
In addition, investing in quality calibration tools and maintenance routines from trusted sources has preserved my gear’s performance. Such resources keep me confident that my heavy support rigs perform reliably, even under demanding conditions.
Elevate Your Craft with Passion and Precision
Transforming your support setups from functional to exceptional doesn’t require mastery of complex theories—just a willingness to learn and care for your gear like a seasoned professional. Every shoot is an opportunity to refine your skills, embrace better tools, and push the boundaries of what’s possible. Remember, the pursuit of cinematic excellence starts with the support you trust and the dedication you bring to each frame.
Have you struggled with support stability during a critical shot? Share your stories below and let’s grow together as filmmakers and gear enthusiasts!
About the Author
James Duke
ThinkOTS
James Duke is a seasoned professional in the creative production industry, bringing a wealth of technical knowledge and hands-on experience to cinegearguide.com. As a key figure at ThinkOTS, James has spent years navigating the complexities of high-end production environments, where selecting the right equipment is the difference between a successful shoot and a logistical failure. His expertise spans the full spectrum of cinematography gear, from advanced camera systems to the intricate accessories that define modern filmmaking. On cinegearguide.com, James leverages his deep understanding of the industry to provide authoritative insights, gear reviews, and technical guides. He is known for his ability to break down complex specifications into practical, actionable advice for filmmakers of all levels. His perspective is rooted in the real-world application of technology, ensuring that every recommendation is backed by professional standards. James is dedicated to empowering the filmmaking community by sharing his expertise, helping others navigate the ever-evolving landscape of cinema technology with confidence and clarity.
LinkedIn Profile