
I vividly remember the moment I realized I was wasting hours tweaking colors in post-production. After a long shoot day, I’d sit at my editing station, endlessly adjusting curves and saturation, hoping to get that perfect look. One day, it hit me—what if I could get it right straight out of the camera? That lightbulb moment led me to using a color meter, and honestly, it changed my workflow forever. Today, I want to share with you how mastering this simple tool can save you precious hours—and frustration—in post-production.
Why Accurate Color Measurement Accelerates Your Workflow
Understanding and controlling color temperature and exposure during shooting isn’t just a geeky detail; it directly impacts how quickly your footage will end up on screen. When I first started, I underestimated the importance of measuring light accurately. I trusted my camera’s auto settings or eyeballed it, which often led to mismatched shots and hours of color correction later. That mistake cost me more time than I was willing to admit. Since then, I’ve learned that a reliable color meter allows you to set precise parameters from the start—think of it as your secret weapon for consistency and speed.
Using a color meter, you can quickly determine the correct Kelvin temperature and luminance levels, ensuring that your footage is properly balanced right out of the camera. This approach keeps your editing process lean and focused, letting you spend more time on storytelling rather than chasing down color inconsistencies. If you want to learn more about the technical side, check out this comprehensive guide.
Are You Wasting Time Fixing Colors in Post?
Here’s a reality check: I used to think minor color tweaks were no big deal. Turns out, that mindset cost me days every project. Early on, I made the mistake of skipping proper light measurement because I believed experience alone could compensate. But the truth is, without objective data, you’re guessing—often in vain. Now, I swear by my color meter, and it’s become a staple in my kit. If you’ve ever faced the frustration of mismatched footage or spent hours color-correcting, you’re not alone. Let’s explore how you can avoid these pitfalls and work smarter, not harder.
Set Your Scene Before Shooting Begins
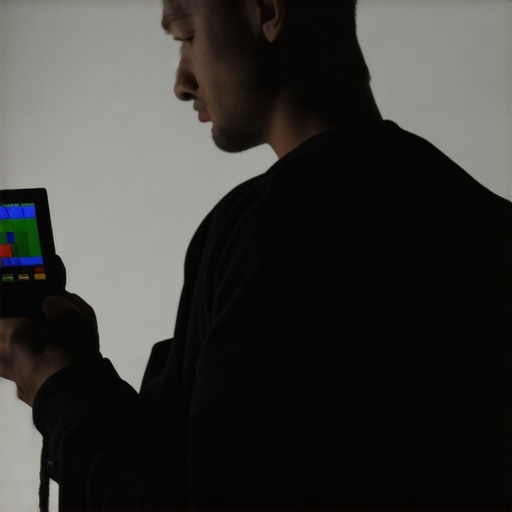
Start by evaluating your lighting environment with your color meter. Hold the device towards your light source at a 45-degree angle, avoiding direct contact with reflective surfaces. Adjust your on-camera settings based on this reading—match the kelvin temperature and luminance to your desired aesthetic. In a recent shoot, I measured my key light at 5600K, shot a test frame, and ensured the shot was perfectly balanced without the need for extensive color correction afterward.
Choose the Right Equipment
Opt for a reliable, easy-to-use color meter like the Sekonic C-700 series. This device allows you to measure both color temperature and incident light quickly, saving time during setup. Remember, consistency is key; use the same device across multiple shots to maintain uniformity.
Calibrate Your Camera Settings Properly
Apply your measurements directly by setting your camera’s white balance to match the measured kelvin value. For example, if your scene measures at 5600K, dial your camera to that temperature. Additionally, adjust your exposure based on luminance readings to prevent overexposure or underexposure, ensuring detailed shadows and highlights straight out of the camera. During a recent documentary shoot, this approach allowed me to shoot multiple scenes with minimal post-processing, reducing editing time significantly.
Use LUTs and Monitor Calibration
After initial setup, employ calibrated monitors and look-up tables (LUTs) to preview your footage accurately. This ensures your on-set color decisions translate perfectly during post-production. For instance, I calibrated my monitor with the same tools used in post, preventing surprises and making effective on-the-fly adjustments.
Implement Consistency Checks Throughout Shooting
Periodically re-measure your light as your scene progresses or as natural light changes. This maintains color consistency across all shots. For example, during a long outdoor shoot, I checked my light readings every 20 minutes, adjusting my camera or fill lights as needed. This practice avoided color shifts, reducing corrections in post and ensuring visual continuity.
Integrate Basic Lighting and Lens Knowledge
Understanding how projection screens or camera supports can influence your scene’s look is vital. For instance, using a flat, matte-white surface can reflect light evenly, aiding in accurate measurements. Similarly, choosing the right cine lens affects color rendition and sharpness, complementing your measured lighting conditions. Educating yourself with resources like this guide can refine your technical decisions further.
Many filmmakers operate under misconceptions that can subtly sabotage their production quality. For instance, the prevalent belief that higher-priced cinema lenses automatically yield superior images misses the crucial point that lens choice should align with the specific shooting conditions and aesthetic goals. In fact, many amateur setups overlook the impact of lens coatings and flare control, which can dramatically influence the final look. Contrary to popular myth, budget-friendly lenses with proper technique can outperform high-end gear in certain scenarios. Additionally, the assumption that all projection screens are interchangeable is misleading. Many rely on standard options without considering the ambient lighting and throw distance, leading to washed-out images or poor contrast.
Are You Choosing the Right Projection Screen for Your Space
Well-informed professionals customize their screen selection based on room-specific factors—like reflective properties and gain—to optimize visual fidelity. For further insights, check this guide on projection screens. Equally, misconceptions about camera supports linger: many believe that the heaviest stabilizers produce the smoothest shots. However, overbuilt rigs can hinder mobility and increase setup time, often leading to less dynamic footage. Streamlined rigs with proper weight distribution enable smoother operation and faster setups. Investing time in understanding the nuances of support ergonomics, as explained at this resource, can elevate your filmmaking. Moreover, the oversimplified view that all cinema projectors deliver identical performance ignores the technological distinctions such as laser versus arc lamps, resolution, and color accuracy. These factors significantly impact the viewer’s experience. Don’t fall into the trap of assuming a cheap projector suffices; instead, evaluate specifications in light of your viewing environment. For a detailed comparison, see this comprehensive projector guide. Finally, many underestimate the importance of lens coatings and aperture blades, which influence image contrast and flares. Advanced cine lenses incorporate multi-layer coatings and precise aperture mechanisms—features that even cost-effective lenses can benefit from if used correctly. Remember, understanding these nuanced details allows you to make informed choices that elevate your craft. Have you ever fallen into this trap? Let me know in the comments.Maintaining your film lighting setups, projection screens, camera supports, cinema projectors, and cine lenses requires careful attention to detail and the right mix of tools and methods. Personally, I rely on a combination of high-quality, durable equipment and software solutions designed specifically for professional use. For instance, a reliable lens cleaning kit like the VSGO Professional Camera Cleaning Kit helps prevent dust and smudges that can mar image quality over time. Regular calibration of your projectors is essential—using software such as Calman Home for Projectors ensures your display stays consistent, avoiding color shifts that can compromise your intended aesthetic. Additionally, investing in sturdy, well-engineered camera supports like the Manfrotto Silver Series tripods and fluid heads guarantees smooth operation, especially during long shoots or complex camera movements. To monitor performance and troubleshoot issues effectively, I recommend using waveform monitors and vectorscopes, which assist in fine-tuning exposure and color accuracy, ultimately ensuring your footage remains pristine.
Future trends suggest a rise in intelligent, self-diagnosing gear that can alert you to maintenance needs before equipment fails. For example, newer cinema projectors are beginning to include diagnostic features that track lamp hours and temperature fluctuations, allowing proactive servicing rather than reactive repairs. As this technology matures, it will dramatically reduce downtime and extend the lifespan of your tools.
How do I maintain my film lighting and support gear over time?
Consistency in maintenance begins with scheduled inspections and using the right cleaning and calibration tools. Regularly clean lenses and filters with specialized optics cloths and solutions like Eclipse Blower Brush Kits to prevent dust buildup. Calibrating your projectors and monitors with hardware such as the SpyderX Elite Colorimeter will keep colors accurate and images sharp. Moreover, routinely inspecting support gear for wear or damage, especially joints and locking mechanisms, ensures safety and performance during shoots. Implementing a checklist before each project—covering equipment status, calibration date, and cleaning schedule—helps prevent unexpected failures and prolongs your gear’s usable life. For more detailed guidance on calibrating projectors effectively, check out this calibration guide. Don’t forget to stay ahead by investing in advanced diagnostic tools; over time, they will save you costly repairs and lost shoots. Try integrating routine calibration with software solutions into your maintenance routine and see how it transforms your workflow.
What I Wish I Knew About Measuring Light Early On
One of the most eye-opening lessons I learned was how a simple, consistent approach to light measurement can eliminate guesswork and accelerate project timelines. I used to rely solely on my camera’s auto white balance, only to find my shots had inconsistent color temperatures and extra work in post. Discovering the power of a dedicated color meter transformed my workflow — now, I set my scene’s parameters with confidence, saving hours of corrections. This insight became the cornerstone of my professional practice, and I believe it can do the same for you.
The Power of Choosing the Right Tools and Wisdom from the Pros
Over time, I realized that investing in a quality Sekonic C-700 series was crucial. Their reliability and speed in capturing light readings kept my setup efficient, especially when shooting complex scenes or outdoors. Complementing that with calibrated monitors and LUTs ensured what I saw during filming matched the final output. Additionally, learning from industry experts through dedicated resources elevated my understanding of how technical details influence storytelling — knowledge like this is invaluable for creating visuals that truly resonate.
Your Journey Starts Now: Elevate Your Craft
Remember, mastery in film lighting and supporting gear isn’t just about equipment; it’s about cultivating an intentional approach that integrates technical precision with creative vision. Embracing these practices empowers you to craft compelling visuals with fewer hurdles, freeing you to focus on what truly matters: telling your story. Don’t be afraid to experiment and refine your skills—your next breakthrough could be just a measurement away.
About the Author
James Duke
ThinkOTS
James Duke is a seasoned professional in the creative production industry, bringing a wealth of technical knowledge and hands-on experience to cinegearguide.com. As a key figure at ThinkOTS, James has spent years navigating the complexities of high-end production environments, where selecting the right equipment is the difference between a successful shoot and a logistical failure. His expertise spans the full spectrum of cinematography gear, from advanced camera systems to the intricate accessories that define modern filmmaking. On cinegearguide.com, James leverages his deep understanding of the industry to provide authoritative insights, gear reviews, and technical guides. He is known for his ability to break down complex specifications into practical, actionable advice for filmmakers of all levels. His perspective is rooted in the real-world application of technology, ensuring that every recommendation is backed by professional standards. James is dedicated to empowering the filmmaking community by sharing his expertise, helping others navigate the ever-evolving landscape of cinema technology with confidence and clarity.
LinkedIn Profile