
Have you ever watched a film or viewed an image where your eye was irresistibly drawn to a specific spot, yet you couldn’t quite put your finger on why? I used to struggle with this myself—lighting that seemed almost random, yet somehow failed to direct the viewer’s gaze. One night on set, after a long day of tweaking lights and repositioning reflectors, I experienced a genuine lightbulb moment. It was as if I discovered a hidden language in lighting that I had overlooked for years: negative space.
Understanding how to intentionally use negative space in your lighting setups dramatically transforms the way viewers interpret your work. It’s not just about illuminating your subject, but about guiding their eye through the story you’re telling. And funnily enough, many beginners make the mistake of filling every inch with light, thinking more means better. I did this early on, and it diminished the impact of my shots. The key is learning when to leave areas in shadow—creating contrast that naturally directs attention.
Today, I’ll show you how to harness negative space through lighting techniques that are as powerful as they are simple. We’ll break down how strategic shadows and highlights communicate importance without overcrowding the frame. Whether you’re working with film lighting, financial support gear, or projecting on a screen, mastering this skill will make your visuals more compelling and your viewers more engaged.
The Power of Shadows: Why Less Is More in Lighting
Shape Your Shadows for Clarity
Begin by planning your lighting setup around the areas you want to emphasize. Use lighting techniques that create intentional shadows, leaving surrounding spaces in darkness. A practical approach is to position a key light at a 45-degree angle from your subject, illuminating the face while allowing the background and edges to fall into shadow. In my experience, a shoot where I used a narrow-beam cine lens with a focused beam made the subject stand out sharply against dark surroundings, guiding viewers’ eyes directly to the focal point.
Utilize Contrast Effectively
Contrast is your best ally here. Increase the difference between lit and shadowed areas to naturally direct attention. For example, set your fill lights at a lower intensity than your key light; this creates a stark separation between the subject and background. While working on a documentary, I intentionally reduced fill light to emphasize a person’s face against a busy cityscape, making their expression the uncontested focal point. Remember, this plays into the visual hierarchy—letting the viewer’s eye follow the natural path of brightness.
Control Ambient and Practical Lighting
Minimize unwanted light that can dilute your negative space effect. Turn off or cover light sources in your environment that aren’t part of your design. When I shot a dramatic scene in a small room, I used flags and blackout fabric to block outside light, leaving only a single practical lamp illuminating the subject. This not only created a spotlight effect but also achieved a minimalist composition where negative space accentuated emotional tension. Think of your scene as a theatre stage—everything not meant to focus attention should be hidden or subdued.
Defining Edges with Light—Or Not
Sometimes, the absence of light delineates space more effectively than bright highlights. Use directional lighting to carve out edges, creating a silhouette effect that emphasizes shape over detail. During a fashion shoot, I placed a spotlight behind the model to silhouette her figure against a dark backdrop, making her form stand out without revealing every inch of detail. This technique guides the viewer’s eye through the composition, emphasizing form and posture—crucial elements in storytelling.
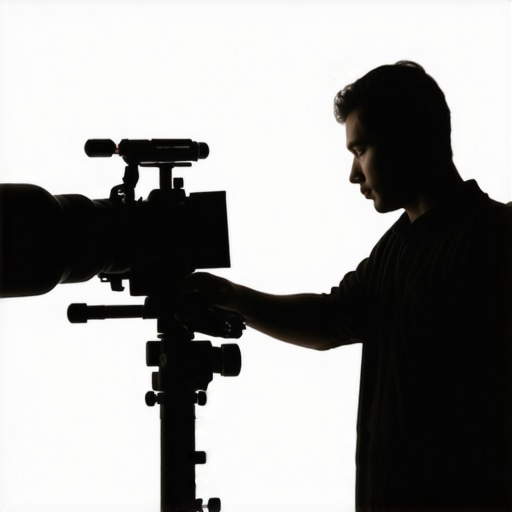
Visualize using shadows and highlights to craft a compelling scene where the subject is illuminated while the surroundings recede into darkness, directing viewer focus effortlessly.
Layer Elements for Depth and Focus
Introduce layers within your negative space to guide the viewer’s gaze dynamically. Position secondary lights or objects strategically to create a sense of depth. For example, in a scene where a character looks out over a vast landscape, I used a backlight to softly highlight their profile, while the distant background remained in shadow. This layering enhances separation and directs attention centrally, effectively following the viewer’s natural visual path. Think of it like setting up a stage that naturally leads the eye toward the main action.
While many enthusiasts understand the fundamental principles of cinema projectors, cine lenses, camera supports, film lighting, and projection screens, few grasp the intricate nuances that can make or break a professional setup. Let’s dig deeper into common myths, pitfalls, and advanced considerations that even seasoned practitioners often overlook.
Is Bigger Always Better When Choosing Cine Lenses?
Contrary to popular belief, larger, more expensive lenses don’t automatically deliver superior image quality. The real advantage lies in understanding lens characteristics such as coatings, T-stop consistency, and distortion control. Over-investing in a high-end zoom lens might not yield better results than a well-chosen prime lens tailored to your specific shot. Focusing on optical quality over brand prestige can prevent costly mistakes and improve your cinematic results.
The trap of overspecifying projection screens and projectors
Many believe that the highest brightness or GAIN levels in projection screens ensure the best image. However, screen gain and projector brightness are often misused as indicators of quality. Overshooting can cause unwanted glare, reduce contrast, and introduce artifacts. Instead, matching a projector’s lumen output to your room’s ambient light and choosing a screen with appropriate gain for your space is a more nuanced approach. Remember, a balanced setup often outperforms an overpowered one.
Why cheap camera supports can cost you in the long run
It’s a common misconception that all camera supports are created equal—many opt for budget rigs, only to find out later that they cause unwanted vibrations or instability. High-quality support systems like gimbals, tripods, and rigs require precision engineering and proper maintenance. Cutting corners on supports might save money upfront but will lead to compromised footage, especially during complex shots. Investing in robust supports ensures stability and sharpness, vital for professional-grade visuals.
Are we overestimating the importance of high-tech lighting?
Advanced film lighting techniques can seem daunting, but many overlook simple yet effective methods. For instance, over-reliance on software color grading or expensive LEDs can overshadow the power of well-placed natural light or practical sources. The key lies in understanding how to control shadow depth and contrast without overcomplicating your setup. Mastery of light and shadow nuances allows you to craft mood and depth that high-tech equipment alone can’t achieve.
Remember, even the most sophisticated gear won’t compensate for a lack of understanding of these nuances. Do you know which pitfalls you should avoid in your next project? Let me know in the comments!
< >
>
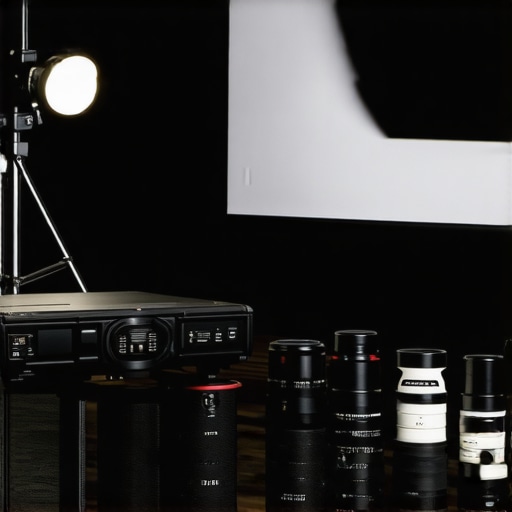
Visualize a carefully balanced scene where light control, lens choice, and support stability come together to produce cinematic excellence, illustrating the complex interplay of equipment nuances.
Stay Ahead with Proper Maintenance and Reliable Tools
Poor maintenance can turn your professional cinematography setup into a constant source of frustration. To ensure your gear performs flawlessly film after film, investing in the right tools and following disciplined maintenance routines is essential. From cine lenses to projection screens, every component benefits from careful attention and quality support systems.
My personal go-to maintenance tool is a high-quality lens cleaning kit, which includes lint-free wipes, sensor swabs, and cleaning solutions. For example, I prefer the premium coatings on my cine lenses and use specialized cleaning tools to maintain their optical clarity without damaging coatings. Regularly cleaning and inspecting lenses prevents dust buildup and optical degradation, keeping your images sharp over years of use.
For camera supports, I rely on a sturdy support system like the SliderPlus 3-axis gimbal, which offers precise control and durability. Proper support not only stabilizes shots but also preserves your investment in expensive gear. Routine checks for loose bolts or lubricants are critical; a simple torque check every few months can prevent surprise supports failure during critical shoots.
Projection screens demand attention as well. To maintain optimal image quality, I recommend cleaning with microfiber cloths and avoiding harsh chemicals. When coating or tensioning the screen fabric, follow manufacturer guidelines closely. An overlooked detail is preventing environmental damage—covering screens when not in use protects against dust and UV degradation, extending their life significantly.
How do I maintain consistent results with my film lighting setup?
Consistent results stem from regular calibration and quality support gear. For example, I use a digital light meter to regularly check the output of my LED panels and halogen fixtures, ensuring color temperature stability. With lighting, even minor drift can adversely affect the scene’s look, so scheduled calibrations or using software like lighting calibration tools are worth the investment.
It’s also essential to keep your filters clean and properly stored. I use filter holders with anti-reflective coatings to avoid flare and ghosting, and I handle these with gloves to prevent fingerprints that can affect image quality. For long-term storage, I recommend keeping filters in padded cases away from heat and humidity, prolonging their usability.
In the future, I believe the trend will favor smart maintenance devices—like IoT-enabled support gear that can alert you to mechanical issues before they cause real problems. This proactive approach helps save time and money, especially on high-stakes productions.
Tools I Recommend for Longevity and Performance
Investing in quality maintenance tools might seem costly initially, but it pays off in seamless production and long-lasting equipment. For instance, a dedicated sensor cleaning station paired with ultrasonic cleaning solutions ensures your camera sensors and cine glasses stay pristine. My personal recommendation is the ultrasonic cleaner—it effectively removes stubborn dust and debris without risking damage.
Another must-have is a support tension meter, which guarantees your support systems remain within optimal parameters, preventing unexpected collapses or vibrations. Regularly calibrating support equipment with these tools ensures your shots stay steady, especially during complex moves or extended shoots.
Extend Your Gear’s Life: Practical Maintenance Strategies
Beyond tools, establishing a routine of visual inspections and scheduled maintenance is vital. Replacing worn-out parts such as support grommets or using lubricants designed for cinematic equipment can prevent larger issues. Remember, the key to long-term success is consistency—set a monthly or quarterly maintenance schedule and stick to it.
Try integrating these advanced maintenance strategies into your workflow—the upfront effort saves you countless headaches and keeps your cinematography gear performing at its best for years to come. For detailed advice, consult resources like the support and repair guides. Ready to elevate your support game? Start by calibrating your support system today and notice the difference in shot stability and footage quality.
Throughout my journey in cinematography, one revelation has continually reshaped my approach—embracing the subtle power of negative space. It’s not just about lighting a subject but sculpting the entire frame so that what remains in shadow guides the viewer’s eye seamlessly. This principle has saved me from flashy but forgettable shots, pushing me toward visuals that resonate deeply.
Real mastery involves intentional darkness—knowing when to let shadows fall in place of fill lights, creating contrast that elevates storytelling. It’s akin to a black canvas highlighting the strokes of vibrant color—simple, yet profoundly impactful. Over time, I’ve discovered that strategic negative space can evoke emotion, emphasize form, and even build suspense, often more effectively than overt illumination.
Incorporating negative space is a skill that bridges technical knowledge and artistic intuition. It demands a keen eye for composition, a deep understanding of light behavior, and a willingness to leave parts of the scene in shadow intentionally. This balance is what separates good cinematography from truly memorable visuals. By mastering this nuanced approach, you can direct attention where it matters most and craft scenes that linger in viewers’ minds long after the credits roll.
As you experiment with your setups, remember that sometimes, less truly is more. Sparing use of light, combined with well-placed shadows, turns your scenes into compelling visual stories that invite viewers to look deeper—a secret weapon for elevating your cinematography beyond basic illumination.
My Secret Weapon for Cinematic Depth and Focus
One tool I always keep close is a reliable cine lens tailored for controlled beams and crisp contrast. Pairing this with strategic light placement allows me to carve out subjects against a sea of darkness, guiding viewers effortlessly. Additionally, I rely on my support system to keep my camera perfectly steady, ensuring that every shadow and highlight maintains its intended effect without distraction.
Remember, the key lies in deliberate choices—whether it’s how you position your lighting, the angles you shoot from, or the physical support that keeps your shot steady. These small but significant details culminate in a scene that’s not just visually pleasing but emotionally resonant. Investing in quality tools and understanding their interplay with shadow can dramatically elevate your storytelling—so don’t overlook the importance of maintaining your gear to ensure your vision stays intact.
Challenge Your Perspective: Seeing Darkness as an Ally
In my early days, I Thought I needed to fill every frame with light to keep things interesting. Over time, I learned that darkness offers its own language—one that commands attention and conveys mood with subtlety. It’s a reminder that sometimes, the most powerful visuals come from what you choose to leave out.
So I challenge you to view shadows and negative space as your allies, not limitations. Experiment with silhouettes, partial lighting, and framing that emphasizes form over detail. With patience and practice, you’ll find that negative space isn’t just empty background—it’s a crucial element that unlocks deeper levels of storytelling and emotional impact.
My Arsenal of Resources for Cinematic Excellence
To deepen your mastery, I rely on a few trusted sources and tools. First, this comprehensive guide on film lighting techniques consistently provides fresh insights into controlling shadows and contrast. Additionally, choosing the right cine lens makes all the difference when shaping the light and shadows you desire. And for support systems, this resource on camera supports helps me keep everything steady so my vision remains undisturbed.
Remember, the right tools combined with a thoughtful approach create a seamless workflow that lets your creativity shine. Maintain your gear diligently, calibrate your lights regularly, and never underestimate the power of a well-placed shadow.
Take the Leap and Redefine Your Visual Language
Embarking on this path of mastering negative space in lighting is both challenging and incredibly rewarding. It pushes you to think differently about how you craft scenes, encouraging a deeper connection between your technical skills and storytelling instincts. So, organize your workspace, fine-tune your lighting setup, and dare to leave parts of your frame in darkness—your audience will thank you for the emotional depth you reveal.
What’s one scene where you’ve hesitated to use shadow creatively? Share your experience below and let’s inspire each other to push boundaries in cinematography!
About the Author
James Duke
ThinkOTS
James Duke is a seasoned professional in the creative production industry, bringing a wealth of technical knowledge and hands-on experience to cinegearguide.com. As a key figure at ThinkOTS, James has spent years navigating the complexities of high-end production environments, where selecting the right equipment is the difference between a successful shoot and a logistical failure. His expertise spans the full spectrum of cinematography gear, from advanced camera systems to the intricate accessories that define modern filmmaking. On cinegearguide.com, James leverages his deep understanding of the industry to provide authoritative insights, gear reviews, and technical guides. He is known for his ability to break down complex specifications into practical, actionable advice for filmmakers of all levels. His perspective is rooted in the real-world application of technology, ensuring that every recommendation is backed by professional standards. James is dedicated to empowering the filmmaking community by sharing his expertise, helping others navigate the ever-evolving landscape of cinema technology with confidence and clarity.
LinkedIn Profile