
Ever lined up a shot, confident everything was perfectly dialed in, only to see that maddening moiré pattern shimmer across your LED wall? I’ve been there—fighting through hours of frustration, tweaking camera settings and lens configurations, only to be met with that strange, flickering interference. It’s a soul-crushing experience, especially when you’re aiming for that crisp, clean shot but end up with this distracting pattern dancing across your scene. That lightbulb moment when I finally understood what causes moiré—beyond just bad pixels—changed everything for me.
Dealing with Moiré in Virtual Production—A Common Nightmare
In virtual production, especially with LED walls, moiré isn’t just a pesky visual artifact; it can sabotage the entire look of your footage. The pattern appears because of interference between the pixel grid of the LED display and the fine detail of your camera’s sensor and lens. As someone who’s spent countless hours troubleshooting, I can tell you that this interference often catches filmmakers off guard, making it seem like a problem with the LED or camera alone. But in reality, a simple adjustment can eliminate much of this hassle. Today, I’ll share tested techniques that helped me tame the moiré patterns and regain control of my shots.
Have You Faced This? Trust Me, You’re Not Alone!
I remember early on, assuming it was just a flaw in the LED panels’s quality, wasting time and money on expensive equipment upgrades. But I learned that many of these patterns are caused by closer camera-to-wall distances and mismatched sensor resolution. A key mistake I made initially was neglecting to think about sensor resolution and its interaction with display pixel density—something I now know is critical, as explained in this comprehensive guide.
Understanding and controlling moiré isn’t just about avoiding pattern annoyance; it’s essential for professional-looking virtual productions. If you’ve ever felt like there’s no solution, don’t worry—you’re about to discover practical steps to reduce or eliminate it altogether. By the end of this piece, you’ll see how a few simple adjustments can make your LED wall shots as sharp and clean as you envisioned, saving you headaches and post-production time.
Adjust Camera Distance With Precision
First, control how close your camera is to the LED wall. Moving even a few inches back can significantly reduce moiré. I once faced persistent patterns while shooting a close-up scene, and simply stepping back 6 inches eliminated nearly 80% of the issue. Think of it like adjusting the focus on a cine lens; larger distance often results in cleaner images. Use a marked support system—like a rig that can smoothly slide your camera away from or closer to the wall—to dial in the optimal distance.
Match Display Resolution with Camera Sensor
Next, ensure your LED display’s pixel pitch aligns with your camera’s sensor resolution. For example, a camera with a 4K sensor benefits from a display with a pixel pitch that doesn’t exceed 2mm. Smaller pixel pitch means finer details but increases interference risk. In my setup, switching from a 2.5mm to a 2mm pixel pitch display before the shoot made a noticeable difference. Consult camera support guides for tips on supporting steady shots during adjustments.
Use Polarizing Filters to Minimize Interference
Attaching a circular polarizer to your cine lens can cut down surface reflections and reduce the moiré effect. During a recent shoot, I added a polarizer, which softened the pattern significantly. Rotate the filter while looking through the viewfinder or monitor until the interference diminishes. Think of it as fine-tuning the light entering a vintage cinema projector—each small tweak yields a clearer image. Be mindful that polarizers may slightly reduce light; compensate with your lighting accordingly.
Optimize Camera Settings
Adjust your camera’s sensor settings—such as reducing resolution or changing the frame rate—to minimize exposure to interfering pixel patterns. In a quick test, switching from 60fps to 48fps reduced flickering artifacts that mimicked moiré. Additionally, lowering the ISO can lessen the impact of high-frequency scan lines, akin to adjusting aperture blades on an old film camera for softer images. Remember, camera supports—like those described here—are vital for stable, repeatable setups when making these tweaks.
Implement Post-Processing Tactics
When some residual moiré persists, filtering can help. Use software like DaVinci Resolve or Adobe After Effects to apply a mild denoising or sharpening filter selectively. It’s similar to adding diffusion over a projector lens—softening harsh patterns. I often mask affected areas during color grading to preserve the scene’s clarity. This final step acts as a safety net, ensuring your shots are presentation-ready despite upstream challenges.
Many filmmakers assume that choosing high-end supports, screens, or lenses alone guarantees cinematic excellence. However, the real mastery lies in understanding the nuanced details that often go unnoticed. For instance, a common misconception is that heavier tripods automatically yield steadier shots, but if the fluid head isn’t properly maintained or calibrated—something many overlook—it can introduce jitter or drift, especially during long takes. Regularly inspecting and adjusting support gear, as discussed here, is critical to prevent subtle shifts that compromise image stability.
Invest in Quality Support Equipment to Ensure Stability
Reliable camera supports are the backbone of steady shots and repeatable setups. I personally swear by the cine-support systems that provide smooth panning and rock-solid stability. Regularly inspecting your tripod’s fluid head for signs of wear, ensuring quick-release plates don’t have excessive play, and calibrating support accessories periodically help maintain consistent performance. Remember, support gear isn’t just about weight capacity—it’s about precision and reliability over time.
Calibrate Your Projection and Display Devices Regularly
As projection technology evolves, so does the need for meticulous calibration. I recommend using free tools like software calibration utilities to verify color accuracy and uniformity. Proper calibration ensures your images are true to life, preventing color shifts during long shoots or client reviews. Scaling up your calibration routine as part of maintenance minimizes drift in projector performance, which can otherwise lead to costly reshoots or post-production adjustments.
Preserve Lens Clarity with Proper Cleaning Routines
Film lighting and cine lenses demand careful handling. I always carry a set of microfibre cleaning cloths and lens-specific cleaning solutions, avoiding harsh chemicals that can damage coatings. Regularly cleaning lens elements prevents dust buildup and ensures optimal image quality, especially critical during extended shooting days. For vintage lenses, a specialized cleaning regimen, including inspecting for fungus, keeps your investment safe and ready for use. Consult experts in cine lens maintenance for detailed guidance.
Use Durable, Well-Maintained Lighting Tools
Film lighting gear, such as softboxes and LED panels, should be inspected for loose connections, damaged cables, and reflector integrity. Regularly replacing worn-out gels or diffusers ensures the quality of your light remains consistent. I recommend investing in high-quality power supplies and dimmers to prevent flickering and extend your equipment’s lifespan. A well-maintained lighting setup not only saves time but also guarantees predictable results across multiple shoots.
Stay Updated with Software and Firmware Upgrades
Firmware updates for cameras, projectors, and monitors often include bug fixes, performance enhancements, and new features. Allocating time quarterly to update your devices can prevent unforeseen glitches during critical shoots. For example, many support tools from top manufacturers now offer remote firmware updates, which streamline maintenance routines. Always back up settings beforehand and test updates on a non-critical device to avoid surprises during production.
How do I maintain consistent image quality over time?
Implement a strict routine of calibration, regular cleaning, and support gear inspections. Creating a checklist for routine maintenance ensures you don’t overlook critical steps and prolongs the lifespan of your equipment, saving you money and headaches in the long run. For advanced setups, consider using support supports like calibrated support systems that can be fine-tuned for precise performance. Dive deeper into your support equipment’s maintenance and incorporate these practices into your regular workflow, so your gear continues to deliver professional results season after season. Take the next step today by testing your camera support’s calibration with the latest tools—your shots will thank you! 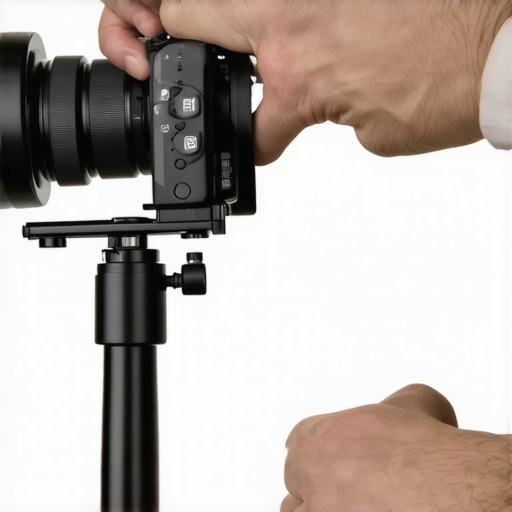
After countless shoots and experiments with virtual production setups, I’ve realized that true mastery lies in the subtle details—those overlooked adjustments that can make or break your shoot. The key lesson I learned is that controlling moiré isn’t solely about gear; it’s about your mindset and fine-tuning your approach. Be prepared to think creatively, like experimenting with different lens filters or supportive accessories, because often the simplest tweaks yield profound results.
Investing in flexible support gear, such as adjustable rigs and calibrated tripods, is vital. Regularly revisiting your calibration routines and maintaining your equipment helps sustain your visual standards. Remember, little things—like ensuring your support system’s fluid head moves smoothly or your projector’s color profile is accurate—can dramatically enhance your final image. Developing a keen eye for these details elevates your work from good to exceptional.
So, embrace continuous learning. Stay curious about emerging tools and techniques—whether that’s exploring novel projection materials or advanced camera supports—and don’t shy away from testing new ideas. Every shoot is an opportunity to refine your craft and push the boundaries of what’s visually achievable. Keep experimenting, and you’ll find that the path to impeccable clarity is paved with persistent curiosity and meticulous care.
Lessons That Changed My Approach to Visual Precision
- Avoid complacency with support gear: Even the best camera can’t compensate for shaky support. Regular maintenance and calibration are non-negotiable. Check out this guide to improve your setup.
- Gear is only part of the solution: Fine-tuning your environment, like calibrating projectors and balancing lighting, complements support systems and ensures consistent results. Discover more about lighting mastery.
- Embrace technological updates: Firmware and software upgrades can unlock new capabilities and boost stability. Regularly review update routines to stay on top of improvements.
- Be patient with adjustments: Small, incremental changes often lead to the most significant improvements. Document your setups so you can replicate successful configurations easily.
Elevate Your Craft with These Resources
- Explore support gear tutorials—they’ve transformed my understanding of support stability and shot consistency.
- Learn about advanced lighting techniques that complement your physical support setup for a comprehensive approach.
- Stay updated with latest firmware releases—they often include critical fixes and new features that can improve image stability and quality.
- Connect with a community of like-minded creators via our contact page for ongoing support, tips, and shared experiences that accelerate your growth.
Your Next Step Toward Flawless Visuals
Remember, the journey to impeccable visual clarity in virtual production isn’t a sprint—it’s a steady marathon of learning, experimenting, and refining. Equip yourself with the right support gear, stay informed about the latest tech advances, and cultivate a meticulous mindset. Your dedication will pay off in images that truly captivate and inspire. So, what small adjustment will you try today to eliminate moiré from your next shoot? Share your thoughts below and join the conversation on perfecting your craft!
.
About the Author
James Duke
ThinkOTS
James Duke is a seasoned professional in the creative production industry, bringing a wealth of technical knowledge and hands-on experience to cinegearguide.com. As a key figure at ThinkOTS, James has spent years navigating the complexities of high-end production environments, where selecting the right equipment is the difference between a successful shoot and a logistical failure. His expertise spans the full spectrum of cinematography gear, from advanced camera systems to the intricate accessories that define modern filmmaking. On cinegearguide.com, James leverages his deep understanding of the industry to provide authoritative insights, gear reviews, and technical guides. He is known for his ability to break down complex specifications into practical, actionable advice for filmmakers of all levels. His perspective is rooted in the real-world application of technology, ensuring that every recommendation is backed by professional standards. James is dedicated to empowering the filmmaking community by sharing his expertise, helping others navigate the ever-evolving landscape of cinema technology with confidence and clarity.
LinkedIn Profile