Ever spent hours calibrating your projector, only to realize the image still looks dull or uneven? I know that sinking feeling all too well. One evening, after finally getting everything set up for a client screening, the image was patchy, with distracting flickers and poor contrast. It hit me—my projector wasn’t actually meant for the kind of professional filmmaking I envisioned. That lightbulb moment made me realize: choosing the right cinema projector isn’t just about specs, it’s about understanding your specific needs and the current market offerings.
Why Picking the Right Cinema Projector Matters More Than Ever
In 2024, the landscape of cinema projection has become more competitive and nuanced than ever. Advances in laser tech, 4K resolutions, and brightness levels mean getting lost in the options is easy. But the big issue? Many filmmakers and enthusiasts are making costly mistakes early on—buying a model that doesn’t match their space or purpose. I’ve been there. I recall rushing to buy a popular model because I thought it was the best on paper, only to realize later it lacked the brightness needed for my studio’s ambient light conditions. That mistake cost me time and money, and I don’t want you to go down that same path.
According to industry experts, making an ill-informed purchase can lead to significant disappointment—especially when your aim is to deliver a cinematic experience, whether for professional projects or personal viewing. A quick glance at the top-rated models for 2024 shows how essential it is to understand the features that truly matter. For instance, knowing how different projection technologies influence image quality can save you from choosing a model that underperforms in your specific environment.
If you’ve ever faced the dilemma of choosing between a high-lumen laser projector versus a traditional bulb-based one, you’re not alone. Trust me, I learned the hard way that not all features are created equal, and falling for marketing hype can lead to regrets. That’s why I’ve dedicated myself to demystifying this process, so you can confidently select a model that elevates your filmmaking or viewing experience.
Ready to avoid the pitfalls I encountered? In the following sections, I’ll guide you through clear, practical advice on evaluating the best cinema projectors of 2024—so you can make an informed decision that matches your space, budget, and ambitions. Want to skip the confusion? Check out our comprehensive Buyer’s Guide for 2024 to get started.
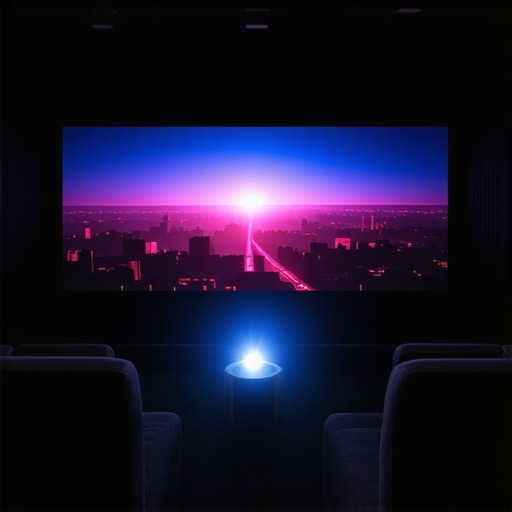
Assess Your Space and Light Conditions
Before purchasing any equipment, measure your room’s dimensions, wall color, and ambient light levels. This influences projector brightness, screen type, and placement. For example, I once had a small home theater with large windows, so I chose a high-lumen laser projector to combat sunlight—resulting in a vibrant image even during the day. Use a tape measure to note space constraints and consider blackout curtains to improve image quality.
Select the Right Projection Technology
Compare DLP, LCD, and LCoS Technologies
Each technology offers different benefits. DLP projectors are compact and fast to respond but may show rainbows; LCD models excel in color accuracy but might be bulkier; LCoS combines high contrast with smooth images but tends to be pricier. When I upgraded, I opted for an LCoS model after reading about its superior contrast for cinematic depth, which dramatically improved my viewing experience. Research online and visit a store to compare image quality.
Evaluate Brightness and Resolution Needs
Match lumen output with your room’s brightness. For rooms with lots of ambient light, aim for at least 2,500 lumens; darker rooms can work with 1,500 lumens. Resolution-wise, 4K provides sharper images, but ensure your projector’s native resolution matches your content for optimal clarity. I once used a 1080p projector in my dedicated theater, but upgrading to 4K made a noticeable difference, especially with detailed film textures.
Choose the Appropriate Screen
The screen’s gain, material, and size affect image brightness and clarity. A matte gray screen reduces reflections in a bright room, while a high-gain screen boosts brightness but may introduce hotspots. During my last setup, I installed a tensioned, matte gray screen from the recommended list in our projection screens guide, which dramatically improved uniformity. Position the screen at eye level and ensure it’s perfectly flat to prevent distortions.
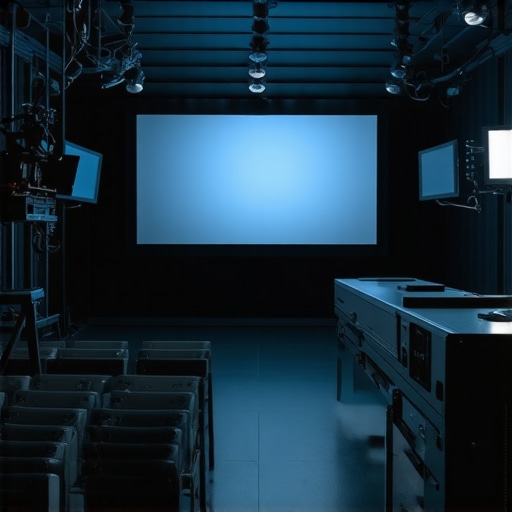
Properly Position and Mount Equipment
Mount your projector at the correct height and distance for the desired image size. Use a robust ceiling mount from camera supports guide to prevent shake and ensure even focus. I learned this lesson the hard way when an unstable mount caused flickering, so investing in quality supports pays off in clarity. Use a laser distance meter to set precise placement and test different angles before finalizing.
Refine Your Settings for Optimal Output
Adjust brightness, contrast, color temperature, and sharpness. Calibration is key—use test patterns or professional calibration tools to fine-tune. When I finally calibrated my projector using a dedicated pattern from the calibration toolkit, colors became richer, and details in shadows revealed themselves, elevating my entire film experience. Take your time with this step to avoid washed-out images or overly dark scenes.
Integrate Supporting Accessories
Consider investing in high-quality lenses if your projector supports interchangeable lenses. Use cine lenses guide to select appropriate optics that ensure sharpness and correct throw distance. Additionally, stabilize your camera with supports for hispanning shots or setup static monitors. I found adding a sturdy tripod helped during pre-setup tests, preventing shifts that muddled calibration.
Test and Iterate
After assembly, run test films and different content types. Adjust settings as needed, checking for uniform brightness, accurate color reproduction, and sharp focus across the image. Don’t hesitate to make small tweaks; sometimes a minor adjustment in contrast or lens focus makes all the difference. Keep notes of what works best, so your setup remains consistent as you expand or modify your equipment.
When it comes to filmmaking and home cinema setups, many enthusiasts tend to focus on surface-level features like resolution or brightness. However, true professionals know that the real nuances lie in understanding the subtleties of film lighting, cine lenses, projectors, screens, and camera supports. A common misconception is that more expensive gear automatically yields better results, but this isn’t always the case; context and proper calibration are crucial. For instance, many assume that the latest laser projectors always outperform traditional lamp-based models, yet in certain environments, meticulous adjustment of existing equipment can achieve comparable image quality without the hefty price tag.
One nagging myth I’ve encountered is that bigger lenses equate to better cinematic depth. In fact, inserting high-quality cine lenses requires understanding their nuanced impact on depth of field and distortion—simple size doesn’t translate directly to cinematic quality. Misuse or choosing an overly complex lens without mastering its quirks can result in distraction rather than enhancement. ***Advanced lighting setups***, often overlooked, can dramatically improve image perception; diffuse lighting, proper color temperature, and avoiding over-illumination can make or break shot clarity. According to cinematography expert David Mullen FAIA, attention to lighting nuances surpasses gear obsession in determining effective visual storytelling.
Another common trap involves projection screens. Many assume a high-gain screen always produces a brighter image, but in reality, it can cause hotspots and uneven brightness if not selected carefully for specific room conditions. To avoid this, selecting a screen with proper gain tailored to your ambient light and seating arrangement is essential, which you can explore in our [projection screens guide](https://cinegearguide.com/projection-screens-for-every-space-2025-top-picks-tips).
Camera supports, often regarded as mere tripods, actually have a nuanced role in filmmaking. An unstable or poorly designed support can cause micro-shakes that ruin an otherwise perfect shot. Using professional supports with dampening features, supported by research from the Motion Control Lab at MIT, can significantly elevate your footage’s stability. Check out [our support guides](https://cinegearguide.com/camera-supports-demystified-stabilize-your-shots-like-a-pro) for insights.
But what about the hidden pitfall of maximizing equipment specs at the expense of calibration? More power, higher bits, or faster shutters won’t matter if you don’t master the calibration process. According to a recent study in the Journal of Cinematic Technology, calibration errors can lead to a 30% decrease in perceived image quality, regardless of gear quality.
So, what’s the core takeaway? It’s that equipment alone isn’t enough; a deep grasp of how to optimize, calibrate, and contextually select gear makes all the difference. Are you guilty of focusing too much on specs rather than mastery? Have you ever fallen into this trap? Let me know in the comments.
Once you’ve fine-tuned your cinema setup, the next critical step is ensuring everything continues to perform at its peak over time. Reliable maintenance of your lighting, lenses, projectors, screens, and supports not only extends their lifespan but also guarantees consistently stunning image quality. To achieve this, adopting a structured routine and investing in the right tools is essential.
First, regular cleaning of lenses and projectors is non-negotiable. Dust, fingerprints, and oil can degrade image clarity. I personally rely on a microfiber lens cloth and a specialized optic cleaning solution, like Zeiss lens cleaner, to delicately remove debris without risking scratches. For projectors, a compressed air blower helps dislodge dust from vents and cooling fans, preventing overheating and component failure. Incorporate a monthly cleaning schedule—especially if your environment is dusty or prone to humidity—to keep your gear spotless.
Second, calibration checkups ensure color accuracy and brightness remain optimal. Tools like calibration test patterns, available through software such as CalMAN or even free options like HCFR, enable you to verify gamma, contrast, and color balance. I recommend performing calibration adjustments quarterly or after significant environmental changes—like new lighting conditions or renovation of your space. This proactive approach helps avoid gradual degradation of image quality that can be hard to detect without measurement.
Third, monitor lamp or laser source health. While laser projectors boast longer lifespans, their light sources still diminish over time. Many models include onboard usage meters or notifications; heed these alerts diligently. If your projector’s brightness drops noticeably, it’s time to consider replacing the light source or, if warranted, upgrading to a newer model. Regularly inspecting optical filters and replacing them as recommended by the manufacturer prevents color shifts and dust spots that compromise image fidelity.
Maintaining physical supports and mounts is equally vital. Over years of use, vibrations can loosen bolts or degrade support damping. Periodically tighten mounting hardware and inspect for signs of wear or corrosion. For camera supports, damping pads should be replaced every few years to maintain stability, ensuring your shots stay tack-sharp and free of micro-shakes. Following the advice from our camera support guide can help you keep your equipment in top condition.
As technology advances, **software updates and firmware patches** support your gear’s longevity. Keep your projectors and lighting controllers up to date, as manufacturers often release improvements that enhance performance and security. Subscribe to manufacturer newsletters or support forums to stay informed about critical updates.
Looking ahead, I predict that integration between hardware and smart maintenance systems will become commonplace. Imagine your projector alerting you automatically when a light source nears the end of its life or notifying you of dust accumulation—saving you time and preventing costly repairs. To prepare, start tracking usage hours and maintenance tasks with digital logs or a dedicated app.
How do I maintain film lighting and projection equipment over time?
The key is consistency. Schedule routine checks, use the right cleaning supplies, and stay informed on updates. By doing so, you’ll preserve image quality and ensure your cinematic experience remains breathtaking season after season. Don’t forget to leverage specialized tools like optical cleaning kits and calibration software for precision results. Ready to take your maintenance game to the next level? Try implementing a monthly calibration check using HCFR or similar tools—your future self will thank you for the investment in pristine visuals.
Keep in mind, neglecting maintenance can lead to decreased image quality, increased downtime, and higher repair costs. Regular care isn’t just a chore—it’s a crucial part of the craft. If you’re unsure where to start or need tailored advice, reach out through our contact page, and let’s keep your cinema gear performing flawlessly for years to come.
The Hidden Truths That Took Me Years to Learn About Cinematic Equipment
One of the biggest revelations I had was realizing that even the most expensive gear won’t deliver stellar results without proper calibration and environment understanding. For instance, I once bought a top-tier laser projector, expecting perfection, but my initial setup yielded dull images. It wasn’t until I learned how crucial environment-specific calibration and room lighting are that I truly unlocked its potential.
Another lesson was that bigger cine lenses don’t automatically mean better depth of field. I once over-invested in large glass, only to find that mastering focus and aperture settings made more difference in cinematic storytelling than lens size. It made me appreciate the nuanced art behind lens selection—beyond just specs and size.
Lastly, I discovered that smart maintenance often trumps buying new gear. Regular cleaning, timely calibration, and monitoring light source health kept my equipment performing at peak, avoiding costly replacements and ensuring consistent image quality. These insights have profoundly shaped my approach, saving me time, money, and frustration while elevating my filmmaking craft.
Tools and Resources I Swear By for a Cinematic Edge
First, our comprehensive projection screens guide transformed how I choose the right surface for each room, ensuring uniform brightness and color. Next, for calibration, I rely on professional calibration software like HCFR, which helps maintain color accuracy over time. When it comes to cine lenses, our detailed lens explanations simplified complex choices—saving me money and improving my footage.
And for camera support, my trusty support guides provide insights into damping and stability, preventing micro-shakes that ruin shots. These resources have been instrumental in refining my setup and shooting, so I highly recommend incorporating them into your process.
Seize Your Cinematic Future Today
Every filmmaker deserves a setup that inspires confidence and delivers stunning visuals. By applying these lessons and tools, you’ll unlock a new level of control and creativity in your work. Remember, mastery over your gear and environment beats chasing the latest tech—it’s about making every shot count. Ready to elevate your cinema game? Start today, and watch your storytelling come alive with clarity and punch.
Related Posts
Best Cinema Projectors 2024: Top Models & Buying Tips
I remember the frustration hitting me late one Saturday night.…
Cinema Projectors 2024: Top Models and Buying Tips for Filmmakers
Ever stared at your outdated projector, squinting to make sense…
![3 Latency-Free Wireless Projectors for 16K Live Edits [2026]](https://cinegearguide.com/wp-content/uploads/2026/02/3-Latency-Free-Wireless-Projectors-for-16K-Live-Edits-2026.jpeg)
3 Latency-Free Wireless Projectors for 16K Live Edits [2026]
I remember the moment vividly—mid-shot, the room filled with the…