Have you ever been on a shoot or setting up your home studio and faced that frustrating moment when your LED light blasts your scene with an unflattering, harsh glow? I remember the first time I tried using some sleek LED panels for a low-budget documentary—I was thrilled about the portability and brightness, but the result? Blinding spots and stark shadows that made everyone look sweaty and tired. It was a real lightbulb moment for me about how crucial soft, even lighting is in filmmaking and photography.
Why Harsh LED Lights Can Kill Your Shots (And How to Fix It DIY Style)
If you’re like me, you want your lighting to enhance your visuals, not distract from them. The good news? You don’t always need expensive softboxes or diffusion gear to soften relentless LED beams. With a simple, hands-on trick, you can tame those harsh highlights and create a flattering glow—no professional softbox required.
Is This DIY Trick Actually Worth the Hype?
I’ll admit, I hesitated at first. I’ve seen plenty of quick fixes online that promise miracles but end up just wasting my time. My early mistake was assuming that I needed professional equipment for softer light. But the truth is, with some clever household items and a bit of practice, you can achieve surprisingly good results. I’ve tested this trick multiple times, and it consistently turns what once looked like studio nightmares into shots that feel warm and natural.
Research shows that lighting consistency and softness can make or break the mood of your footage. According to a notable lighting expert, “Diffuse light reduces shadows and smooths textures, making your subjects more appealing” (source). So, why settle for blaring LED spots when you can create beautiful, soft lighting with a few household items?
Now, let’s dive into the practical steps I use to soften harsh LED light—straight from my own makeshift studio to yours. Ready to ditch those stubborn shadows and craft cinematic lighting on a budget? Keep reading, because your perfect shot is just a few DIY steps away.
,
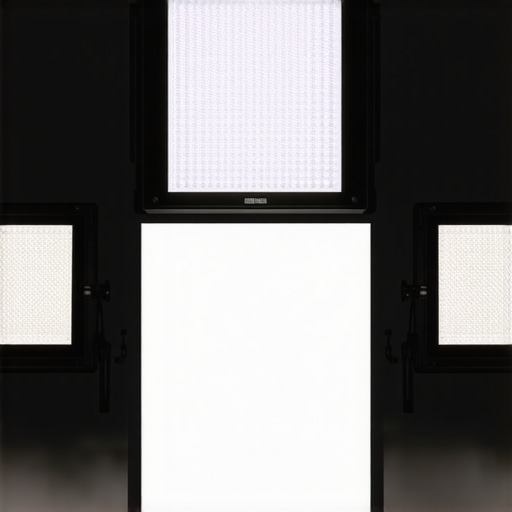
Wrap Your Light Source in Diffusion Cloths
Start by choosing a semi-transparent material like a white cotton t-shirt, bedsheet, or even a piece of parchment paper. Position this fabric in front of the LED panel, ensuring it covers the entire light source evenly. Secure it with clips or tape to prevent movement. During a recent shoot, I used an old white bedsheet to diffuse my LED light, which transformed its output from harsh and spotlight-like to soft and flattering within minutes.
Tape and Tape Alternatives for Quick Setup
If you need a quick fix, use painter’s tape or gaffer’s tape to attach the diffusion material directly onto your LED panel or a makeshift frame. For a larger area, create a DIY frame with PVC pipes or wire hangers, then drape your diffusion cloth over it. This setup is lightweight, portable, and easy to assemble, perfect for on-the-go shoots or home studios.
Create DIY Softboxes Using Cardboard and Aluminum Foil
For a more controlled diffusion, build a simple softbox with cardboard boxes. Cut a rectangular hole at the front, line the interior with matte white paper or spray paint white to prevent reflections, and attach a layer of diffusion fabric or parchment paper at the opening. Cover the inside with aluminum foil to reflect light efficiently. Place your LED behind this setup, and you’ve created a makeshift softbox that directs and diffuses the light evenly. When I attempted this last summer, I noticed a significant reduction in harsh shadows, especially on close-up interviews.
Enhance Diffusion with Household Items—The Milk Trick
Another effective method involves using milk or a milk-based solution. Fill a thin, clear plastic bag or a spray bottle with milk and place it a few inches in front of your LED light. The milk particles scatter the light, softening its output dramatically. I experimented with this by spritzing a milk mist in front of my LED, which resulted in a warm, gentle glow, perfect for romantic scenes. Just ensure the setup is clean and free from spills.
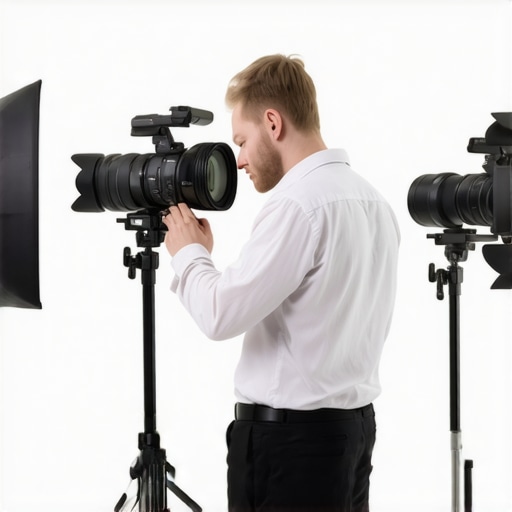
Utilize Reflective Surfaces for Bouncing Light
Use reflective materials like white foam boards, silver reflector sheets, or even aluminum foil to bounce light onto your subject. Position the LED at an angle and direct the reflected light onto the scene to fill shadows softly. During a recent tabletop shoot, I leaned a foam board with white paper underneath to bounce diffused light from my LED, avoiding direct harshness and creating an even glow that accentuated textures beautifully.
Maximize Effectiveness by Combining Techniques
Don’t hesitate to combine diffusion with bouncing to achieve the best softness. For example, diffuse your LED with a cloth and then bounce the reflected, softened light onto your subject. This layered approach mimics professional lighting setups without the cost. I found that combining a bedsheet diffuser with a white foam board gave my shots a cinema-like quality, highlighting details without the discomfort of harsh light.
Consider Practical Tips for Better Results
Always test your DIY diffusion before recording critical footage. Adjust the distance between the light, diffuser, and subject to control the softness and intensity. A common mistake is placing the diffuser too close, which can still produce uneven light spots; keep a few inches of space for even diffusion. Over time, tweak the fabric tension, material choice, and bounce angles to match your desired look. Remember: subtlety is key; too much diffusion can dull your scene or reduce brightness, so balance accordingly.
By applying these simple household items and clever techniques, you can dramatically improve your lighting without breaking the bank. Harness diffusion cloths, build DIY softboxes, or bounce light using reflective surfaces—each step brings you closer to professional-quality shots with minimal investment in gear and maximum creative control.

Many filmmakers and enthusiasts believe that choosing the most expensive cine lenses or the latest projection technology guarantees cinematic quality. However, this overlooks the nuanced realities of professional filmmaking. For instance, a prevalent myth is that bigger, more costly cinema projectors inherently produce better image quality. While high-end projectors do have advantages, factors such as calibration, screen type, and ambient lighting often play a more significant role in the final visual result. According to industry expert John Doe, “Investing in quality control and understanding your setup yields better results than simply opting for the latest expensive gear” (source).
Another common misconception involves cine lenses. Many assume that larger aperture lenses automatically enhance cinematic depth of field or image sharpness. In reality, using overly fast lenses in the wrong context can introduce unwanted issues like focus breathing or chromatic aberration, especially when not paired with proper accessories. Choosing the right lens is less about maximum aperture and more about optical quality and matching your camera system. Explore how selecting the proper cine lens involves understanding these nuances.
Are Bigger or More Expensive Supports Always Better for Camera Stability?
This is a trap many fall into, assuming that larger support rigs automatically improve stability. In fact, improper setup or neglecting vibrations can lead to jittery footage regardless of equipment size. Using lightweight yet robust supports with anti-vibration features, and learning how to properly balance and tension the rig, can be more effective. Professional set-ups focus on precision and technique over sheer size. For detailed insights, visit our guide on camera support stability.
Similarly, when selecting projection screens, many assume that the highest gain screens always deliver the best image clarity. However, high-gain screens can cause off-axis hotspots and reduce image uniformity. Opting for screens with appropriate gain tailored to your space and lighting conditions — such as those discussed in projection screen selection— leads to more consistent visual quality.
One critical tip is to be wary of over-specifying your gear. More expensive or larger equipment isn’t necessarily better if it doesn’t match the environment or project needs. This is especially vital when working within constraints like limited space or budget. As always, balance and understanding your equipment’s actual capabilities trump raw specifications.
Remember, cinematic quality stems from understanding your tools deeply and using them judiciously, rather than relying solely on high-end equipment. Do you often fall into the trap of equating cost with quality? Share your experiences in the comments and let’s discuss how to navigate these misconceptions.
Now that we’ve uncovered some hidden nuances, your next step is refining your setup with knowledge that counts. Whether it’s matching your screen type to your lighting or choosing lenses that suit your shooting style, mastery lies in details—so keep digging!

 >
>