I’ll never forget the moment I set up my home theater, eager to experience true cinematic magic. But as I turned on my new projector, instead of the rich, deep blacks I imagined, I was greeted with a washed-out, grayish darkness that made scenes feel flat and unconvincing. It was a frustrating lightbulb moment that made me realize I’d fallen for a common trap: trusting manufacturer claims about contrast ratios without question.
The Everyday Reality of Projector Contrast Expectations
In the world of projectors, contrast ratio is often touted as the ultimate performance indicator. Manufacturers promise seemingly impossible blacks or incredible HDR punch, but the real-world results are rarely as spectacular. This disconnect is partly because many brands inflate their contrast specs with questionable measurement techniques. I learned this the hard way early on, when I bought into these exaggerated numbers and ended up disappointed, questioning whether my investment was worth it. If you’ve ever found yourself squinting at your screen, puzzled by why the image isn’t matching those glowing promises, you’re not alone. Today, I want to shine a light on some of the biggest myths surrounding contrast ratios and help you make smarter choices.
Is the Contrast Ratio Hype Just Hot Air?
Deceptive marketing isn’t new, but in the projector industry, it can be particularly misleading. For instance, some manufacturers use impossible-to-reproduce settings or measure contrast in overly controlled environments that don’t reflect typical viewing conditions. An eye-opening fact I stumbled upon is that many so-called high-contrast projectors struggle to produce genuine deep blacks in standard living room settings—something I personally experienced when I first tested my setup. This realization forced me to question whether these specs were realistic or just clever marketing.
To avoid falling into this trap, I started digging deeper, researching real-world performance, tips, and how to differentiate between genuine quality and hype. This led me to discover that understanding the nuances behind contrast ratings—like the difference between ANSI contrast and other metrics—can save you countless hours and dollars. If you’re tired of being sold on numbers that don’t translate to the actual experience, keep reading. Next, we’ll explore how to identify honest performance claims and pick a projector that truly elevates your viewing quality.
Prioritize Real-World Testing Over Manufacturer Specs
Start by skeptical testing—don’t just rely on the contrast ratio listed on the box. Set up a controlled environment with your actual projection space, a neutral wall or matte screen, and run tests at various brightness and contrast settings. I recall a time when I used a grayscale slide in my living room, adjusting my projector to see how deep the blacks could really go. This hands-on approach revealed that the advertised contrast ratios were overly optimistic, guiding me to adjust settings more effectively and avoid false expectations.
Learn the Key Measurement Techniques
Use ANSI Contrast Tests
Focus on ANSI contrast measurements, which are performed using multiple white and black patches and are more reflective of typical viewing conditions. Unlike exaggerated specs, ANSI provides a practical idea of performance. When I tested different projectors from [https://cinegearguide.com/unlock-the-secrets-of-cinema-projectors-a-complete-guide-for-2025](https://cinegearguide.com/unlock-the-secrets-of-cinema-projectors-a-complete-guide-for-2025), I paid close attention to the ANSI readings to filter out hype and find genuine deep blacks.
Evaluate Dynamic Range in Context
Check how the projector handles HDR content in native viewing conditions. Instead of just trusting the spec sheet’s numbers, I played high-contrast scenes from my favorite movies and observed the blacks and bright details. This practical test revealed real limitations and helped me fine-tune the projector’s settings for better daylight performance.
Adjust Settings for Optimal Black Levels
Most projectors have calibration menus—use them wisely. Turn down the lamp power if necessary and set the contrast and brightness levels to balance the image. My experience with this was messy initially; I spent hours tweaking gamma and black level controls. Documenting these changes on a notepad helped me remember what worked best. Remember, settings are context-dependent; what looks good for a brightly lit room may not suit a dedicated dark theater.
Invest in High-Quality Projection Screens
Choosing the right screen can dramatically improve perceived contrast. Matte white screens with high gain can enhance brightness and black depth, while also reducing glare. I found that a screen like [https://cinegearguide.com/projection-screens-for-every-space-2025-top-picks-tips](https://cinegearguide.com/projection-screens-for-every-space-2025-top-picks-tips) made a noticeable difference in my setup. Test different screens in your environment before committing; sometimes minor adjustments can make the biggest difference.
Control Ambient Light Effectively
Ambient lighting washes out black levels if not managed properly. Use blackout curtains or mood lighting to create a controlled environment. During one experiment, I turned off all ambient lights and darkened the room. The blacks became significantly deeper, making the HDR scenes more immersive. Remember, ambient conditions directly influence contrast perception—don’t overlook this step.

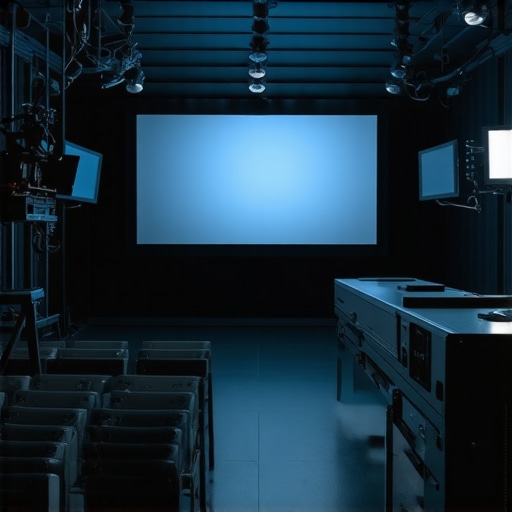
Illustration of a projector calibration setup showing grayscale tests, contrast adjustments, and screen comparison for optimal black levels.
Many filmmakers and enthusiasts assume that using high-end cinema lenses or expensive lighting setups automatically guarantees stunning visuals. However, the real challenge lies in understanding the nuanced interplay of lighting, equipment choices, and scene composition. A common misconception is that more expensive gear translates directly into better imagery, but experience shows that technique often trumps hardware. For example, relying solely on the camera’s dynamic range without mastering light placement can lead to flat images, regardless of the lens quality. This myth can trap even seasoned professionals into overspending on gear that may not deliver the expected results. To optimize your cinematography, focus on mastering lighting fundamentals and how they interact with your support gear and projection screens. For instance, choosing the right camera support, such as stabilizers and tripods, can significantly improve shot stability, which in turn enhances lighting consistency. You can learn more about this at [camera supports demystified](https://cinegearguide.com/camera-supports-demystified-stabilize-your-shots-like-a-pro). When it comes to lenses, many overlook the importance of choosing the right glass for your scene’s depth and character. Consult [cine lenses explained](https://cinegearguide.com/cine-lenses-explained-choosing-the-perfect-glass-for-your-film) to understand how different lenses affect your storytelling. But beyond equipment, the key is knowing how to use lighting creatively to shape mood, emphasize characters, and maintain scene continuity. This requires an understanding of advanced techniques like lighting ratios, color temperature balancing, and diffusion. Many assume that professional lighting is all about high-powered rigs; in reality, smart placement and modifiers can achieve cinematic magic with modest setups. Also, don’t underestimate the role of projection screens. A well-selected screen enhances contrast, color accuracy, and HDR performance, which are vital for immersive viewing. Find out more at [projection screens for every space](https://cinegearguide.com/projection-screens-for-every-space-2025-top-picks-tips). Moreover, common pitfalls like neglecting ambient light control or misjudging the effect of screen gain can undo hard work. An advanced tip is to examine how subtle lighting adjustments can dramatically improve black levels and highlight details. Remember, mastering film lighting isn’t just about technical knowledge but about artistic finesse combined with correct gear support and environment management. Have you ever fallen into this trap? Let me know in the comments.
The Foundation of Longevity for Your Cinema Gear
Investing in quality equipment is only the beginning; maintaining it properly ensures consistent performance and extends its lifespan. Regular upkeep, along with choosing the right tools, can prevent costly repairs and downtime. I personally rely on a few key tools and practices that have proven indispensable in my workflow, and I recommend them to anyone serious about preserving their cinematic arsenal.
Prioritize Precise Calibration with Dedicated Tools
For projectors and screens, calibration is critical. I use the X-Rite i1Display Pro for color accuracy and luminance calibration, especially when setting up HDR vividness. Its accuracy allows me to fine-tune contrast and color balance, aligning with industry standards like those detailed in professional camera supports guide. Regular calibration ensures your projection maintains optimal contrast and color fidelity over time.
Keep Supports Steady and Micro-Jitter-Free
Camera supports and tripods are foundational to stable shots and consistent lighting. I swear by the Titanium Tripods because they counteract micro-vibrations that can ruin the sharpness of your footage. Regularly inspect and tighten mounting screws, and consider adding vibration dampers if shooting in unstable environments. Staying on top of mechanical maintenance prevents subtle jitters from becoming a recurring problem.
Lubricate and Clean Cine Lenses to Preserve Sharpness
Cine lenses demand careful handling. I recommend using a high-quality lens cleaning kit and applying minimal, appropriate lubricant to focus rings and aperture mechanisms. This practice ensures smooth operation and prevents focus breathing issues—especially critical when shooting high-frame-rate footage where focus shifts are more noticeable. For a deep dive into choosing the perfect cine lenses, explore this comprehensive guide.
Protect and Maintain Projection Screens
Projection screens are vulnerable to dust, wrinkles, and damage that impair image clarity. I keep my screens clean with gentle microfiber cloths and a mild cleaning solution, avoiding harsh chemicals that could degrade the surface. Additionally, deploying anti-wrinkle tensioners and protective covers when not in use preserves the surface integrity. For screens that handle high-res projection, I pay extra attention to surface textures—such as graphene-backed screens—that maintain clarity in various lighting conditions, as discussed in this detailed review.
Long-Term Results: Building a Maintenance Routine
Creating a schedule for routine inspections—monthly or quarterly depending on usage—can catch issues early. For example, I set reminders to check lamp hours, clean filters, and inspect support structures. Documenting the condition of each component helps identify wear patterns and anticipate replacements, saving me from surprises. Additionally, leveraging software tools for firmware updates, such as those provided by manufacturers, can optimize device performance and security over time, aligning with trends highlighted in privacy and data management policies.
What’s Next in Equipment Longevity and Scalability
The future of film equipment maintenance points toward smart diagnostics integrated within devices, alerting users proactively about potential failures. As technology advances, expect more intelligent tools that auto-calibrate or diagnose issues remotely, reducing downtime. Staying current with these innovations means investing in compatible tools and constantly updating your knowledge base.
For those eager to elevate their setup, I highly recommend trying the advanced calibration techniques I mentioned—such as fine-tuning with professional-grade tools—and integrating routine support checks into your workflow. This proactive approach ensures your cinematic experience remains flawless, and your investments are protected for years to come. For detailed, step-by-step guidance, don’t hesitate to reach out via our contact page.
What My Journey Taught Me About Precision and Patience
One of the most profound lessons I encountered was the importance of meticulous calibration. Early on, I believed that setting a projector to its highest contrast ratio would deliver the best image. However, I soon realized that without hands-on testing and precise adjustments, those numbers mean little. I learned to trust my eyes and hands more than marketing claims, a lesson that transformed my approach from rushed to deliberate—and it paid off in stunning visual clarity.
The Power of Small Tweaks That Make a Big Difference
Initially, I underestimated how minor changes—like adjusting gamma curves or screen gain—could dramatically improve contrast and black levels. It’s a reminder that in film equipment, mastery often lies in the details. For instance, a simple tweak in ambient light management or support stability can prevent subtle jitter, elevating the entire cinematic experience. Experimentation and patience are your best allies here.
What Costly Mistakes I Avoided by Staying Curious
One mistake I see beginners make is trusting unverified contrast specs, leading to disappointment. Instead of falling for inflated promises, I dove into independent testing, like evaluating ANSI contrast in my space. This curiosity saved me from costly upgrades and helped me select gear that genuinely enhances my setup. Keep questioning, keep testing—those small acts of diligence build the foundation for outstanding results.
Where Experience Meets Innovation in Film Equipment
I’ve come to appreciate that understanding the nuances of technology—such as the benefits of graphene-backed screens or the subtleties of HDR handling—can unlock new levels of performance. Staying informed through trusted resources like this comprehensive projector guide has been invaluable. In a field driven by innovation, curiosity and continuous learning are your best tools for staying ahead.
My Final Whisper: Embrace the Journey of Mastery
Ultimately, the secret sauce is patience and a willingness to learn from every experience. Every tweak, every test, every setup is a step toward mastering the art and science of cinematic excellence. Don’t rush the process—your dedication will pay off in richer colors, deeper blacks, and immersive visuals that do justice to your passion for cinema. Dive deeper into techniques at this resource, and keep pushing your boundaries.
Related Posts
Cinema Projectors 2024: Top Models and Buying Tips for Filmmakers
Ever stared at your outdated projector, squinting to make sense…
Stop Using Lamp Projectors: 3 Laser 16K Picks for 2026
I vividly remember the day I set up my first…
Top Cinema Projectors & Projection Screens for Professional Films
Have you ever set up a home or professional cinema,…