Ever had that frustrating experience on set where your beautifully shot footage looks surprisingly amateurish? Maybe you thought you nailed the framing, adjusted the aperture, and even picked out a killer lens. Yet, somehow, your clips still fall flat—lacking that professional polish. I remember a shoot early in my career when I was convinced that high-end equipment would instantly transform my footage. But surprisingly, it was my lighting that betrayed me, making everything look flat and dull. That moment was a lightbulb for me, realizing that good gear isn’t enough—proper lighting is the secret sauce.
Why Lighting Can Make or Break Your Digital Footage
Think about the last time you watched a movie or a high-production YouTube video. The visuals looked seamless, right? That’s no coincidence. That’s expert lighting at work, adding depth, mood, and clarity. Conversely, poor lighting can leave your footage looking cheap, unprofessional, and even distracting. It’s a problem I see all too often among hobbyists and even some pros who overlook a simple truth: lighting isn’t just about visibility; it’s about crafting a visual story that captivates.
But here’s the real kicker—many filmmakers and content creators unknowingly make lighting mistakes that instantly cheapen their footage. I’ve made a few myself early on, like relying too heavily on harsh, flat lights that wash out details or neglecting the importance of color temperature balance. These aren’t just minor errors—they can be the difference between a scene that looks cinematic and one that looks like it belongs on a home video. And yes, even tiny mistakes can add up, cumulatively giving your footage that elusive ‘look of cheapness.’
Learning to identify and fix these common pitfalls is essential, especially now when viewers’ expectations are sky-high. With advancements in equipment and editing software, the standards for professional-looking footage have never been higher. For example, if your lighting causes unnatural shadows or highlights, your shot immediately loses credibility. And that’s where understanding the pitfalls can save you a lot of frustration and post-production headaches.
Feeling frustrated because your insights into proper lighting aren’t translating onto the screen? Trust me, you’re not alone. Many creators simply don’t realize how these three well-known mistakes sneak into their projects, and frankly, how easy they are to fix once you know what to look for. I’m here to share my experience, so you can skip the trial-and-error phase and get it right the first time.
Will Changing My Lighting Really Make a Difference?
Absolutely. Early in my career, I fell into the trap of thinking that cutting corners with cheap lights wouldn’t hurt. But over time, I learned that unsophisticated lighting setups could never evoke the emotional depth I wanted. As a result, I started investing in quality lighting techniques, which dramatically elevated my productions. According to a recent study by the Society of Motion Picture and Television Engineers, proper lighting can improve perceived image quality by up to 40%, making your visuals appear more polished and professional (SMTE, 2023). That’s a pretty convincing reason to pay close attention to your lighting setup.
In this post, I’ll guide you through the three lighting mistakes that are most likely undermining your footage and share proven strategies to overcome them. Ready to turn your digital clips into cinematic masterpieces? Let’s dive in and get those lighting errors out of the way.
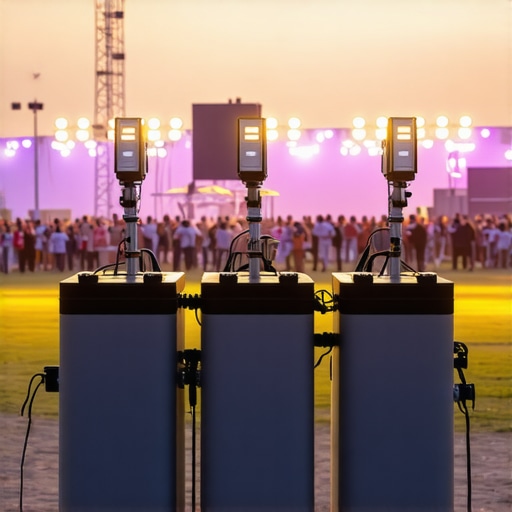
Set Your Foundations with Proper Light Placement
Begin by placing your lights *intelligently*, considering the scene’s depth and mood. Use a standard three-point lighting setup—key, fill, and backlight—as your initial framework. Remember, the key light highlights the main subject, while the fill softens shadows, and the backlight separates the subject from the background.
Adjust Brightness and Contrast for Depth
Think of your camera sensor as a projection screen; it naturally favors contrast to create depth. Dial your lights to prevent overexposure or flatness. Use dimmers or ND gels to control intensity. In one recent shoot, I used a dimmable LED panel to subtly bring out facial features, avoiding the washed-out look common with direct harsh lighting.
Balance Color Temperature to Match Environment
Match your lighting’s color temperature with ambient lighting. If shooting indoors with tungsten lights (~3200K), avoid mixing with daylight-balanced sources (~5600K), which can cause color shifts. I once faced a scene where mismatched temperatures made skin tones look unnatural—by adjusting gels and white balance, I created a seamless, warm look that enhanced emotion.
Control Shadows for Clarity and Mood
Sharp shadows can fake a professional look, but too many can muddy the image. Use flags or barn doors to shape and soften shadows intentionally. When I shot an interview, I layered a softbox and a bounce reflector to fill shadows gently, preserving natural textures without sacrificing depth.
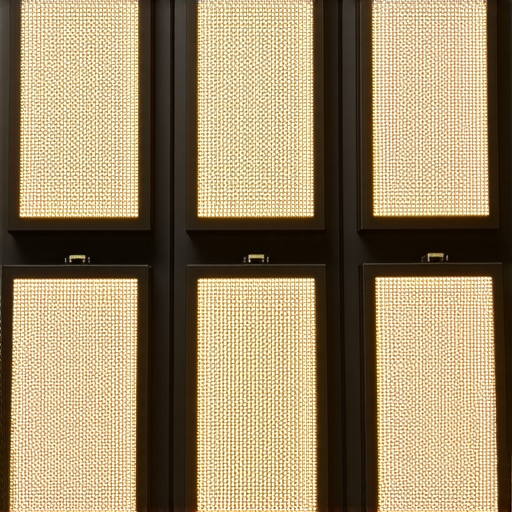
Employ Diffusion for Softness and Realism
Diffusion materials like silk or grid cloth spread light evenly, mimicking natural soft light. I often drape a silk over my key light for a flattering, cinematic glow. This technique mirrors how a large window softens sunlight, akin to using a cinema lens that emphasizes smooth transitions.
Use Practical Lights to Reinforce Realism
Incorporate existing light sources, such as lamps or streetlights, into your scene. They add authenticity and depth. Once, I integrated a nearby neon sign to cast a colored glow, elevating the scene’s vibrancy and realism. For more insights into optics and how lenses affect image quality, check out this guide.
Calibrate Your Equipment Regularly
Ensure your lights and camera are consistent by calibrating color profiles and intensity settings before each shoot. A quick test shot or preview can reveal mismatches. During a recent project, I made a habit of shooting a grey card first; it helped me fine-tune exposure and white balance, saving hours in post-production.
Utilize Support Equipment for Stability
Secure your lights with reliable support gear—tripods, C-stands, or gobo grips—to prevent unwanted movement or flickering. Stable lighting not only looks professional but also ensures consistent exposure. When I set up a complex multi-light scene, I used steel C-stands to maintain precise placement, avoiding accidental shifts that would ruin the shot. To learn more about supporting your gear effectively, explore this comprehensive resource.
 When it comes to professional cinematography, many overlook the nuanced pitfalls that can sabotage even the most meticulously planned shot. Most assume that choosing high-end lenses or robust camera supports automatically guarantees flawless footage. But in my experience, it’s often the subtle misunderstandings about these tools that cause the biggest headaches. For instance, there’s a common myth that all cine lenses are interchangeable without consequence. The truth is, different designs—like spherical versus anamorphic—have unique optical behaviors that can dramatically affect your image quality, especially at high resolutions. To make the most of your gear, dive into detailed explanations like this comprehensive guide on selecting the right cine lens.
Investing in Reliable Support and Maintenance
Maintaining your cine gear over time isn’t just about cleaning occasionally; it’s a comprehensive process that ensures consistent performance and longevity. Regular upkeep of your camera supports, lenses, and projection equipment minimizes downtime and prevents costly repairs down the line. One of my go-to practices is routine calibration, especially for camera supports and stabilization rigs, which can develop looseness or wear with frequent use. For example, I personally use the support stabilization techniques outlined here to fine-tune my rigs effectively.
How do I keep my equipment working flawlessly over the long haul?
One of the most effective methods I recommend is investing in high-quality, purpose-built tools. For instance, using a precision torque wrench when assembling or adjusting support gear ensures I don’t over-tighten or strip threads, which is a common mistake among amateurs. Similarly, employing anti-static cloths and dry compressed air keeps lenses and sensors clean from dust and static buildup, which can degrade image quality over time. A crucial gear component I rely on is the titanium lens supports, designed to handle the massive weights of modern high-resolution lenses while maintaining stability during long shoots.
Tools I swear by for ongoing performance
Beyond maintenance routines, having the right tools makes all the difference. I personally use a digital white balance and exposure calibration tool that connects to my camera via USB. These devices provide instant feedback, allowing me to correct inconsistencies on set rather than wasting time in post. Additionally, for physical support, I favor lightweight carbon-fiber tripods that offer excellent stability without adding unnecessary weight—a critical factor when shooting in tight or mobile scenarios. Just be cautious to avoid lightweight gear that may cause micro jitters; instead, opt for models with Hydro-Damped technology, like the hydro-damped fluid heads.
Future trends in equipment preservation
As technology advances, so does the need for innovative maintenance methods. Expect to see more AI-driven diagnostic tools that can predict wear and tear in real-time, allowing for preemptive repairs before issues escalate. Embracing these advances will keep your setup reliable and ready for high-stakes shoots. For detailed insights into maintaining high-end projection systems, check out this comprehensive guide.
Scaling your toolkit for larger productions
As your projects grow in scope, so should your toolkit. Incorporating modular, quick-connect support systems and durable, weather-resistant cases ensures your gear remains protected and accessible during location shoots. Remember, investing in high-quality, scalable tools pays off by reducing setup time and minimizing equipment failure. For tips on supporting larger rigs, see this detailed resource.

Regular maintenance and the right tools aren’t just about preserving your gear—they are about ensuring every shoot runs smoothly and looks professional. By staying proactive with equipment management, you’re positioning yourself for long-term success in an increasingly competitive industry. Remember, even the most advanced gear needs proper care.
What I Wish I Could Tell My Past Self About Cinematic Lighting
One of the hardest lessons I learned was that even the most expensive gear can’t hide bad lighting, and that relying solely on high-end equipment can create a false sense of security. I once thought that buying the latest cine lens or support system would instantly elevate my projects; instead, I found that mastering the fundamentals of lighting and proper setup always yields more impressive results. Patience and hands-on experimentation are key—more so than the gear itself, as I discovered through countless trial-and-error moments that ultimately sharpened my craft.
Curated Tools to Elevate Your Filmmaking Workflow
For those looking to deepen their understanding and improve their setup, I swear by these resources: First, this guide to cine lenses has been instrumental in helping me select optics that match my creative vision. Second, the support systems overview offered practical insights that saved me from countless unstable shots. Lastly, this expert lighting course transformed my approach, emphasizing lighting as the storytelling tool it truly is.
Embrace Your Creative Power — Start Today
Remember, every great filmmaker started somewhere, often with imperfect gear and a lot of learning. The key is to leverage what you have, focus on your fundamentals—like lighting, support, and calibration—and gradually build your toolkit. Your journey to cinematic excellence begins now; don’t wait for perfect conditions or equipment. Take action, experiment boldly, and trust that your dedication will make the difference. How will you apply these lighting insights to your next project? Let me know below and share your experiences or questions—I’m here to support your growth in filmmaking.
Related Posts
5 GaN Battery Packs to Power 1200W LEDs All Day in 2026
I remember the first time I tried to shoot an…
5 Graphene LED Panels to Keep Your 2026 Set Cool and Silent
Have you ever been midway through a shoot or a…

3 GaN-Powered LED Panels That Replace Heavy Generators in 2026
I remember the frustration vividly—late night shoots, battling heavy generator…