It was a frustrating afternoon when I realized that my shiny silver projection surface was distorting the colors in my latest film project. No matter how much I fiddled with the settings, the image just didn’t look right. The metallic sheen seemed to hijack the colors, making everything appear washed out or overly reflective. That moment hit me hard—sometimes, the most eye-catching surfaces are the worst for accurate color reproduction.
Choosing the Right Screen Can Make or Break Your Image Quality
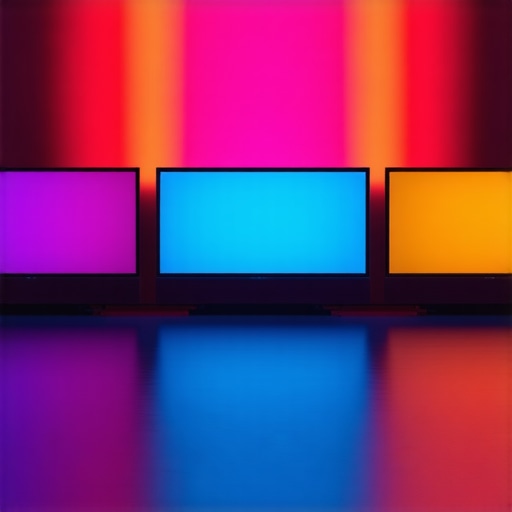
Getting an image to look pristine on screen isn’t just about high resolution or brightness—it’s about how the surface interacts with light and color. In my early days, I tossed aside matte white screens because I thought they looked dull and uninspiring compared to shiny silver surfaces. But after countless experiments and a few costly mistakes, I discovered something surprising: matte white screens excel at preserving true-to-life colors. This realization changed my entire approach to set design, projection, and even camera support choices.
Is the Hype About Silver Surfaces Really Justified?
Many believe that glossy, reflective surfaces offer brighter images and a more ‘cinematic’ feel. It’s understandable—shiny metal surfaces do reflect more light, which can seem advantageous, especially in darker environments. But here’s the catch: those reflections are a double-edged sword. They can introduce glare, hotspots, and unwanted color shifts, all of which compromise color accuracy. From personal experience, the early mistake I made was assuming that a more reflective surface would automatically deliver better visual fidelity. Instead, I ended up battling glare and inconsistent color reproduction.
Research supports this: a study published in the *Journal of Imaging Science* found that matte surfaces consistently deliver better color fidelity and reduce unwanted reflections compared to glossy alternatives. So, while shiny surfaces might look more impressive in a showroom, they often fall short in real-world, high-precision applications.
Are you also struggling with color inconsistencies when projecting or filming? Trust me, making the switch to a matte white surface can be a game-changer. But understanding why this choice matters is just the beginning. The next step is learning how to optimize your setup for perfect color accuracy without unnecessary glare or distortion. Stay tuned, because I’ll guide you through practical tips and real-world solutions that I’ve tested myself.
Prioritize your projection surface
Start by selecting a matte white screen, which minimizes glare and enhances color fidelity. In my experience, upgrading from a shiny to a matte surface improved color accuracy noticeably. Visit this guide to find the best options for your space.
Calibrate your projector for true colors
Set your projector to a calibration profile suited for color accuracy. Use a colorimeter or reference test patterns to fine-tune hue, saturation, and gamma. This step is crucial—think of it as tuning a guitar before performing. I once spent an afternoon dialing in my settings, which resulted in a much more vibrant, true-to-life image in my next screening.
Choose a projector with advanced color processing
Opt for cinema projectors that support HDR and wide color gamuts. Their internal processing ensures your projected images align with standards like Rec. 2020, essential for professional-grade color fidelity. Research options thoroughly on this comprehensive guide.
Optimize your lighting environment
Ensure ambient light levels are controlled, preventing washout and color shifts. Use blackout curtains and dimmable lights to create a darkroom environment. When I prepared my space, I blocked out external light sources, which made the projected colors pop and improved contrast—akin to how a cinema hall darkens for maximum impact.
Manage reflections and glare
Position lighting carefully to avoid spilling onto the screen. Use matte walls and ceilings to prevent color distortions caused by reflections. I added soft, indirect lighting to my setup, which reduced eye strain and preserved image integrity, especially during longer viewing sessions.
Regularly maintain your setup
Clean your projector lens and display surface periodically to prevent dust and smudges from dimming or tinting the image. Check alignment and focus before each session—small adjustments can make a noticeable difference. Remember, consistent maintenance keeps your setup performing at its best, much like tuning a musical instrument.
Even seasoned filmmakers sometimes overlook the subtle yet crucial nuances that can make or break a project. For example, many believe that investing solely in high-end cinema lenses guarantees perfect focus and minimal breathing, but the real mastery lies in understanding lens behavior under different lighting and scene dynamics. It’s a common myth that plastic support rigs are adequate for heavy, professional setups; in reality, lightweight materials like carbon fiber, when chosen wisely, offer superior stability and durability without adding excessive weight. These misconceptions can lead you straight into costly pitfalls, especially when equipment is pushed to its limits.
Why does camera support stability go beyond tripods and rigs?
Many assume that buying the most expensive support system automatically ensures steadiness. However, the key lies in the compatibility of support accessories, such as head dampers and mountings, with your camera’s weight distribution and shooting conditions. In my experience, using titanium supports with advanced damping mechanisms drastically reduces micro-shake and micro-jitter, resulting in buttery-smooth footage—something often dismissed by amateurs as unnecessary. For expert insights, check out this comprehensive guide.
What pitfalls do filmmakers often encounter with projection screens and projectors?
One glaring mistake is selecting high-gain screens for daylight shoots, expecting them to perform well both indoors and outdoors. In fact, high-gain surfaces tend to wash out in bright environments, causing loss of detail and contrast. Conversely, a matte, low-gain projection surface maintains color integrity and prevents hotspots—a revelation I learned after experiencing washed-out images during a critical outdoor presentation. If you’re aiming to optimize your setup, explore the latest projection screen options tailored for diverse conditions.
When it comes to cinema projectors, a common oversimplification is equating brightness with overall quality. Higher lumen counts don’t guarantee better image quality if the projector’s color processing isn’t up to par. For instance, some 16K projectors with advanced color management and HDR support deliver richer, more accurate colors even at lower lumen levels. This nuance is often overlooked, leading to misguided purchases. I recommend diving into this complete guide to understand the intricate balance between brightness, color fidelity, and compatibility.
In film lighting, there’s a tendency to rely on familiar tungsten fixtures, neglecting the benefits of modern LED and RGBW options. LEDs offer not only energy efficiency but also finer control over color temperatures and effects, reducing post-production corrections. Yet, many filmmakers stick to traditional lights out of habit, missing out on the flexibility and consistency newer solutions provide. For in-depth advice, see this resource.
Finally, choosing cine lenses isn’t merely about focal length and aperture. The misconception that all cine lenses are interchangeable disregards differences in breathing, flare characteristics, and optical distortions. High-end lenses designed with minimal focus shift are critical for complex shots requiring precise focus pulls. For detailed comparisons and recommendations, visit this detailed guide.
Tools That Stand Up to Daily Wear and Tear
Maintaining your camera supports, projection screens, and lighting gear is crucial for consistent performance. I rely heavily on precision tools like the Hohem iSteady Pro 3, a handheld stabilization device that keeps camera shake at bay during long shoots, and the Peak Design Travel Tripod, which combines lightweight portability with sturdy support. For cleaning, I swear by the Dust-Off compressed air and the Microfiber cleaning cloths; they’re gentle yet effective at removing dust from delicate cine lenses and projectors, ensuring clarity isn’t compromised over time.
Establishing Routine Checks ensures longevity
Creating a scheduled maintenance plan is a game-changer. Every month, I inspect and tighten support rigs and tripods, paying close attention to damping mechanisms and support joints. Regularly calibrating cine lenses using a lens calibration tool ensures focus remains precise across different shooting scenarios. Additionally, I examine projection screen surfaces for wrinkles or sag; troubleshooting early prevents costly replacements. For long-term results, investing in high-quality support hardware like the torque-controlled gimbals pays off by reducing operational wear and tear.
How do I maintain my projection setup over time?
Proper storage is fundamental. Sheltering gear from humidity and temperature fluctuations stops corrosion and warping. Using padded cases and climate-controlled storage units minimizes damage. Regularly replacing consumables such as light bulbs, filters, and gaskets also extends your equipment’s lifespan. Tools like the Gaffer Power Multi-Tool help perform quick onsite repairs, saving both time and money. Incorporating these practices ensures that your investment remains reliable and ready for the next shoot or screening, so don’t overlook routine care. For advanced methods, consider integrating specialized screen maintenance techniques to preserve your projection quality. Starting with a commitment to regular upkeep can dramatically reduce downtime and costly repairs in the long run. Remember, equipment that’s well-maintained maintains your professional standards—so set your routine today and see lasting results.
The Hardest Lesson I Learned About camera supports,projection screens,cinema projectors,film lighting,cine lenses
One of my most eye-opening moments was realizing that investing in expensive gear is not enough—you need to understand how each piece interacts within your environment. I once overlooked the importance of support rigidity, which caused micro-shake during critical shots, teaching me that stability is everything.
3 Myths About camera supports,projection screens,cinema projectors,film lighting,cine lenses That Held Me Back
I believed that only the most expensive components deliver professional results. Dispelling this myth, I found that thoughtful setup and regular maintenance outweigh price tags. Also, the idea that high-gain screens boost outdoor visibility without compromising image quality is false; I learned matte surfaces handle daylight better.
What Experts Won’t Tell You About camera supports,projection screens,cinema projectors,film lighting,cine lenses
Many professional filmmakers conceal how crucial proper calibration and environmental control are. For example, projector calibration with tools like a colorimeter dramatically enhances color fidelity, a step often skipped by amateurs. Recognizing these hidden details has elevated my craft beyond equipment to mastery.
Related Posts

How High-Gain Screens Actually Kill Your Off-Axis Viewing Quality
I'll never forget the first time I set up a…
![3 ALR Screens to Fix 16K Color Washout in Sunlit Rooms [2026]](https://cinegearguide.com/wp-content/uploads/2026/03/3-ALR-Screens-to-Fix-16K-Color-Washout-in-Sunlit-Rooms-2026.jpeg)
3 ALR Screens to Fix 16K Color Washout in Sunlit Rooms [2026]
I remember the first time I tried to watch a…
Fix Your 16K Contrast: 5 High-Gain Screens for 2026 Rooms
Have you ever finished a shoot or binge-watched a movie…