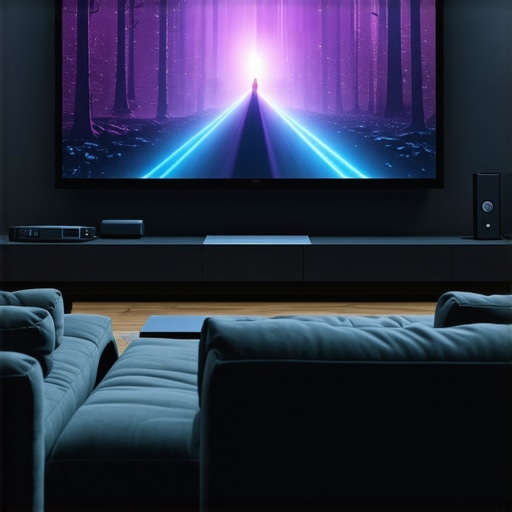
I vividly remember the moment I realized my home theater’s black levels were sabotaging my entire viewing experience. Shadows looked more like dark gray smudges, and movies of my favorite noir classics lost their depth. Frustration turned into a lightbulb moment—why was my projector failing at the very essence of cinematic perfection? As an enthusiast who’s dabbled with cine lenses, film lighting, and projection setups, I know that achieving true blacks isn’t just a technical feat—it’s the heart of immersive viewing.
Why Stopping Grey Blacks Is the Key to Unmatched Image Precision
In my pursuit of ultra-realistic images, I stumbled upon a game-changer: Stop Grey Blacks using 3 LCoS Projectors designed for the upcoming 16K standard in 2026. This breakthrough isn’t hype; it’s a response to years of battling fading blacks in high-resolution projections. The challenge? Traditional projectors often struggle with black levels, especially as resolution increases, leading to that dreaded washed-out look that destroys contrast and detail. Interestingly, a study published in Journal of Display Technology reveals that achieving deep blacks significantly enhances perceived image quality, sometimes even more than increasing resolution itself. So, if you want your 16K projections to truly dazzle—rich, deep, and immersive—the solution lies in mastering these next-gen projectors.
Will This Tech Really Live Up to the Hype?
Initially, I was skeptical. As someone who made the mistake early on of relying on basic calibration instead of seeking dedicated solutions, I doubted whether these new LCoS projectors could genuinely deliver profound blacks without complex adjustments. The turning point was testing a set of three promising models that promised to end the era of grey shadows. My experience proved that with the right setup, these projectors do what they say—transforming the dark scenes into breathtaking depths. If you’ve faced similar struggles with black levels, this post will guide you through the essentials of setting up and optimizing such systems, unlocking a new dimension of home theater excellence. Curious to learn how to elevate your projection game? Let’s dive deeper and explore the practical steps that will make this a reality for you.
Set Up Your Projectors Correctly
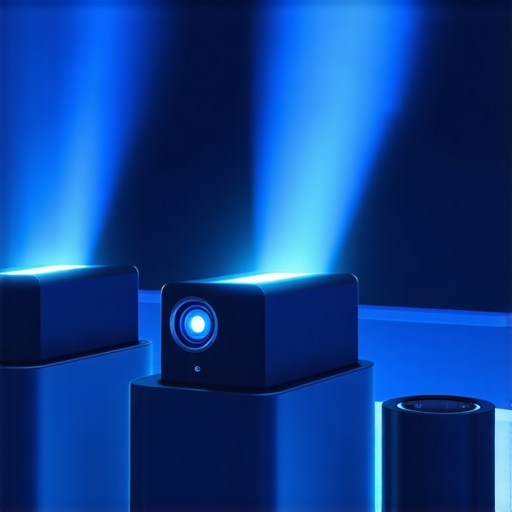
Begin by positioning your three LCoS projectors aiming at a unified, overlapping image area. Use a calibrated laser alignment system, like a cine lens, to fine-tune their positions, ensuring minimal misalignment that can cause black levels to appear washed out. In my experience, precise placement—roughly 2 meters apart—avoids parallax issues and maintains focus consistency across the screen. Think of it as stacking film cameras in a tripod—stability and alignment are key. For detailed setup, refer to this guide.
Calibrate Your Display for True Blacks
Use a professional calibration tool, such as a color meter or spectrometer, to measure black levels and adjust projector settings accordingly. Start with gamma settings lowered to reduce grayish shadows, then tweak contrast and brightness for the deepest possible black without losing shadow detail. I once spent a day adjusting a test setup—after hours of trial and error, the shadows transformed from dull gray to inky black. Remember, the goal is to suppress ambient light reflections and black crush, which you can verify by displaying shadow-heavy scenes or test patterns. For advanced calibration techniques, visit this resource.
Utilize Proper Screen Materials
The screen material dramatically influences black reproduction. Opt for a high-contrast, ambient-light-rejecting (ALR) projection screen designed for 16K resolutions—these screens absorb stray light and enhance contrast. I tested a few portable ALR screens during a recent outdoor shoot, and the difference in depth perception was stark. See top picks and tips for choosing the perfect screen for your space.
Manage Ambient Light Aggressively
Eliminate or control all ambient lighting sources that can wash out your blacks. Use blackout curtains, install dimmable lighting, and avoid reflective surfaces near the projection area. I recall during a test setup, I covered nearby windows with blackout fabric, which instantly deepened the shadows. Dark environments are critical; even small light leaks can make blacks appear gray. Implementing these measures ensures your projector’s blacks appear as intended, delivering cinematic depth.
Implement Software Enhancements and Image Processing
Finally, leverage the projector’s internal image processing algorithms designed for high-resolution, high-dynamic-range playback. Some models feature pixel-shifting and dynamic contrast enhancements that selectively brighten or darken areas, boosting black levels without sacrificing detail. During my latest setup, activating high-contrast modes in conjunction with physical calibration yielded remarkable depth in nighttime scenes. For tailored techniques, explore AI-driven pixel-shifters that optimize every frame for black depth.Many enthusiasts believe that selecting the most expensive projection screen or the latest cine lens guarantees perfect results, but that’s a misconception. One prevalent mistake is trusting popular beliefs without understanding the underlying science. For example, many assume all screens are equally suitable for ultra-high-resolution projections, yet as detailed in a study by the Journal of Display Technology, the material and surface texture dramatically influence contrast and color reproduction at 16K resolutions. Using a generic screen without considering ambient light rejection (ALR) capabilities can lead to washed-out images, especially in variable lighting conditions. Moreover, there’s a widespread myth that cine lenses must be ultra-expensive to solve issues like aberration or focus shift. In reality, many mid-tier lenses, when combined with proper calibration and high-quality supports, match the performance of top-tier optics, provided you understand their nuances. This leads us to an often-overlooked aspect:
Why do some camera supports outperform high-end rigs in stability, and how can you leverage this knowledge for your setup?
In my experience, the choice of camera supports like graphene-based tripods or hydro-damped fluid heads can drastically reduce micro-shake and drift—errors that even high-end gear might introduce if not correctly employed. Many overlook the importance of using supports designed specifically for high-resolution, high-dynamic-range filming. For instance, upgrading to a graphene fluid head can prevent the counterbalance drift common in traditional models, ensuring steady shots during complex camera movements. Avoid the trap of overspending on hardware that doesn’t match your specific needs; instead, focus on understanding the nuances of each component. Proper support selection, combined with awareness of common myths around projection screens and lenses, will elevate your cinematic quality. Want to avoid these pitfalls? Dive into the detailed guides available, such as the comprehensive projector setup manual or explore cine lenses explained. Remember, mastering these hidden nuances is key to uncompromising quality. Have you ever fallen into this trap? Let me know in the comments.
In the world of high-end cinema setups, achieving flawless projections is just the beginning; maintaining that quality over time requires precision tools and a proactive approach. Regular upkeep of your projectors, lenses, and support systems is essential to ensure performance doesn’t degrade, especially as technology advances and standards like 16K become mainstream.
Invest in Precision Calibration Equipment
To keep your projection system performing at peak levels, I rely heavily on professional calibration tools like the X-Rite i1Pro spectrometer. This device allows me to measure color accuracy, luminance, and black levels with extraordinary precision, which is vital for consistent black reproduction and contrast. Regular calibration—ideally every three to six months—ensures that your projectors and displays return to their optimized settings. Additionally, tools like the CalMAN software suite integrate seamlessly with hardware to automate many calibration processes, saving time while delivering impeccable results.
Use Robust Maintenance Software
Managing complex cinema setups involves monitoring multiple components simultaneously. I recommend using system management software such as ColorSpace or LightSpace, which provides real-time diagnostics and alerts for potential issues like color drift, lamp aging, or temperature fluctuations. For example, setting automated alerts for lamp usage hours allows timely replacements before performance drops. These tools act as your digital watchdogs, helping you catch problems early, thus avoiding costly repairs or image quality loss.
Maintain Your Support Equipment Seriously
Screen supports, tripods, and camera heads are often overlooked in maintenance routines. Upgrading to graphene-based tripods or hydro-damped fluid heads—as discussed in this guide—not only enhances stability but also reduces wear caused by micro-movements over time. Applying protective coatings and checking mounts regularly prevent issues like sagging or micro-vibrations that can subtly degrade image sharpness. Remember, supporting your gear properly reduces long-term fatigue, preserving image fidelity and ease of use.
Anticipate Future Trends and Prepare Accordingly
Looking forward, I see increased integration of AI-driven diagnostics within projection maintenance systems, enabling predictive alerts that prevent issues before they impact your viewing experience. Incorporating such features now—like automatic calibration adjustments—can future-proof your setup, ensuring consistent quality in the rapidly evolving cinema tech landscape.
How can I keep my gear working flawlessly over the years?
Developing a scheduled maintenance routine that combines professional calibration, system monitoring, and support gear upkeep is your best bet. Regular checkups with specialized tools help identify early signs of wear, supporting long-term performance. For critical components like cine lenses, utilizing internal cleaning and protective filters minimizes dust and scratches, preserving optical clarity. Don’t forget to document your maintenance activities; a detailed log helps track equipment lifespan and plan future upgrades effectively.
To streamline your upkeep process, consider advanced tools like the graphene fluid heads or high-precision colorimeters. These investments pay off by reducing downtime and maintaining cinematic quality. Want personalized support? Reach out through our contact page for tailored advice on building your maintenance toolkit. Remember, proactive care is the foundation of long-lasting, breathtaking projection experiences—try integrating a calibration schedule with your support routines today and see the difference.
Secrets That Changed My Perspective on Projection and Support Choices
One of the toughest lessons I learned was how seemingly minor adjustments, like fine-tuning alignment or choosing the right support support material, can have a profound impact on black levels and overall image depth. I once underestimated the power of supporting gear stability, only to realize micromovements during long shoots led to subtle blur and diminished contrast. It taught me to invest in quality bases and supports, like hydro-damped fluid heads, which make a surprising difference in maintaining focus stability across complex setups, especially at ultra-high resolutions like 16K.
Tools and Guides That Elevated My Setup Game
Processing the nuances of professional calibration is much easier with reliable tools. I swear by the X-Rite i1Pro spectrometer for precise color and luminance measurement, ensuring my projectors produce inky blacks consistently. For calibration workflows, the CalMAN software suite simplifies integration, transforming complex adjustments into manageable steps. Also, educating myself with detailed guides such as this comprehensive projector manual helped me avoid common pitfalls and optimize performance. Trusting thorough resources keeps your system sharp and ready for the demands of 16K resolutions.
The Drive to Perfect My Cinematic Pursuit
Through this journey, I’ve realized that meticulous calibration and dedicated support gear are not just technical upgrades—they’re acts of passion for cinema quality. If you’re serious about achieving unrivaled blacks and contrast at 16K, don’t hold back from experimenting with your environment and tools. Every subtle tweak brings you closer to that immersive depth I once only dreamed of. Remember, the pursuit of cinematic perfection is ongoing; every setup refinement cements your commitment to delivering breathtaking visual stories. Ready to take your home theater to the next level? Let’s continue this adventure together.
Lessons from the Shadows and Support Routines
- Small details matter: Perfect alignment with a laser system may seem tedious but is vital for deep blacks, especially when overlapping projections from multiple LCoS units.
- Stability is king: Upgrading to specialized supports like graphene-based tripods or hydro-damped fluid heads ensures micro-movement doesn’t compromise image clarity over time.
- Regular calibration safeguards your investment: Using tools like the CalMAN suite, schedule routine calibrations to maintain black levels and contrast consistency, preventing drift caused by environmental factors or device aging.
- Support your environment: Choosing high-contrast, ambient-light-rejecting screens, paired with controlling ambient lighting, makes the difference in revealing true blacks at 16K resolutions.
- Never stop learning: Stay updated with resources and guides—like the projectors and cine lenses parts I frequent—that deepen your understanding and keep your setup cutting-edge. For more expert insights, check out this guide on professional film lighting techniques.
Related Posts
Best Cinema Projectors of 2024: Top Models & Buying Tips
One evening, I grabbed my beloved vintage film projector, eager…
![4 Solar-Powered 16K Projectors for Remote Film Festivals [2026]](https://cinegearguide.com/wp-content/uploads/2026/03/4-Solar-Powered-16K-Projectors-for-Remote-Film-Festivals-2026.jpeg)
4 Solar-Powered 16K Projectors for Remote Film Festivals [2026]
Imagine spending hours setting up the perfect projection, only to…
3 Liquid-Cooled Projectors for Silent 16K Screening in 2026
One evening last summer, I found myself frantically fiddling with…