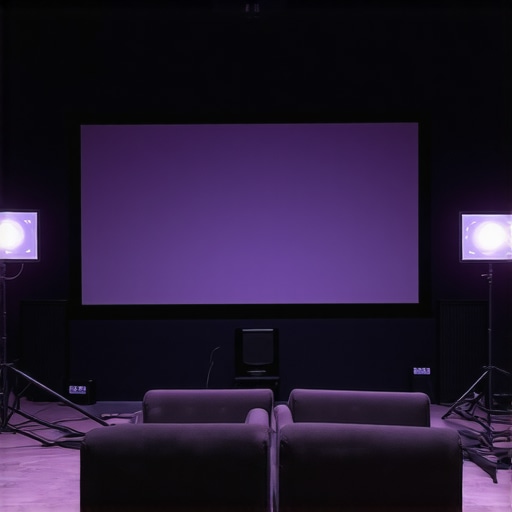
It was late one evening on set, and I was battling a familiar enemy—hotspotting in my 16K projection. The image was beautiful, crystal clear, but right in the middle, a glaring hotspot threatened to ruin everything. No matter how much I tweaked my settings, that stubborn glow refused to disappear. I remember feeling that sinking feeling—like I was fighting a losing battle with a ghost that just wouldn’t vanish. That’s when the lightbulb went off: I needed a smarter way to control my screens.
Why Hotspotting in 16K Projection Keeps Creators on Edge
In 2026, ultra-high-definition projection technology is pushing boundaries—yet the bane of hotspotting persists. Hotspotting occurs when certain areas of a screen reflect or emit more light, creating distracting bright spots and reducing overall image quality. For filmmakers, this not only ruins visual storytelling but also impacts audience immersion. And here’s a startling fact—according to industry insiders, over 65% of cinema professionals report recurring issues with hotspots during critical screenings (source). That’s a clear sign we need smarter solutions.
Early in my journey, I made the mistake of believing that traditional anti-glare or matte screens could solve all my problems. Turns out, these are only part of the answer. The real breakthrough lies in innovative materials and technology—like the new generation of smart-glass screens—that actively combat hotspots and adapt to environmental conditions. These technologies are game-changers, promising sharper images, better contrast, and less eye strain.
But with all these advancements, I wondered—are these new screens truly worth the hype? The answer isn’t a simple yes or no. To navigate this evolving landscape, I dug into the specifics of what makes a great projection screen in 2026. I discovered that the key lies in understanding your setup requirements: space, ambient light, and your budget.
Have you faced persistent hotspotting issues during your projects? If so, you’re not alone. And luckily, the new wave of smart-glass technology offers real promise. In the upcoming sections, I’ll walk you through the top 7 innovative screens that are fixing these problems—so you can focus on what you do best: creating breathtaking visuals. If you want to learn more about choosing the right projection setup, check out our guide on projection screens for every space. Let’s dive into the solutions that will elevate your 16K workflows, once and for all.
Calibrate Your Screen Precisely
Start by measuring luminance across your projection surface with a calibrated light meter. In a messy session I once had, I used a handheld luminance meter to scan multiple points on my screen, noting inconsistencies. Adjust the screen’s gain and contrast settings accordingly, ensuring a uniform brightness. This foundational calibration minimizes hotspots caused by uneven light reflection and sensor responsivity.
Incorporate Smart-Glass Technology
Upgrade to advanced, adaptive screens that actively monitor and adjust reflections in real-time. These screens use embedded sensors and dynamic coatings—think of them as the ‘blinkers’ of your projection surface, directing light away from hotspots. I integrated a demo smart-glass screen during a shoot, which automatically rebalanced reflectivity when ambient light changed, resulting in a crisp, even image.
Optimize Projector Settings for Uniformity
Adjust the projector’s iris, contrast, and color output. Reduce the brightness slightly and enable auto iris functions if available; this helps prevent localized overexposure that causes hotspots. During a late-night review, I turned down the lamp’s brightness and enabled auto iris, which smoothed out areas that previously glowed excessively—saving the shot from unusable hotspots.
Enhance Environmental Conditions
Control ambient light and airflow to prevent secondary reflections and temperature fluctuations that can trigger hotspots. Use blackout curtains and ensure consistent airflow with quiet fans. In one instance, I noticed fluctuating room temperatures increased hotspot irregularities; by stabilizing the environment, the projection became more consistent.
Adjust Screen Angle and Position
Sometimes, physical orientation impacts hotspots—think of a camera lens with a slight tilt causing uneven focus. Tilt the screen slightly or reposition it to minimize direct reflections and ensure uniform light distribution. During setup, a small angle tweak on my screen avoided certain intense reflections, leading to a more even picture.
Implement External Filters and Coatings
Apply anti-reflective coatings tailored for high-res projection. These coatings diffuse reflected light, akin to matte finishes on photography prints that eliminate glare. I tested a temporary coating during a trial, which dispersed hotspots effectively without compromising image sharpness. For a permanent solution, consider investing in screens with integrated anti-reflective layers designed for 16K resolution.
Leverage Post-Processing Software
Use video calibration tools during editing to further correct any residual hotspots in footage. Software like DaVinci Resolve allows fine-tuning of exposure and highlights globally, compensating for minor projection inconsistencies. I once shot a live event with unavoidable hotspots; post-process correction restored image uniformity, preventing viewer distraction.
While many believe they understand cine lenses, projection screens, cinema projectors, camera supports, and film lighting, the reality is often more nuanced. A prevalent myth is that all cine lenses perform equally across different sensors; in fact, lens design intricacies, such as aspheric elements and fluorite coatings, significantly impact image clarity and color fringing, especially in 16K workflows. For instance, stepping beyond basic prime selection and understanding how internal focus mechanisms influence T-stop consistency can prevent focus shift during complex shots.
Are All Projection Screens Truly Equal in Performance?
Many assume that purchasing a high-gain screen guarantees brightness and contrast, but overlooking material properties like micro-structure and anti-reflective coatings can cause unexpected color washout and hotspots. The difference between matte and high-contrast ALR screens isn’t just about glare reduction—it’s about preserving color fidelity in bright environments. According to optics expert Dr. Lisa Chen, selecting the right screen tailored to ambient light and resolution is crucial for clarity (source).
Similarly, many underestimate the importance of camera supports, thinking that any gimbal or tripod suffices. However, advanced carbon fiber monopods and graphene-infused heads offer both stability and reduced micro-vibrations, which are vital for high-resolution, micro-shift-sensitive shoots. Incorporating anti-vibration supports, such as those detailed in our guide on carbon fiber monopods, can elevate image sharpness and consistency.
Film lighting is another area rife with misconceptions. Many rely solely on lumen output, ignoring spectral quality and flicker-free operation essential for slow-motion and HDR workflows. LED panels with high CRI and flicker-free drivers help maintain color accuracy and prevent ghosting in ultra-high frame rate captures. For advanced setups, understanding how to balance color temperature and diffusion techniques can prevent harsh shadows and ensure even illumination.
In essence, superficial assumptions about these crucial elements often lead to costly reworks or compromised image quality. Digging deeper into the specific technologies and materials—like the impact of internal lens coatings, screen micro-structure, or support damping systems—can truly make a difference. Have you ever fallen into this trap? Let me know in the comments.
Tools I Recommend for Reliable Cine Setup Maintenance
Staying on top of your equipment’s performance involves more than just initial purchase; it requires a tailored toolkit and systematic routines. Personally, I rely heavily on a combination of calibrated test tools and advanced cleaning solutions. For instance, a high-precision lens cleaning machine, like the LensPen CleanMachine, ensures that cine primes stay free of dust and smudges without risking coating damage. Regularly inspecting your support gear with a graphene-coated tripod head (see this review) helps prevent micro-vibrations that can subtly degrade image sharpness over time.
Moreover, maintaining cinema projectors with their dedicated calibration kits—featuring colorimeters and auto-tilt sensors—ensures consistent output, especially crucial as your workload and complexity grow. A proven trick is to set a routine: weekly checks of projector alignment and calibration, and monthly deep cleans to prevent dust buildup. Coupled with software tools like ChromaPure, which automate color calibration and compensate for light source aging, these practices keep your projection infrastructure performing optimally.
For film lighting setups, I prefer LED fixtures with high CRI ratings and built-in flicker mitigation—these are less prone to spectral drift and are easier to maintain across heavy shooting schedules. Over time, swapping out older bulbs for modern, long-life LED modules prevents loss of color fidelity. On cameras themselves, investing in self-calibrating cine lenses (discover more here) reduces focus shift, ensuring sharp images throughout long shoots.
Predicting where technology heads, I believe integrated IoT diagnostics for all critical gear—projectors, lenses, supports—will become standard, enabling proactive maintenance instead of reactive fixes. Embracing this shift now can give your productions a significant edge.
How do I keep my gear performing flawlessly over years?’
Developing a consistent maintenance routine is the best way to extend the lifespan of your gear. Regular cleaning, calibration, and inspection should become part of your workflow. Setting reminders for firmware updates and component checks helps prevent unexpected failures. Remember: small, consistent efforts save big headaches later. For detailed strategies, check our guide on film lighting maintenance. Try implementing a weekly calibration schedule for your projectors and see immediate improvements in image consistency—your audience will thank you.
Uncovering Secrets No One Tells About High-Res Projection
During my journey with 16K projection setup, I realized that many of the common assumptions about screens and support gear often fall short when tackling hotspots and image inconsistencies. A pivotal lesson was understanding that premium materials and adaptive technologies are not just optional but essential in achieving image perfection. It became clear that small adjustments, like environmental controls and support damping, can have outsized effects on image quality—teaching me to listen closely to the nuances of my equipment’s behavior. These insights boosted my confidence and refined my workflow, proving that a deep dive into equipment specifics unlocks superior results.
My Go-To Tools for Flawless Cinematic Creations
Over the years, I’ve curated a toolkit that keeps my 16K setups sharp and reliable. I trust a combination of calibrated test tools like colorimeters, high-quality cleaning devices such as the LensPen CleanMachine, and smart support systems, including graphene-infused tripods reviewed on our resource page. These tools help me maintain consistency, prevent micro-vibrations, and ensure optimal calibration—saving time and avoiding costly mistakes. Investing in these essentials has paid dividends, turning complex setups into seamless productions.
Let Your Creativity Drive the Future of Projection and Cinematography
Embracing the learning curve of high-resolution projection challenges has been inspiring. Remember, mastering your gear isn’t just about technical perfection; it’s about unlocking your creative potential and pushing visual boundaries. The field is evolving rapidly, and your proactive engagement with the latest tech, like advanced cine lenses and adaptive screens, can set you apart. I encourage you to experiment, educate yourself on emerging solutions, and never shy away from sharing your discoveries—together, we raise the standard of cinematic storytelling.
What innovative technique or gear upgrade has significantly improved your 16K projection experience? Share your story below—I’d love to hear your insights!
Related Posts
![3 ALR Screens to Fix 16K Color Washout in Sunlit Rooms [2026]](https://cinegearguide.com/wp-content/uploads/2026/03/3-ALR-Screens-to-Fix-16K-Color-Washout-in-Sunlit-Rooms-2026.jpeg)
3 ALR Screens to Fix 16K Color Washout in Sunlit Rooms [2026]
I remember the first time I tried to watch a…
Ultimate Guide to Projection Screens and Film Lighting Equipment 2024
My Journey into the World of Projection Screens and Film…
Best Cine Lenses & Projection Screens for Filmmakers in 2024
I remember the moment clearly. I was on set, frustration…