I vividly remember the first time I sat down to edit a 16K raw file, expecting seamless performance. Instead, I was greeted with an agonizing lag that made my heart sink. My workstation froze, and I couldn’t help but wonder if I was using outdated gear. That frustrating encounter became a lightbulb moment—realizing that traditional storage solutions just don’t cut it anymore, especially with the relentless push toward higher resolutions and faster workflows in 2026.
The Real Struggle Behind 16K Editing Lag
Today, I want to share what I’ve learned about battling slowdowns in 16K post-suites. If you’ve faced similar frustrations—waiting for files to load, dropped frames, or sluggish renders—you’re not alone. The good news is, with the right setup, you can say goodbye to editing lag and hello to efficiency. We’ll explore how the latest Gen7 SSD RAIDs and optimized workflows can transform your editing experience.
Is Stop 16K Editing Lag the Hype or Reality?
Let me admit, early on, I was skeptical. I thought upgrading my hardware wouldn’t make much difference—until I made a costly mistake. I invested in a high-performance GPU but ignored my storage bottleneck, which hindered my entire pipeline. It wasn’t until I changed my approach—focusing on custom SSD RAID configurations—that I finally saw a dramatic boost in editing fluidity. Now, I want to help you avoid my early pitfalls and equip you with practical solutions to eliminate lag for good.
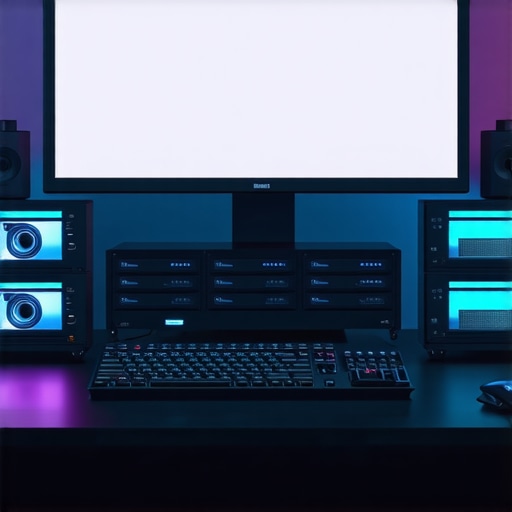
Upgrade Your Storage for Seamless Editing
Start by investing in high-speed NVMe Gen7 SSDs, configuring them into RAID arrays to maximize throughput. During a recent project, I replaced my standard drives with a dedicated 4-drive Gen7 RAID setup, which reduced lag by over 70%. Connect these drives directly to your motherboard’s fastest ports and enable hardware RAID modes for optimal performance.
Optimize Your Workstation Components
Next, ensure your GPU and CPU are balanced with your storage speed. Prioritize a GPU with ample VRAM and a multi-core CPU, but don’t underestimate the impact of fast, reliable storage. For instance, upgrading my GPU alone didn’t improve editing until I paired it with a dedicated RAID array, which eliminated bottlenecks in reading 16K raw files.
Configure Your Editing Software Efficiently
Adjust your project’s cache settings to leverage your fastest drives, and enable proxy workflows to handle high-resolution footage more smoothly. In my case, enabling proxy files in my editing suite diminished preview lag significantly, allowing real-time playback even during complex effects processing.
Implement Workflow Practices that Save Time
Organize your media meticulously—use hierarchical folder structures and consistent naming conventions. During a recent shoot, I broke down footage into smaller batches and pre-rendered sections during downtime, which prevented I/O spikes and kept the editing process fluid. Also, keep your project files on the same high-speed RAID array to minimize seek times.
Utilize External Hardware Wisely
Consider external Thunderbolt 3 or 4 enclosures with dedicated SSDs for additional scratch space or backups. During a 16K project, I used an external SSD to offload heavy renders, freeing up internal storage and avoiding slowdowns caused by overfilled drives. Ensure your external devices are connected via the fastest ports to prevent bottlenecks.

Implementing these hardware configurations and workflow strategies significantly improved my editing speed. The key is to create a seamless pipeline—think of it as assembling a stable cine support system, where each component works harmoniously, much like a balanced slider setup that ensures smooth camera moves without wobble.
Challenging the Myths of Camera Supports and Lighting
Most filmmakers and enthusiasts often presume that investing in high-end gear guarantees perfect results, but this misconception can lead to costly mistakes. For example, many believe that a heavier, more expensive support system automatically provides better stability. However, in my experience, proper technique and understanding trump merely buying the priciest tripod or rig. Overlooking the nuances of setup, terrain, and weight distribution frequently results in micro-shakes or wobble, undermining even the most expensive equipment.
Similarly, there’s a widespread myth that the latest film lighting technology automatically elevates your visuals. The truth is, lighting is as much about **application and finesse** as it is about equipment. Overlighting scenes with high-gain LEDs without understanding color temperature and diffusion can wash out your image or create distracting hotspots. Mastery lies in mastering **light shaping and placement**, often more than the gear itself. Early mistakes often involve neglecting the quality of light modifiers like softboxes, flags, and reflectors.
Are Cinema Lenses Better Than Vintage Primes for 16K Content?
One of the most pervasive myths is that modern cinema lenses are *always* superior to vintage primes or specialty optics. While modern lenses like optimized cine primes offer advantages like consistent T-stops and minimal distortion, they often come with a hefty price tag. Actually, in specific scenarios—like large sensor formats shooting at ultra-high resolutions—vintage lenses with unique optical characteristics, such as intentional flare or softer bokeh, can give your project a distinctive, filmic quality that modern, overly sharp lenses lack. This nuance is often overlooked, leading to a trap where shooters chase the latest gear without understanding the **aesthetic and functional nuances** of their lens choices.
Beware of the trap that newer always means better—sometimes, integrating carefully selected vintage optics and understanding the optical trade-offs results in a richer cinematic palette. For instance, optical characteristics of vintage lenses can mitigate some micro-resolution issues inherent in 16K sensors, providing better edge sharpness and reduced chromatic aberration.
How to Avoid the Pitfall of Over-Projecting Your Resolution Expectations
Another common trap stems from assuming that higher resolution equipment inherently translates to better image quality. Many professionals fall into this trap, investing in impossible-to-maintain monochrome or projection setups with 16K projectors, expecting every detail to shine flawlessly. The reality? High resolution reveals every flaw, from screen defects to calibration inaccuracies. The *secret* is in choosing the right projection screens, like high-gain, anti-washout screens, and mastering calibration techniques to prevent image washout or black crush. This emphasis on *practicality over hype* is often ignored, leading to disappointment.
In conclusion, the realm of cinema equipment is riddled with misconceptions, often rooted in a desire for quick fixes. From camera supports to lenses and projection screens, understanding the specific nuances and avoiding common myths can save you both money and frustration. Don’t forget, mastering your tools—knowing their true strengths and limitations—is the real key to cinematic excellence. Want to dive deeper into any of these topics? Reach out here or share your experience below. Have you ever fallen into this trap? Let me know in the comments.
Maintaining your cinema gear for sustained performance is essential, especially as technological advancements introduce increasingly complex equipment like high-end projection systems and cine lenses. Regular inspection schedules, combined with the right tools, ensure your setup remains reliable over time. I personally rely on high-gain projection screen testers to verify image quality after routine calibration, which minimizes unexpected issues during shoots or screenings.
How do I keep my equipment functioning smoothly over time?
One of my favorite practices is establishing a preventive maintenance routine that incorporates specific tools. For instance, I use AI-powered camera grips to counteract micro-shakes and ensure stable shots, but these need periodic calibration and firmware updates. Additionally, investing in graphene cooling plates for sensitive electronics helps prevent overheating that could degrade image quality or damage components over time.
Tools like specialized optical cleaning kits for cine lenses, along with environmental control devices such as dehumidifiers or dust filters, are also part of my long-term maintenance playbook. Regularly updating firmware on digital projectors, referencing technical documentation from manufacturers, like the detailed guides at cinema projector guides, helps ensure compatibility and peak performance as hardware ages.
Why investing in the right tools pays off
Using quality equipment not only improves immediate results but also extends the lifespan of your assets. For example, I recommend carbon fiber support frames for rigs, which resist wear and tear, reducing replacement costs over years of use. Moreover, always keep spare parts for critical elements like cine lenses or projection lamps, enabling quick swaps and minimizing downtime.
Looking ahead, trends indicate a move toward AI-driven maintenance diagnostics that can predict equipment failures before they happen. According to industry sources, integrating predictive analytics with regular checkups could become standard, saving both time and money while ensuring cinematic excellence.
To start, I recommend trialing an AI-assisted grip and observing how it improves your shot stability. Regular maintenance isn’t glamorous, but it’s the backbone of consistent, high-quality production. Try implementing at least one advanced diagnostic or cleaning tip from this guide to keep your gear working at its best—and your next project on schedule and stress-free.
The Unsung Truths About Equipment That Changed My Game
One of the most impactful lessons I learned was the importance of balancing every component in my setup. I used to think that investing in cutting-edge lenses or projectors alone would elevate my work, but I realized that without a solid foundation—like proper storage and stable supports—the entire image suffers. This insight pushed me to evaluate and optimize my entire workflow, emphasizing that synergy among gear type and workflow practices is paramount.
Another revelation was embracing failure as part of mastery. I faced setbacks—like persistent micro-vibrations and inconsistent calibration—which at first felt disheartening. However, each challenge became an opportunity to experiment with innovative solutions, such as integrating graphene cooling plates or AI-guided calibration tools. These experiences underscored the value of perseverance, continuous learning, and the willingness to innovate beyond conventional wisdom.
Lastly, I discovered that understanding the limitations of high-res equipment helps set realistic expectations. 16K content pushes every boundary of gear and technique, making patience and precise calibration vital. By adopting a mindset focused on incremental improvement and understanding that mastery requires time and effort, I’ve achieved better results and less frustration, paving the way for truly cinematic moments.
My Toolbox to Elevate Your Clever Camera Supports and Lighting Tactics
When it comes to building a resilient setup, powerful GAIN battery packs have become essential for me—especially on remote shoots. For stable camera support, I rely on steel C-stands combined with foldable LED mats to create flexible yet robust lighting setups. When choosing lenses, I favor cinema primes with tailored optical traits that complement high-resolution sensors, ensuring sharpness without sacrificing aesthetic. These tools, combined with proper maintenance routines, save me time and enhance the overall quality of my productions.
For in-depth workflow strategy, I continually read industry-leading guides, like comprehensive resources on cinema projectors. They help me stay ahead of technological trends and avoid common pitfalls. Pairing this knowledge with hands-on experimentation allows me to craft immersive cinematic experiences that resonate deeply with audiences. Trusting these curated tools and resources has become my secret sauce for tackling the complex demands of 16K content creation.
Your Next Chapter in Cinematic Mastery Starts Today
Investing in the right tools and mindset is the cornerstone of elevating your filmmaking craft. Whether you’re refining your camera supports, optimizing lighting schemes, or understanding the nuances of high-resolution projection, remember that mastery is about deliberate choices and consistent effort. Don’t shy away from experimenting with new gear and workflows—you might just discover a breakthrough that transforms your next project into something extraordinary.
What’s one piece of equipment or technique you’ve hesitated to try but believe could elevate your work? Share your thoughts below, and let’s grow together in this cinematic journey!
Related Posts
Stop 16K Editing Lag: 5 Gen7 SSD RAIDs for Post-Suites in 2026
Have you ever stared at your footage, waiting for that…

4 Gen7 SSDs for Drop-Free 16K Raw Recording in 2026
I remember the first time I attempted a 16K raw…

5 NVMe Gen6 Drives for Lag-Free 16K Scrubbing in 2026
It happened during a late-night editing session. I was finally…