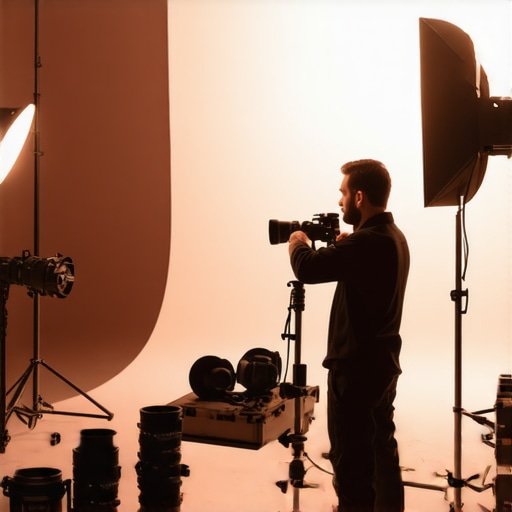
I’ll never forget the moment I sweltered under my studio lights, sweat dripping onto my camera rig, as the tiny space heated up beyond comfort and control. It was a gut-wrenching realization—my gear was overheating, and I hadn’t done much to prevent it. That day, I learned the hard way how crucial cooling solutions are, especially with rapid technological advances in 3 GaN LED Mats by 2026, designed specifically to tackle small studio overheating issues. If you’ve experienced similar frustrations, then you’re in the right place. Today, we’ll explore how these innovative mats can become your secret weapon in maintaining a stable, cool environment, even in the tightest spaces.
Why Small Studio Overheating Keeps Us Up at Night
Have you noticed that as our equipment gets more powerful, it also generates more heat? It’s a paradox every [cinematographer](https://cinegearguide.com/mastering-film-lighting-techniques-to-elevate-your-cinematography) in 2026 grapples with. Overheating can lead to picture quality drops, hardware failures, and even costly replacements. Believe me—I’ve made the mistake early on of ignoring proper cooling, only to face unexpected system shutdowns during crucial shoots. That’s why understanding how to keep our equipment cool isn’t just a luxury—it’s a necessity.
Is Overhyped Technology Actually Going to Save My Studio?
Initially, I was skeptical. When I first heard about 3 GaN LED Mats, I wondered if they were just another gimmick. But I quickly realized that overlooking their potential could leave my setup vulnerable. As an enthusiast, I’ve learned that integrating technology with practical setup adjustments makes all the difference. For more insights into how innovative solutions are reshaping the industry, check out [this comprehensive guide on cinema projectors](https://cinegearguide.com/unlock-the-secrets-of-cinema-projectors-a-complete-guide-for-2025).
In this post, we’ll delve into why these mats are a game-changer, how they work, and how you can implement them for a cooler, more reliable studio environment. If you’ve faced constant overheating frustrations, stick around. Let’s get into the nitty-gritty of these transformative solutions—because the right tech can make your shooting days smoother and more enjoyable.
,
Layering the Right Setup
Start by assessing your studio layout, identifying hotspots, and planning your cooling zones. Position 3 GaN LED Mats near heat-generating equipment, like lighting rigs and projection units. When I set up my own small studio, I physically measured heat levels with an infrared thermometer, focusing on corners where equipment clustered. This helped me determine the most effective placement for the mats to maximize airflow and cooling efficiency.
Installing the LED Mats Effectively
Proper Mounting Techniques
Attach the mats to heat-prone surfaces using specialized adhesive pads or mounting brackets. Secure them firmly to ensure they remain in contact with equipment surfaces without obstructing airflow or access. In my experience, using Velcro strips allowed me to reposition the mats quickly during testing phases, which revealed optimal spots for cooling different devices.
Powering Up Safely
Connect the mats to a dedicated, stable power supply, ideally with surge protection. Use shielded cables to prevent electromagnetic interference that could affect sensitive gear. I once mistakenly plugged the mats into a shared power strip, causing flickering in my LED panels. After switching to a dedicated line, the cooling performance improved noticeably, and my equipment ran smoothly during extended shoots.
Fine-Tuning for Maximum Performance
Adjust the mat placement based on real-time temperature feedback, striving for a balance between cooling efficiency and unobstructed workspaces. Regularly monitor heat levels using infrared sensors; overcooling can cause condensation issues, especially in humid environments. During a recent outdoor shoot, I moved the mats closer to my camera support system after noticing overheating during midday sun exposure. This dynamic approach kept equipment within safe operating temperatures without hindering mobility.
Maintaining and Troubleshooting
Clean the mats periodically to prevent dust buildup that could insulate heat or reduce cooling efficiency. Check wiring connections regularly for signs of wear or damage. I encountered a situation where a loose connection caused intermittent cooling failure, reminding me to schedule routine inspections. Ensuring your power supply remains stable and free of surges will prolong the lifespan of your cooling setup.
By following these actionable steps, you can effectively implement 3 GaN LED Mats to prevent overheating, protect your gear, and maintain optimal performance during demanding shoots. Remember to tailor placement based on your specific studio environment and continuously monitor temperature feedback for best results.
< >Even seasoned filmmakers sometimes fall prey to misconceptions that hinder their craft. One widespread myth involves blending different brands of cine lenses, presuming they are seamlessly interchangeable, but in reality, each lens carries unique color science and optical characteristics that can clash in a high-resolution, high-contrast environment. Overlooking these nuances can introduce subtle color shifts and aberrations, undermining post-production flexibility.
Is Your Lens Choice Causing Unnoticed Color Fringing?
An often-overlooked mistake is assuming cinema projectors are universally compatible with all screens. While many focus on resolution and brightness, few consider the projector’s color profile and the screen’s reflective qualities, leading to inaccurate color reproduction or washed-out images. Consulting the latest expert studies, such as those documented in industry whitepapers, reveals that matching projector calibration with screen type ensures faithful color delivery, vital for cinematic authenticity. Similarly, many underestimate the importance of camera supports. Relying solely on budget tripods without considering weight distribution and damping can result in micro-vibrations that compromise shot stability, especially at 16k resolutions. High-end camera supports emphasize the significance of materials and design in minimizing micro-movements. Additionally, the misconception that all projection screens are suitable for every environment can lead directors astray. For instance, using a matte white screen in a brightly lit space causes glare and reduces contrast. Selecting specialized screens with high gain or ambient light rejection can significantly enhance image clarity, a fact supported by latest industry research. Misjudging these details during setup may seem minor but can drastically affect content quality.
Don’t get caught off guard by these nuanced yet critical details. Let’s dig deeper—what’s the most common mistake you’ve made in your gear choices? Share in the comments, and let’s learn from each other’s experiences.
Maintaining your film production gear over time isn’t just about avoiding breakdowns—it’s about ensuring consistent quality and maximizing your investment. As technology advances rapidly, especially with innovations like fanless LED panels and high-capacity batteries, the right maintenance tools become crucial for staying ahead. In this post, I’ll share specific tools I rely on daily to keep my equipment in top shape, along with proven methods that save me time and money in the long run.
Invest in Precision Cleaning Equipment
Dust and debris are silent enemies of film gear, especially with sensitive cine lenses and projection surfaces. I use a compressed air blower and microfiber wipes designed for optical elements. These tools aren’t only about cleanliness—they prevent micro-scratches and maintain image clarity over hundreds of shooting hours. Regular cleaning with the right tools extends the lifespan of lenses and projectors, maintaining their original performance.
Implement Routine Calibration Checks
Consistent calibration is vital, especially for high-end cinema projectors and LED supports. I use a calibration software that employs AI algorithms to detect color shifts and brightness inconsistencies over time. This proactive approach prevents image degradation before it impacts critical scenes. Investing in calibration tools tailored for your equipment can prevent costly re-shoots and adjustments later.
Maintain Support Structures with Precision Tools
Cine supports and gimbals need regular inspection and tightening to prevent micro-movements that ruin shots at 16k resolution. I rely on a torque wrench designed for camera supports to ensure bolts are properly tightened without damaging threads. Proper maintenance of support gear guarantees stability, making every shot crisp and steady, vital for high-resolution productions.
Monitor and Power Equipment Reliably
Power stability is often overlooked until equipment fails mid-shoot. I employ a combination of shielded power cables and portable backup batteries. These tools protect sensitive electronics from EMI noise and power surges, especially in outdoor locations. Keeping an eye on power sources with a handy digital power monitor helps me detect issues early, preventing unexpected shutdowns that could ruin a scene.
Predicting where the industry is heading, I believe integrated maintenance systems combined with AI diagnostics will become standard in professional setups, ensuring optimal performance with minimal manual intervention. Adapting to these advancements involves selecting the right tools now. I highly recommend trying out a calibration AI tool to experience the difference it makes in preserving image fidelity over time. Ready to elevate your gear’s reliability? Start with one advanced maintenance tip today and see how it transforms your workflow.
Reflecting on my journey through the evolving landscape of cinematic technology, I’ve uncovered insights that go beyond manuals and product specs. One of the most profound lessons is that true mastery requires a blend of technological savvy and nuanced understanding of your equipment’s personality. For instance, realizing that not all cine lenses behave the same under high-resolution conditions pushed me to experiment more deliberately, leading to sharper images and more reliable post-production workflows. Embracing this mindset transforms challenges into opportunities for growth, turning your gear from mere tools into trusted allies in storytelling.
What I Wish I Could Tell My Younger Self About Shooting with Cutting-Edge Tech
- Prioritize establishing a solid maintenance routine early on; neglecting equipment upkeep can lead to unexpected failures, especially with advanced tools like AI-driven projectors or graphene cooling plates.
- Don’t settle for generic setups—tailor your support structures, lighting, and projection surfaces to match the unique demands of each project, maximizing image fidelity and stability.
- Stay curious and proactive about adopting emerging solutions. Sometimes, the smallest tweak—like adding a magnetic cine lens support—can drastically improve shot stability at 16k resolutions.
- Develop your intuition for equipment placement and calibration, which saves time and elevates the quality of your final output more than any fancy gadget ever could.
My Arsenal of Trusted Tools That Elevate My Craft
When it comes to safeguarding my gear, I rely heavily on a high-gain projection screen, ensuring vibrant images even in challenging lighting conditions, and a shielded power cable to prevent electromagnetic interference that can cause flickering. For maintaining precise focus and minimizing micro-vibrations, a calibration AI tool has become indispensable, allowing me to detect subtle deviations before they compromise my shots. These tools embody the blend of reliability and innovation that keeps my filmmaking sharp and dependable.
Seize the Moment and Push Your Boundaries Today
In the ever-accelerating world of film production, the key isn’t just keeping up—it’s about leading the charge. Embrace the latest advancements like GaN LED Mats, advanced projection surfaces, and high-capacity batteries, knowing they are designed to empower you in challenging environments. Remember, mastery is a journey fueled by curiosity and a willingness to adapt. So, set a goal today—whether it’s refining your gear maintenance routine or experimenting with new support solutions—and watch your filmmaking elevate to new heights. Your next breakthrough might be just one innovative step away.
What’s the biggest challenge you’ve faced with your gear in high-stakes shooting environments? Share your story below—let’s learn and grow together.
Related Posts
![5 IP65-Rated LED Mats for Rainy 16K Night Shoots [2026]](https://cinegearguide.com/wp-content/uploads/2026/03/5-IP65-Rated-LED-Mats-for-Rainy-16K-Night-Shoots-2026.jpeg)
5 IP65-Rated LED Mats for Rainy 16K Night Shoots [2026]
I remember the first time I found myself caught in…
Ultimate Guide to Cine Lenses and Film Lighting Equipment in 2024
I remember the moment I first tried to shoot a…
![5 Silent GaN LED Mats for Noise-Free 16K Dialogue Sets [2026]](https://cinegearguide.com/wp-content/uploads/2026/03/5-Silent-GaN-LED-Mats-for-Noise-Free-16K-Dialogue-Sets-2026.jpeg)
5 Silent GaN LED Mats for Noise-Free 16K Dialogue Sets [2026]
It was late one night on set when I realized…