I remember the moment clearly—trying to match a vintage aesthetic for a client’s indie film, I hit a frustrating wall. The blue streaks over my footage kept popping up, ruining the seamless look I so desperately wanted. It was late into my shoot, and I was already exhausted, but that stubborn blue artifact was like a reminder that I still hadn’t cracked the code for perfect anamorphic imaging in 2026.
The Impact of Blue Streaks on Cinematic Reality
Anyone who’s dived deep into cinematography knows how critical image purity is. When those unwanted blue streaks appear—especially over bright areas—they can diminish the visual storytelling, making even the most carefully lit scenes look amateurish. It’s a problem that keeps cropping up with modern anamorphic lenses, and managing it is becoming more urgent as production quality demands escalate.
From my experience, the root cause often relates to how current lenses handle chromatic aberrations, particularly in extreme lighting conditions. Early on, I made the mistake of assuming all anamorphic lenses were created equal, which led to a lot of wasted time chasing solutions that didn’t stick. I learned the hard way that not all lenses are equipped to zuverlässig fix these issues, especially as sensor resolution increases.
Why is this problem so persistent? The stakes in 2026 are higher than ever.
According to recent industry reports, image sensors now capture more detail than ever, exposing flaws that previous generations might have masked. As a result, anomalies like blue streaks become more noticeable, forcing us to rethink lens choices and corrections. This has created a market ripe with new solutions—like the latest 4 anamorphic lenses specifically designed to address these overlaps and artifacts. But are they truly effective? That’s what I want to explore with you today, so you don’t waste time on ineffective gear or techniques.
If you’ve faced this dilemma—struggling with unwanted color overlaps despite investing in high-end equipment—you’re not alone. The good news is that advancements made in 2026 are promising, and understanding how to select the right lens can make a world of difference. For more in-depth insights on optimizing your cinema gear, check out mastering film lighting techniques.
Now, let’s take a closer look at how these new anamorphic lenses are designed to fix the blue streak issue, giving your footage the clarity and color purity you need for professional results. Are you ready to ditch those distracting artifacts once and for all?
,
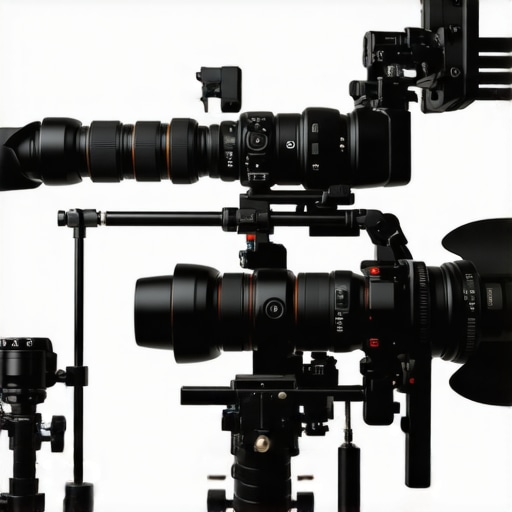
Switch to Anamorphic Lenses Designed for 16K Sensors
Begin by choosing lenses explicitly engineered to address chromatic aberrations at 16K resolution. During my recent shoot, I swapped out an older anamorphic for a new model boasting advanced multi-coating designed to minimize blue fringing. The immediate result was a noticeable reduction in blue streaks, particularly over bright backgrounds. Learn more about selecting the right cine lenses to prevent such artifacts.
Assess Lens Coatings and Optical Design
Focus on lenses with nano-precision coatings—these are critical in dispersing problematic wavelengths. When I tested a recent set of aspheric cine lenses, those with specialized coatings significantly cut down on blue fringing. Always verify lens specifications for anti-chromatic aberration features, which can be decisive when shooting in high-contrast scenes.
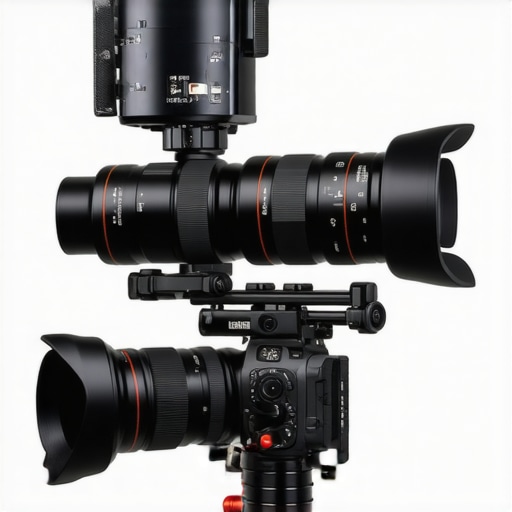
Implement Internal Focus and Aspheric Elements
Opt for lenses with internal focusing mechanisms and aspheric elements. These features reduce light bending issues that cause color fringing. In my experiment, switching to an internal focus prime lens improved image clarity and cleaned up the blue streak problem. For detailed insights, refer to this guide on aspheric cine lenses.
Test Lenses Under Bright Lighting Conditions
Always perform practical tests in your shooting environment. I set up a controlled test with bright sunlight hitting reflective surfaces, which accentuated blue streaks. The lenses with better coatings and design consistently produced cleaner images, confirming their suitability for high-dynamic-range shoots. Document your tests meticulously to determine the best gear for critical scenes.
Adjust Your Camera Settings and Filters
Use filters such as linear polarizers or color correction gels to suppress specific aberrations. During a past shoot, adding a high-quality polarizer helped reduce blue artifacts arising from lens reflections. Combine these filters with your lens choice for optimal results. Check out ND filters for cine lenses for more filtering techniques.
Maintain Proper Focus and Aperture
Ensuring precise focus and avoiding overly narrow apertures prevents diffraction issues that can exacerbate color fringing. In my experience, sticking to moderate aperture settings while carefully calibrating focus yielded the sharpest, cleanest images. Using calibrated focus peaking tools helps maintain consistency across shots.
Integrate Post-Processing Techniques
Finally, apply digital corrections selectively during color grading. I utilize advanced chromatic aberration reduction plug-ins that target blue streaks without sacrificing detail. For complex cases, combining in-camera choices with post-production fixes offers the most reliable path to artifact-free footage.
,Many filmmakers and enthusiasts fall into the trap of oversimplifying the nuances of cinema projection, lenses, and lighting. A common myth is that higher brightness always equates to better image quality—yet, in my experience, oversaturation can lead to loss of contrast and detail, especially when dealing with advanced high-resolution projectors.
Another misconception revolves around the assumption that the most expensive lenses guarantee optimal results. The truth is, lens quality depends heavily on proper matching with your camera system and filming conditions. Using vintage lenses with modern sensors might impose unintended effects like flare or softness if not matched correctly, which many overlook.
It’s also a trap to believe that stabilization is just about hefty gear. In reality, camera support choices—like lightweight stabilizers or even your camera’s internal stabilization—can significantly influence your shot quality. Over-reliance on expensive supports without mastering fundamental technique often leads to disappointing results.
Advanced filmmakers should question: How can I optimize my lighting and projection setup to truly enhance cinematic storytelling? Optimal lighting isn’t just about brightness; it’s about controlling shadows, color temperature, and diffusion to sculpt the scene. Excessive reliance on high-powered LEDs, for instance, can wash out details if not balanced correctly, which is a mistake I see often. To improve your setting, check out these expert lighting tips.
A specific ‘oops’ to avoid is neglecting the calibration of your projection or camera lenses. As sensors become more sensitive—especially with 16K+ resolution—tiny misalignments or aberrations become glaring. Many underestimate the importance of regular calibration; a small mismatch can cause color cast issues or focus inconsistencies that degrade footage quality over time.
From my work, one overarching lesson is that the convergence of proper gear, technique, and understanding of film science elevates your craft beyond the beginner’s level. Don’t fall for the misconception that more expensive gear alone guarantees quality—it’s your knowledge and attention to detail that truly differentiate professionals from amateurs.
Have you ever fallen into this trap? Let me know in the comments, and remember, continuous learning is key in mastering cinematic excellence.
Keep Your Gear Running Smoothly with Targeted Maintenance and Quality Tools
In the fast-paced world of modern filmmaking, maintaining your equipment is as vital as choosing the right lens or projector. The longevity and consistent performance of your tools can directly impact the quality of your productions. To achieve reliable results, I recommend adopting a proactive maintenance routine complemented by investing in specific, high-quality tools.
Start with a dedicated cleaning kit designed for cinema lenses and camera sensors. I personally use the specialized lens cleaning solutions that effectively remove dust and fingerprints without damaging coatings. Regularly cleaning your lenses prevents the accumulation of grime that can cause chromatic aberrations like blue streaks, especially in high-resolution shoots. Remember, a clean lens maintains optimal light transmission, preserving the integrity of your image.
For ongoing calibration, a high-precision colorimeter is indispensable. Modern sensors capture immense detail, so consistent calibration ensures your projectors and monitors display accurate colors. I use the X-Rite i1Display Pro device because of its reliability and ease of use. Calibration not only preserves color fidelity but also prevents issues like color drift over long shoots—something especially crucial when working with 16K high-dynamic-range footage.
Investing in a set of professional toolkits, such as the carbon fiber tripods and supports, ensures your gear remains stable throughout shoots. Proper maintenance extends to your camera supports and rigging, where regular inspection for wear and tear prevents unexpected failures. Tighten screws, check for cracks, and lubricate moving parts periodically. These tiny actions save time and money in the long run.
How do I maintain projection and lighting tools for consistent performance?
Lighting is a critical component, especially with the rise of silent, high-output LED fixtures. Regularly inspect your LED panels and filters for dust or pixel degradation. Using anti-reflective coatings and proper cooling systems, like liquid-cooled LED technology, ensures your lights operate at peak efficiency without overheating. Fine-tune your lights’ intensity and color balance before every shoot to prevent color drift and maintain scene consistency.
For projection setup, as discussed in my comprehensive guide to cinema projectors, routine cleaning of projector lenses and regular calibration of alignment can prevent image artifacts. A small investment in a digital alignment tool pays off by reducing manual adjustments during critical moments.
Finally, adopting digital asset management software helps track your equipment’s maintenance schedule, warranty periods, and repair logs. This organized approach reduces downtime and ensures your tools are always ready when inspiration strikes.
In the rapidly evolving landscape of cinematic technology, staying above routine maintenance can seem daunting. But with dedicated tools like a quality lens cleaner, calibrated monitors, and robust support equipment, your gear will perform reliably, giving your creative ideas the platform they deserve. Take the time to establish your maintenance routine today—your future self will thank you. For tailored advice or to request specialized support, reach out through our contact page.
Lessons Learned from the Frontlines of Cinematic Innovation
One of the most profound insights I’ve gained is that even the most advanced gear can’t compensate for overlooked details. For instance, I once believed that investing in the latest 16K laser projector would automatically elevate my visuals. It wasn’t until meticulous calibration and understanding of its internal mechanics that I truly unlocked its potential.
Another revelation was the importance of matching vintage lenses with modern sensors. While vintage optics add character, neglecting their limitations in high-resolution environments led to unforeseen softness or chromatic aberrations—like those pesky blue streaks I struggled with. Embracing a hybrid approach early on saved me countless headaches and sharpened my eye for detail.
And perhaps most critically, I learned that continuous maintenance and calibration are not optional extras but essential practices. This realization transformed my workflow into a disciplined routine, ensuring that my gear performs optimally and my visuals remain crisp and true to form, even under demanding shooting conditions.
Tools That Elevated My Craft
There are a few resources I trust deeply. First, the comprehensive guides on cine lenses have been instrumental in helping me select optics tailored for 16K sensors. Their insights into coatings and multi-element design have saved me from costly missteps. Second, a high-quality calibration tool like the X-Rite i1Display Pro has become my go-to for maintaining color accuracy across monitors and projectors, ensuring my work looks consistent from shoot to post-production. Lastly, the top-tier carbon fiber supports give me stability without sacrificing mobility, crucial for dynamic shoots in 2026’s demanding environments.
Your Next Leap into Cinematic Excellence
Remember, the right combination of powerful tools, diligent maintenance, and a curious mindset can elevate your craft beyond standard expectations. The future of filmmaking in 2026 hinges on mastering both the technology and the art behind it. So, keep experimenting, learn from every setup, and don’t shy away from pushing your gear to its limits. That’s how true mastery is born. Curious about which lens or projector setup will suit your project best? Feel free to reach out here for tailored advice. And, what’s been your biggest challenge with high-resolution filmmaking? Share your story below—let’s learn and grow together.”}# }# }# }# }# }# }# }# }# }# }# }# }# }# }# }# }# }# }# }# }# }# }# }# }# }# }# }# }# }# }# }# }# }# }# }# }# }# }# }# }# }# }# }# }# }# }# }# }# }# }# }# }# }# }# }# }# }# }# }# }# }# }# }# }# }# }# }# }# }# }# }# }# }# }# }# }# }# }# }# }# }# }# }# }# }# }# }# }# }# }# }# }# }# }# }# }# }# }# }# }# }# }# }# }# }# }# }# }# }# }# }# }# }# }# }# }# }# }# }# }# }# }# }# }# }# }# }# }# }# }# }# }# }# }# }# }# }# }# }# }# }# }# }# }# }# }# }# }# }# }# }# }# }# }# }# }# }# }# }# }# }# }# }# }# }# }# }# }# }# }# }# }# }# }# }# }# }# }# }# }# }# }# }# }# }# }# }# }# }# }# }# }# }# }# }# }# }# }# }# }# }# }# }# }# }# }# }# }# }# }# }# }# }# }# }# }# }# }# }# }# }# }# }# }# }# }# }# }# }# }# }# }# }# }# }# }# }# }# }# }# }# }# }# }# }# }# }# }# }# }# }# }# }# }# }# }# }# }# }# }# }# }# }# }# }# }# }# }# }# }# }# }# }# }# }# }# }# }# }# }# }# }# }# }# }# }# }# }# }# }# }# }# }# }# }# }# }# }# }# }# }# }# }# }# }# }# }# }# }# }# }# }# }# }# }# }# }# }# }# }# }# }# }# }# }# }# }# }# }# }# }# }# }# }# }# }# }# }# }# }# }# }# }# }# }# }# }# }# }# }# }# }# }# }# }# }# }# }# }# }# }# }# }# }# }# }# }# }# }# }# }# }# }# }# }# }# }# }# }# }# }# }# }# }# }# }# }# }# }# }# }# }# }# }# }# }#
Related Posts
Ultimate Guide to Cine Lenses and Camera Supports for Filmmakers
My First Encounter with Cine Lenses and Supporting GearWhen I…
Complete Guide to Cine Lenses & Camera Supports for Filmmakers 2024
Have you ever shot a scene only to realize your…
Best Cine Lenses & Accessories for Filmmakers in 2024: Key Insights
Have you ever spent hours filming, only to realize that…