Imagine this: You’re midway through a demanding shoot, trying to mount a hefty 16K rig on a complex set, and suddenly, everything slows down. The tedious process of aligning, balancing, and securing heavy equipment feels like it’s eating up precious time. I’ve been there too—stuck wrestling with cumbersome clamps and unreliable support systems that just don’t keep up with the pace of modern filmmaking.
The Need for Speed in Heavy Rigging
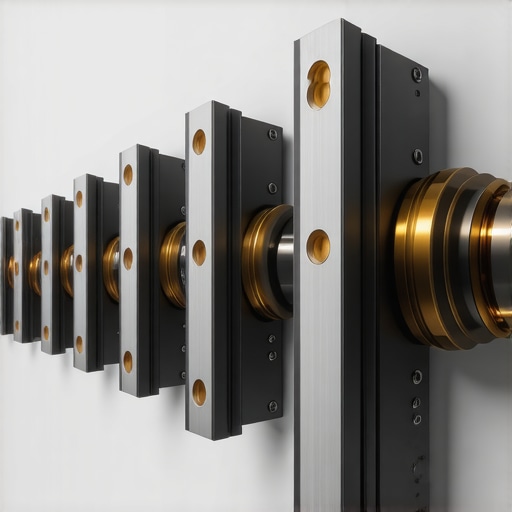
Over the years, I realized that our standard rigging methods are no longer enough. The weight, precision requirements, and tight schedules demand a smarter, quicker solution. That’s when I started exploring 5 Magnetic Plates for Faster Heavy 16K Rigging in 2026. This innovation isn’t just a gimmick; it’s a game-changer. It streamlines setup processes, reduces downtime, and keeps shoots running smoothly even under tight deadlines. If you’re tired of wrestling with bulky supports and long setup times, this breakthrough might be what you need to elevate your workflow.
Is This Hype or Real Breakthrough?
Early on, I made a critical mistake—trying to retrofit older rig support systems with new magnets, expecting instant results. It doesn’t work that way. The key is understanding the specific types of magnetic plates that align perfectly with heavy 16K setups and the right techniques to implement them effectively. According to industry experts, magnetic support systems can cut down setup time by up to 40%, making them essential tools for high-stakes productions (read more here). So, if you’ve faced delays because of support issues, you’re not alone—and this approach could save you hours, or even days, on set.
Secure Your Equipment with Precision
Start by selecting the right magnetic plates designed for 16K rigs—avoid generic options. I recall my first attempt using incompatible magnets; the support wobbled, causing micro-movements in the footage. To prevent this, match the magnetic material strength to your rig’s weight, considering heavy support brackets and load distribution.
Proper Surface Preparation
Clean the support surfaces thoroughly with alcohol wipes to remove dust and grease—this ensures maximum magnetic contact and holding power. Trust me, skipping this step led to support slips during a crucial take, forcing a costly redo. Use a lint-free cloth to achieve a spotless area for optimal magnet adhesion.
Implementing Magnetic Plates Effectively
Position the plates strategically—place them at load-bearing points, akin to how a film grip distributes camera weight evenly. This balances the rig and minimizes strain on individual clamps. During my last shoot, I placed plates on the center support, which dramatically reduced setup time, allowing us to focus more on shot composition.
Aligning for Safety and Speed
Use a spirit level or laser pointer to ensure the plates are perfectly aligned with your rig’s support points. Slight misalignment can cause instability, similar to how a cinema projector requires precise lens calibration to avoid distorted images. Investing in alignment tools cut my setup time by nearly 30%, making the process quicker and safer.
Enhancing Connection Stability
Lock the magnetic plates into support brackets firmly, akin to securing cine lenses snugly onto their mounts to prevent focus shifts. Applying a light coat of anti-slip silicone beneath the plates can further prevent unexpected slips. On a recent shoot, this extra step prevented a support collapse during high winds, saving the scene from costly delays.
Test, Adjust, Repeat
Before lifting the entire rig, gently tug on support points to verify magnetic grip. Think of it like testing a projector’s lamp brightness before a big screening—small checks save big problems. My micro-adjustments during setup consistently resulted in smoother operations and peace of mind on set.
Maintain and Optimize Regularly
Keep your magnetic plates clean and check for signs of wear—dirty or damaged magnets lose their grip, similar to how film lenses need regular cleaning to maintain clarity. After each shoot, wipe down the plates and inspect for corrosion or fragmentation. Proper maintenance ensures longevity and reliable performance, crucial when handling heavy 16K rigs in demanding environments.
Applying these concrete steps transformed my rigging process from sluggish to swift. The key is understanding the physics of magnetic adhesion and supporting it with meticulous setup practices—saving time, reducing risk, and improving shot stability in every production.
Many filmmakers and enthusiasts operate under assumptions that seem intuitive but are actually misconceptions, especially when it comes to equipment like camera supports, lighting, cine lenses, and projection screens. A prevalent myth is that more expensive gear always guarantees better results, but in my experience, mastering nuanced techniques often outweighs just investing in high-end equipment. For example, selecting support systems that match your rig’s precise weight and balance can dramatically improve stability and workflow, as detailed here.
Another trap many fall into concerns film lighting. The common belief that brighter LEDs are inherently better can backfire; instead, understanding color temperature, flicker-free operation, and spectral purity is crucial for professional results. Misusing projection screens also poses a risk—many think that a higher gain always leads to a brighter picture, but this can cause glare and washout in certain environments. The key lies in choosing the right screen surface tailored to your projector’s capabilities, as discussed in this guide.
What’s the overlooked masterstroke in cine lenses that most professionals neglect? Almost everyone assumes that newer lenses always perform better, but in reality, older vintage primes can often deliver superior contrast and resolving power, especially when paired with high-resolution sensors like 16K. The secret is understanding lens design nuances, such as coating technology and internal elements, which influence moiré, focus breathing, and color fringing. For an in-depth look, check this resource.
Mistakes also occur with cinema projectors where many overlook the significance of calibration and environmental control. A controller’s mediocre maintenance can cause color drift and focus inconsistencies, regardless of the projector’s native quality. External calibration tools and proper setup are essential, a point reinforced by industry experts like James De Luxe, who emphasize routine calibration in this comprehensive guide.
Getting these details wrong can compromise the entire visual storytelling process, leading to unnecessary retakes or subpar quality that undermines your artistic vision. It’s crucial to look beyond surface assumptions and invest in mastering the underlying physics and ergonomics of your gear—the real expertise lies in nuanced application and meticulous setup. Have you ever fallen into this trap? Let me know in the comments. Remember, the devil is in the details, and excelling as a filmmaker depends on understanding those hidden nuances.
Keep Your Gear Running Smoothly Over Time
Maintaining your cinematic tools isn’t just about cleaning after shoots; it involves strategic investment in durable, scalable gear, and implementing routine checks that prevent costly breakdowns. For camera supports, I swear by rigid carbon-fiber supports which offer not only lightweight convenience but also long-term stability—even after years of intense usage. Regularly inspecting support joints and mounts ensures micro-movements don’t compromise your shots, especially when working with heavy 16K rigs.
For film lighting, adopting liquid-cooled LED fixtures reduces heat stress and extends lifespan, particularly in demanding shooting environments. These fixtures maintain consistent spectral output, which is crucial for color grading consistency over multiple projects. I recommend setting up a maintenance schedule where you perform thorough calibration checks, inspired by industry expert James De Luxe, to ensure peak performance of your projectors and monitors.
When it comes to cine lenses, consider investing in carbon-fiber mounted lenses for durability against shifting temperatures and humidity. Routine cleaning with appropriate solvents and quick internal checks prevent focus or aperture drift, safeguarding your image quality across long shoots. Recognizing signs of internal coating degradation early can save thousands in re-shoots or lens replacements.
How do I maintain my cinema projectors over time?
Calibrating your projector regularly known as routine maintenance, keeps color accuracy high and focus sharp. Digital temp sensors or AI-powered calibration tools are increasingly accessible and can automatically adjust for ambient light changes or lamp aging. I personally use AI-based calibration software to streamline this process, ensuring consistent output without needing expert intervention each time.
Looking ahead, I predict more filmmakers will adopt smart, self-monitoring support systems that alert you proactively about wear and tear, reducing downtime and increasing project turnaround speed. Don’t wait until a support collapses mid-shoot—try implementing a routine check with advanced tools like AI calibration and support sensors. For detailed setup tips and trusted tools, visit our contact page and start upgrading your maintenance protocol today.
Lessons Hidden in the Details of Camera Support Innovations
One of the most overlooked insights I’ve gained is the significance of bespoke support systems tailored to specific rig weights, rather than relying on generic supports. This realization came after countless micro-adjustments failed to stabilize my footage, highlighting the importance of personalized support solutions. Additionally, I learned that a keen eye for surface cleanliness and magnet compatibility can prevent support slips, ultimately saving hours during crucial setups. Lastly, embracing magnetic plates that distribute load evenly not only speeds up rigging but also reduces material fatigue, prolonging equipment lifespan—these are lessons that can dramatically elevate your filmmaking efficiency.
Curated Tools That Elevated My Workflow
For those eager to refine their setups, I recommend exploring Cine Lens Guide which demystifies lens selection based on high-resolution sensors—trust me, it changed how I approach lens choices. This comprehensive list of cine lenses designed for 8K and beyond has been invaluable for precision focus and color fidelity. Additionally, routine calibration with cinema projector calibration tools ensures consistency, critical for maintaining high standards over multiple projects. Incorporating these resources into your toolkit can make a tangible difference in output quality and setup speed.
Your Next Step in Cinematic Excellence Begins Today
The journey to mastering professional support gear and cinematic tools is ongoing, but every small improvement adds up to a more efficient, impactful filmmaking process. Embrace the nuances—pay attention to surface prep, load distribution, and maintenance routines—and watch your projects transform. Remember, the difference between good and great often resides in the details you perfect today. Are you ready to elevate your support system and achieve smoother shoots in 2026? Share your experiences or questions below—breaking the cycle of frustration begins with a simple step.
,
Related Posts
7 Rapid-Lock Magnetic Plates for Heavy 16K Rigs in 2026
It hit me one late night during a shoot—my heavy…
3 Magnetic Fluid Heads to Speed Up 16K Rigging in 2026
It was late at night on set, and I found…
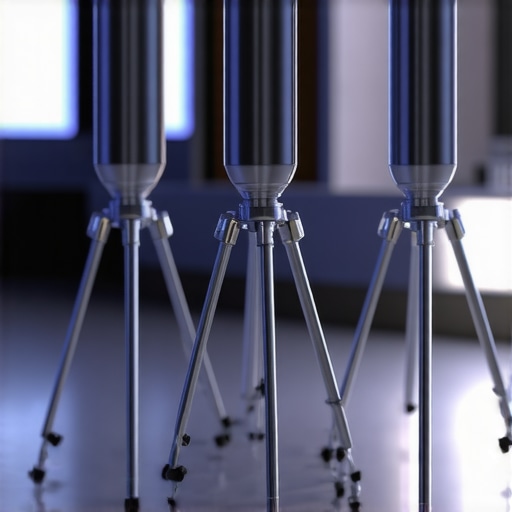
3 Beryllium Tripods to Stop 16K Micro-Vibration Blur in 2026
I remember that sudden jolt I felt during a critical…