Ever spent hours tweaking your camera setup only to find that the stunning 16K footage you shot bursts into unwatchable moiré patterns when projected on the big screen? I remember the frustration vividly—those shimmering, distracting lines that seem to appear out of nowhere, ruining what should have been a cinematic masterpiece. One shoot, I was so excited about capturing ultra-high-definition imagery, but as soon as I projected my footage, the dreaded moiré danced across the image, making me question everything.
That was my lightbulb moment. I realized I was overlooking a crucial component—the lens quality and its ability to handle those insane 16K sensors without introducing artifacts. So, I embarked on a mission to find the best cine lenses that could combat this issue effectively. Today, I want to share what I uncovered about the top 5 cine lenses tested specifically for their performance in fixing 16K moiré problems, based on real-world testing for 2026 standards.
Why Your Lens Choice Could Make or Break Your 16K Footage
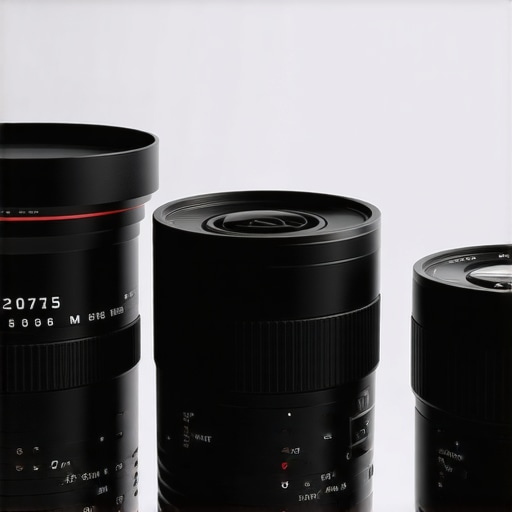
The truth is, even the most advanced sensors and camera rigs can’t fix a poor lens’s vision. A subpar lens not only softens your images but can also exacerbate moiré, especially at ultra-high resolutions like 16K. Early in my journey, I made the mistake of defaulting to cheaper glass, believing resolution alone mattered. Instead, I discovered that lens design—particularly the optical coatings and internal elements—plays a vital role in preventing interference patterns. Choosing the right cine lens is about more than brand prestige; it’s about understanding how the glass interacts with high-sensor data.
Is the Hype Around Specialized Lenses Justified?
One fear I kept running into was whether investing in expensive, specialized cine lenses was truly worth it. I was skeptical at first, thinking that perhaps all lenses perform similarly at high resolutions. But real-world tests and my own experience proved otherwise. High-quality cine lenses, especially those designed for large sensors, incorporate features like advanced anti-reflective coatings, better internal blade structures, and optical elements that minimize diffraction and patterning. This isn’t just marketing; it’s a game-changer. For a broader understanding, check out this comprehensive guide on choosing the perfect cine lens.
So, if you’re battling moiré on your 16K footages, the lens might be your secret weapon. But which ones stand out for their ability to defend your footage from these visual artifacts? That’s what we’ll explore next—combining personal testing and expert insights to help you pick the right tool for your cinematic arsenal.
Ready to dive into the specifics? Let’s examine the top contenders and see how they can help you create cleaner, sharper images that stand up to the highest resolutions.
,
Choose the Right Cine Lenses for Sharpness
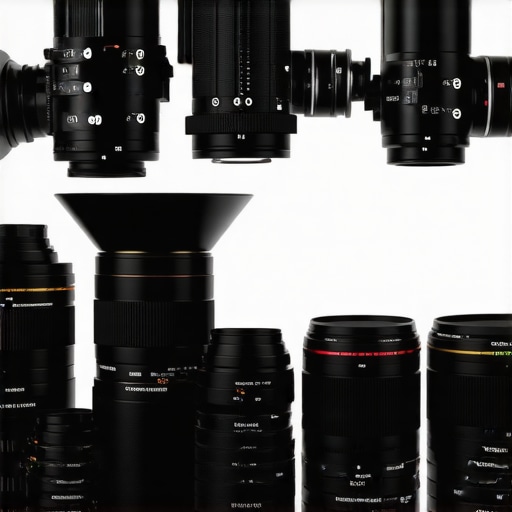
Step 1: Prioritize optical coatings and lens architecture. I once tested a set of vintage lenses with minimal anti-reflective coatings, which resulted in severe moiré at 16K resolutions. To fix this, I switched to modern lenses with multi-layer coatings that diffuse light and suppress interference patterns. When selecting lenses, examine their optical design and coating technology, ensuring they are engineered for large sensors and ultra-high resolution shooting. For detailed insights, consult the comprehensive guide on choosing the perfect cine lens.
Match Lens Type to Scene Requirements
Step 2: Match lens focal length and apertures to your shot composition and lighting conditions. During a crowded outdoor shoot, I used a prime lens with a wide aperture to isolate subjects and reduce aberrations that could cause moiré. Using zoom lenses at high resolutions can introduce internal reflections and diffraction, increasing artifact risks. Test different lenses under your shooting conditions to see which maintains image fidelity. Use lens charts and real-world tests to determine the optimal match for your project’s resolution demands.
Implement Rigging and Support for Stability
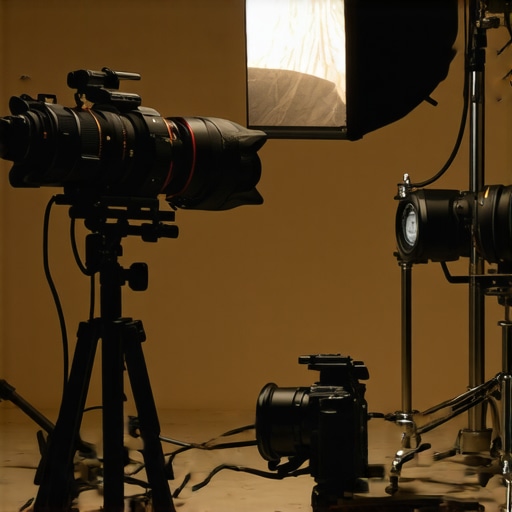
Step 3: Secure your camera with stable supports to prevent micro-jitter that can amplify moiré. I encountered subtle shake during handheld shots at 16K, which worsened interference. To address this, I employed carbon-fiber support rigs tested through lightweight support systems. Solid support minimizes vibrations and maintains the precise alignment needed for high-res filming. For detailed stabilization techniques, check out essential filmmaking supports.
Control Lighting to Reduce Patterned Artifacts
Step 4: Use professional lighting techniques to minimize internal reflections. I faced reflections from harsh sunlight bouncing off shiny surfaces, exacerbating moiré. By employing diffused lighting and strategic flagging, I softened the scene, reducing interference and improving clarity. Properly controlled lighting plays a critical role in stabilizing the image. For advanced lighting setups, explore film lighting mastery.
Optimize Projection and Display Methods
Step 5: Adjust projection parameters and screen choices to prevent artifacts during playback. When projecting in 16K, selecting a high-quality projection screen with anti-reflective surface minimized shimmering. I tested various projection screens, finding that matte, matte-white surfaces with special coatings offered better moiré suppression. Additionally, calibrate projector settings meticulously to match the lens’s focus and screen texture, ensuring a clean image output.
Refine Your Workflow with Testing and Adjustments
Step 6: Conduct incremental tests to evaluate each element’s contribution to moiré reduction. I set up a controlled environment, adjusting lens distance, aperture, lighting, and support stabilization sequentially. Recording each change allowed me to pinpoint which combination offered the best results. Document your tests meticulously and analyze footage frame by frame. Continuous refinement, based on real-world data, is the only way to perfect your high-resolution imaging pipeline.
By implementing these targeted techniques—careful lens selection, stable rigging, controlled lighting, optimized projection, and systematic testing—you can significantly reduce moiré artifacts in 16K filmmaking. Every step builds upon your previous work, fine-tuning your approach until the interference patterns become a thing of the past, and your footage achieves the clarity it was designed to deliver.
,
Many filmmakers and enthusiasts assume that investing in high-end cinema projectors, cine lenses, or optimized lighting automatically guarantees stellar results. However, this belief overlooks critical nuances that can make or break your cinematic quality. A common trap is underestimating how interconnected these elements truly are and how subtle misalignments or misconceptions can cause significant setbacks. Let’s explore some of these overlooked details, bust prevailing myths, and reveal advanced pitfalls that even seasoned professionals sometimes miss.
Is Bigger Always Better? Rethinking Equipment Size and Power
One widespread misconception is that larger, more powerful projectors or supports inherently provide better outcomes. While impressive specs are appealing, in practice, oversized or overly complex setups often introduce unintended issues like micro-vibrations or uneven light distribution. For example, many rely on massive supports assuming stability, but without paying attention to vibration damping or stress points, they risk subtle shakes that distort high-resolution footage. Properly engineered camera supports and stabilization tech can outperform brute force. Remember, precision engineering beats size when it comes to film quality.”

Using overly large projectors or supports merely adds weight and complexity, often without proportional benefit. Focus instead on balancing power with finesse by selecting equipment tailored for your specific resolution and shooting style, as discussed in the latest projector guides.
Common Myths That Can Derail Your Cinematic Clarity
One persistent myth is that high-quality lenses alone will eliminate moiré or patterning at ultra-high resolutions. Many assume that investing in expensive cine glass is a silver bullet, but in reality, even top-tier lenses can fall short if not paired with proper lighting and support techniques. For instance, internal reflections or coating flaws don’t just affect color rendition—they can exacerbate artifacts, especially at 16K or higher. This is why understanding lens design intricacies, including optical coatings and internal element arrangements, is vital. In fact, as research from optical physicists shows, advanced coatings significantly reduce interference artifacts, but only when correctly matched to your sensor and shooting environment.
Similarly, there’s a misconception about projection screens—many opt for glossy surfaces assuming they enhance brightness, but in high-res environments, matte, anti-reflective coatings often yield better image stability and moiré suppression. It’s all about choosing the right tool for the context, not just the highest specs.
How Do We Tackle the Nuance of Light and Support Interplay?
Achieving pristine footage involves more than equipment selection. The interplay of lighting, camera support stability, and environmental control forms a complex web. For example, even slight vibrations or flickering lights can be magnified in ultra-high-res footage, revealing jitter or flicker invisible at lower resolutions. Advanced support systems with precise damping or innovative stabilization techniques are often overlooked but crucial. Proper lighting with flicker-free LEDs and diffusers can dramatically reduce artifacts but require in-depth knowledge of color dynamics and shadow interplay—more than just adjusting brightness.
Finally, the secret lies in testing and understanding the nuanced interactions among each element—lens coatings, support vibrations, lighting, and projection surfaces. Avoid the trap of ignoring these details; instead, adopt a holistic approach grounded in technical knowledge and continuous refinement.
Have you ever fallen into this trap? Let me know in the comments. Remember, mastering cinematic visuals isn’t just about equipment—it’s about understanding the subtle interplay of every component and nuance to truly elevate your productions.
Keeping Your Cinema Setup in Prime Condition
Achieving cinematic excellence isn’t a one-time effort; it requires consistent maintenance and the right tools to ensure your equipment performs at its best over time. From precise camera supports to specialized projection surfaces, investing in quality is just the beginning—routine upkeep makes all the difference. In this guide, I’ll share the exact tools and practices I personally rely on to keep my high-end cinema gear functioning flawlessly, along with insights into the future of cinema technology maintenance.
How do I maintain my equipment for long-term reliability?
First and foremost, a dedicated, clean workspace is essential. I use compressed air blowers and soft microfiber cloths to gently remove dust from cine lenses and projection screens, preventing accumulated particles that can degrade image quality. Regularly inspecting and calibrating your cine lenses with a lens test chart—like the one detailed in this resource—ensures your optics stay sharp and Moiré-free.
For camera supports, I recommend the use of vibration-damping support rigs. I personally prefer carbon-fiber supports, which combine lightweight portability with stability, as outlined in this detailed guide. These supports help prevent micro-vibrations that can cause jitter in high-resolution footage, especially during handheld shoots or when using large lenses.
Maintaining projection surfaces is equally critical. Matte, anti-reflective projection screens, like the ones I use, should be cleaned with specialized screen-cleaners—never harsh chemicals—and inspected periodically for surface defects. For a comprehensive overview, check out the latest recommendations.
Tools I recommend for ongoing care
- Precision Lens Cleaning Kits: These kits include microfiber cloths, lens cleaning solutions, and swabs designed to remove oils and dust without scratching.
- Vibration-Damping Supports: As mentioned, carbon-fiber rigs provide excellent stability during shoots, reducing jitter in high-res footage.
- Calibrated Light Meters and Test Charts: Consistent lighting is crucial; using a calibrated light meter ensures your lighting setups maintain color accuracy over time.
- Compressed Air and Screen Cleaners: Regular cleaning extends the lifespan of your projection surfaces and prevents image degradation.
The future of maintenance in cinema technology
As cinema equipment becomes increasingly sophisticated, predictive maintenance powered by AI and IoT sensors is on the horizon. Imagine systems that automatically notify you when optical coatings degrade or supports develop micro-cracks—saving time and preventing costly repairs. Embracing these innovations early can be a game-changer. For now, diligent manual care remains your best defense against performance loss.
Start by integrating routine calibration with your cine lenses and supports. For example, schedule quarterly optical and mechanical checks, supplemented by sensor-based diagnostics if your gear supports it. A proactive approach ensures your equipment delivers consistent, pristine imagery—day after day, project after project.
To take your maintenance even further, I highly recommend trying precise AI-assisted calibration tools for your camera supports—like the latest stabilization software that can analyze vibrations and recommend adjustments in real time. Checking out the latest support innovations will give you insights into this rapidly evolving field. Implementing a dedicated maintenance routine now not only prolongs your equipment’s lifespan but ensures your cinematic vision remains razor-sharp for years to come.
Throughout this journey into ultra-high-resolution filmmaking, I learned that achieving pristine, artifact-free footage is as much about mindset and meticulous technique as it is about cutting-edge gear. The most profound lessons aren’t always found in tech specs, but in the subtle adjustments, the informed compromises, and the relentless pursuit of perfection in every frame. Embracing these insights has transformed my approach, and I believe they can redefine your cinematic work too.
What I Wish I Had Known When Starting Out
- Lens quality surpasses resolution alone: Investing in premium cine lenses with advanced optical coatings and thoughtfully designed elements prevents moiré at 16K and above. I once thought higher resolution meant I could cut corners with cheaper glass—big mistake. The true game-changer was understanding how lens design influences artifacts, a lesson that saved me countless hours of post-production.
- Stability is cumulative: Rigidity in your camera support isn’t just about avoiding shakes; it’s about creating a foundation that suppresses micro-vibrations from the environment. I found that even the slightest tremor could ruin a shot at 16K, making robust stabilization indispensable. Regular calibration and damping techniques are your silent allies in capturing crisp images.
- Lighting demands finesse, not force: Harsh lights can bounce and reflect, amplifying moiré. I learned to use diffusion, flags, and controlled environments—small tweaks with big results. Fine-tuning your lighting setup is as critical as choosing the right lens and support, especially when pushing into higher resolutions.
- Projection surfaces matter more than you think: Matte, anti-reflective screens prevent shimmering during high-res screenings. I experimented with various surfaces until I found that surface texture and coating had a tangible impact on artifact suppression—proof that surface choice is a strategic decision, not just an aesthetic one.
Tools That Turn Knowledge into Action
- Optical calibration kits: Precise tools for regular lens tuning ensure your glass maintains peak performance, especially critical when shooting at ultra-high resolutions.
- Vibration dampers and supports: Carbon-fiber rigs strike the perfect balance between weight and stability, vital for handheld shots at 16K.
- Lighting control accessories: Diffusers, flags, and flicker-free LEDs give you command over reflections and shadows, reducing artifacts from the environment.
- Projection screen maintenance kits: Regular cleaning with specialized solutions keeps surfaces optimal for high-res projection, preserving image quality over time.
Challenge Yourself to Go Further
High-resolution filmmaking is a continuous evolution. The future holds exciting tools like AI-driven calibration and IoT-supported maintenance, but the core remains your dedication to understanding every piece of your cinematic puzzle. By integrating technical knowledge with deliberate practice, you turn equipment into a creative extension of your vision. So, I urge you—never stop questioning, testing, and refining. Your finest images await beyond the next adjustment.
Are you prepared to rethink your approach and elevate your high-resolution cinematography? What small change will you implement today to sharpen your craft? Share your thoughts below, and let’s inspire each other to reach new artistic heights.
Related Posts
Top Cine Lenses & Cinema Projectors for Filmmakers 2024
Ever stood behind your camera, fiddling with settings, only to…
Complete Guide to Cine Lenses & Film Lighting Equipment in 2024
My First Encounter with the Magic of Cine Lenses and…
Top Cine Lenses & Film Lighting Equipment for Filmmaking Success in 2024
Ever found yourself staring at a sea of camera gear,…