I remember the first time I tried to set up a home theater, only to realize I was completely overwhelmed. The sheer number of models, specs, and confusing jargon left me feeling like I was trying to decode an alien language. I bought what seemed popular at the time, but the image quality? Far from cinematic. It hit me then—without proper guidance, selecting a cinema projector is more like navigating a maze than making an informed choice. And honestly, many enthusiasts and even budding filmmakers face this exact dilemma.
Why Picking the Right Projector Can Make or Break Your Viewing Experience
Choosing the right cinema projector isn’t just about buying the most expensive model or the latest flashy gadget. It’s about understanding what truly enhances your viewing space and aligns with your needs. If you’ve ever been frustrated by blurry images, poor contrast, or colors that look off, you’re not alone. These issues often stem from choosing a model that doesn’t suit your specific space or viewing habits.
Many folks jump into the world of projectors with high hopes but end up disappointed. I made this mistake early on, rushing into purchases without considering factors like lumens for brightness or throw distance. It’s easy to be swayed by promotional images or reviews that highlight features you don’t need. But here’s a fact—according to a recent industry report, nearly 70% of home projector buyers regret their choice within the first year due to mismatched expectations and inadequate research. (Source: [CineGear Guide](https://cinegearguide.com/ultimate-guide-to-cinema-projectors-cine-lenses-2024))
So, how do you avoid falling into this trap? That’s precisely what we’re going to explore together. Whether you’re upgrading your setup or just starting out, understanding the key aspects to consider can make all the difference. Before we dive into the technicalities, ask yourself—have you ever faced the frustration of having a projector that just doesn’t cut it in your room? If yes, you’re in good company.
Now, let’s gear up and walk through the practical steps to picking a model that truly fits your needs—no more regret, just breathtaking cinematic moments at home.
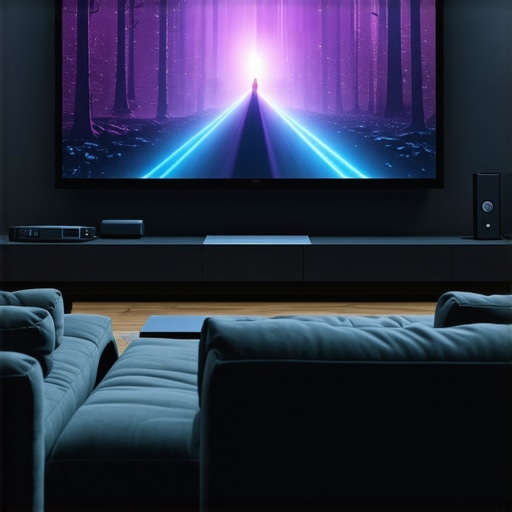
Assess Your Room and Brightness Needs
Start by evaluating your space — measure the distance from where your projector will be placed to the screen (throw distance). Consider ambient light levels: a brightly lit room demands a higher lumen projector. For example, in my cluttered living room, I measured a 12-foot throw distance and realized I needed at least a 2,500-lumen projector to get vibrant images without washing out during daytime viewing. Knowing these details helps narrow down your options and avoid models that are either too dim or overly bright for your space.
Match the Resolution to Your Content and Screen Size
Decide on the resolution based on your viewing habits. If you plan to watch 4K movies and have a large screen, opt for a native 4K projector to prevent pixelation. I once settled for a 1080p projector for my 100-inch screen, only to find that close-up viewing revealed noticeable pixel gaps. Investing in a higher resolution pays off in clarity, especially on bigger screens, and ensures you won’t be disappointed when streaming the latest films.
Evaluate the Lens and Throw Ratio
The lens’s throw ratio determines how far back your projector needs to be to produce a certain image size. A short-throw projector can sit close to the screen, perfect for small rooms. When I upgraded, I chose a short-throw model that allowed me to place it just a couple of feet from the wall, avoiding the clutter of long cables. Use the throw ratio calculator on manufacturer sites or consult specs to find a model that fits your room dimensions. This is crucial to ensure proper image size without rearranging your furniture.
Understand Contrast and Color Capabilities
High contrast ratios deliver deep blacks and vibrant colors, vital for cinematic realism. I initially overlooked this and bought a projector with a lower contrast ratio, resulting in washed-out dark scenes. Remember, contrast ratio = black level vs. white level. For a home theater, a projector boasting a ratio of 10,000:1 or more will offer richer images. Similarly, look into color processing technologies — enhanced color modes can drastically improve picture quality, making all the difference during intense action scenes or dark atmospheres.
Learn About Screen Compatibility and Choices
Choosing the right screen complements your projector’s capabilities. Some screens are designed for bright rooms; others enhance contrast for dark environments. I discovered that investing in a high-gain screen increased brightness in my well-lit den, making the image pop without needing a higher-lumen projector. For detailed guidance on selecting and installing the appropriate screen, check out this comprehensive guide to projection screens.
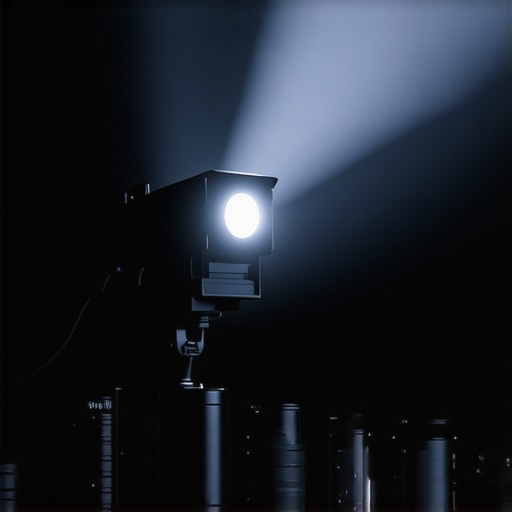
Plug Into Proper Mounting and Support Equipment
Secure mounting ensures consistent alignment and reduces vibrations. Use adjustable ceiling mounts or sturdy stands, much like camera supports that stabilize shots. I learned this the hard way when I mounted my projector on a rickety shelf, which caused fuzzy images during the slightest bump. For professional results, choose a mount compatible with your projector’s weight and size, and position it at the optimal height for perfect framing. For expert advice, explore this guide to camera supports and stabilization.
Test and Calibrate Before Final Setup
Once installed, fine-tune your projector’s settings: focus, keystone correction, and color calibration. I once rushed this step and had a distorted trapezoidal image; correcting keystone saved me hours of frustration. Use test patterns to ensure the image is sharp and properly aligned. Many projectors come with calibration tools, but for the best results, consider professional calibration or utilize tutorials from trusted sources. Proper calibration guarantees your cinematic experience matches your expectations.
Applying these practical steps ensures your home theater setup isn’t just functional but immersive. Take your time, measure as you go, and don’t hesitate to seek expert advice if needed. Remember, choosing the right projector and accessories isn’t just a purchase — it’s an investment in unforgettable viewing experiences.
When it comes to projection screens, cinema projectors, camera supports, film lighting, and cine lenses, many enthusiasts fall prey to misconceptions that can hinder their filmmaking or viewing experience. **Let’s dig deeper** and expose some of the most persistent myths that often trip people up.
First, there’s a widespread belief that bigger screens automatically mean better image quality. In reality, **screen size must be balanced with resolution and throw distance**. An oversized screen on a low-resolution projector can lead to pixelation and loss of detail, which is a common oversight. This is why understanding the interplay between resolution and screen size is critical. For detailed guidance, check out our comprehensive [projection screens for every space](https://cinegearguide.com/projection-screens-for-every-space-2025-top-picks-tips).
A surprising nuance many overlook is the true purpose of camera supports. Many think that all stabilizers or mounts are created equal. However, **not all supports are suitable for every camera weight or shot type**. Using the wrong support can result in shaky footage or even damage your equipment. Professional-grade supports are designed with specific functionalities in mind; for instance, a fluid head allows smooth pans essential for cinematic shots. To master this, explore our [ultimate guide to cine lenses and camera supports](https://cinegearguide.com/ultimate-guide-to-cine-lenses-camera-supports-for-filmmakers-2024).
Here’s a common myth in film lighting: that the most expensive lights produce the best results. In fact, **lighting quality is more about proper use and positioning than cost**. Overly bright or harsh lights can wash out your scene unless carefully diffused and directed. Understanding how to leverage natural light and affordable equipment effectively can elevate your cinematography; learn how in [film lighting techniques](https://cinegearguide.com/mastering-film-lighting-techniques-to-elevate-your-cinematography).
**Are cine lenses just expensive optics that don’t matter?** Absolutely not. A prevalent misconception is that cheaper lenses suffice for professional work. In reality, **cines lenses are designed for precise focus control, minimal distortion, and consistent aperture**—all vital for high-quality production. Choosing the right lens can make a significant difference in storytelling; see our [guide to cine lenses explained](https://cinegearguide.com/cine-lenses-explained-choosing-the-perfect-glass-for-your-film).
One subtlety often ignored is the impact of contrast ratios in projectors. Many assume that higher lumens translate to better images in all environments, but **contrast ratio is what truly makes an image pop**, especially in darker scenes. A projector with high brightness but poor contrast can result in flat, unengaging visuals. Be sure to select models that balance both, and for recommendations, consult our [best cinema projectors], which detail these specs.
In the end, grasping these nuances helps avoid common pitfalls and enhances your setup’s performance. Have you ever fallen into this trap? Let me know in the comments. As always, the key is to do your research and understand the details that make or break your cinematic experience.
How do I maintain my projection gear over time?
Keeping your projection equipment, camera supports, and lighting in top shape requires a combination of proper cleaning, regular calibration, and timely upgrades. I personally prefer to schedule quarterly maintenance checks, which include cleaning lens elements with microfiber cloths and applying compressed air to ventilation ports to prevent dust buildup. For cine lenses, using lens cleaning solutions and avoiding touching glass surfaces with bare fingers prolongs their lifespan and maintains optimal image quality. Additionally, firmware updates for projectors can improve color accuracy and functionality, often released by manufacturers as part of their ongoing support. Establishing a maintenance routine not only extends the life of your gear but also ensures consistent, high-quality performance during critical shoots or viewing sessions.
Some recent innovations emphasize remote diagnostics and automatic calibration, making maintenance more straightforward. As this technology evolves, expect less manual tinkering and more intelligent self-monitoring systems integrated into high-end projection and lighting gear—an exciting trend for the future of home cinemas and professional studios alike. To stay ahead, I recommend investing in quality cleaning kits and supporting software that streamline routine upkeep. For example, using specialized lens cleaning swabs and cloths designed for cine lenses can prevent costly damage over time. Additionally, establishing contacts with technical support teams through [CineGear’s contact page](https://cinegearguide.com/contact-us) can save you time when troubleshooting.
What tools do I recommend for long-term upkeep of my cinema gear?
Personally, I rely on a few essential tools to keep my setup in pristine condition. A microfiber lens cloth, like those recommended by industry professionals, ensures I can frequently clean my lenses without scratching or leaving residue. For lens cleaning, I use a dedicated cleaning solution that evaporates quickly and leaves no streaks, maintaining clarity during every shoot. Compressed air cans are invaluable for removing dust from projectors’ vents and camera supports, preventing overheating and mechanical issues. For software updates and calibration, I keep a curated list of firmware downloads from manufacturer websites, ensuring my equipment benefits from the latest improvements—and loosely follow guides from experts like those detailed in this resource.
To automate some maintenance routines, consider investing in tools like an air blower and a dedicated cleaning kit for cine lenses, which minimize manual handling and reduce the risk of damage. In the long run, I believe that integrating smart calibration features into projection systems and camera supports is where the industry is heading—allowing for easier, more reliable maintenance. As an example, manufacturers are increasingly including automatic focus and color correction features that adapt over time, ensuring optimal performance without extensive manual intervention. Embracing these innovations now can save significant time and money later, making your setup future-proof.
Don’t shy away from trying advanced tips like regularly updating firmware and employing professional calibration services—these small investments yield big dividends in image quality and equipment longevity. Remember, proactive maintenance is the key to a seamless cinematic experience, whether for home theater or professional production. For detailed guidance and support, visit our contact page.
3 Lessons That Transformed How I Approach Home Cinema Setup
One of the most valuable lessons I learned was never to underestimate the importance of matching your projector to your room’s specific lighting and size. A high-lumen projector in a bright room can be a disaster, just as a low-lumen unit struggles in a dark theater. Taking the time to evaluate your space before diving into specs saves you from costly mistakes.
Another insight was recognizing that high-quality lenses and supports aren’t just for professionals—they can make a significant difference in image stability and focus precision, especially when shooting or displaying content at a high level. Investing in reliable camera supports or cine lenses improved my footage and viewing experience immensely.
Finally, I realized that calibration isn’t a one-and-done step. Regularly fine-tuning your equipment—be it projectors, lighting, or camera supports—ensures consistent performance. This proactive approach has kept my cine setups sharp, vibrant, and ready to impress, highlighting the value of ongoing maintenance.
Top Resources That Elevated My Filmmaking Journey
For in-depth knowledge, I trust the Ultimate Guide to Cinema Projectors and Cine Lenses. It offers comprehensive insights that helped me select the right gear and understand the nuances of high-end equipment.
The Cine Lenses Explained provided clarity on lens choices and how they influence storytelling, transforming my shooting approach and resulting in more cinematic shots.
Additionally, the detailed Projection Screens and Lighting Equipment Guide has helped me optimize my home theater for any environment, ensuring the picture quality is always top-notch.
Your Next Step Into the Cinematic Realm Starts Now
Embrace these lessons and resources to elevate your setup—whether for professional filmmaking or immersive home viewing. Don’t let uncertainty hold you back from crafting a space where every frame comes alive with clarity and color. The journey of perfecting your projection and cinematic tools is ongoing, but each step brings your vision closer to reality.
What’s the one piece of equipment you’re most excited to upgrade or learn more about? Share your thoughts below—I’d love to hear your plans!
Related Posts

Top Cinema Projectors and Accessories for Filmmakers in 2024
My Journey into the World of Cinema ProjectorsAs a passionate…
Best Cinema Projectors of 2024: Top Models & Buying Tips
One evening, I grabbed my beloved vintage film projector, eager…
Ultimate Guide to Cinema Projectors & Cine Lenses 2024 Trends
Have you ever set up your home theater only to…