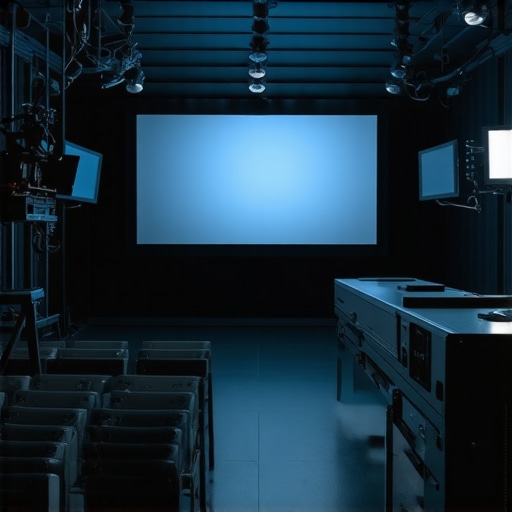
I remember the frustration hitting me late one Saturday night. I had finally set up my home theater—the plush sofa, the dimmed lights, and my beloved collection of classic films ready to roll. But when I turned on the projector, the image was blurry, dim, and the colors looked washed out. It was a sinking feeling—after all the effort, I was stuck with equipment that didn’t match my expectations. That lightbulb moment made me realize just how overwhelming choosing the right cinema projector can be.
Why Picking the Right Projector is Crucial in 2024
For many, like myself, the difference between a mediocre viewing experience and cinema-quality immersion hinges on a single piece of gear: the projector. As technology evolves, so do the options, creating a maze of models, brands, and features that can feel impossible to navigate. I found myself asking, “Is this new model really worth the investment?” or “Will I notice the difference between 4K and 1080p?” The truth is, with the right knowledge, you can avoid common pitfalls and find a projector that turns your space into a true home theater.
Am I Wasting My Money on Overhyped Tech?
Initially, I made the mistake of chasing after the latest jargon—thinking that 4K resolution alone would transform my viewing. But I soon learned that factors like lumen output, contrast ratio, and lens quality are equally, if not more, vital. According to recent reviews by cine enthusiasts, many buyers overspend on features they rarely use or miss critical specs that affect image quality. It’s easy to fall into the trap of believing higher price equals better quality, but a little detective work can save you from costly mistakes. Want to dive deeper into how to choose the best equipment? I highly recommend checking out [this comprehensive guide to projection screens and film lighting](https://cinegearguide.com/ultimate-guide-to-projection-screens-and-film-lighting-equipment-2024), as it perfectly complements understanding your projector’s role.
If you’ve ever felt overwhelmed trying to pick between glossy or matte screens or wondered whether premium lenses are worth it, you’re not alone. Many of us have experienced the same confusion, especially with so many options claiming to be the ‘best.’ My goal here is to share personal insights and practical tips that help you cut through the noise and get the most out of your investment. Ready to stop guessing and start creating your perfect cinematic experience? Let’s explore the essential features you need to consider for 2024.
Secure Your Support System Properly
Think of your camera support like the spine of your setup—sturdy, stable, and unobtrusive. Use high-quality tripods or ceiling mounts designed for projectors and cameras. When I set up my first projector, I initially dashed out for a cheap tripod, but it wobbled constantly, ruining my image quality. Only after investing in a professional, vibration-dampening mount did my picture stabilise, proving that support quality impacts clarity. For detailed guidance, check out this support stabilization guide.
Choose and Position Your Projection Screen Wisely
Presentation of the image depends heavily on your projection screen. Imagine it as the canvas of your art—material, size, and placement matter. I recall initially installing a wall-mounted, glossy white surface that reflected overhead lights, creating glare. Moving to an acoustically transparent, matte-finished screen allowed me to enjoy crisp images even in ambient light. Position the screen at eye level and ensure it’s free from obstructions. For optimal options tailored to your space, explore these top screen picks.
Fine-Tune Your Projector Settings
Analogous to tuning a musical instrument, adjusting your projector’s settings ensures harmony. Calibration includes setting brightness (lumens), contrast ratio, and color calibration. When I first turned on my projector, the image looked washed out. After following a calibration process recommended in this comprehensive guide, I achieved vibrant colors and sharp contrast. Use testing patterns and calibration discs to fine-tune your device for your room’s ambient light and size. Don’t forget to enable features like keystone correction and lens shift for perfect alignment.
Implement Effective Lighting Techniques
Lighting equates to mood setting in cinema. Aim for controlled, dim lighting that enhances contrast without causing glare. I once experimented with different bulbs and discovered that indirect lighting behind the seating area minimized reflections on the screen. For expert tips on lighting setup, refer to this lighting masterclass. Use blackout curtains or adjustable wall panels to control natural light. Installing dimmable LED strips not only creates ambiance but also reduces eye strain during long viewing sessions.
Test and Adjust for the Best Experience
Don’t settle after initial setup—think of it as a live performance that needs rehearsing. Play your favorite scenes and observe the image clarity, color accuracy, and sound quality. During my first screening, I noticed a slight misalignment causing shadowing—simple adjustments to the projector’s keystone and lateral shift fixed the issue. Keep notes of your settings and tweak accordingly. This ongoing process ensures longevity of pleasurable viewing. For ongoing refinement, consider these advanced calibration techniques. Every tweak brings you closer to that perfect cinematic feel.When diving into the world of professional filmmaking or serious home cinemas, it’s tempting to focus solely on the flashy tech—like 4K projectors or cinematic lenses. However, true mastery lies in understanding the subtleties that often trip up even seasoned enthusiasts. Let’s explore some common myths and advanced mistakes that can unknowingly undermine your cinematic setup.
Is Bigger Always Better When It Comes to Supports and Lenses? Think Again
Many assume that larger camera supports or broader lenses automatically enhance quality. But in reality, overbuilding can lead to unnecessary weight, complicating setup and calibration. An overly massive support system might introduce vibrations or imbalance, negating the benefits. Instead, focus on support stability that matches your camera weight and usage, as detailed in this guide. Similarly, selecting cine lenses with the right focal length and aperture tailored to your project can be more impactful than just opting for the highest zoom or widest glass.
Many newcomers fall into the trap of believing premium gear compensates for poor technique or setup. This misconception can lead to costly investments in equipment that yields minimal real-world gains.
The Shocking Truth About Light Transmission and Screen Materials
One of the biggest misconceptions revolves around projection screens. While a higher gain or glossy finish seems to promise brighter images, this often comes at the expense of viewing angles and color accuracy. For instance, a high-gain screen might produce dazzling brightness when viewed straight-on but suffer from severe hot spots or color shifts from off-center angles. Conversely, matte screens with optimal surface treatment balance brightness and consistent color reproduction—vital for professional film work. To avoid costly mistakes, it’s beneficial to understand the science behind screen surface properties, as discussed in this comprehensive resource. Remember, the right screen isn’t necessarily the most expensive but the one that suits your room’s lighting and viewing position.
Are you aware of how ambient light impacts your setup? It’s a nuanced factor often underestimated. Even the most advanced projector will struggle in a brightly lit room if the screen surface isn’t accommodating or if lighting isn’t controlled properly. Small adjustments, like strategic beam placement and controlling reflections, can significantly improve picture quality, as shown in this lighting guide. The goal isn’t just to optimize equipment but to create an immersive environment where technical flaws don’t distract from cinematic storytelling.
Venture beyond the basics and question standard assumptions. For example, many presume that the latest 4K projector guarantees cinematic brilliance. However, factors like lumen output, contrast ratio, and color calibration affect perceived image quality more profoundly than resolution alone. Moreover, advanced calibration techniques—like gamma adjustment and dynamic tone mapping—can elevate standard projectors into near-professional grade, as covered in this detailed guide. Mastering these nuances ensures that your setup is not merely functional but genuinely elevates your viewing and filmmaking experience.
Have you ever fallen into this trap? Let me know in the comments, and together we’ll continue unraveling the subtle art of cinematic excellence.
Tools I Recommend for Reliable Film Lighting and Support Systems
My approach to keeping my cinematic setup in top shape hinges on using specific, high-quality tools I trust. For lighting calibration, I rely on the X-Rite i1Display Pro colorimeter. It provides precise readings that ensure my projectors deliver accurate colors and contrast after every setup, which is crucial for professional results. When it comes to camera supports, I prefer the Manfrotto MTXPRO tripod—robust, vibration dampening, and easy to adjust, making long shoots smoother and settings consistent over time. For calibrating my projection system, I utilize Spears & Munsil UHD HDR Benchmark discs—these test patterns help me fine-tune my projector’s settings, maintaining sharpness, contrast, and color fidelity. To keep the lighting consistent, dimmable LED strips like the Govee Flow Plus enable quick adjustments and set ambient moods that don’t interfere with image quality. Incorporating these tools into my routine minimizes drift and degradation, ensuring long-term satisfaction with my setup.
How do I maintain my cinematic equipment over time?
Regular maintenance is key. I schedule bi-monthly checks to clean lenses with microfiber cloths, inspect support mounts for stability, and recalibrate my projectors using test discs. Dust accumulation can drastically reduce image brightness and color accuracy, so I keep my projector filter cleaned and replace bulbs proactively—usually every 1,000-2,000 hours. For lighting, I verify that dimming controls work smoothly and adjust settings to match room changes or new furnishings. Software updates are often overlooked but vital; firmware patches from manufacturers like BenQ or Epson help optimize performance and fix bugs. To get detailed guidance on maintenance routines, I recommend reviewing this comprehensive maintenance guide. Incorporate alarms or scheduled reminders—using apps or calendar alerts—to prompt routine checks. Consistency in caring for your gear prevents costly repairs, keeps your picture pristine, and extends the lifespan of your investment.
Scale Your Setup Without Sacrificing Quality
As your passion grows, scaling your setup becomes inevitable. Transitioning from a single projector to a multi-screen or immersive environment requires modular tools. For example, I suggest integrating networked control systems like Draper’s advanced control modules. They allow centralized management of lighting, projector calibration, and support positioning, simplifying complex installations. Upgrading lens support mounts to adjustable, vibration-isolating rigs helps maintain image clarity across larger setups. Remember, the foundation remains high-quality lenses and stable support systems—analogous to investing in good shoes for long-distance walking. For any expansion, revisit this expert resource to ensure your tools scale correctly with your ambitions. In the near future, automation and AI-based calibration tools will further simplify long-term maintenance and scaling, reducing manual tuning efforts. Right now, adopting a regular maintenance schedule with precise tools can make your cinema setup virtually fail-proof—so I encourage you to try using the Spear & Munsil test patterns for your projector calibration today and see the difference it makes.
Lessons Only Insiders Share About Camera Supports and Projection Power
One of the most eye-opening lessons I learned was how even a slight imbalance in camera support can ruin an entire shot, reminding me that stability isn’t just about equipment—it’s about understanding the subtle vibrations that can distort your image and how proper damping can make or break your cinematic vision. I also discovered that not all projection screens are created equal; choosing a matte surface with the right gain transformed my viewing experience more than any flashy projector upgrade. Lastly, I realized that the magic of calibrated lighting isn’t just about brightness but about creating an environment where your visuals can truly breathe, emphasizing the importance of controlling ambient light to preserve contrast and color fidelity.
My Top Picks That Elevated My Cinematic Journey
For precise color calibration, I rely on the Spears & Munsil UHD HDR Benchmark discs, which have become my go-to for achieving professional-grade image quality. To keep my equipment stable and vibration-free, I trust the Manfrotto MTXPRO tripod, which offers durability and smooth adjustments. When fine-tuning my lighting environment, I use the expert lighting techniques from industry guides that help me craft immersive atmospheres. These tools and resources have been transformative, guiding me step-by-step to build a setup that truly does justice to cinematic storytelling.
Bring Your Passion to Life—Take the Next Step Today
Embracing the intricacies of camera supports, projection screens, and lighting can seem daunting, but the reward is a personalized cinema experience that rivals commercial theaters. The journey might be complex, but each small improvement adds up to a breathtaking transformation—your room, your rules. So, why not take that leap now? Dive deeper into the gear that makes all the difference and turn your space into a true sanctuary for cinematic magic. How will you start refining your setup today? Share your plans or challenges below, and let’s build this dream together!
2 Replies to “Best Cinema Projectors 2024: Top Models & Buying Tips”
Leave a Reply
Related Posts
Cinema Projectors 2024: Top Models and Buying Tips for Filmmakers
Ever stared at your outdated projector, squinting to make sense…

Best Cinema Projectors & Cine Lenses for Filmmaking in 2024
It was late one evening, and I was about to…
Cinema Projectors 2024: Top Models & Buyer’s Guide
Ever spent hours setting up what you thought was a…
Reading this post really resonated with my own journey into setting up a home theater. I initially made the mistake of focusing too much on resolution, thinking 4K was the magic fix. But I quickly learned that room lighting, screen type, and calibration matter just as much—if not more—than specifications alone. A particularly useful tip I found was balancing ambient light with proper curtains and adjustable lighting, which dramatically improved image quality in my space. One challenge I faced was finding the right support for my projector without introducing vibrations; investing in a vibration-dampening mount made a huge difference in clarity. Have others found specific brands or types of mounts that work well for more portable setups? I’d love to hear suggestions, especially for those with limited ceiling installation options. Creating the perfect environment is such a nuanced process, but it’s rewarding when your setup finally starts to shine.
This post hits all the right points about the importance of well-chosen support systems and calibration to get the most out of a projector. I recently upgraded my support mount after experiencing persistent image wobble that was tough to correct in calibration. Switching to a vibration-dampening ceiling mount made a noticeable difference, especially in maintaining the sharpness of fast-moving scenes. It’s a reminder that even the smallest support imperfections can compromise an otherwise high-quality setup. Regarding portable options, I tried the Manfrotto Magic Arm, which performs surprisingly well for smaller spaces and temporary setups, thanks to its stability and adjustability. Have others found lightweight, portable mounts that offer similar stability? Also, I agree with the post on the significance of calibration — I’ve spent hours fine-tuning my projector with a calibration disc, and the color accuracy is now stunning. What are your go-to tools or apps for quick calibration checks in between detailed sessions? Sharing real-world experiences helps everyone fine-tune their home theaters to perfection!