
Ever had a shoot where the colors just didn’t look right—skin tones off, reds bleeding, or blues looking dull? I remember my first big project, sweating over the color grading, only to realize that my footage was technically flawed from the start. It was a lightbulb moment: my camera’s auto white balance? Not reliable when you’re aiming for perfection. That’s when I discovered the power of a simple tool—a grey card—and everything changed.
Why Using a Grey Card Is a Game-Changer for Color Precision
No matter how advanced your camera gear is, achieving consistent and accurate colors relies heavily on proper calibration. Early on, I made the mistake of trusting auto settings and relying on ambient lighting to do the right thing. Spoiler alert: it often doesn’t. The result? Color casts that stubbornly refused to match later in post, wasting hours of correction. Implementing a grey card in my workflow has been a revelation—training my eye and ensuring my footage maintains true-to-life colors. It’s like giving my camera a consistent reference point, making post-production a breeze, and elevating the professionalism of my work.
Is the Hype About Gray Cards Just a Trend?
Honestly, I used to think all this fuss about grey cards was overhyped—just another technical detail for gear geeks. My biggest mistake early in my journey was dismissing the importance of proper white balance calibration, assuming that adjusting colors in editing was enough. But accurate capture upfront saves so much time and preserves image integrity. As filmmakers like those at Cine Gear Guide emphasize, consistent color temperature and exposure are the backbone of professional-looking footage. If you’ve faced issues with inconsistent skin tones or mismatched shots, you’re not alone—but understanding and using tools like the grey card can be your secret weapon.
Now that I’ve shared my initial stumble and how I turned things around, let’s dive into how you can confidently incorporate a grey card into your shoots and get flawless colors every time.
Position the Grey Card Precisely
Place the grey card in the scene where your subject will be shot, ensuring it’s at the same distance and angle as your talent. During my first shoot, I mistakenly clipped it into a corner, making it hard to get a good reading. When I corrected this, I got a clear, accurate color reference that matched the scene’s lighting, significantly improving my post-production color grading.
Set Exposure and Focus Before Measuring
Adjust your camera settings—aperture, shutter speed, ISO—so that the scene is properly exposed. Focus the camera carefully on the grey card, avoiding any blur or softness. This ensures your camera’s sensor is calibrated correctly and that your measurement isn’t skewed by focus errors or exposure mishaps. During a recent shoot, I forgot to lock focus and notice how slight softness on the grey card led to inaccurate white balance readings, which I corrected by refocusing properly.
Use the Camera’s White Balance Tool or Post-Processing
Many cameras allow you to use a custom white balance setting. Point your camera at the grey card, activate the custom WB mode, and hit the set button. This establishes a baseline reference point. Alternatively, shoot in RAW so you can fine-tune white balance during post-processing using software like DaVinci Resolve or Adobe Premiere. In my experience, shooting in RAW and setting a custom WB with the grey card results in more consistent colors across shots, especially when working on multiple scenes with different lighting conditions.
Apply Color Corrections in Post-Production
Import your footage into a grading software and use the grey card reference to set your white balance and color tone. Use your software’s eyedropper tool to sample the grey card in each shot, ensuring it reads exactly 18% grey. This step neutralizes color casts introduced by mixed lighting or imperfect camera settings. During a project, I used this method to match shots filmed at different times of day, achieving a seamless visual flow that impressed my client.
Double-Check with Test Shots
Before proceeding with your entire shoot, take test shots with the grey card under the current lighting conditions. Review the captured images to verify the accuracy, adjusting your camera settings if necessary. This proactive step saves time and reduces the need for extensive corrections later. Once, I missed this step and only realized post-production that the skin tones were off, leading to unnecessary re-shoots. Now, I always do quick test frames to confirm proper calibration.
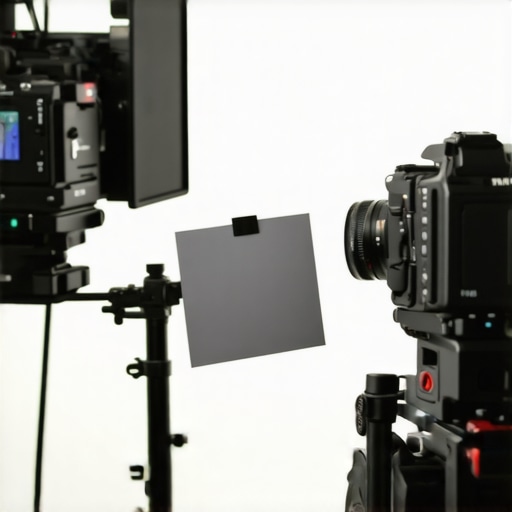
Many filmmakers and enthusiasts operate under common assumptions about projection screens, camera supports, cine lenses, cinema projectors, and lighting. However, these beliefs often contain overlooked nuances that can make or break a shoot. Discovering these subtleties is what elevates an amateur project to professional-level work. Let’s dig deeper into some myths and advanced mistakes that even experienced creators might fall prey to.
Myth of the Perfect Projection Screen
Everyone says that a high-gain screen equals the best picture quality, but in reality, more gain often results in unwanted hot spots and reduced contrast. This can lead to an uneven image, especially in rooms with ambient light. Experts recommend choosing a screen with a balanced gain—around 1.0 to 1.3—to ensure uniformity and clarity. Gray projection screens are gaining popularity precisely because of their ability to reject ambient light and maintain image consistency. Avoid falling into the trap of assuming that higher gain always means better, as this can diminish your viewer’s experience.
Why You Should Rethink Your Camera Supports
Many underestimate the importance of proper stabilization tools. An overused monopod or a cheap tripod can cause subtle vibrations that ruin focus and smoothness, especially during handheld scenes or slow pans. Instead, investing in a sturdy, well-designed support—like a professional camera support system—can be transformative. Remember, a common mistake is leaving support adjustments unchecked, which results in micro-movements. Small tweaks make big differences, especially when you’re capturing high-res footage.
Advanced Cine Lenses and Their Overlooked Value
Many shooters pick lenses based on focal length or aperture alone, but few appreciate the sophisticated mechanics behind cine lenses that allow for focus breathing control or chromatic aberration reduction. These features can save hours in post-production and improve visual storytelling. For example, choosing the right cine lens involves understanding the glass elements’ design, not just brand reputation or price. Ignoring these nuances might lead to disappointing quality, particularly during complex focus pulls or multi-camera setups.
Piecing Together the Puzzle with Cinema Projectors
People often believe brighter is better when selecting a cinema projector. But, higher lumen output can cause unintended issues such as light bleed and uneven projection. The critical factor is contrast ratio, which affects image depth and realism. Experts suggest matching the projector’s capabilities to your room size and ambient light conditions. The full guide to cinema projectors emphasizes understanding these technical nuances to avoid costly mistakes and ensure a quality experience.
Lighting Techniques That Make a Difference
Finally, many overlook how subtle lighting adjustments influence mood, depth, and focal clarity. Using dim, soft fill light can add dimension to scenes without flattening shadows. Conversely, over lighting can wash out textures and skin tones. One trap to avoid is relying solely on budget fixtures; instead, learn how to manipulate film lighting techniques for dramatic effect. Mastery of these nuances supports storytelling and ensures your visuals communicate precisely what you intend.
Have you ever fallen into this trap? Let me know in the comments!
Maintaining your filmmaking equipment is crucial to ensuring consistent quality and extending the lifespan of your investment. From camera supports to cinema projectors, each component requires specific tools and routines to stay in peak condition. In this section, I’ll share the essential tools and methods I personally rely on to keep my gear functioning flawlessly over time.
High-Quality Lens Cleaning Kits and Their Impact
I always invest in a professional lens cleaning kit that includes anti-static brushes, microfiber cloths, and blower bulbs. Regularly cleaning cine lenses with these tools prevents dust and fingerprints from compromising image quality. I avoid compressed air cans, as they can introduce moisture or damage delicate elements. Personally, I use a lens cleaning solution with optical-grade cloths to ensure no residue is left behind. Consistent, gentle cleaning prevents scratches and maintains clarity—crucial for high-budget shoots. For detailed guidance, check out this guide.
Routine Calibration with Advanced Software
Color and exposure drift over time can undermine your project’s consistency. I recommend using calibration tools like the X-Rite i1Display Pro for monitors and software such as DaVinci Resolve’s [color management](https://cinegearguide.com/how-to-grade-log-footage-without-losing-skin-tone-detail) features to fine-tune your workflow. These tools help verify that your display accurately reproduces colors, which is vital when matching footage shot at different times or with different cameras. Regular calibration—every few months—ensures your creative decisions are based on reliable visuals, reducing rework and delayed deliveries.
Protective Cases and Proper Storage Solutions
Long-term equipment health depends on proper storage. Rigid, padded cases for cine lenses and support rigs protect against dust and bumps, especially when moving between locations. I prefer to store sensitive items in climate-controlled environments — avoiding extreme temperatures and humidity that can cause fungus or metal corrosion. For film lighting gear, quick-release mounts and dedicated rack systems make setup and teardown efficient, minimizing wear. Investing in custom foam inserts and dedicated shelving helps maintain organization and quick access to every component, saving time during busy shoots.
Investing in Durable Camera Supports and Stability Tools
Micro-movements in camera supports can ruin shot stability. I rely on robust tripod systems with fluid heads designed for smooth pans and tilts, like the Manfrotto 504HD. For handheld shoots, I use stabilizers such as steadicams and gimbals that require routine maintenance—like tightening joints and checking motor balance—to function smoothly. This resource offers excellent tips for supporting gear longevity and shot stability. Regularly inspecting and maintaining supports ensures security and shot precision, avoiding costly re-shoots.
Preparing Cinema Projectors for Long-Term Use
Projection systems are an investment over time, especially as more productions incorporate large-format or high-lumen projectors. I use specialized projector cleaning kits for lenses and filters, along with regular calibration using free software like LightDetect. Preventative maintenance includes replacing filters, checking lamp hours, and updating firmware, which can prevent unexpected failures. For detailed procedures, consult this comprehensive guide. Staying proactive with these steps preserves image quality and operational reliability during critical post-production screenings or client presentations.
How do I maintain my cinematic tools over time?
Creating a routine inspection schedule—checking calibration, cleaning, and parts wear—ensures your equipment operates smoothly. Establish a checklist for each gear type, set reminders, and document maintenance activities. Supplement your routine with firmware updates for camera systems and lighting controllers to benefit from the latest enhancements. Remember, investing in quality tools for maintenance, like dedicated cleaning kits and calibration devices, ultimately saves money and stress in the long run.
For those serious about elevating their craft, I recommend exploring advanced methods like using color grading software in conjunction with regular calibration. Also, consider upgrading support systems with anti-vibration mounts for ultra-smooth footage. Implementing these tools and routines now will prepare you for future trends—such as higher resolutions and dynamic HDR footage—where precision and durability are non-negotiable. Ready to level up your maintenance game? Start by integrating a professional lens cleaning routine today—your shots will thank you.
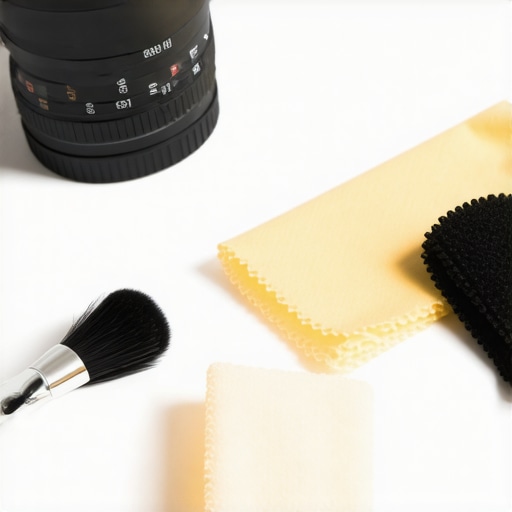
Close-up of a professional cine lens cleaning kit, featuring brushes, microfiber cloths, and cleaning solutions, essential for maintaining image quality and lens longevity.
Lessons That Changed My Approach to Cinematic Tech
- One of the toughest lessons I learned was how overlooking minor details—like proper support setup or screen material—can ruin an entire shoot. I once assumed that a standard projection screen would suffice for vibrant colors, only to realize that specifics like gain and material significantly impact image quality. Now, I always seek out expert-reviewed options and don’t settle for generic gear, knowing that such choices can elevate or sabotage the final product.
- Another revelation came with camera stabilization. I used to ignore the importance of micromovements, thinking all tripods are equal. It wasn’t until I invested in a sturdy, well-calibrated support system that I saw the difference, especially during long takes or slow pans. This lesson emphasized that durability and precision in supports directly translate into smoother footage and less post-production hassle.
- Dealing with projection distortions taught me to re-examine assumptions about keystone correction and screen uniformity. Relying solely on digital adjustments can lead to resolution loss, so I now prioritize physical setup accuracy. This shift has saved me countless hours fixing issues in post, and I encourage everyone to balance on-set precision with smart technology use.
Tools and Resources That Upped My Cinematic Game
- Gray Projection Screens— Expert-approved for rejecting ambient light and maintaining consistent images. I trust this material especially because of its proven performance in diverse environments, which ensures my work looks impeccable every time. Check out this guide to select the best for your space.
- Camera Support Systems— A sturdy, well-designed rig is invaluable. My current support from this resource has drastically reduced micro-movements and improved shot stability, especially for handheld scenarios. I recommend investing in quality gear backed by expert insights.
- Film Lighting Techniques— Creative lighting can make or break a scene. I constantly revisit this resource to refine my skills in manipulating shadows and highlights, which enhances storytelling power and visual depth.
- Calibration Tools— Regular monitor and projector calibration are essential. I use tools like the X-Rite i1Display Pro and software guides to maintain color accuracy over time, ensuring consistent results that meet professional standards. Remember, precision at every step starts with reliable calibration.
Your Next Step in Cinematic Excellence
Gearing up with the right tools and knowledge transforms your filmmaking journey. Embracing these lesser-known details—like support stability, screen material, and precise calibration—sets you apart as a craftsman dedicated to quality. Don’t hesitate to experiment and refine your process; small improvements compound into cinematic masterpieces. Ready to elevate your setup and create visuals that captivate? Start with those subtle tweaks today, and watch your work reach new heights.
What subtle support or setup adjustment made the biggest difference in your projects? Share your story below—I’d love to hear your insights!
About the Author
James Duke
ThinkOTS
James Duke is a seasoned professional in the creative production industry, bringing a wealth of technical knowledge and hands-on experience to cinegearguide.com. As a key figure at ThinkOTS, James has spent years navigating the complexities of high-end production environments, where selecting the right equipment is the difference between a successful shoot and a logistical failure. His expertise spans the full spectrum of cinematography gear, from advanced camera systems to the intricate accessories that define modern filmmaking. On cinegearguide.com, James leverages his deep understanding of the industry to provide authoritative insights, gear reviews, and technical guides. He is known for his ability to break down complex specifications into practical, actionable advice for filmmakers of all levels. His perspective is rooted in the real-world application of technology, ensuring that every recommendation is backed by professional standards. James is dedicated to empowering the filmmaking community by sharing his expertise, helping others navigate the ever-evolving landscape of cinema technology with confidence and clarity.
LinkedIn Profile