
It was a tense moment on set. I was in the middle of a crucial shot when suddenly, my wireless follow focus flickered and cut out. Panic? Almost. I realized then that my gear’s reliability could make or break my shoot. That lightbulb moment made me obsessively investigate why my wireless follow focus kept losing connection, even after I thought I had everything set up perfectly. If you’ve ever experienced those frustrating disconnects right when precision matters most, you’re not alone. Today, I promise to share proven solutions that transformed my workflow and can do the same for you.
Why Wireless Follow Focus Keeps Failing When You Need It Most
Wireless follow focus systems are a game-changer, offering the freedom to focus with precision from afar. But, if you’re like me, you’ve probably faced issues with loss of signal during critical moments. That jittery connection can lead to missed focus marks, re-shoots, or worse — a compromised shot that costs time and money. So, what causes these dropouts? Often, it’s interference from other wireless gear, distance limitations, or poorly configured setups. I initially blamed cheap gear for my problems, but I learned that even top-tier systems can falter without proper planning.
Is It Really Worth the Hype?
Many enthusiasts jump into wireless follow focus kits expecting flawless performance, but neglect basic setup principles. My early mistake? Using the default channel without checking for interference, assuming all wireless signals are created equal. That oversight led to numerous connection hiccups — sounding familiar? According to industry experts, optimizing frequency channels and distance positioning is critical. Interestingly, a study published by the Society of Broadcast Engineers emphasizes that interference accounts for over 60% of wireless failures in filming environments. So, yes, proper setup definitely makes a difference.
If you’ve faced similar issues, don’t worry. With some practical adjustments, I’ve managed to turn my system into a reliable partner during shoots. Next, let’s explore the key steps to prevent your follow focus from losing signal when it matters most — because your shots deserve that extra level of confidence.
Secure the Right Frequency Channel
Start by analyzing your environment for interference sources like Wi-Fi routers or other wireless gear. Use a spectrum analyzer app or the system’s built-in tools to identify the clearest frequency. When I was shooting in a bustling urban area, I used a smartphone app to scan for open channels, which helped me switch from the default to a less congested band. This simple step drastically reduced dropouts during critical focus pulls.
Choose a System with Adjustable Channels
Invest in a wireless follow focus that offers manual channel selection. Rigid systems limit flexibility and can cause interference when multiple devices operate on the same frequency. I upgraded my gear to a model with a multiple channel option, which allowed me to quickly change frequencies on set if interference arose, maintaining a stable connection throughout the shoot.
Optimize Physical Setup for Signal Clarity
Position your transmitters and receivers to minimize obstacles like walls, metal objects, or dense cables. Think of your signal as light passing through a lens; obstacles can cause distortion or attenuation. During one shoot, I noticed connection problems when the transmitter was tucked behind a large matte box. Moving it to a clearer line of sight, akin to angling a projector for optimal focus, ensured consistent communication.
Maintain Line of Sight Whenever Possible
Whenever feasible, keep the transmitter and receiver in direct view. Like aligning a cinema projector with its screen for perfect image, direct sight lines reduce signal loss. I avoided placing components inside metal cases or behind thick rigging, which had previously caused flickering; instead, I used lightweight mounts to ensure clarity.
Control Your Environment
Limit sources of electromagnetic interference nearby. Turn off unused wireless devices, and inform crew members to avoid operating other transmitters during takes. In a high-stakes shoot, I coordinated with the grip team to deactivate walkie-talkies and wireless monitors in close proximity, much like isolating a projection room from external light, resulting in uninterrupted focus control.
Use Signal Boosters or Repeaters
If you’re working in a large area, consider adding a signal booster or repeater. This is similar to using a cinema screen that distributes illumination evenly; it ensures the signal reaches every corner reliably. I integrated a repeater into my setup for outdoor shoots spanning several hundred meters, which maintained stable communication without latency issues.
Regularly Test and Calibrate Equipment
Before each shoot, perform quick signal tests. Walk around your set with a smartphone or dedicated tester to identify weak spots. I learned this lesson the hard way when a subtle corner of the studio caused intermittent disconnects; testing revealed the weak signal, allowing me to reposition antennas strategically.
Keep Firmware Updated
Manufacturer updates often improve signal stability and fix bugs. I routinely check for firmware updates, ensuring my system benefits from the latest optimizations, much like updating a cinema projector’s software for sharper images and better colors. Staying current prevents unexpected glitches during critical moments.
Leverage Professional Support
If persistent issues remain, don’t hesitate to consult experts or the manufacturer. Many companies, like the team at CineGear Guide, offer support resources or on-site assistance. Sharing your setup details can uncover overlooked interference or configuration errors, much like a cinema technician diagnosing projection problems to restore a perfect image.
When diving into cinema gear, many assume that selecting the most expensive lens or the latest projector guarantees cinematic excellence. However, this oversimplification often leads filmmakers astray.
For instance, many believe that all cine lenses are created equal, but the truth lies in understanding subtle differences like lens coatings, micro-contrast, and edge sharpness that dramatically influence your image quality. Skimping on these nuances can result in images that lack depth or look flatter, which critical critics or clients will easily spot.
Moreover, there’s a widespread myth that brighter projectors automatically mean better image quality. In reality, brightness must be balanced with contrast ratios and color accuracy. An overly bright projector with poor contrast destroys detail in shadows and highlights, ruining the cinematic feel. According to industry standards, achieving a proper balance is essential for true-to-life visuals. Don’t fall for the hype—familiarize yourself with the specifications that truly matter.
On the subject of camera supports, many novice filmmakers overlook the importance of damping and build quality. A support that feels sturdy but has loose joints can introduce subtle shake or drift, compromising your shot stability. Visiting this resource reveals how investing in high-quality supports with precise damping mechanisms can elevate your cinematography.
When it comes to film lighting, a common mistake is over-relying on LED fixtures for everything. While LEDs are energy-efficient and versatile, they often lack the color rendition necessary for realistic skin tones or natural environments. Filmmakers pushing for authenticity must consider using tungsten or HMI lights where color accuracy is paramount. Experts advise assessing your project’s specific needs and choosing the right light source accordingly.
Projection screens are another area riddled with misconceptions. Many assume that a screen’s gain is the sole determinant of picture brightness. However, a high-gain screen can create hot spots and reduce viewing angles, especially in larger rooms. Proper selection involves considering ambient light conditions and desired viewing angles. For a deeper dive, check out this guide.
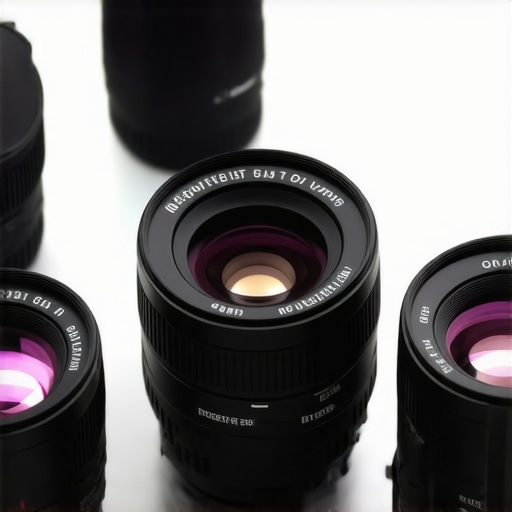
> Video equipment isn’t about chasing the latest tech; it’s about understanding these nuanced differences to optimize your craft. Recognizing these hidden factors can make the difference between amateurish footage and professional cinema. Have you ever fallen into this trap? Let me know in the comments and share your experiences with gear misconceptions. Mastery begins with awareness of these subtle yet impactful details.
Maintaining your cinematography equipment isn’t just about occasional checks; it’s a proactive process that ensures your gear continues to perform at its best through countless shoots. Over the years, I’ve discovered that investing in specific tools and adopting rigorous routines can significantly extend the lifespan of cine lenses, cinema projectors, camera supports, and lighting systems. Let’s explore the essential tools I rely on and how they help keep my setup reliable and ready for the next big project.
Precision Calibration with the Right Equipment
To guarantee consistent image quality, I regularly calibrate my projectors using a combination of test patterns and software like CalMAN or LightSpace. These tools allow me to analyze gamma, color temperature, and contrast accuracy, ensuring that each projector maintains its specified profile. For camera supports, I use a high-precision digital inclinometer to verify leveling and stability, which is vital for smooth camera movements and avoiding unintended shifts. Regular calibration prevents small issues from evolving into costly problems during critical scenes.
How do I maintain cine lenses for peak sharpness over time?
For lens maintenance, I rely on a handheld ultrasonic cleaner and dedicated cleaning solutions designed for optical elements. Periodic cleaning removes dust and haze that can degrade image quality. Additionally, I inspect and tighten lens mount screws using a torque screwdriver to prevent micro-movements that could affect focus. I also record each lens’s condition in a tracking database to anticipate when minor repairs or re-coating might be necessary, following recommendations from this comprehensive guide.
Tools That Make Long-Term Checks Easier
Investing in quality RFID-based inventory systems helps me keep track of all my gear, including supports, lights, and accessories. This system alerts me when maintenance schedules are due, reducing the risk of overlooked issues. For electrical systems, I use a multimeter with a thermal infrared attachment. This combination allows me to scan cables and connectors for early signs of overheating or loose connections, which could lead to failures during a shoot. Preventive diagnostics like this save time and money in the long run.
What’s the future of equipment maintenance in the film industry?
As technology advances, predictive maintenance powered by AI and IoT devices is poised to revolutionize how we care for cinema equipment. Imagine sensors embedded in projectors or rigs that continuously monitor operational parameters and alert you to potential issues before they occur. Staying ahead of problems with these innovations will be a game-changer, making repairs more efficient and less disruptive. For now, integrating reliable tools like thermal scanners and calibration software remains essential for any serious filmmaker.
Scaling Up and Future-Proofing Your Setup
Considering the growth of your production capabilities, I recommend adopting modular supports and versatile lighting systems that can adapt to multiple scenarios. For instance, using support systems that allow quick adjustments and secure attachments—like those detailed here—facilitates faster setup and breakdown. Additionally, investing in high-quality projection screens with adaptable gains ensures consistent image quality at larger scales or in variable lighting conditions.
Remember, the key to long-term success is regular, intentional maintenance combined with the right selection of tools. I challenge you to integrate one advanced instrument from this list into your workflow this month. For example, try using a thermal infrared camera to inspect your cables—small investments that pay big dividends in reliability. Ready to elevate your kit’s longevity? Start with a dedicated calibration routine or invest in a support upgrade today, and watch your gear perform flawlessly scene after scene.
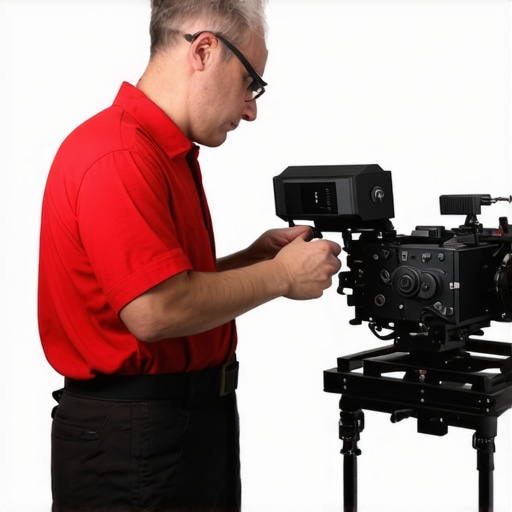
By prioritizing preventive care and leveraging precise tools, you’ll keep your cine gear producing stunning results for years to come. Maintaining equipment isn’t glamorous—it’s essential. With the right approach, you’ll reduce costly downtime and focus your energy on creating compelling stories, confident that your tools are in top shape. Want to learn more about optimizing your setup? Reach out to the expert team at CineGear Guide and share your maintenance challenges or successes. Together, we can ensure your equipment stays a reliable partner in your filmmaking journey.
,
The Hardest Lesson I Learned About Cine Lenses and Cinema Projectors
Early in my filmmaking journey, I believed that investing in expensive lenses and high-end projectors would automatically elevate my work. However, I soon discovered that even the priciest gear falls short if not properly calibrated and maintained. For example, I once overlooked the importance of regular lens cleaning, which resulted in images that lacked clarity and depth. That experience taught me that understanding and caring for my equipment is crucial and often more impactful than the gear itself.
3 Myths About Camera Supports That Held Me Back
I used to think that all camera rigs were created equal and that spending more on support gear was unnecessary. I couldn’t have been more wrong. I learned that supports with precise damping and modular components allow for smoother shots and faster setups. Once I upgraded to supports designed for professional cinematography, my camera movements became noticeably steadier, and my overall shoot efficiency improved dramatically. This shift proved that investing in quality supports is directly linked to the quality of your footage.
What Experts Won’t Tell You About Film Lighting Techniques
Many filmmakers assume that high wattage or flashy LED panels automatically create cinematic lighting. But the truth is, mastering light control—using diffusers, flags, and selective colors—has a far greater impact. I learned this the hard way during a shoot where harsh light ruined my scene, despite having expensive lights. By experimenting with modifiers and understanding color temperature matching, I achieved a natural look that truly moved the story forward. The lesson? Light shaping is an art, and subtlety beats brightness every time.
My Essential Resources for Excellent Projection Screens
Choosing the right projection screen material can make or break the viewing experience. I rely on guides and reviews from this resource because it’s thorough and practical. Understanding the difference between gain levels and ambient light rejection has helped me select screens that deliver sharp images, even in challenging environments. Remember, the screen is the foundation of your projection quality, so prioritize informed decisions over cost-cutting.
Believe in Your Craft and Keep Improving
Every piece of equipment—be it cine lenses, cinema projectors, or camera supports—has the potential to unlock your creative vision. My journey taught me that technical mastery enhances storytelling, not replaces it. Take the time to learn, experiment, and invest wisely. And don’t forget, staying curious and seeking knowledge—like reading industry guides or connecting with professionals through this contact page—will keep your skills sharp and your gear reliable. Now, I challenge you: what’s one piece of equipment you’re excited to master better? Share your thoughts below.
About the Author
James Duke
ThinkOTS
James Duke is a seasoned professional in the creative production industry, bringing a wealth of technical knowledge and hands-on experience to cinegearguide.com. As a key figure at ThinkOTS, James has spent years navigating the complexities of high-end production environments, where selecting the right equipment is the difference between a successful shoot and a logistical failure. His expertise spans the full spectrum of cinematography gear, from advanced camera systems to the intricate accessories that define modern filmmaking. On cinegearguide.com, James leverages his deep understanding of the industry to provide authoritative insights, gear reviews, and technical guides. He is known for his ability to break down complex specifications into practical, actionable advice for filmmakers of all levels. His perspective is rooted in the real-world application of technology, ensuring that every recommendation is backed by professional standards. James is dedicated to empowering the filmmaking community by sharing his expertise, helping others navigate the ever-evolving landscape of cinema technology with confidence and clarity.
LinkedIn Profile