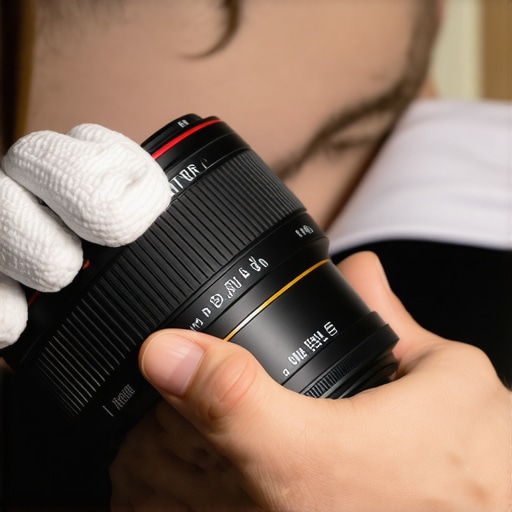
It was a late evening, the room dimly lit, and I was preparing for a client presentation. As I rolled in the projector, I noticed something was off—the bright images seemed washed out, and the contrast didn’t pop like I remembered from earlier tests. Frustration tugged at me. Then it hit me—my projection screen’s edges were reflecting stray light, reducing overall contrast and diminishing the image’s sharpness.
At that moment, I realized a small, overlooked detail had a massive impact on image quality—the velvet border I had temporarily dismissed. Since then, I’ve come to appreciate just how crucial velvet borders are in elevating projection performance, especially in high-contrast scenarios.
The Hidden Power of Velvet Borders in Projection
Today, I want to share why incorporating velvet borders into your projection setup can make all the difference. Whether you’re a professional filmmaker, a home theater enthusiast, or someone who simply demands the best picture quality, understanding this detail can transform your viewing experience. Velvet borders aren’t just aesthetic—they serve a vital functional purpose by absorbing stray light, reducing reflections around the edges, and enhancing the contrast of your projected image. This is especially important when dealing with high-contrast images where every detail counts.
Choose the Right Projection Screen Material
Start by selecting a screen material optimized for contrast and ambient light rejection, such as matte black or ambient light rejecting screens. Ensure it matches your room size and projection technology. A good choice minimizes reflections that velvet borders can further absorb. For detailed options, refer to this guide.
Measure and Prepare Your Projection Area
Accurately measure the perimeter of your projection surface to determine the size of your velvet border. Use a tape measure to mark off consistent border widths, typically 2-4 inches, depending on your space. Marking helps maintain symmetry and ensures the velvet is snugly fitted. I once mistakenly installed a too-wide border, causing uneven light absorption and distracting reflections, so precise measurement is key.
Select Quality Velvet for Optimal Light Absorption
Choose plush, dense velvet fabric specifically designed for theater or photographic use. Avoid shiny or reflective textures, which can negate the benefits. The velvet’s deep pile traps stray light effectively, enhancing contrast. When I experimented with different fabrics, only the high-quality velvet maintained its efficacy after multiple cleanings, confirming durability matters.
Cut and Attach the Velvet Borders
Cut the velvet into strips matching your measured dimensions. Use a sharp utility knife and a straightedge for clean edges. Attach the velvet using industrial-strength adhesive spray or Velcro strips, ensuring it hugs the screen tightly without sagging. I once used a spray adhesive that over-penetrated, causing wrinkles, so I recommend testing on a scrap first. For a seamless look, fold the fabric edges under and secure tightly, avoiding puckering.
Seal Edges and Prevent Light Leakages
Apply black acyclic or matte black paint along the border edges to eliminate any light spill. This step enhances the absorption qualities and prevents reflections from bouncing back onto the screen. During my own setup, sealing the edges noticeably improved contrast, especially in high-contrast scenes, making the effort worthwhile. Consider using weatherstripping tape for additional sealing where appropriate.
Fine-Tune Your Setup for Maximum Effectiveness
Test your projection by playing high-contrast test patterns and adjusting the velvet borders as needed. Ensure they are flush against the screen and free from gaps. If reflections persist, consider increasing the border width or adding additional layers of velvet. I once increased the border width from 2 to 3 inches after noticing stray reflections along the edges, which resulted in sharper contrast.
Maintain and Clean to Preserve Performance
Regularly vacuum the velvet with a soft brush attachment to remove dust and prevent buildup that can diminish light absorption. Avoid harsh cleaning agents that might damage the fabric. Keeping your velvet borders clean helps sustain their absorptive properties, ensuring consistent image quality over time. I found that a gentle vacuum brought back the fabric’s vibrancy and performance after months of use.
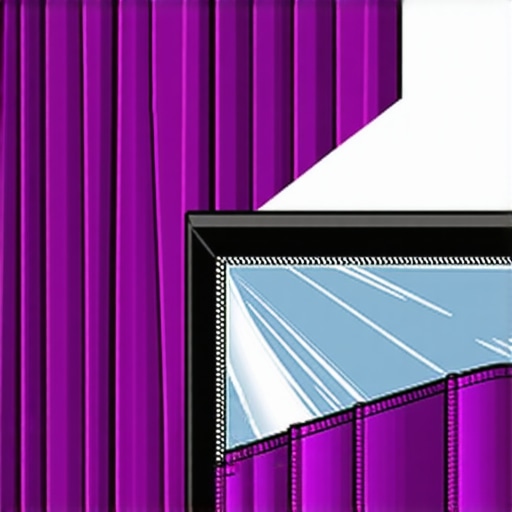
Illustration of cutting and attaching velvet borders around a projection screen, highlighting best practices for a seamless fit and maximum light absorption.
Many enthusiasts and even seasoned professionals often cling to common beliefs about cine lenses, camera supports, projection screens, cinema projectors, and lighting setups. However, these assumptions can lead to costly mistakes or overlook key subtleties that elevate production quality. Let’s dig deeper into some lesser-known truths and traps to avoid, enriching your cinematic skill set.
First, a prevalent myth is that all cine lenses are created equal, with many assuming that premium optics always guarantee superior images. In reality, focus shifts, chromatic aberrations, or even manufacturing inconsistencies, such as differences between plastic and glass elements, profoundly affect image quality. For instance, expert David Mullen emphasizes that glass elements generally provide better clarity and color rendition, but only when correctly manufactured and coated. Choosing the right lens requires nuanced knowledge, not just a high price tag.
Secondly, many underestimate the importance of camera supports like C-stands or gimbals for stability. A common mistake is assuming that lightweight support equals stability, but in fact, understanding the mechanics and physics behind support systems makes all the difference, especially during long shoots or complex movements. Properly tightening support knuckles or using counterweights, as detailed in this guide, can prevent subtle jitters that ruin otherwise professional footage.
Third, regarding projection screens, many opt for high gain options believing they enhance brightness. However, high gain screens can induce hot spots and glare, especially in uncontrolled ambient lighting. Conversely, matte or low-gain screens tend to distribute light more evenly, a fact overlooked by many. A particularly tricky area is when screens are sagging or misaligned, causing vignetting and uneven image quality—something easily missed until it’s too late. Regularly assessing and maintaining screen flatness ensures crisp visuals; for more on choosing the right surface, see expert recommendations.
Fourth, cinema projectors are often misunderstood in terms of color fidelity and contrast. Many believe the latest 4K or laser projectors automatically produce cinema-quality images. Yet, neglecting calibration, proper screen gain, and room acoustics can undermine their potential. Advanced setups demand attention to subtle factors like keystone correction and light spill, which degrade native contrast and sharpness. For detailed insight, check this comprehensive guide.
Finally, lighting in cinematic environments goes beyond simply illuminating actors; it’s about shaping mood, depth, and realism. A common mistake is relying solely on soft, diffuse lights without considering practicals, contrast ratios, or color temperature mismatches. Expert cinematographers plan lighting around these nuances, often using gels or flags to control spill and maintain color consistency. For example, mastering film lighting techniques can elevate a scene’s realism, as shown in this article.
In conclusion, understanding these hidden nuances and avoiding common traps can dramatically improve your cinematic results. Remember, mastering the details—like supporting your camera correctly or selecting the optimal projection surface—sets pros apart from amateurs. Have you ever fallen into this trap? Let me know in the comments.
Keep Your Gear Running Smoothly with Proven Methods
Maintaining cine lenses, camera supports, projection screens, and lighting equipment is vital to ensure consistent, high-quality results on set or in the theater. Regular maintenance extends the lifespan of your gear and preserves its performance, preventing costly repairs or replacements down the line.
For cine lenses, I recommend periodically inspecting and cleaning the glass using specialized lens cleaning solutions and microfiber cloths. Avoid using harsh chemicals that can damage coatings. I personally use Arri Lens Cleaner for its residue-free properties.
Camera supports like tripods and gimbals require thorough checks of their moving parts. Regularly lubricate tripod heads with light silicone-based oil to prevent stiffness, and tighten support clamps. A trick I swear by is to carry a small set of Allen wrenches to address loose screws immediately, which can otherwise compromise stability during shoots.
Projection screens benefit from routine dust removal; vacuuming with soft brushes prevents dust buildup that can affect image quality. I also recommend applying a protective coating periodically to prevent mold or fungi, especially in humid environments. When it comes to projection projectors, cleaning the internal filters and lenses is crucial. Use appropriate cleaning tools and replace worn filters to maintain optimal brightness and contrast.
Lighting equipment demands careful handling; regularly check and replace worn cables, and ensure fixtures are properly cooled to prevent overheating. For long-term performance, investing in a dedicated rack-mounted cooling system has proven effective for me, especially during extended shoots. Additionally, storing equipment in climate-controlled environments reduces wear and degradation over time.
How do I maintain my cinematic setup over time?
Creating a routine maintenance schedule is key. Schedule monthly checks for cleaning lenses and sensors, tighten support fixtures, and verify calibration for projectors and monitors. Document issues as they arise; this proactive approach helps identify patterns before small problems become expensive repairs.
Embracing technological upgrades can also improve longevity. For instance, updating firmware on cinema projectors ensures you benefit from the latest performance enhancements and bug fixes—companies like Sony and Christie regularly release updates addressing common concerns. Staying current with such updates can prevent issues and extend your equipment’s usability.
Looking ahead, the trend toward AI-assisted calibration tools and remote diagnostics promises even easier maintenance. For example, advanced lens calibration software can detect misalignments automatically, saving time and reducing errors. Exploring tools like this can elevate your workflow and keep your gear in peak condition.
Finally, I recommend investing in quality tools and cleaning supplies tailored specifically for your gear. Using generic solutions might save a few dollars upfront but can cause long-term damage, leading to more expenses. For comprehensive guidance, my favorite resource remains this in-depth article on lighting and gear maintenance. Now, challenge yourself to implement one advanced maintenance tip this week—your equipment will thank you.