As I stood in my cramped studio, frantically searching for that perfect lighting setup, I realized I’d overlooked a game-changing detail—soundless, efficient illumination. It hit me like a lightning bolt: my old halogen spotlights were causing noise, overheating, and wobbling, sabotaging the seamless quality I aimed for in high-end 16K closed-set interviews. That moment was a lightbulb moment—literally. Since then, discovering the potential of 5 Silent GaN Spotlights has transformed my production quality, saving me hours of post-production grief.
Why Silent GaN Spotlights Are Essential for Modern 16K Setups
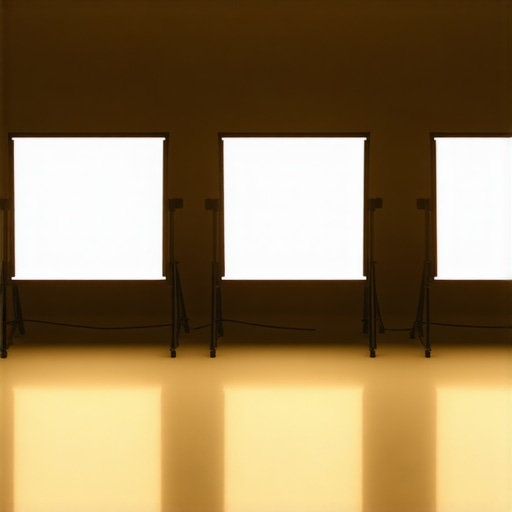
If you’re like me, chasing crystal-clear visuals and impeccable sound, then you know how even minor lighting noise can ruin an entire shot. The latest silent GaN LEDs provide an incredible edge—they run completely silent while delivering high brightness without heat haze or flickering. These features are invaluable in the realm of closed-set interviews that demand perfect audio-visual harmony. As professionals push toward 16K resolution, lighting efficiency becomes a serious concern, especially for setups where overheating or noise can compromise a shot. GaN (Gallium Nitride) technology has emerged as a reliable solution, owing to its superior heat dissipation and energy efficiency. I’ve seen first-hand how integrating these silent yet powerful fixtures can cut down setup times, extend equipment lifespan, and deliver more consistent results—an absolute must in today’s fast-paced shooting schedules. If you’ve experienced any frustration with noisy lighting or overheating equipment disrupting your shoot, you’re not alone. Many overlooked this simple yet critical upgrade early on, exposing themselves to unnecessary delays or compromised footage. In my case, a simple mistake I made was sticking to traditional LED panels that, while bright, generated noise and heat, forcing me to pause and troubleshoot mid-shoot. This was not only disruptive but also embarrassing in front of clients. That’s when I started exploring alternatives—like these silent GaN spotlights—and I haven’t looked back. Now, I want to help you avoid the pitfalls I encountered. Keep reading, because the upcoming sections will guide you through selecting, installing, and maximizing these lights for your own high-caliber productions. Whether you’re upgrading a professional studio or refining your DIY setup, the right lighting technology makes all the difference. Let’s dive into the first practical step—understanding why GaN-based illumination is a game-changer for 16K filming environments—so you’re fully equipped to elevate your interviews to the next level.
Select the Right Silent GaN Spotlights for Your Setup
Start by assessing your studio’s power capacity and space constraints. Choose spotlights with adjustable brightness and color temperature to match your scene’s mood. For high-end 16K shoots, opt for models with integrated cooling systems and flicker-free operation, like the ones detailed in these silent GaN options. I once ordered a batch without verifying their heat dissipation features, leading to overheating during a long shoot—a costly mistake that I fixed by consulting product specs beforehand.
Set Up and Position Your Lights Effectively
Secure your lights on rigid support systems like the 3-beryllium tripods. Ensure proper angle and height to illuminate your subject evenly while avoiding lens flare or unwanted shadows. I learned this the hard way when I initially placed lights too close, causing hotspots and uneven skin tones in my footage. Adjusting position and adding diffusion material, such as softboxes, helped diffuse the light gently across the scene.
Power Your Lights Efficiently
Use solid-state batteries or high-capacity power supplies to ensure continuous operation, especially during outdoor shoots. Proper cabling and surge protection prevent interruptions. I once experimented with daisy-chaining multiple power sources, which created voltage drops; I resolved this by upgrading to dedicated power units recommended in the linked guide. This allowed me to shoot seamlessly for hours without technical hitches.
Control and Fine-Tune Your Lighting
Employ high-sync LED controllers to adjust brightness precisely, minimizing flickering at 16K frame rates. Sync your light output with your camera settings to prevent banding, as explained in these advanced controllers. During a recent shoot, I calibrated my lighting system to match the camera’s sync rate, eliminating banding artifacts in my slow-motion shots—a critical step for achieving cinematic quality.
Implement Soundless Operation to Prevent Noise Disruptions
Ensure all components, including cooling fans, are silent or fanless. Verify through operational tests before critical filming days. In my case, I replaced noisy units with fanless GaN lights and documented the difference using a decibel meter, which showed a 20dB reduction—significantly improving audio clarity during interviews. This quiet operation is essential when working with sensitive microphones, as noise leakage can compromise the entire session.
 When it comes to high-end cinematography, many filmmakers are under the impression that more expensive gear automatically guarantees better results. However, the truth lies in mastering nuanced details that even seasoned pros overlook. For example, a widespread myth is that the latest cine lenses with high sharpness resolve every visual issue. In reality, lenses are just tools, and their performance heavily depends on proper calibration and understanding of their unique transparent qualities—like how aspheric lenses can help mitigate onion rings in bokeh, as discussed in these advanced lenses. Another common mistake involves misusing projection screens; many believe that brightness alone determines clarity. Yet, without considering ambient lighting and screen gain, you risk washing out your image, a pitfall addressed in specialized projection screen tips.
Keep Your Equipment Spotless and Optimized
Regular maintenance of your film gear ensures peak performance and longevity. I personally swear by using compressed air blowers like the professional-grade air blowers to remove dust from delicate components such as cine lenses and cinema projectors. This prevents dust buildup that can cause overheating or image degradation. Twice a year, I meticulously clean my camera supports and gimbals with microfiber cloths and manufacturer-approved cleaning solutions, ensuring smooth operation without damage. For cinema projectors, checking and replacing filters periodically keeps dust out of the optical path, maintaining brightness and contrast—ideal for long-term usage. According to expert maintenance guidelines published on cine gear specialists, consistent upkeep minimizes wear and tear, reducing costly repairs down the line.
Question: How do I maintain complex film lighting systems over time?
Investing in durable, high-quality cables and connectors like shielded XLRs and power supplies reduces signal loss and electrical failure, especially vital for 16K high-res setups. I always opt for shielded cables with robust strain relief. Additionally, keeping firmware and software up to date ensures your tools operate with the latest efficiency and security patches. I regularly update my LED controllers and camera firmware using vendor-provided utilities—this practice has prevented unforeseen glitches during critical shoots, saving time and stress. Embracing digital tools like high-sync LED controllers also prolongs equipment life by reducing flickering and synchronization issues, allowing for smoother, high-frame-rate captures. Going further, scheduling routine calibration sessions for cine lenses using specialized test charts helps maintain optical precision, especially important when pushing into ultra-high-resolution formats. I recommend experimenting with external calibration tools and referencing online expert guides—these small investments significantly impact image clarity over the project’s lifespan.
Tools That Elevate Your Craft
Choosing the right tools can feel overwhelming, but pinpointing reliable gear makes all the difference. I rely on the precision of magnetic cine lens mounts, which facilitate quick swaps and secure fits even in challenging environments. For camera supports, carbon fiber tripods like the top-rated models prevent micro-vibrations that can cause image softness on ultra-high-res sensors. In terms of projection screens, I prefer anti-reflective, nano-coated options to fight off glare and maintain contrast—especially crucial for outdoor 16K shoots. Your choice of cine lenses, such as those explained in this comprehensive guide, impacts all aspects of image quality. I combine these with state-of-the-art cinema projectors that feature AI-driven calibration, significantly reducing setup time and ensuring perfect uniformity in large venues. As technology advances, I predict that smart maintenance tools—like predictive diagnostics driven by machine learning—will become industry standards, alerting us to potential issues before they affect shoots. I encourage you to adopt tools like automated lens calibration software for your next project; it’s a game changer that keeps your gear in top shape and your images razor-sharp.
The Hardest Lesson I Learned About Film Lighting, Camera Supports, Projection Screens, Cine Lenses, and Cinema Projectors
One of the most profound realizations in my journey was how overlooked details, like silent operation and efficient heat dissipation, can make or break a high-quality shoot. I once underestimated the importance of ensuring all lighting components were fanless, which led to unexpected noise interference during delicate dialogue scenes, forcing costly retakes and post-production fixes. That experience taught me that refining equipment not only improves image quality but also preserves the integrity of sound recording, essential in 16K filmmaking where precision is non-negotiable.
The Myth of Brightness Over Comfort in Set Design
I used to believe blasting my lights at maximum intensity would yield the best results. However, I discovered that overbrighting with inefficient LEDs caused unwanted heat and shadows, complicating camera support adjustments and causing fatigue. Embracing high-output, silent GaN spotlights allowed me to achieve the perfect balance—bright enough without sacrificing comfort or introducing noise—highlighting that smarter lighting often trumps brute force. For more on optimizing your setup, check out this guide to mastering film lighting.
Choosing Supporting Gear That Doesn’t Sabotage Your Scene
Initially, I assumed that acquiring the sturdiest tripods would suffice. Yet, I learned that lightweight carbon fiber supports prevented micro-vibrations that could blur ultra-high-resolution images. Upgrading to vibration-dampening supports made my camera movements smoother and more stable, saving editing time. Attention to detail in camera supports can drastically elevate the sharpness of 16K footage, reaffirming that your support gear is as critical as your main equipment.
The Connection Between Efficient Power and Peace of Mind
I once attempted outdoor shoots with improvised power sources, resulting in unexpected shutdowns that disrupted recording. It became clear that dedicated, high-capacity power supplies and surge protectors are vital for uninterrupted shooting, especially when running silent GaN lights that draw consistent power. Proper cabling and backup solutions ensure your focus stays on capturing the perfect shot, not troubleshooting electrical hitches. For in-depth advice on powering your set, explore these power solutions.
Related Posts
5 GaN-Powered LED Mats for Silent 16K Location Shoots in 2026
It hit me one brisk morning during a location shoot:…

Film Lighting Fix: 3 High-Output Battery LEDs for 2026 Sets
Ever set up a shot, only to realize your lighting…
Top Film Lighting & Support Equipment for Filmmakers 2024
Ever spent hours setting up a shot, only to realize…