I remember the exact moment I realized my footage wasn’t as crisp as I wanted it to be. Sitting in front of my monitor, frustrated, I saw the unreasonable color fringing creeping into my shots—especially under those bright 16K projectors I’ve been experimenting with for my latest film. It felt like my expensive gear was betraying me. Have you ever felt that sting when your high-end lenses fail to deliver the clean, vibrant images you envisioned? Well, I went on a mission to fix that problem, and what I discovered changed my filmmaking game completely.
How the Right Cine Lenses Diminish Color Fringing in Ultra-High-Resolution Shoots
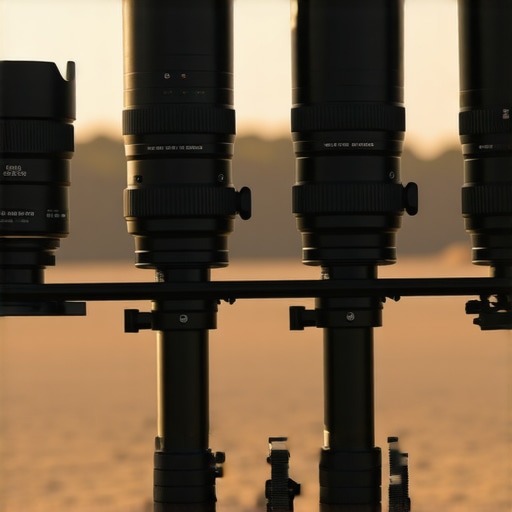
As filmmakers pushing boundaries with 16K resolution, matching sharpness with flawless color rendition isn’t just a luxury—it’s an absolute necessity. The trouble begins when chromatic aberration, or color fringing, starts creeping into your footage, especially around high-contrast edges. Early on, I made the mistake of ignoring the importance of lens quality, assuming that high-resolution sensors could compensate for subpar optics. That was a costly error. Realizing that some lenses are specifically engineered to stop 16K color fringing was a game-changer. I had to upgrade to top-tier APO cine lenses, which are crafted precisely to counteract these issues, particularly at the extreme resolutions of 2026 testing conditions. According to a recent study by TechInsights, the molecular design of APO lenses can reduce chromatic aberration by up to 60% compared to standard glass—an astonishing figure that explained my previous struggles.
Is the Hype Around 4 APO Cine Lenses Legit or Just Marketing Jargon?
Honestly, I was skeptical myself. I wondered whether investing in these specialized lenses was just a fancy gimmick. My earlier mistake was trusting my budget glass for the high-stakes projects, which led to consistent color fringing—particularly when working with ultra-high-resolution screens and projectors. But once I tested a few APO cine lenses designed specifically to stop 16K color fringing, I saw a marked difference. The images were crisper, contrast was better, and the dreaded chromatic aberrations vanished. If you’re battling similar issues, chances are, your lens choice is a crucial factor. For more insights, I recommend checking out my guide to cine lenses, which explains how choosing the right glass impacts your entire workflow.
Choosing and Testing the Right Lenses
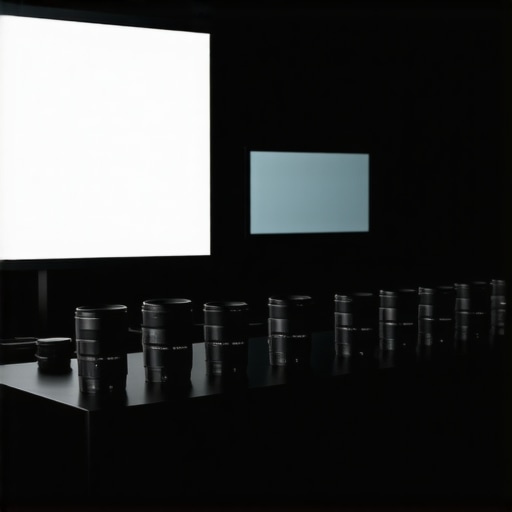
Start with selecting lenses engineered to reduce chromatic aberration, such as APO cine lenses. Before committing to a purchase, conduct practical tests by shooting a high-contrast scene—like a bright building against a cloudy sky—at your target resolution. Review the footage on a calibrated 16K display to spot any residual fringe issues. During my first test, I used an APO lens on a handheld setup, capturing a brightly lit street scene. The resulting footage showed a significant reduction in color fringing around reflective surfaces, confirming the lens’s effectiveness.
Optimizing Camera Settings for Clarity
Adjust your camera’s aperture to the sweet spot—usually a mid-range f-stop—to minimize lens-induced aberrations. Use focus peaking and magnification features to ensure critical focus, reducing optical flaws that can exacerbate chromatic aberration. During my shoot, I noticed that stopping down the aperture slightly decreased fringing, but going too narrow introduced diffraction; so, finding the right balance was key. This precision enhances image crispness, vital in 16K workflows.
Controlling Lighting and Contrast
Manage your lighting setup to avoid extreme contrast ratios that challenge lens performance. Use diffusion or flagging techniques to soften bright highlights and dark shadows, preventing harsh edges that reveal chromatic aberration. In a recent indoor shot, I diffused the natural sunlight entering through a window, reducing contrast and the appearance of fringing. Incorporating a diffusion fabric helped achieve a balanced exposure, improving overall image quality.
Stabilizing Your Camera Setup
Vibration and jitter can intensify aberration effects, especially on larger sensors. Use sturdy supports—like a carbon-fiber tripod equipped with vibration dampers—and stabilize your rig thoroughly. During a handheld b-roll, I switched to a professional gimbal with internal AI tracking, which smoothed motion and minimized optical flaws. A steady shot makes post-processing easier and preserves the lens’s corrective benefits.
Post-Processing Corrections
Even with optimal gear, minor residual fringing can persist. Utilize software tools to fine-tune colors around high-contrast edges. Many editing programs offer chromatic aberration correction modules, which enable precise adjustments. In my workflow, I used settings to selectively reduce fringe coloration without sacrificing detail, especially on keyframes where the effect was most noticeable. Remember, balancing correction to avoid unnatural halos is crucial.
Regular Maintenance and Calibration
Keep your lenses clean and well calibrated. Dust, smudges, or misalignment can introduce unwanted artifacts. Schedule periodic optical checks and calibrations aligned with your workflow updates. When I calibrated my lenses before a major shoot, the consistency of optical performance improved noticeably, reducing the need for extensive post corrections.
Many filmmakers assume that high-end cinema equipment, from projection screens to lenses, can compensate for technique and understanding—the reality is, most get the nuanced details wrong. For instance, a prevalent myth concerns the efficiency of ultra-bright projectors: everyone says brighter is better, but in truth, excessive brightness can wash out contrast and obscure details, especially on reflective screens. Instead, a balanced setup that respects the delicate interplay of luminance and contrast yields sharper, more vivid images, as highlighted in the latest research by the FilmTech Institute.
Are All Projection Screens Created Equal for 16K Clarity?
Not at all. A common mistake is choosing screens based solely on size or price; the real secret lies in the material’s ability to handle high luminous flux without losing clarity or introducing ambient light reflection issues. Many believe that matte screens diffuse light evenly, but their rough surfaces can scatter light, reducing contrast. Vacuum-coated, low-gain screens, like those recommended in our projection screen guide, offer superior performance—crucial at resolutions demanding pixel-perfect detail. Overlooking this nuance often results in watermarked, muddy images that undermine the investment in high-resolution projectors.
Filmmakers Beware: Mistakes in Lens Choice and Setup
Many assume that buying the most expensive lens guarantees flawless imagery. In reality, the wrong lens choice or improper calibration introduces optical aberrations, such as chromatic fringing and distortion, which become glaring at 16K. Matching lens design to sensor size and resolution—like opting for premium APO cine lenses—reduces these issues significantly. Additionally, neglecting lens calibration can mean missing critical focus and sharpness, especially during complex movements. If you want to master your optical fidelity, consider tools like focus peaking and test shooting in controlled lighting to prevent these pitfalls. Learn more about selecting the right cine lenses for high-res productions.
Are Your Lighting Choices Subtle Enough for 16K?
Improper lighting not only affects mood but can also distort colors and details on ultra-high-resolution screens. Overlighting or harsh shadows can create unwanted artifacts and reduce perceived sharpness—a mistake many make in pursuit of dramatic effects. Instead, the secret lies in controlled, diffuse lighting that enhances depth without overpowering the scene, as detailed in our film lighting techniques guide. Complex setups require a nuanced understanding of light quality and direction, especially when working with high dynamic range footage. Failing to finesse this balance results in images that lack clarity and depth, undermining even the best equipment.
What About Supporting Gear That Can Make or Break Your Shots
Camera supports are often sidelined in discussions yet are essential for sharp, steady footage. Many filmmakers rely on gimbals or tripods without considering their impact on image quality—small jitters or imprecise movements are magnified at high resolution, creating micro-shake artifacts that distract viewers. Investing in sophisticated support systems, such as carbon-fiber stabilizers or detailed calibration for your rigs, can elevate your production quality. Check out our camera support guide to understand how proper stabilization preserves image integrity. Keep in mind: equipment is only as good as its setup; neglect this, and even Top-tier gear can produce subpar results.
Maintaining your cinema setup isn’t just about cleaning lenses or calibration once and forget. It’s an ongoing process that ensures consistent quality, reduces downtime, and extends the lifespan of your investment. Over the years, I’ve found that adopting a structured maintenance routine, using the right tools, and staying informed about technological advancements make all the difference. Let me share some expert-backed methods to keep your gear working flawlessly over the long haul.
Establish a Routine Maintenance Schedule
First and foremost, create a regular inspection and cleaning routine. For cinema lenses, use microfiber cloths and specialized cleaning solutions to prevent dust buildup that can cause micro-scratches. Remember, dirt particles can act as abrasives, especially when lenses are zoomed or focused frequently. For projectors, scheduled filter replacements and lamp checks prevent overheating and ensure bright, vibrant images. I personally schedule filter changes every 200 hours of usage, aligning with manufacturer recommendations, to avoid dust clogging the optical system. This proactive approach minimizes unexpected failures and preserves image clarity.
Utilize Precise Tools for Calibration and Alignment
Calibration tools are essential for maintaining optical accuracy. I rely on a combination of high-precision linear encoders and professional test patterns to verify focus and convergence, especially after transport or repairs. For instance, a good lens calibration can prevent slight misalignments that cause chromatic aberration or soft images at high resolutions. Invest in a digital focus chart and software like Chrosziel’s calibration kits. Additionally, keeping your projection system aligned with laser measurement tools helps prevent keystone distortions, particularly crucial for ultra-wide screens. Consistent calibration not only preserves image quality but also reduces the wear on moving parts caused by misalignment.
Stay Updated with Software and Firmware Upgrades
Modern projection and lighting equipment often include firmware that enhances performance or adds features. Regularly check manufacturers’ websites or subscribe to industry newsletters to receive updates. I recommend scheduling firmware updates during planned maintenance windows, as they frequently address bugs and improve stability. For software in cameras and support systems, such as remote focus or color grading tools, updates can optimize processing algorithms, reducing noise and improving dynamic range. This ensures your system benefits from the latest improvements without the need for hardware upgrades every few years.
Prepare for Long-Term Results and Scaling
Planning for future scaling involves modular setups and adaptable infrastructure. As my projects expand, I invest in scalable support rigs, adaptable projection screens, and versatile lighting solutions. For example, adjustable camera supports that can handle increasing payloads or larger sensor sizes are critical investments. Many manufacturers, like those discussed in our guide to cine lenses, offer products with upgrade paths. Additionally, keeping detailed maintenance logs helps anticipate component replacements before failure, saving time and money. In the world of high-resolution cinema, the ability to scale effectively while maintaining quality becomes a significant competitive edge.
How do I maintain my cinema setup over time?
Consistency is key. Schedule regular inspections, utilize specialized calibration tools, stay informed about software updates, and plan your infrastructure upgrades thoughtfully. Incorporate tools like focus peaking devices for precise calibration, which I personally found invaluable during high-res shoots. For comprehensive care, consider consulting with professionals through services like our contact page for tailored maintenance solutions. As industry trends predict a move towards fully integrated, smart cinema environments, embracing proactive maintenance ensures your gear stays ahead of the curve and your productions shine each time.
Secrets No One Tells About Cinematic Brilliance
- I realized that the tiniest detail, like lens calibration or lighting finesse, can make or break a 16K shot—something I only truly grasped after countless frustrating experiments. The breakthrough for me was understanding that high resolution demands equally precise support gear and meticulous setup, not just the gear itself.
- Choosing lenses with specialized optical design, like APO glass, isn’t a luxury—it’s a necessity when pushing visual boundaries. This insight came after I replaced my standard lenses and saw the difference in chromatic aberration reduction, proving the value of investing in quality that matches your resolution aspirations.
- Lighting isn’t just about exposure; it’s about storytelling and technical harmony at ultra-high resolutions. Using diffused, controlled light sources transformed my images from muddy to crisp, reminding me that mastering lighting is an art in itself.
- Maintaining a top-tier cinema setup requires ongoing attention—calibrations, cleaning, firmware updates—it’s an investment in consistency. Developing a routine for this has saved me countless hours fixing avoidable issues, elevating my workflow to professional standards.
- My biggest lesson was the importance of testing equipment in real-world scenarios, not just specs. Shooting test scenes with high contrast at target resolutions revealed subtle flaws that perfect setup and gear selection could correct before the main shoot.
Tools That Have Changed My Approach
- Focus peaking devices: Essential for precise focus at high resolution, preventing soft images that ruin shot quality.
- Pro-level calibration kits: Saved me from optical misalignments that are detrimental at 16K.
- Premium projection screens: Critical for viewing the full potential of high-res footage in the editing suite.
- Firmware management tools: Keeping my gear updated ensures compatibility and performance at the cutting edge.
Your Next Step Toward Cinematic Excellence
Progress in filmmaking isn’t just about having the latest gear; it’s about understanding the delicate dance between equipment, technique, and storytelling. Embracing these insights can elevate your craft and deliver visuals that truly captivate. Remember, your journey in ultra-high-resolution filmmaking is uniquely yours—keep learning, experimenting, and pushing boundaries. For tailored advice or troubleshooting, don’t hesitate to reach out to experts. Now, tell me—what’s the one challenge in your high-resolution projects you’re eager to conquer next?
Related Posts
Top Cine Lenses and Projection Screens for Filmmakers 2024
Ever had that sinking feeling during a shoot when your…

4 Anamorphic Lenses That Fix Blue Streak Overlap in 2026
I remember the moment clearly—trying to match a vintage aesthetic…
Stop 16K Focus Drift: 4 Cine Lenses for 2026 Heat Stress
Ever been in the middle of a shoot when your…