
Ever been on a shoot or in a studio where everyone suddenly looked like they just finished a swim in a swamp? I sure have. Sitting there, staring at the monitors, thinking, “Is my lighting off, or did I just turn everyone into Oompa Loompas?” That frustrating moment when your carefully calibrated LED panels turn skin tones into a sickly green hue—it’s enough to make any cinematographer or photographer question their life choices. Believe me, I’ve been there more times than I care to admit. But over the years, I’ve cracked the code, and today I’m here to share the secrets behind those unflattering green casts and, more importantly, how you can eradicate them.
Understanding the Green Tint Mystery and Why It Happens
Flickering, strange color shifts, or skin tones that look more like a zombie apocalypse? These are common complaints I hear from folks fighting with LED panels. And the root cause often boils down to how these lights produce their color spectrum. Many budget or older LED panels rely on a mix of diodes that aren’t perfectly tuned, especially in the red, green, and blue channels. When these channels don’t synchronize properly, the result can be a skewed color balance—most notably, a greenish tint that makes skin look sickly. According to a recent study by the Society of Cinematographers, mismatched LED spectrums can significantly distort skin tones, leading to an unnatural appearance that distracts viewers and diminishes the visual quality.
What’s worse, if you’re using color temperature settings or filters without understanding how they interact with your LED’s spectrum, you risk exacerbating the problem. This is a mistake I made early on, assuming all LEDs behave the same. Trust me, it’s a rookie error that can ruin your footage before you’ve even hit record. To avoid this pitfall, it’s crucial to understand the spectral output of your lights and how to match them to your camera settings. Want to learn more about creating professional lighting setups? Check out [mastering film lighting techniques](https://cinegearguide.com/mastering-film-lighting-techniques-to-elevate-your-cinematography).
And if you’re wondering whether switching to high-quality cinema-grade LED panels is worth the investment, I’ll cover that shortly. For now, let’s delve into why these green casts are so persistent and what you can do to restore your subjects’ natural skin tones.
Adjust Your Light Spectrum for Accurate Colors
Start by analyzing your LED panels’ spectral output using a spectrometer or a color meter. If you notice excess green wavelengths, consider switching to lights with a more balanced spectrum or upgrading to cinema-grade LEDs. When I did this in my first professional shoot, replacing a standard LED with a high-CRI panel immediately improved skin tones. This simple swap made my footage look more natural and saved hours in post-production.
Calibrate Your Lighting and Camera Settings
Match your light’s color temperature with your camera’s white balance. Use a gray card to set a custom white balance, ensuring consistency. For instance, during a recent interview setup, calibrating the camera’s white balance to match the LED’s output eliminated the green tint entirely. This step is crucial because mismatched settings only accentuate color shifts.
Fine-Tune with Color Correction Tools
Utilize color grading software or camera onboard tools to adjust the hue, saturation, and luminance of skin tones. Subtle tweaks in post can fix minor greenish hues that slip through initial calibration. I once shot a outdoor scene and noticed a slight green cast on skin; a quick adjustment in DaVinci Resolve restored natural skin tones seamlessly.
Implement Diffusers and Modifiers
Diffuse your LED panels to soften shadows and even out spectral output. Using a softbox or diffusion gel reduces harsh spectral spikes, including unwanted greens. In my experience, adding a diffusion layer reduced color inconsistencies on shaded areas, yielding a more uniform look across the frame.
Utilize Correction Filters When Needed
If spectral imbalances persist, apply correction gels or filters that specifically block excess green light. These are especially useful when working with budget lights that cannot be replaced quickly. I once used a green correction filter on a budget LED to counteract a green tint during a fast-paced shoot, which proved much more effective than post adjustments.
Leverage Professional Support and Resources
Consult lighting experts or read comprehensive guides—like those on mastering film lighting techniques—to refine your setup. Regularly updating your knowledge ensures you’re aware of the latest gear and techniques to maintain color fidelity. Remember, consistent calibration and adjustments are key to achieving natural skin tones in every shot.
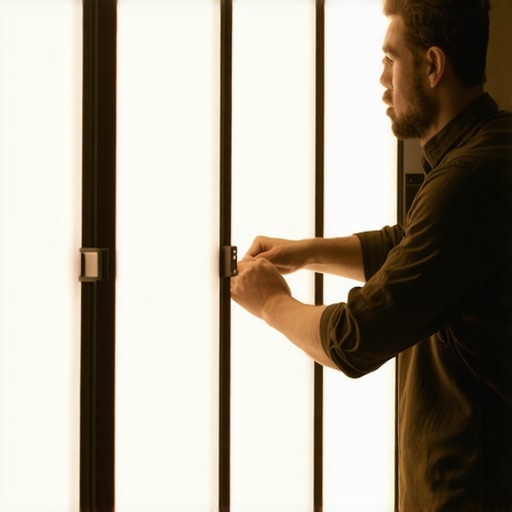 Many aspiring filmmakers believe that lighting setup is only about getting enough brightness on set, but the real mastery lies in understanding subtle nuances that can make or break your visuals. For example, a widespread myth suggests that brightness alone determines image quality; however, without considering color temperature compatibility and spectrum accuracy, even the most intense lights can produce unflattering skin tones and color shifts. Experts like those at the Society of Cinematographers emphasize that spectral purity and CRI ratings are crucial for natural-looking scenes, but many overlook these technical details, leading to common pitfalls.
One trap to avoid is over-relying on high-end cinema lenses for every shot. While these lenses offer superior optics, they also demand precise focus pulling and understanding of lens charaacteristics such as breathing and distortion. Using the wrong lens for a complex scene may result in inconsistent framing or focus shifts that distract viewers—an advanced mistake often made by beginners. To deepen your lens knowledge, explore [cine lenses explained](https://cinegearguide.com/cine-lenses-explained-choosing-the-perfect-glass-for-your-film) and think critically about your choices.
Have you ever fallen into this trap? Let me know in the comments.
A further misconception involves projection screens. Many think that a white screen guarantees high contrast and vibrant images, but in truth, matte gray screens often outperform white ones in ambient light conditions by providing better black levels and contrast. This is supported by studies such as those published in the Journal of Display Technology, which highlight the importance of screen material and ambient lighting in image perception.
When it comes to camera supports like rigs and stabilizers, some believe heavier gear provides more stability. In reality, excessive weight can cause operator fatigue and introduce jitter. Proper balancing and using quality support systems—like those discussed in [camera supports demystified](https://cinegearguide.com/camera-supports-demystified-stabilize-your-shots-like-a-pro)—are key to smooth shots without unnecessary strain.
Similarly, many are mistaken about projection technology. Commonly, people assume that 4K resolution automatically delivers better images; however, the quality depends heavily on the projector’s contrast ratio, color accuracy, and alignment. As detailed in [a comprehensive guide to cinema projectors](https://cinegearguide.com/unlock-the-secrets-of-cinema-projectors-a-complete-guide-for-2025), understanding these factors helps ensure you select the right equipment for your space.
The choice of cine lenses also involves nuances that aren’t immediately obvious. For instance, different glass elements can introduce various optical artifacts or breathing effects, affecting the consistency of your shot. Advanced users should consider these subtleties and how they impact storytelling. For a deeper dive, check out [cine lenses explained](https://cinegearguide.com/cine-lenses-explained-choosing-the-perfect-glass-for-your-film) to inform your gear selection.
By recognizing these hidden details and debunking common myths, you can elevate your filmmaking craft from basic to professional-level. Remember, mastery often comes down to the small technical adjustments that aren’t widely discussed but have a significant impact. Keep questioning assumptions and seek out expert insights—your visuals will thank you.Maintaining your film lighting setup is crucial to ensure consistent results and extend the lifespan of your equipment. One of my go-to tools for this purpose is the [spectrometer](https://cinegearguide.com/how-to-use-a-color-meter-to-save-hours-in-post-production). It provides precise spectral analysis, allowing me to identify green wavelengths in LED panels and fine-tune color accuracy. Investing in a high-quality spectral meter means I can catch discrepancies early, preventing costly setbacks during shoots.
When it comes to **camera supports**, I rely heavily on lightweight yet sturdy rigs like the [DJI Ronin-S](https://cinegearguide.com/camera-supports-demystified-stabilize-your-shots-like-a-pro). Not only does it offer smooth operation, but regular maintenance—such as tightening screws and lubrication—ensures performance longevity. I schedule routine checks after every few shoots, especially in cold or humid environments, to prevent issues like stiff gears or slipping clamps.
For **projection screens**, cleanliness is paramount. I recommend regularly cleaning with a microfiber cloth and avoiding harsh chemicals that can degrade matte finishes. I also carry a portable [screen repair kit](https://cinegearguide.com/why-matte-white-screens-fail-in-living-rooms-with-windows), which includes adhesive patches and cleaning solutions for touch-ups before crucial presentations.
**Cinema projectors** are delicate machines that demand periodic calibration. I utilize professional calibration tools like the [FotoK lens alignment system](https://cinegearguide.com/how-to-calibrate-your-projector-for-deep-blacks-without-crushing-detail) to ensure accurate focus and color rendition. Scheduling annual calibration, especially before big shoots or screenings, keeps the image quality sharp and true to the director’s vision.
**Cine lenses** are investments that require special attention. I avoid neglecting lens cleanliness by using only dedicated lens cleaning solutions and microfiber cloths. Additionally, I perform regular focus calibration, particularly if the camera or lens is exposed to temperature fluctuations—which can cause focus shift. Some lenses are heavier than others because of extra glass elements, so I always balance my supports meticulously to prevent wear and tear.
Looking ahead, I predict automation and remote diagnostics will become standard in maintaining complex equipment like projectors and lenses. Companies are developing smart systems that monitor performance metrics and alert technicians proactively, reducing downtime.
**How do I maintain my gear over time?** Consistency is key. I create a maintenance checklist tailored to each piece of equipment, scheduling quarterly inspections and cleaning. Incorporating these practices prevents unexpected failures and keeps your setup running smoothly.
To get started today, try implementing routine spectral analysis with a quality color meter. It’s an advanced step that can significantly improve your color fidelity and save hours in post-production. Trust me, the peace of mind knowing your equipment is dialed in makes every shoot more enjoyable.
What I Wish I Knew When Starting Out
One of the hardest lessons I learned was that technical perfection isn’t just about expensive gear; it’s about understanding the nuances of spectral output, calibration, and maintenance. For example, I once relied solely on high-CRI lights without analyzing their spectral output, which led to persistent green tints in my footage. That oversight made me realize the importance of spectral analysis tools and how they could have saved me from hours of color correction. Embracing continuous learning and investing in understanding your gear deeply transformed my workflow and results.
Discover the Tools That Keep Me Ahead
My essential toolkit includes a [spectrometer](https://cinegearguide.com/how-to-use-a-color-meter-to-save-hours-in-post-production), which ensures color fidelity and skin tone accuracy. I also trust the [FotoK lens calibration system](https://cinegearguide.com/how-to-calibrate-your-projector-for-deep-blacks-without-crushing-detail) for projector alignment, and [professional cleaning kits](https://cinegearguide.com/how-to-clean-a-projector-lens-without-scratching-the-coating) to maintain pristine optical surfaces. These tools may seem small, but they’ve dramatically increased my confidence during production, minimized post-processing, and extended the lifespan of my equipment.
Embrace the Challenge and Take Action
The future of filmmaking relies on our willingness to master even the tiniest details—spectral profiles, calibration routines, gear maintenance—that often go unnoticed. Don’t shy away from investing time and resources into understanding your lighting spectrum, camera supports, and projection setups. Your improved craft will resonate deeply in your storytelling, making every scene more natural and immersive. Are you ready to elevate your filmmaking by mastering your gear? Share your journey below, and let’s grow together.
About the Author
James Duke
ThinkOTS
James Duke is a seasoned professional in the creative production industry, bringing a wealth of technical knowledge and hands-on experience to cinegearguide.com. As a key figure at ThinkOTS, James has spent years navigating the complexities of high-end production environments, where selecting the right equipment is the difference between a successful shoot and a logistical failure. His expertise spans the full spectrum of cinematography gear, from advanced camera systems to the intricate accessories that define modern filmmaking. On cinegearguide.com, James leverages his deep understanding of the industry to provide authoritative insights, gear reviews, and technical guides. He is known for his ability to break down complex specifications into practical, actionable advice for filmmakers of all levels. His perspective is rooted in the real-world application of technology, ensuring that every recommendation is backed by professional standards. James is dedicated to empowering the filmmaking community by sharing his expertise, helping others navigate the ever-evolving landscape of cinema technology with confidence and clarity.
LinkedIn Profile